Cloud PBX Domains
Creating a Domain
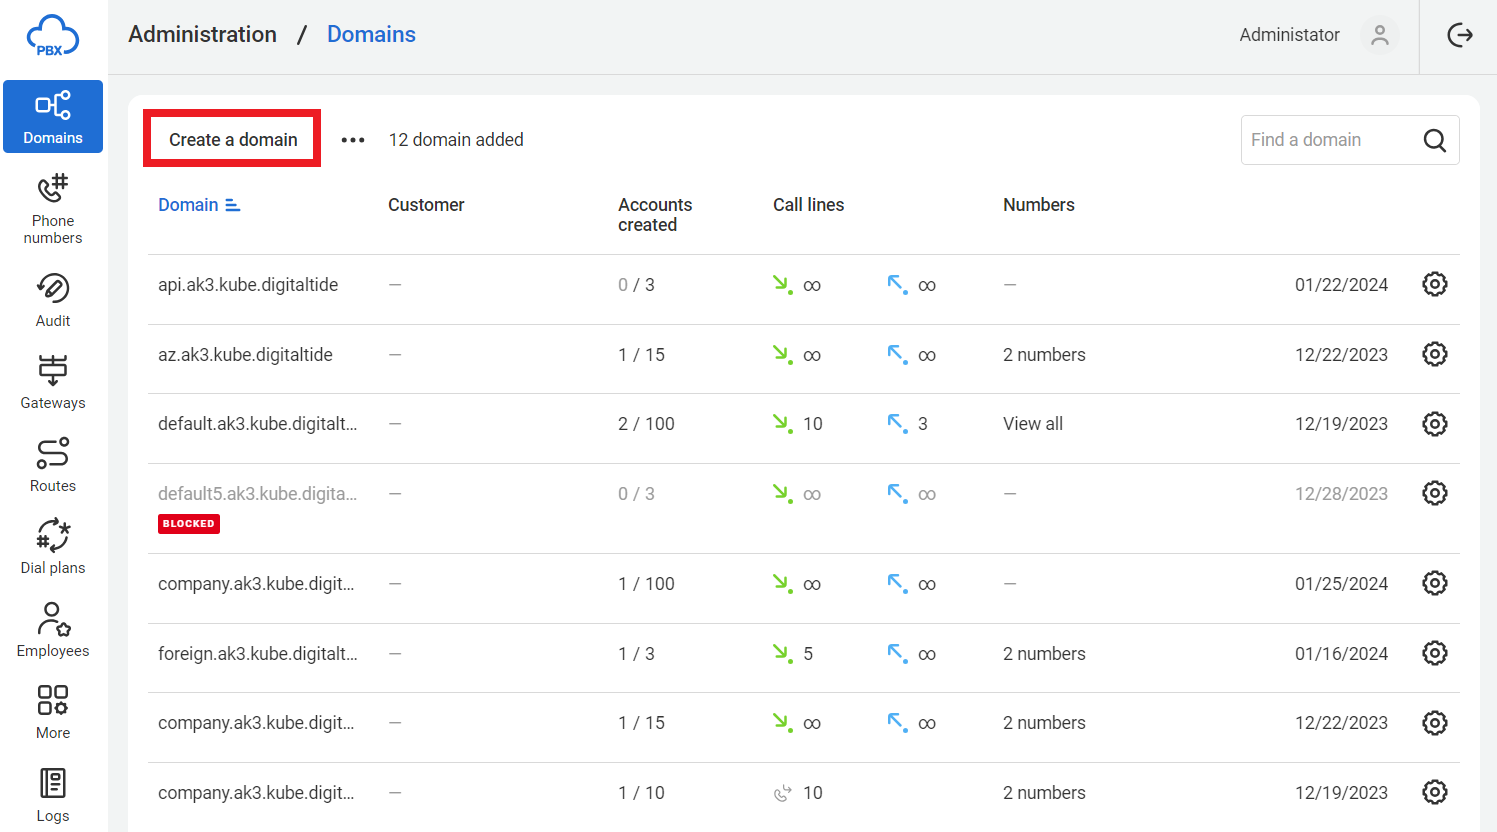
1. Go to the Domains section.
2. Click the Create a domain button.
3. The domain creation form will open. Fill in the form fields. Mandatory fields are marked with an asterisk.
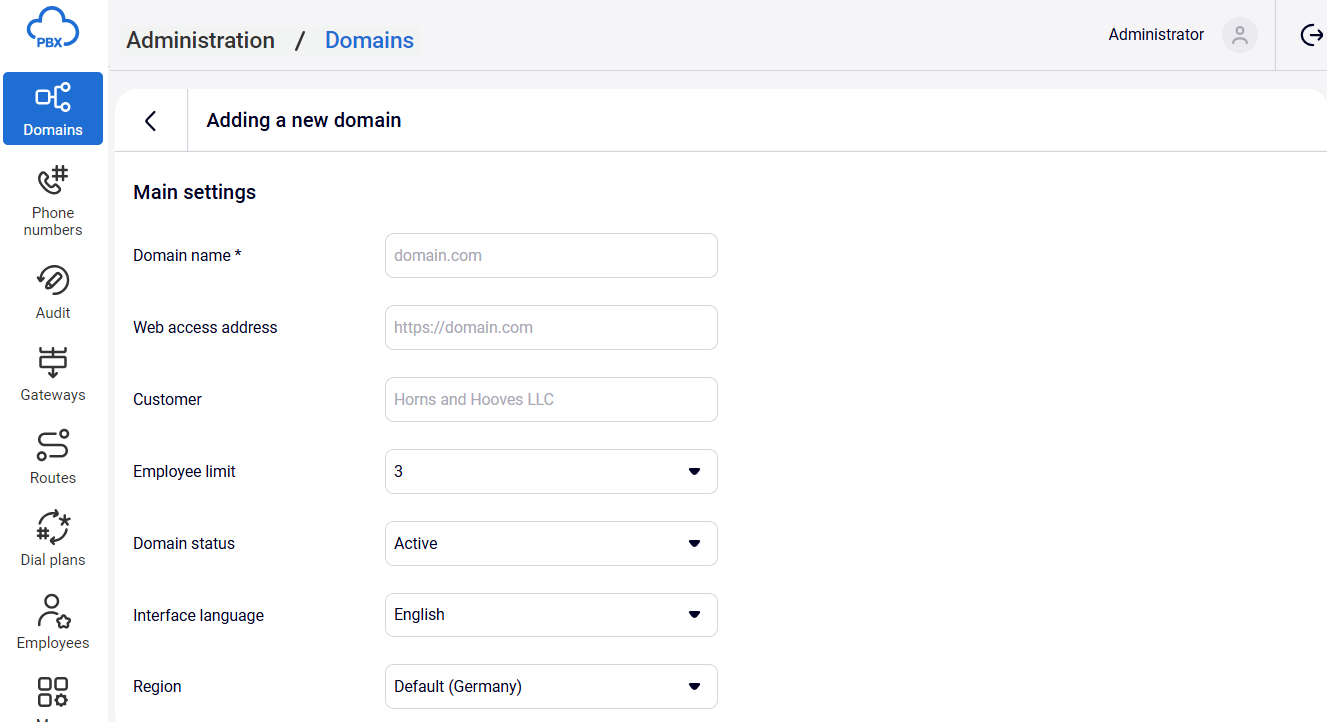
General Settings
- Domain Name — the full domain name, including the unique client name and operator's domain. For example: client.pbx.operator.com, where client is the client name, and pbx.operator.com is the operator's domain. The unique client name must comply with FQDN (Fully Qualified Domain Name) rules and is set during creation.
- Web Access Address — a domain alias (alternative address), specified if available.
- Customer — the customer name, displayed in lists; it can contain any information.
- Employee limit — the maximum number of employees that can be created in Cloud PBX. The appropriate value can be selected from the list or entered manually. The No limits value deletes restrictions on the number of employees.
- Domain status — active or blocked.
- Interface language — language for the Cloud PBX client interface. Language selection is possible if interface localizations are available.
- Region — sets the domain default region for the Call Restriction, Call direction report and Callback Widget settings. It also determines which phone numbers and their codes, logins, names, etc., the user will see in Cloud PBX prompts.
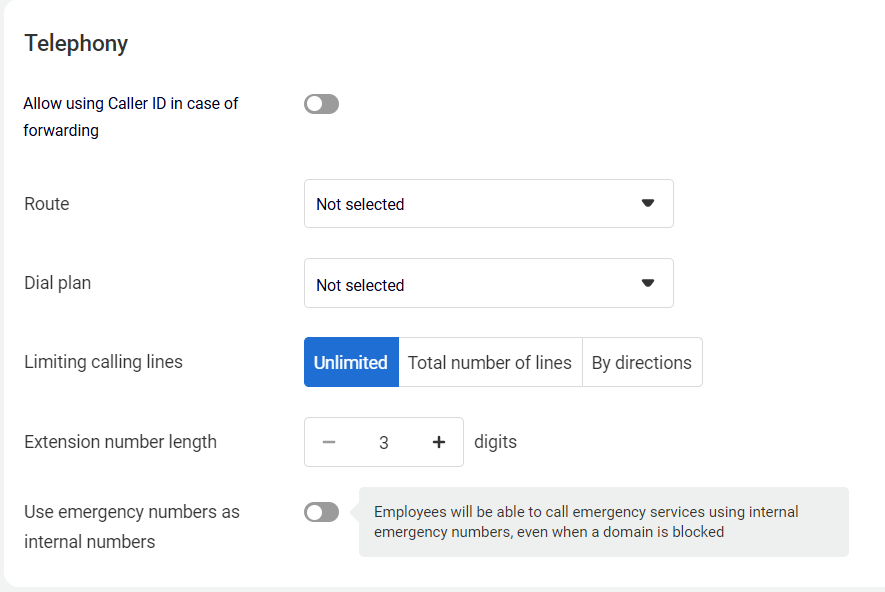
Telephony
- Allow using Caller ID in case of forwarding — enabling this option allows Cloud PBX to send the employee’s number when making calls to external lines.
- Route — specifies through which gateways calls to external lines will be made.
Note: Cloud PBX can have only one route, which must be created in advance.
- Dial plan — the dial plan that will be used in your Cloud PBX. Converts dialed PBX numbers into the internal format of the platform (+E.164 format).
The dial plan must be created in advance.
- Limiting calling lines — the maximum number of simultaneous external calls (no limitations for calls to short numbers within Cloud PBX). You can limit the total number of calls or the number of incoming/outgoing calls. The appropriate value can be selected from the list or entered manually.
- Extension number length — the length of short internal numbers for employees. After creating your Cloud PBX, the length of the short number can only be increased. To reduce it, contact Digital Tide support.
- Use emergency numbers as extension numbers — specifies whether your Cloud PBX can contain internal numbers that overlap with emergency service numbers (911, 112, etc.).
Managing the From Header Value for Internal Calls
URI
- ext — internal number of the employee making the call;
- login — login of the employee making the call;
- caller_id — outgoing number (caller ID), available to the employee making the call (according to the rules of outgoing numbers setup in Cloud PBX);
RealName
- name — name of the employee making the call;
- ext — internal number of the employee making the call;
- login — login of the employee making the call.;
- caller_id — outgoing number (caller ID), available to the employee making the call (according to the rules of outgoing numbers setup in Cloud PBX);
- as_is — value of the “RealName” field received from the SIP client of the employee making the call.
Services
The Services tab allows configuring the list of services available to the customer according to the service provision agreement.
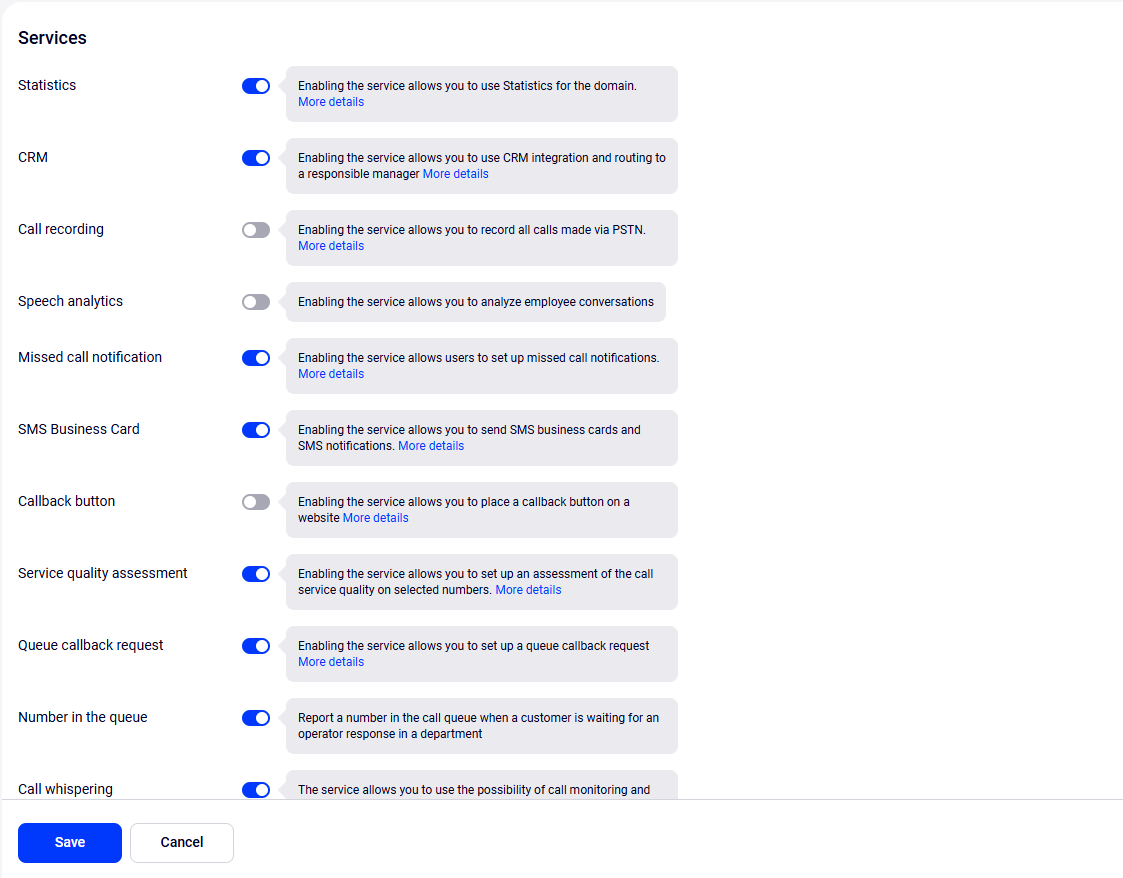
To enable/disable a service, toggle the switch accordingly. If the service is disabled, the corresponding functionality will be unavailable in the client’s interface.
Note: below is the description of services only in terms of their settings in the operator’s interface. For details on using the services, see the client interface documentation.
Service Capabilities::
- Statistics — view call statistics and history.
- CRM — connect the client's PBX to CRM systems.
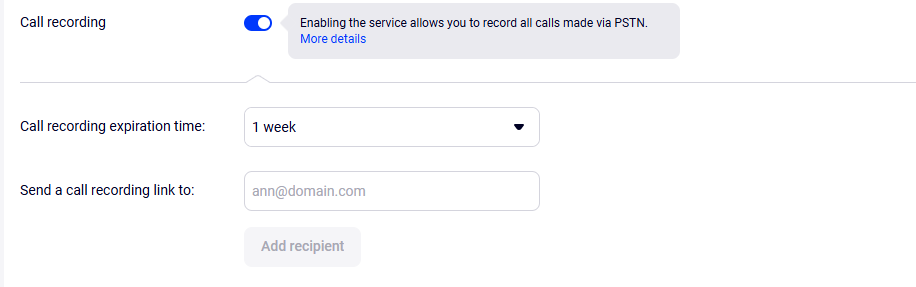
- Call recording — record external and internal calls. Additional fields are available when the service is enabled:
- Call recording expiration time — the default period is 90 days. After the specified time, call recordings will be deleted. The Unlimited value allows storing recordings permanently.
- Send a call recording link to — enter an email address to which links to call recordings will be sent.
- Speech analytics — analyze employees’ conversations.
- Missed call notifications — allow users to set up missed call notifications.
- SMS Business Card — send SMS cards and notifications.
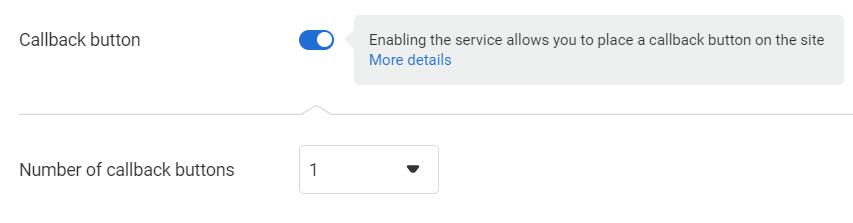
- Callback button — place a callback widget on a website. The Number of callback buttons field is available when the service is enabled, specifying the number of entry points (visitor button clicks) and corresponding call-back processing routes within Cloud PBX. The appropriate value can be selected from the list or entered manually.
- Service quality assessment — rate the quality of service during a conversation with company employees.
- Queue callback request — set up callback requests from the queue.
- Number in the queue — inform the caller about the queue number during their call to the company.
- Call whispering — listen to and monitor active calls.
- Monitoring — track all company calls in real time.
- Call distribution in the department — evenly — set up equal call distribution within the department.
- Call distribution in the department — to everyone at once — set up call distribution to all department employees at once.
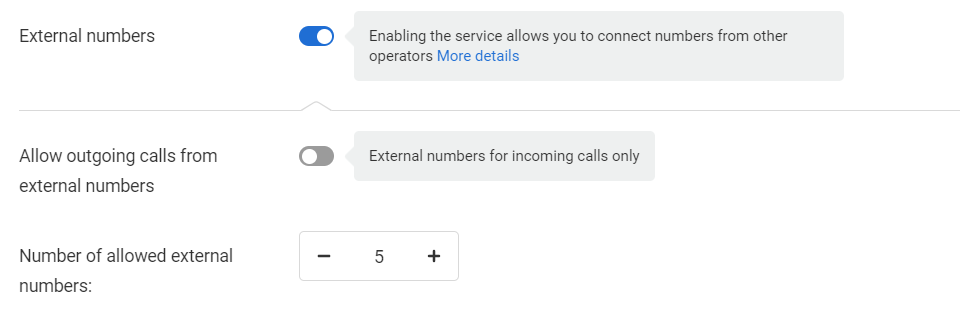
- External numbers — connect numbers from other operators. Additional fields are available when the service is enabled:
Allow outgoing calls from external numbers — allow making calls from numbers of other operators. Number of allowed external numbers — the maximum number of connected numbers from other operators. The appropriate value can be selected from the list or entered manually.
- Branches — connect other compatible Cloud PBXs within one operator.
- Conference rooms — create conference rooms for solving common issues with company employees and customers.
- Automated Voice Messaging (AVM) — automatic calls to inform about new promotions, offers, and other important news.
- Fax — forward fax messages to the specified employees' emails.
- Forwarding to SIP-PBX — enable forwarding from the Shared company number to a SIP-PBX.
- Forwarding to PSTN — enable forwarding from the Shared company number to PSTN.
- SMS — allow users to send SMS.
4. Click the Save button to create the domain. The button is available only if all mandatory fields are filled.
Click the Cancel button to cancel domain creation.
Other Actions with Domains
For each domain in the list, the following information is provided:
- Domain address.
- Domain block indicator — the Blocked label (if the label is absent, it means it's an active domain).
- Customer description — the name of the customer's company, contract number, or any other information.
- The number of created employees (accounts) in your Cloud PBX out of the maximum possible.
- Restrictions on the number of incoming and outgoing telephone lines.
- Number or quantity of phone numbers assigned to the domain (if more than one, hovering over the numbers will display all of them).
Finding a Domain
In the search bar, enter a part of the domain name, phone, or text from the Customer field and press Enter. Only domains with the searched fragment in their titles or descriptions will be displayed in the list.
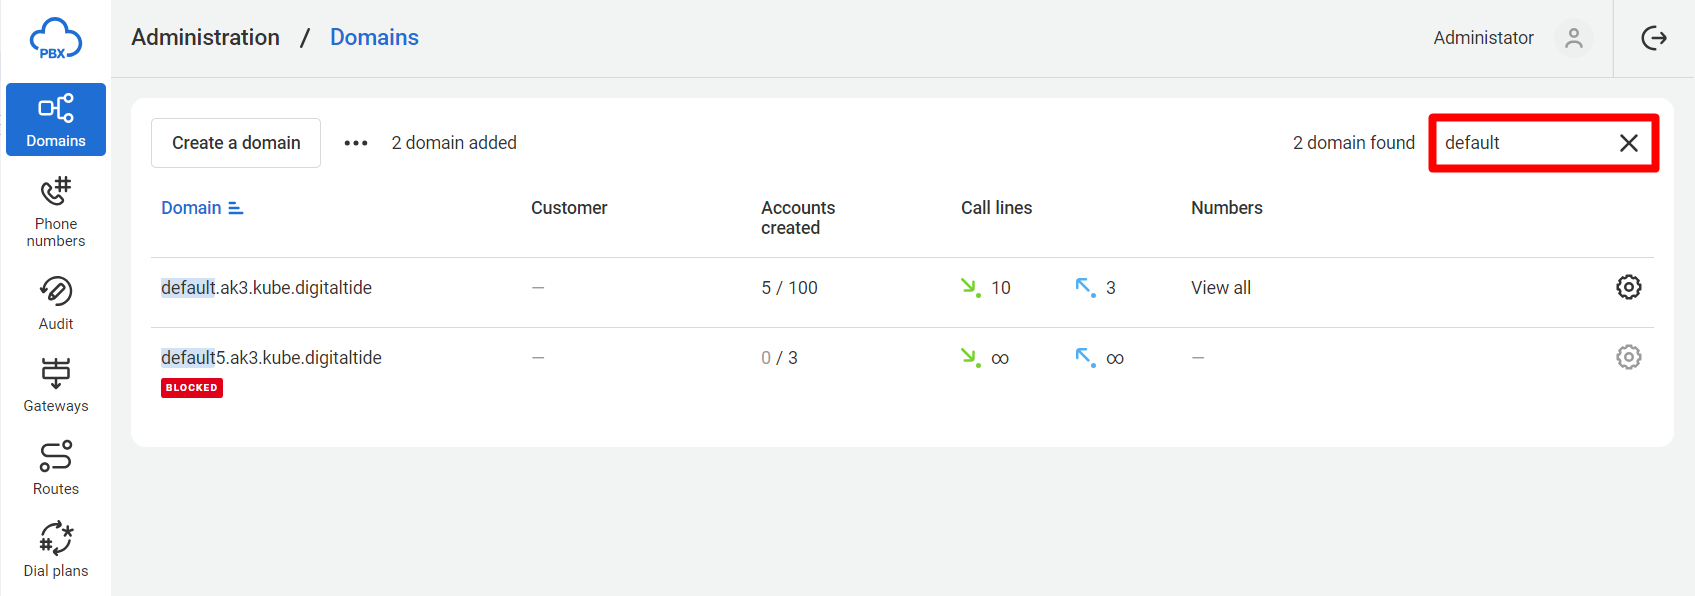
To return to the full list of domains, click x on the search bar.
Filtering Domains by Routes and Dial Plans
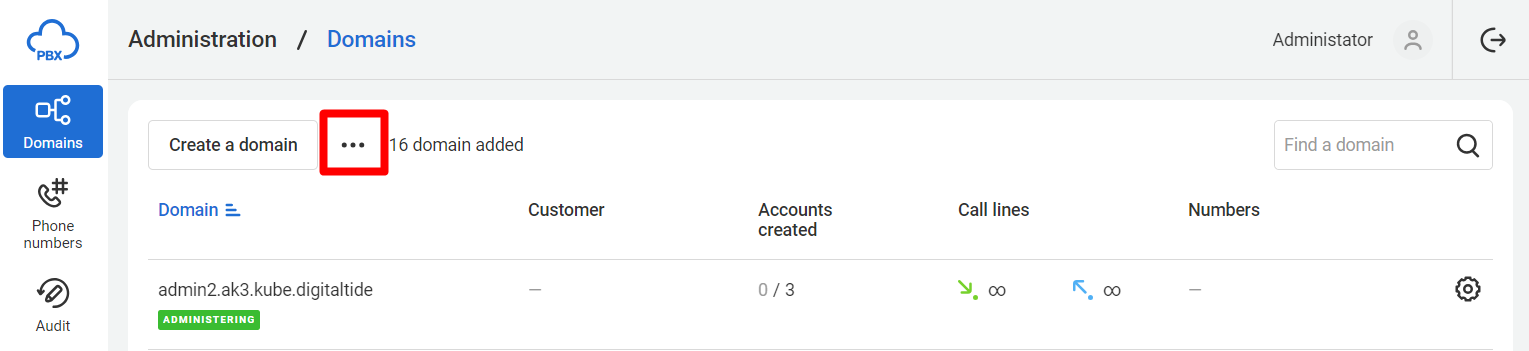
1. Click on the three dots to see hidden filters.
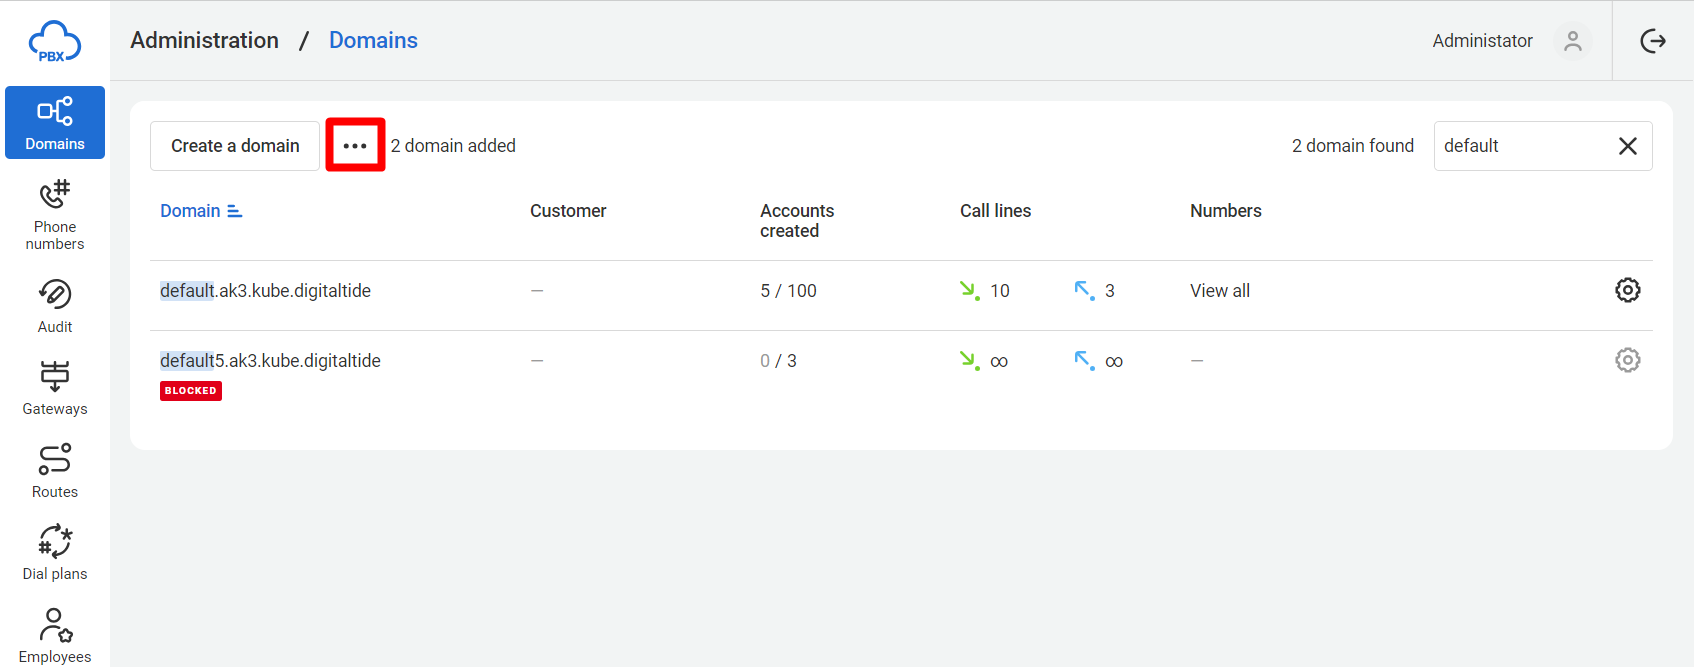
2. In the Routes and Dial plans filters, choose the required values. The list will display only domains associated with the selected routes and dial plans.
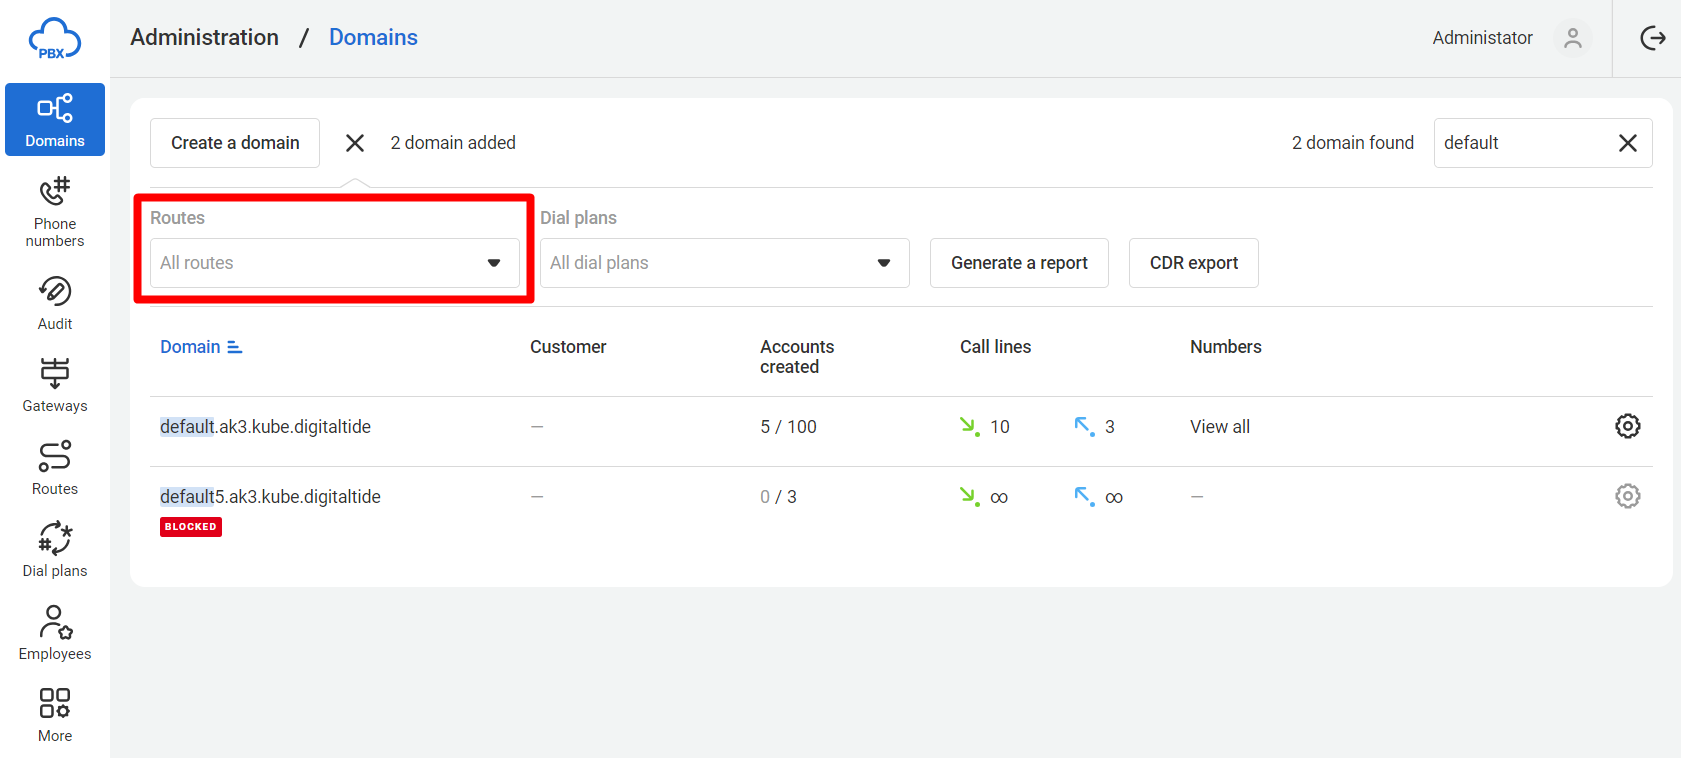
3. To return to the full list of domains, choose All routes and All dial plans in the dropdown lists.
Note: You can also set route and dial plan filters using the Routes and Dial plans sections.
Changing Domain Settings
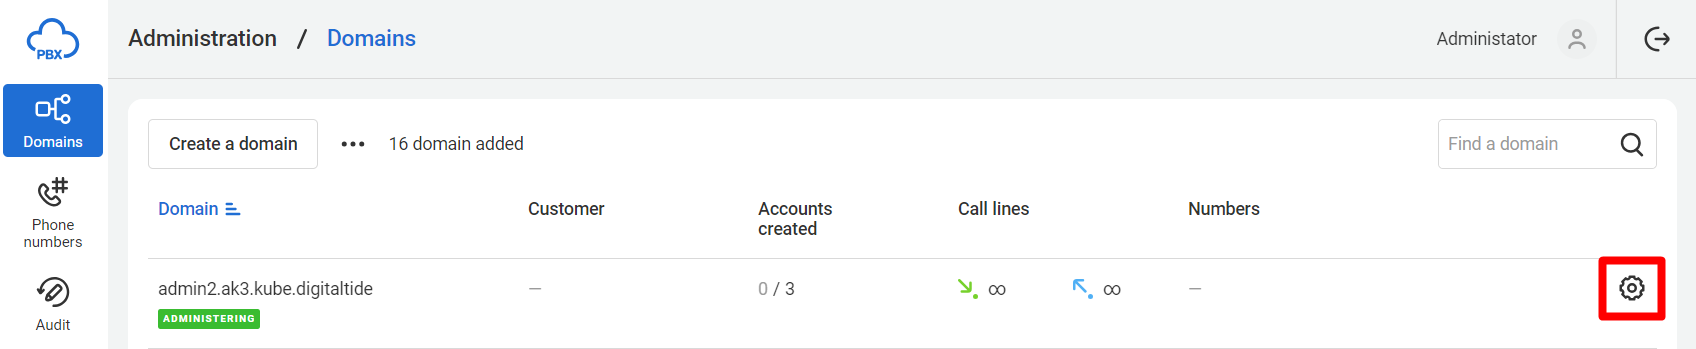
Find the domain that needs adjustment. Click the gear icon.
The domain settings window will open, containing the same tabs as when creating a domain. Make changes and save the settings.
Restricting Domain Access by IP
The IP Restrictions tab allows setting IP addresses for accessing the client interface and making calls. For example, so that employees can make calls from the office but cannot do so remotely.
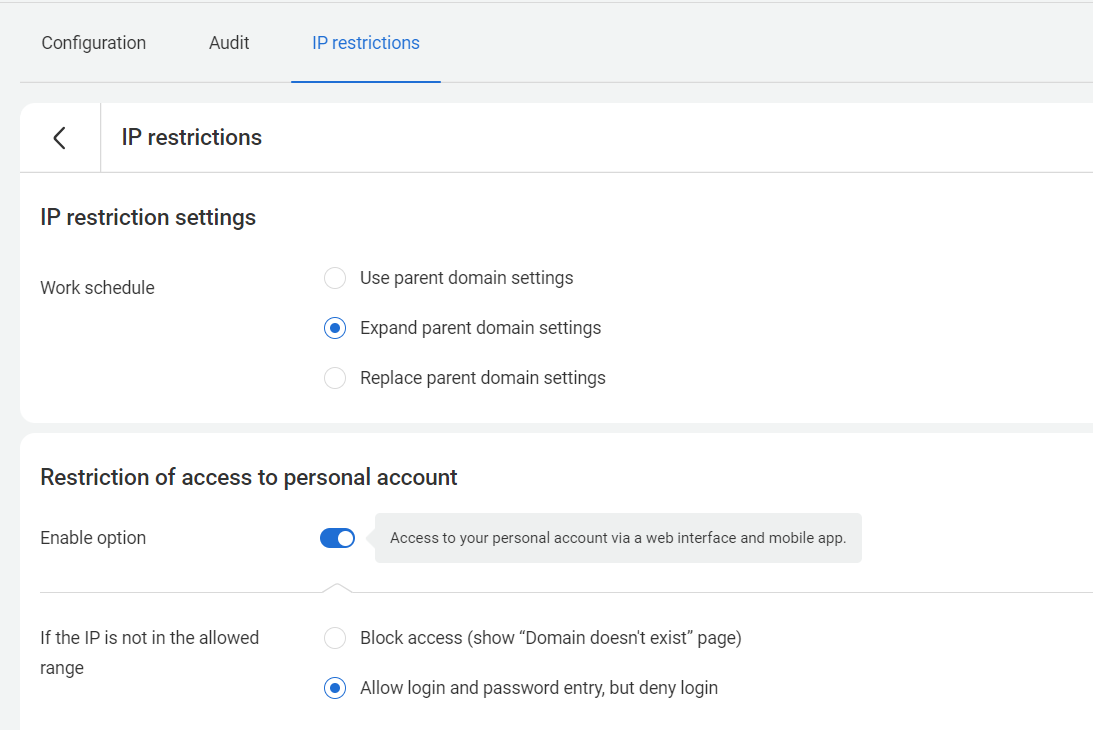
There are three restriction modes:
- Use parent domain settings — apply permissions set at the operator's domain level.
- Expand parent domain setting — in addition to parent domain settings, you can add some more.
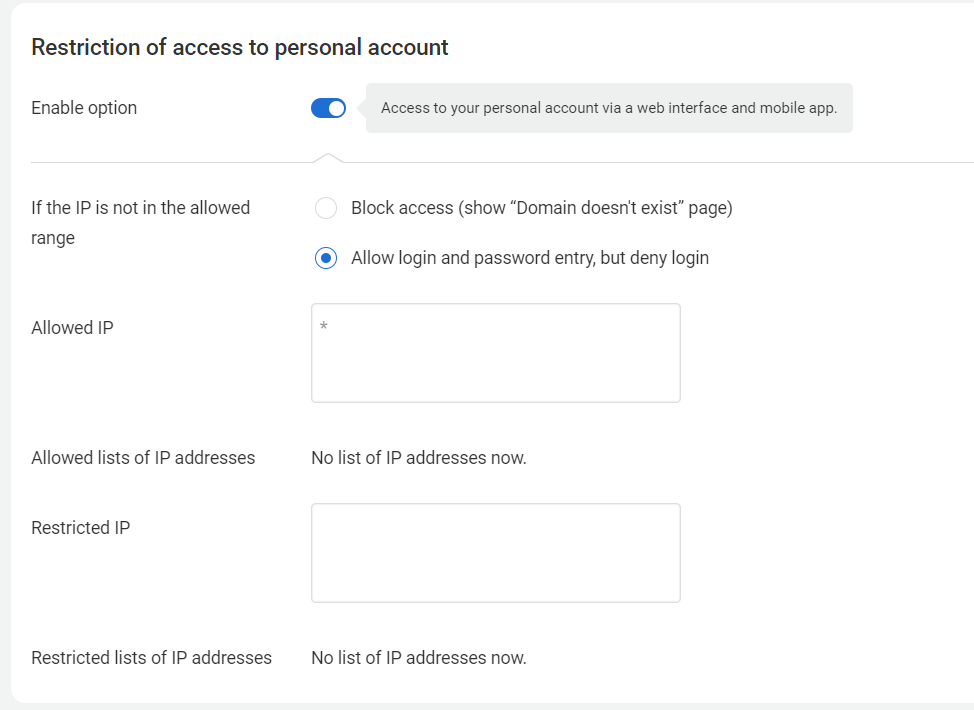
- Restrict access to the personal account (access to the client interface via web interface and mobile application).
To enable access, toggle the switch to On and configure settings:
- If the IP is not in the allowed range — the application’s action if login is attempted from a restricted IP address. Options: Block access (show the “Domain does not exist” page) or Allow login and password entry, but deny logging in
- Allowed IP — a list of IP addresses from which access is permitted. The “*” symbol allows access from all IP addresses.
- Allowed lists of IP addresses — choose addresses from a ready-made list created in the IP Lists tab in the More section.
- Restricted IP — a list of IP addresses with blocked access.
- Restricted lists of IP addresses — choose addresses from a ready-made list created in the IP Lists tab in the More section.
Call restriction
To enable access, toggle the switch to On and select where to get the IP Lists from.
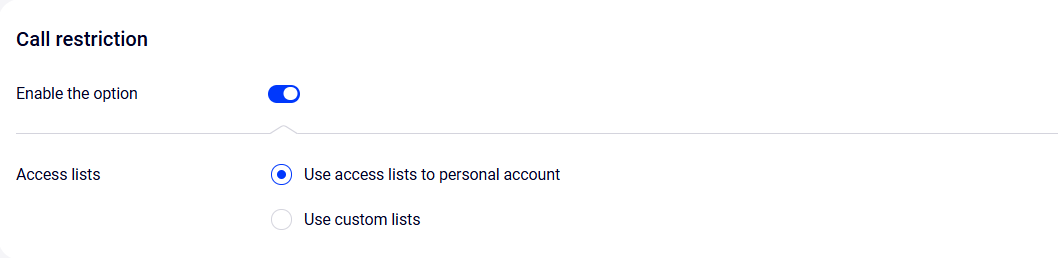
- Use access lists to personal account — the same lists of IP addresses are used that are set for the Restriction of access to personal account parameter.
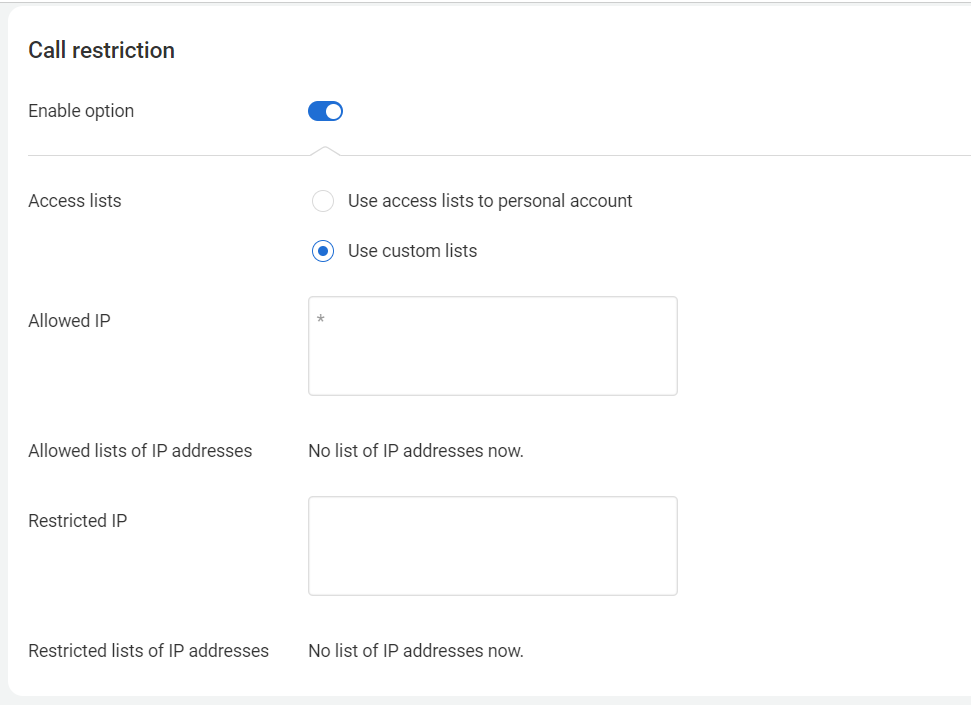
- Use custom lists — opens additional options for creating your own access lists:
- Allowed IP — a list of IP addresses from which access is permitted. The * symbol allows access from all IP addresses.
- Allowed lists of IP addresses — choose addresses from a ready-made list created in the IP Lists tab in the More section.
- Restricted IP — a list of IP addresses with blocked access.
- Restricted lists of IP addresses — choose addresses from a ready-made list created in the IP Lists tab in the More section.
To disable access, turn the switch to the Off position.
- Replace parent domain settings — unlike the previous mode, it does not supplement the parent domain settings but completely replaces them. The rule is the same as for the Expand parent domain settings mode.
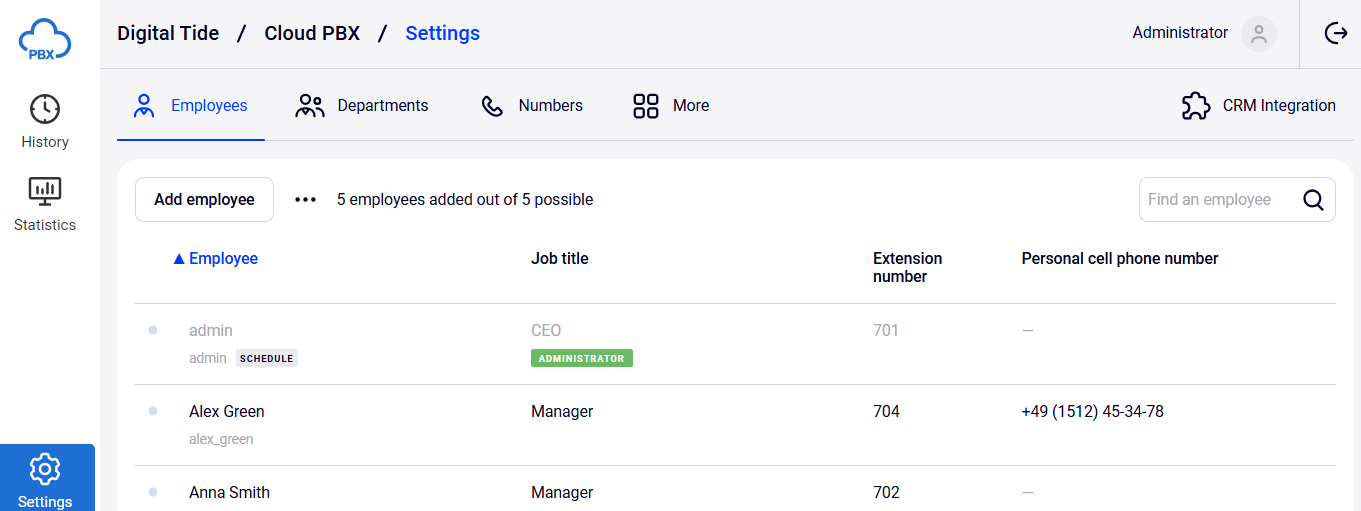
Accessing Client Settings of CPBX
1. Click the domain name to access the Cloud PBX client interface. 2. The client interface for Cloud PBX settings will open.
Blocking a Domain
To block or activate a domain, click the gear icon and in the Domain Status field select the required value from the drop-down list: active or blocked.
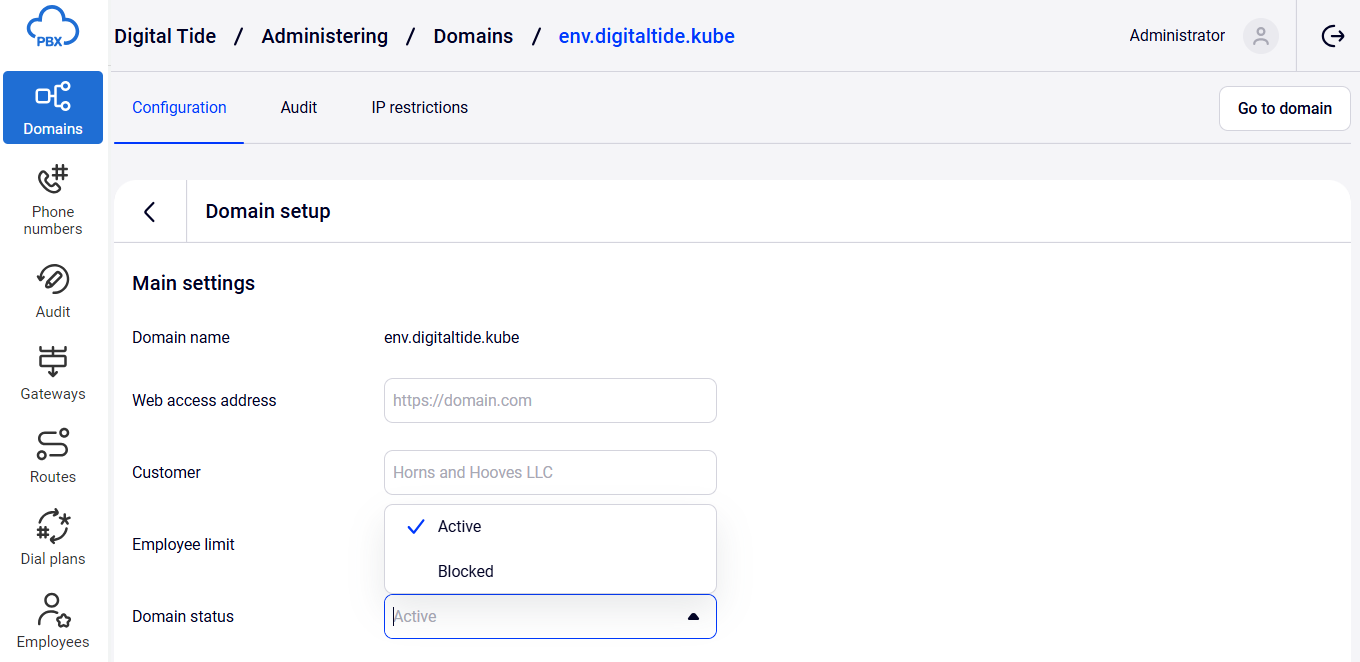
Click Save.
Exporting a Domain List to CSV
1. Click the three dots in the top left corner to reveal additional domain list filters.
2. Select required routes and dial plans. Click Generate a report. A file-saving window will open.
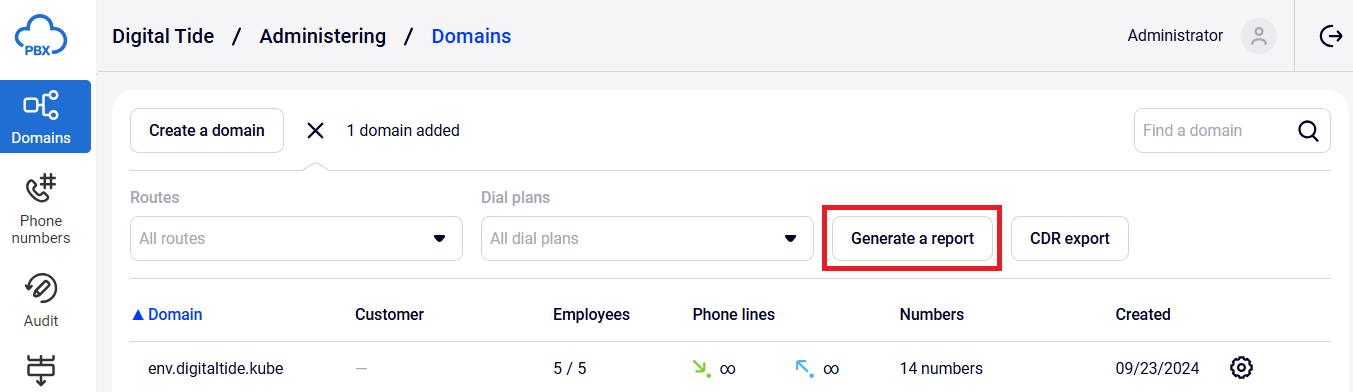
In the report, view information about each domain, including its status, the number and limit of accounts, which routes and dial plans the domain is connected to, enabled services, domain expiration period (in days), as well as more detailed information on individual services.

To export call detail records (CDR) to a CSV file, click CDR Export.
Deleting a Domain
1. Click the gear icon next to the domain name in the general list.
2. Domain settings will open. In the bottom right corner, click Delete domain.

3. In the confirmation message, click Delete to confirm the action.