Dial Plans
This interface section contains a list of dial plans.
Dial plans convert the sequence of numbers dialed by Cloud PBX employees into the +E.164 format. They work similarly to direct conversion rules but on the client side. When an employee makes an outgoing external call, the dialed number is transcribed into the +E.164 format for further processing.
For example, a dial plan is used when an employee calls another city, to determine the area code and direct the call to the right destination. This does not apply when an employee makes an internal call using a short number.
One dial plan can be used for multiple domains.
Creating a Dial Plan
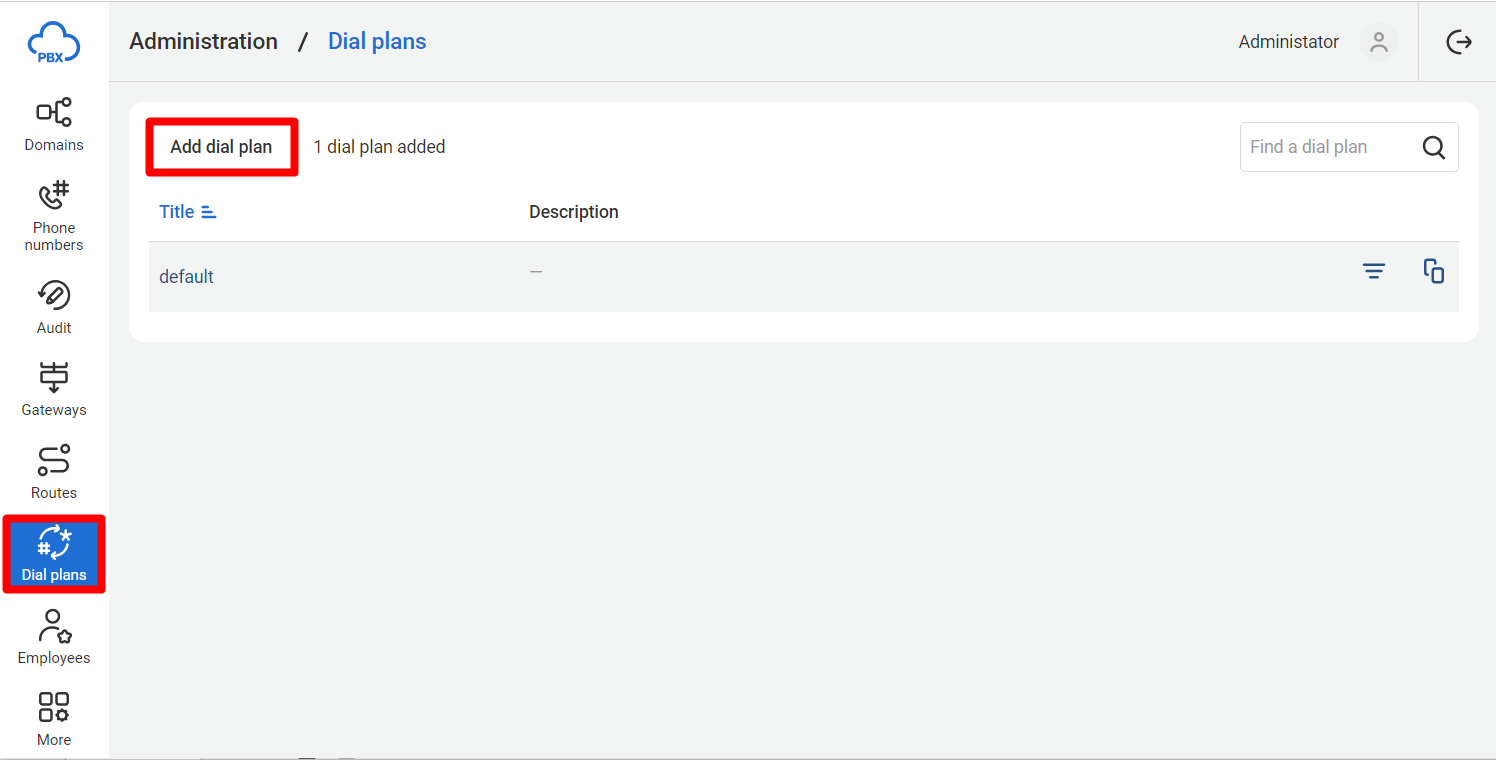
1. Go to the Dial plans section.
By default, the list contains only the preinstalled default dial plan. If it suits the PBX you’re creating, there is no need to create a new dial plan, proceed directly to creating a route. If you need to create a new dial plan, follow the next steps.
2. Click the Add dial plan button.
3. The dial plan creation window will open. Enter a title.
4. Set up direct number conversion rules (see similar settings of direct number conversion rules for gateways).
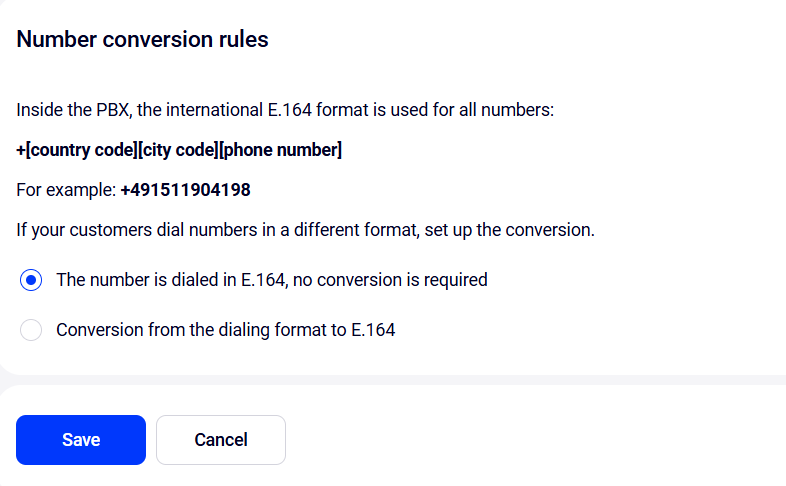
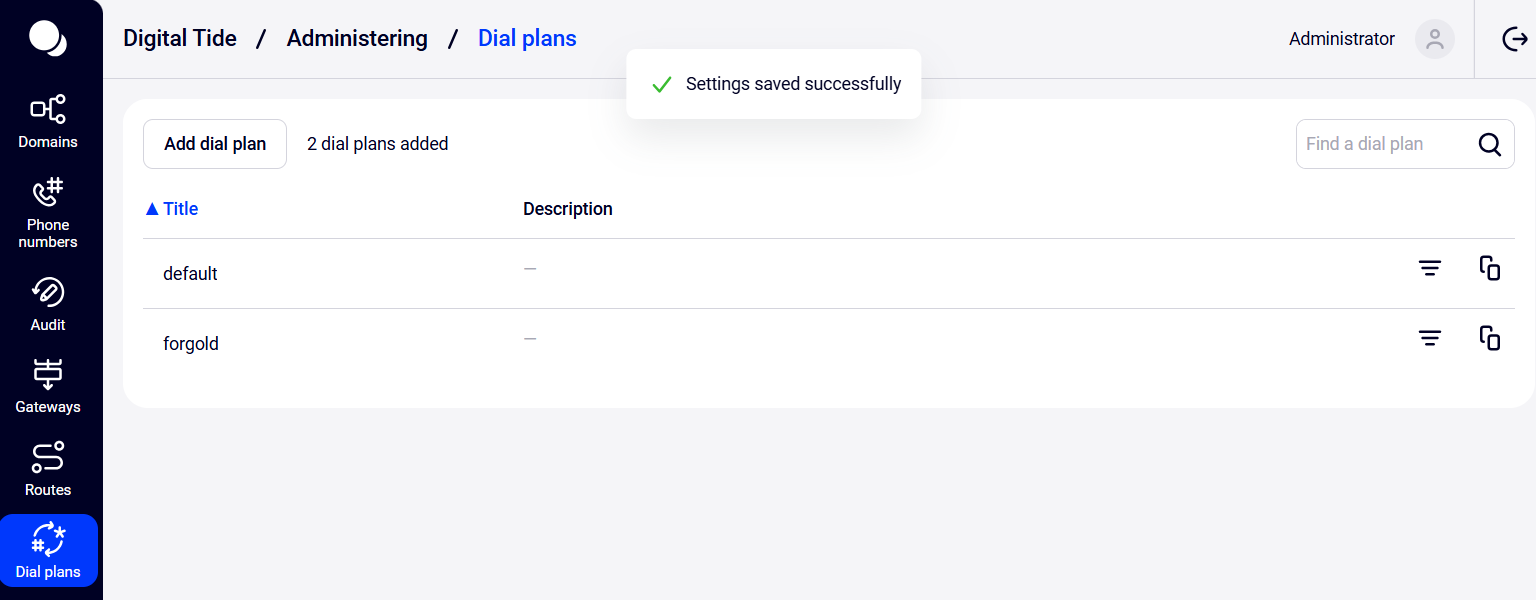
5. Click the Save button to add the dial plan.
Other Actions with Dial Plans
For each dial plan in the table, the following information is provided:
- title;
- description.
In the table, you can search for dial plans, copy the settings of existing dial plans, and filter domains by dial plan.
Finding a Dial Plan
To find a specific dial plan in the general list, enter the title or part of the dial plan title in the search bar and press Enter. Only dial plans with the searched fragment in their titles will be displayed in the list.
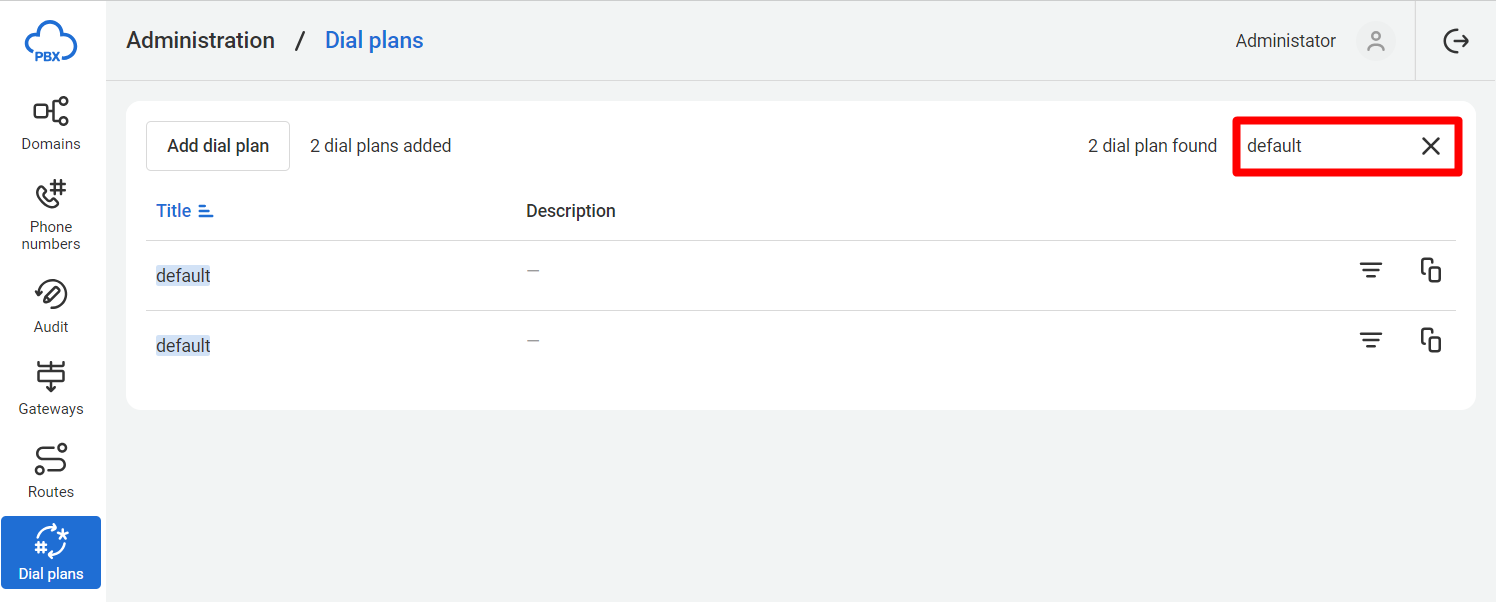
To return to the full list of dial plans, click the x in the search bar.
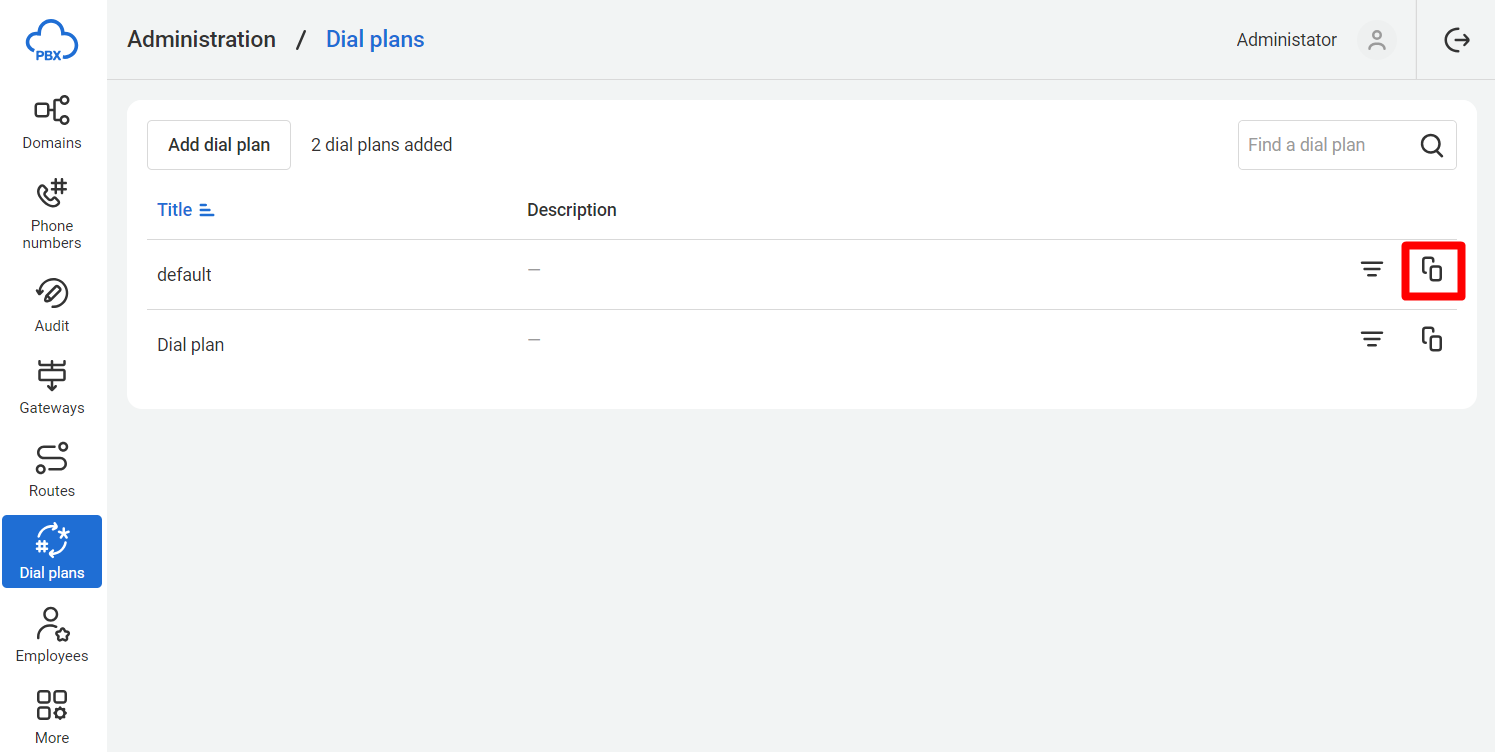
Copying a Dial Plan
1. To quickly create a new dial plan based on an existing one, click the copy icon to the right of the required dial plan.
2. The dial plan creation form will open. All form fields will be filled with values from the copied dial plan. A postfix (copy) will be added to the title in the Title field.
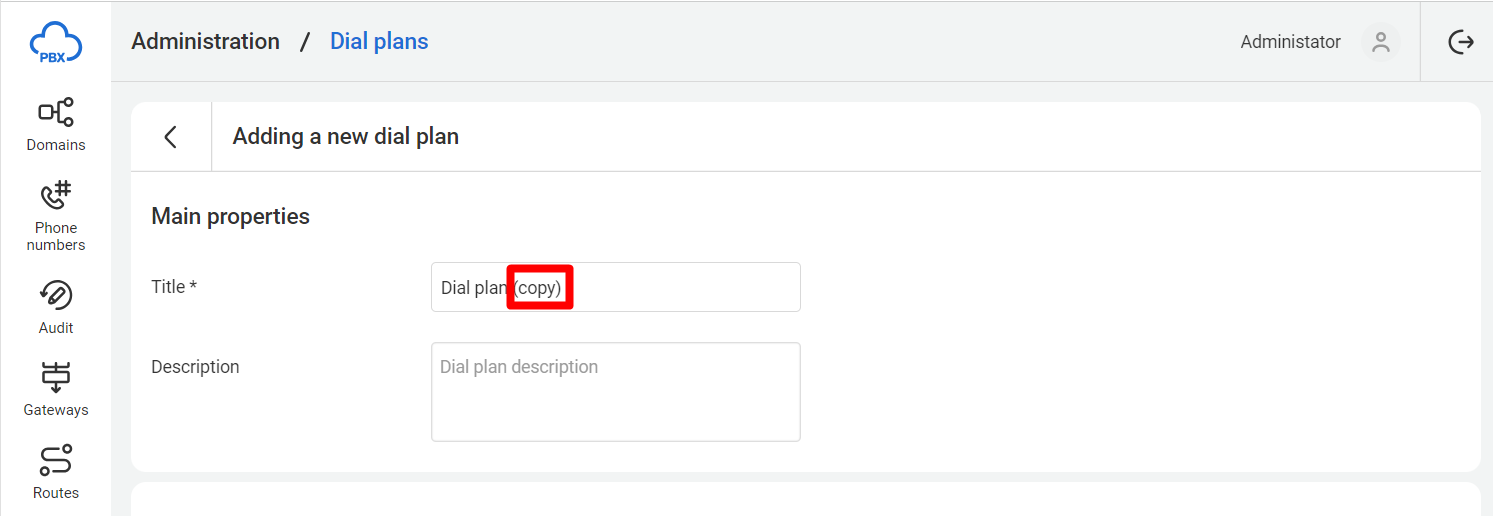
3. Make necessary changes. Click the Save button — the dial plan will be created, and you will be redirected to the list of dial plans.
Filtering Domains by Dial Plan
1. To filter domains by a specific dial plan, click the filter icon in the row of the required dial plan.
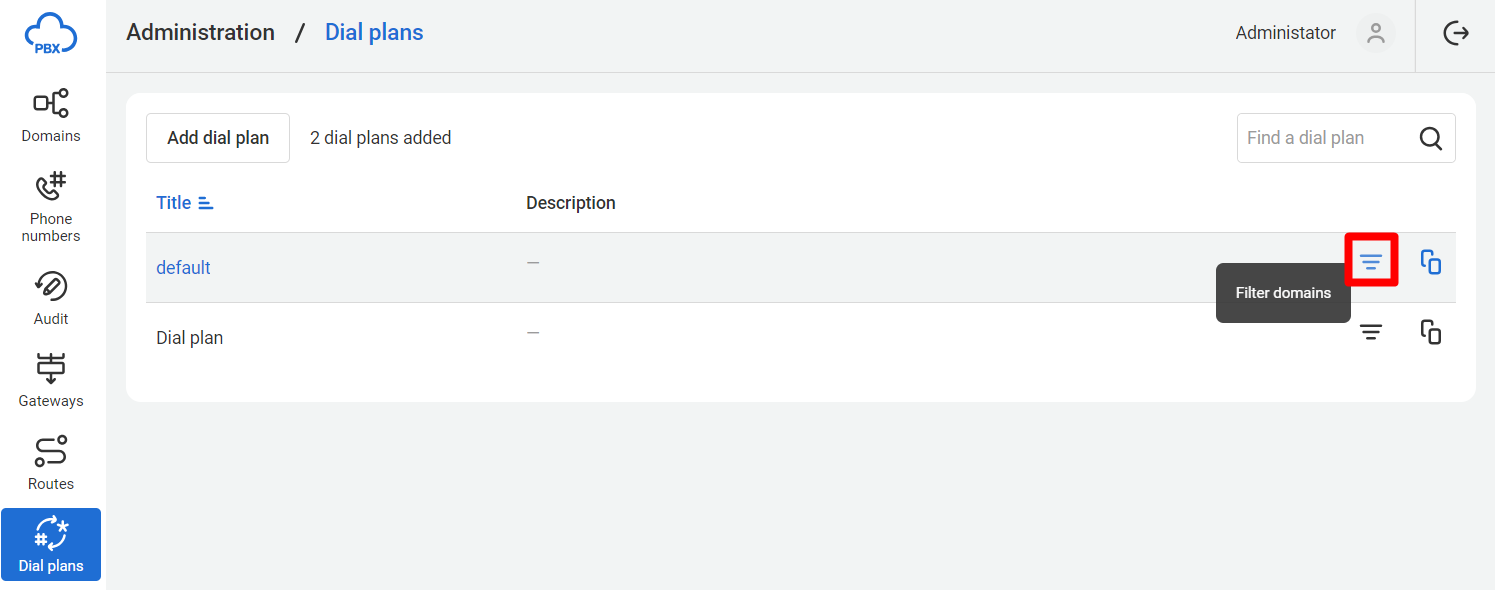
2. The Domains section will open, displaying domains associated with the selected dial plan.
Deleting a Dial Plan
1. To delete a dial plan, click the dial plan title, and in the settings window, click the Delete dial plan button.

2. In the dial plan deletion message, click the Delete button to confirm the action.