Routes
The Routes section contains a list of call routes. Routing rules establish which gateway will be used for making outgoing external calls in the specified direction. The direction refers to the operator's network or region to or from which the call is made. The direction is determined by the phone prefix (prefix is a code, part of the code, or part of a number with the code).
A single route can be assigned to multiple domains. To avoid confusion, it’s not recommended to create multiple identical routes for different domains.
Creating a Route
1. Click the Add a route button.
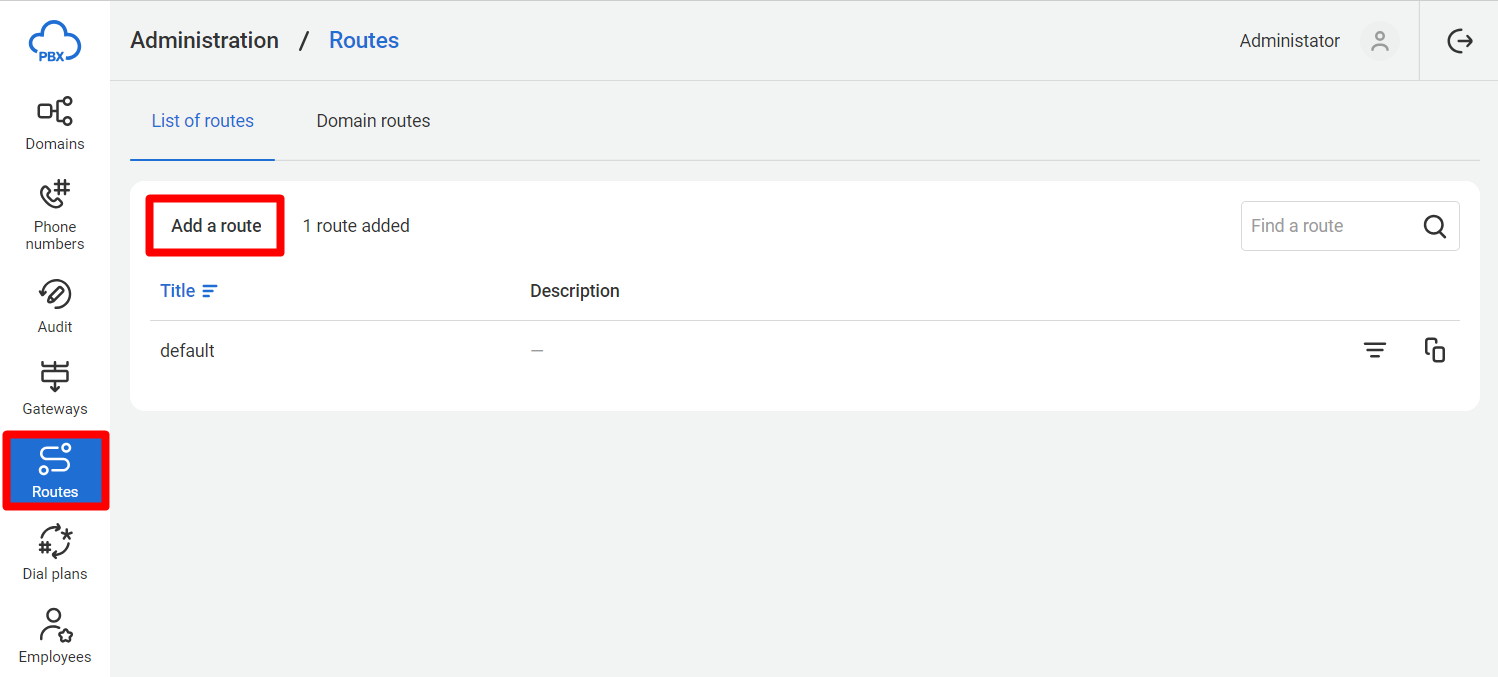
2. The route creation window will open.
3. Fill in the fields:
- Title —route title.
- Description — route description.
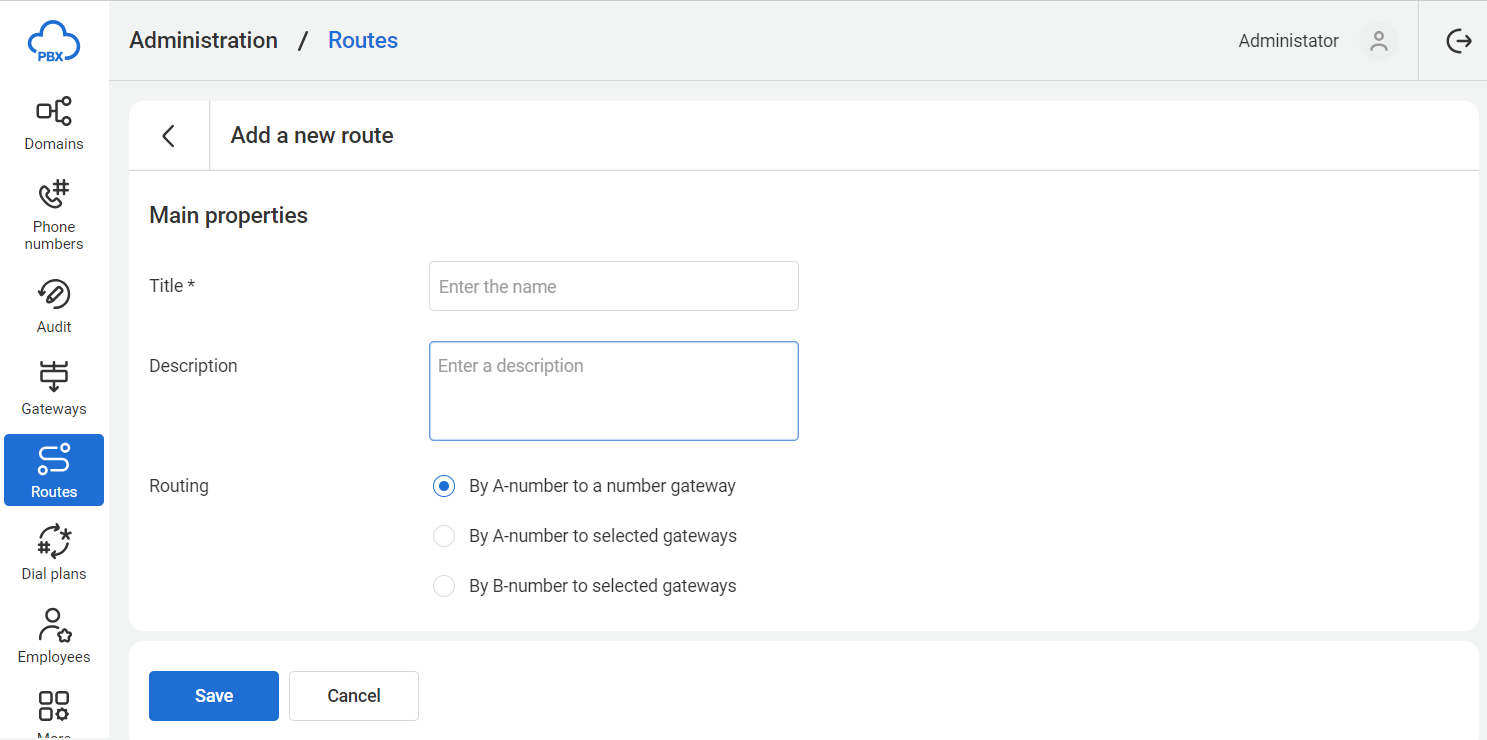
4. In the Routing field, select the routing type. The routing type cannot be changed after the route is created.
- By A-number to a number gateway — uses the gateway associated with the number from which an outgoing external call from Cloud PBX is made.
- By A-number to selected gateways — the gateway is selected based on the routing rules applied to the number from which the call is made.
- By B-number to selected gateways — the gateway is selected based on the routing rules applied to the number being called.
If By A-number to selected gateways or By B-number to selected gateways is chosen, a table for configuring routing rules will open.
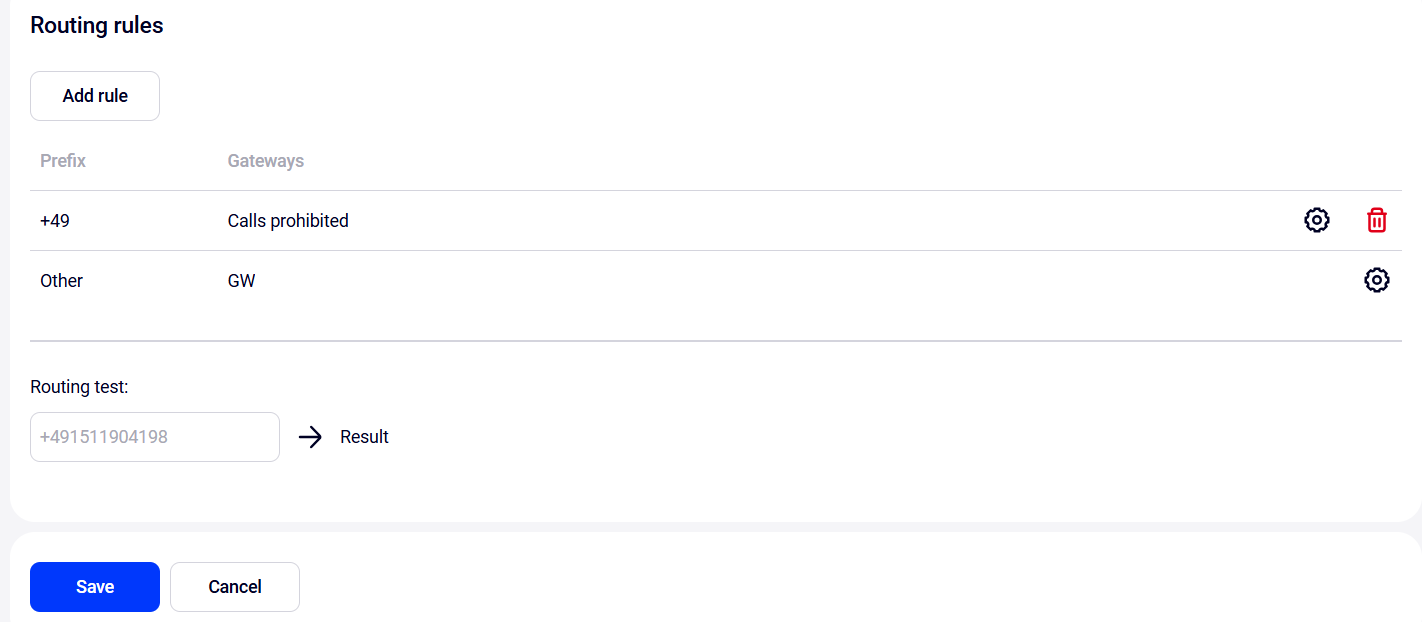
By default, the table contains a row with the prefix Other. It means that calls from the numbers that do not meet other rules (or if other rules are absent) will use this rule. It cannot be deleted, but you can configure gateways for it.
5. To create a new rule, click the Add rule button. A pop-up window will appear where you need to specify the following:
- Prefix — the initial fragment of the phone number (code, part of the code, or part of the number with the code) indicating the call direction. Click the Add button to add a prefix. A field will appear where you can enter one or more digits of the code. Multiple prefixes can be added. To delete a prefix, click the cross icon.
- Note. The prefix must be entered in +E.164 format (the number format after being converted by the dial plan rules).
- Gateways — the list of gateways through which the call will go for the specified directions. The dropdown list displays all available gateways, and you can add them by clicking. If multiple gateways are added, their priority can be changed using arrows. If no gateways are added, calls from or to numbers with the specified prefixes will be prohibited.

Other Actions with Routes
The Routes interface section has two tabs:
- List of routes: the first column shows the routes and the second column shows their descriptions.
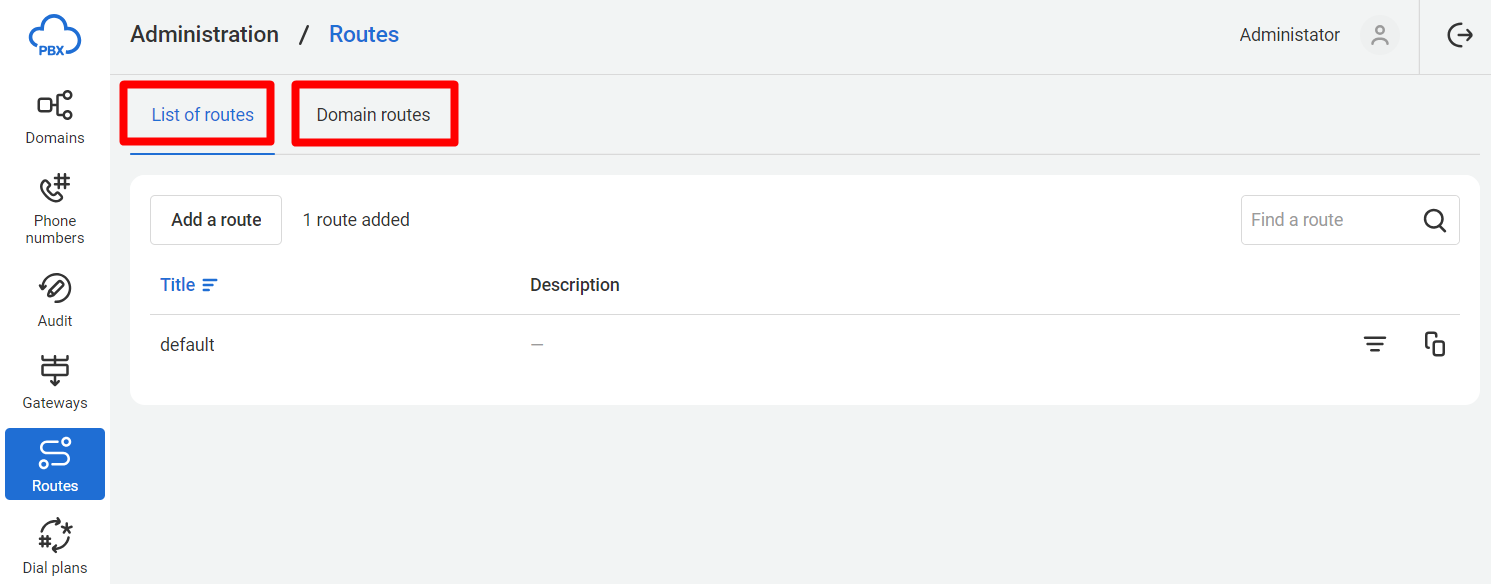
- Domain routes: the first column shows the domains and the second column shows the routes assigned to them.
Let's go over the features of each tab in more detail.
Linking a Domain to a Route
1. On the Domain routes tab, click the Add button.
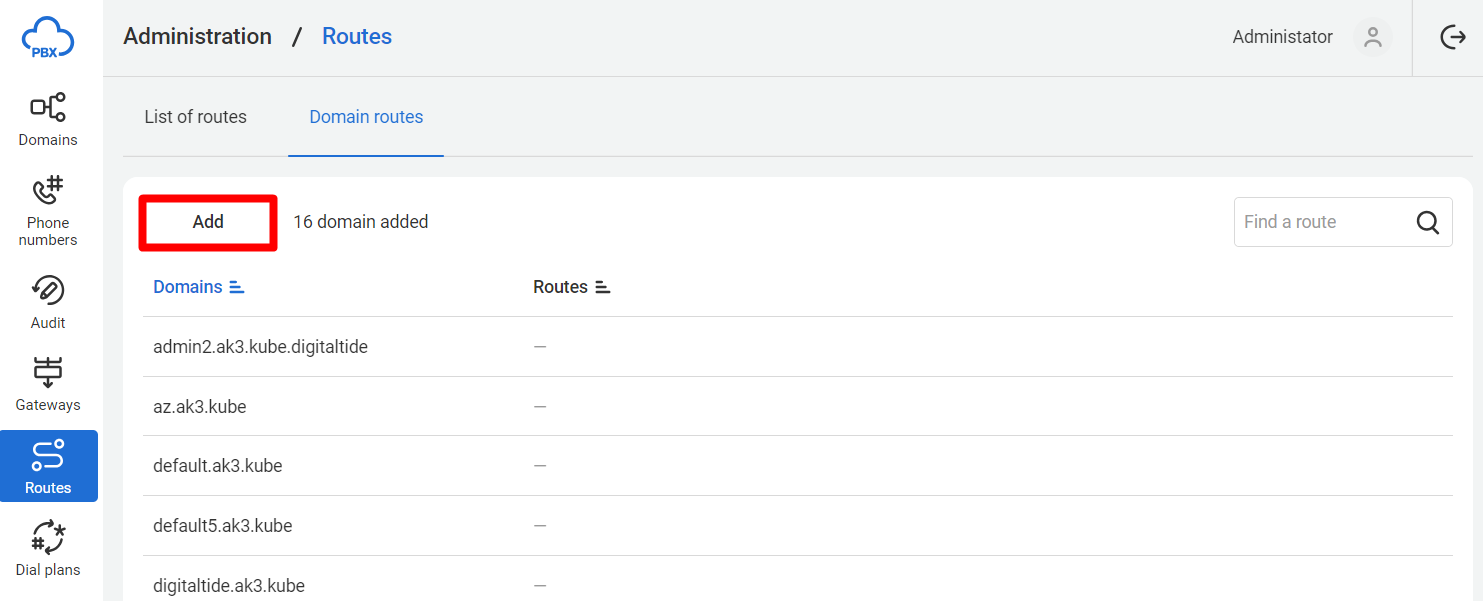
2. In the domain route editing form, enter the domain title and select the routes.
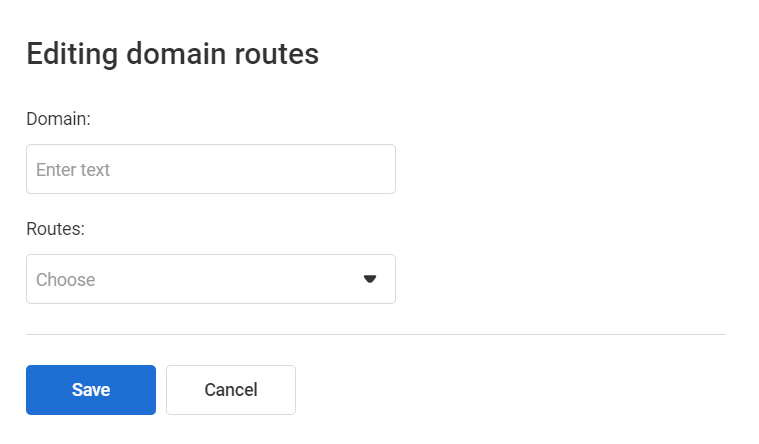
3. Click Save to link the domain to the route.
Note. You can also link a domain to a route when creating or configuring the domain.
Finding a Route
On the List of routes tab, in the search bar, enter part of the route title or description. Press Enter. Only routes with the searched fragment in their titles or descriptions will be displayed in the list.
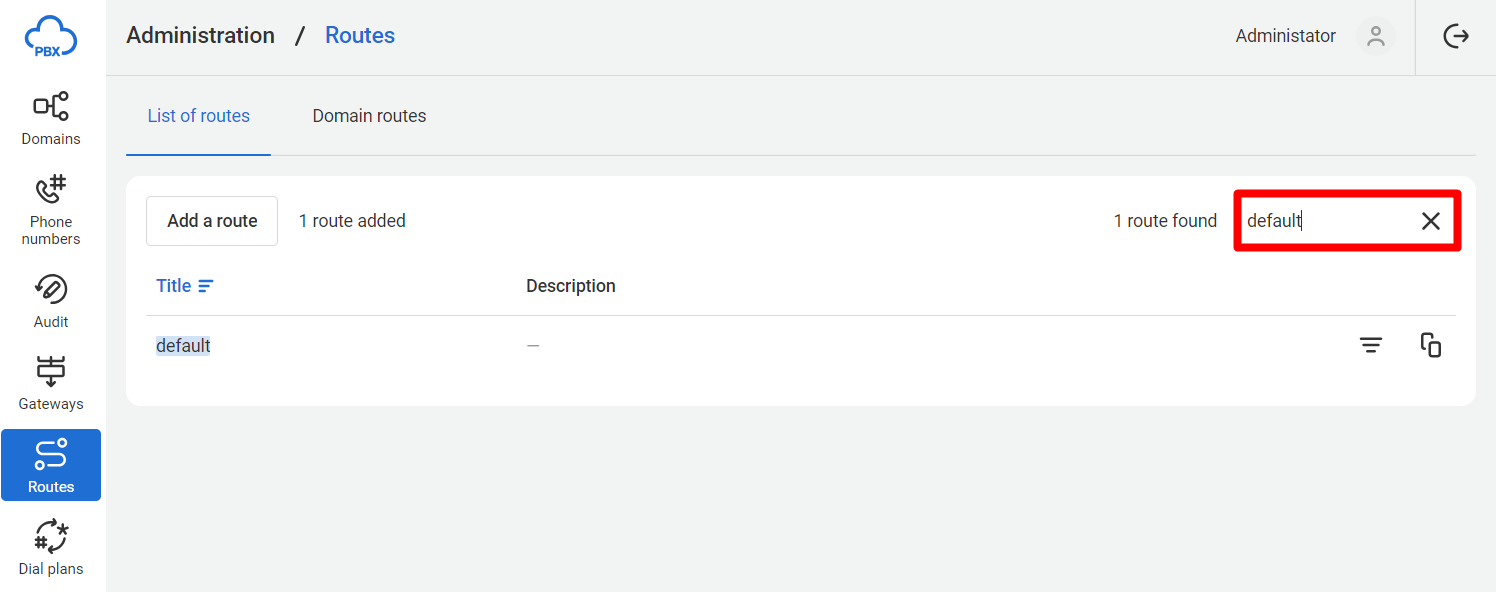
To return to the full list of routes, click the x in the search bar.
In the Domain Routes tab, you can also search for routes by the title of the associated domains.
Copying a Route
Copying allows you to quickly create new routes based on existing ones and then make minor changes. To copy a route:
1. Click the icon to the right of the required route.

2. The route creation window will open. All form fields will be filled with values from the copied route. A postfix (copy) will be added to the title in the Title field.
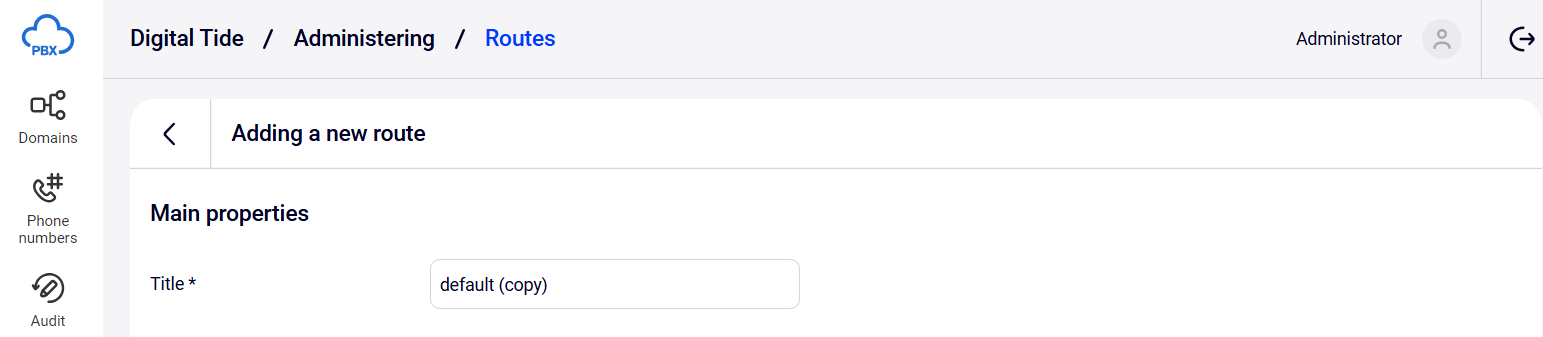
3. Make necessary changes. There is only one restriction: you cannot change the routing type. Click Save to create the route.
Filtering Domains by Route
1. To filter domains by route, go to the List of routes tab. In the row of the route you want to filter by, click the filter icon.

2. The Domains section will open, displaying domains associated with the selected route.
Deleting a Route
1. To delete a route, click its title. In the route settings, click Delete route in the bottom right corner of the page.

2. In the route deletion confirmation dialog, click the Delete button to confirm the action.
If the route is in use, attempting to delete it will display a warning that the route cannot be deleted. The route can be deleted only after detaching it from the domains in the domain route settings.