Maintenance Notification and Change Freeze
During maintenance, you can set up a system notification, block certain actions on a page, and show a pop-up about these restrictions.
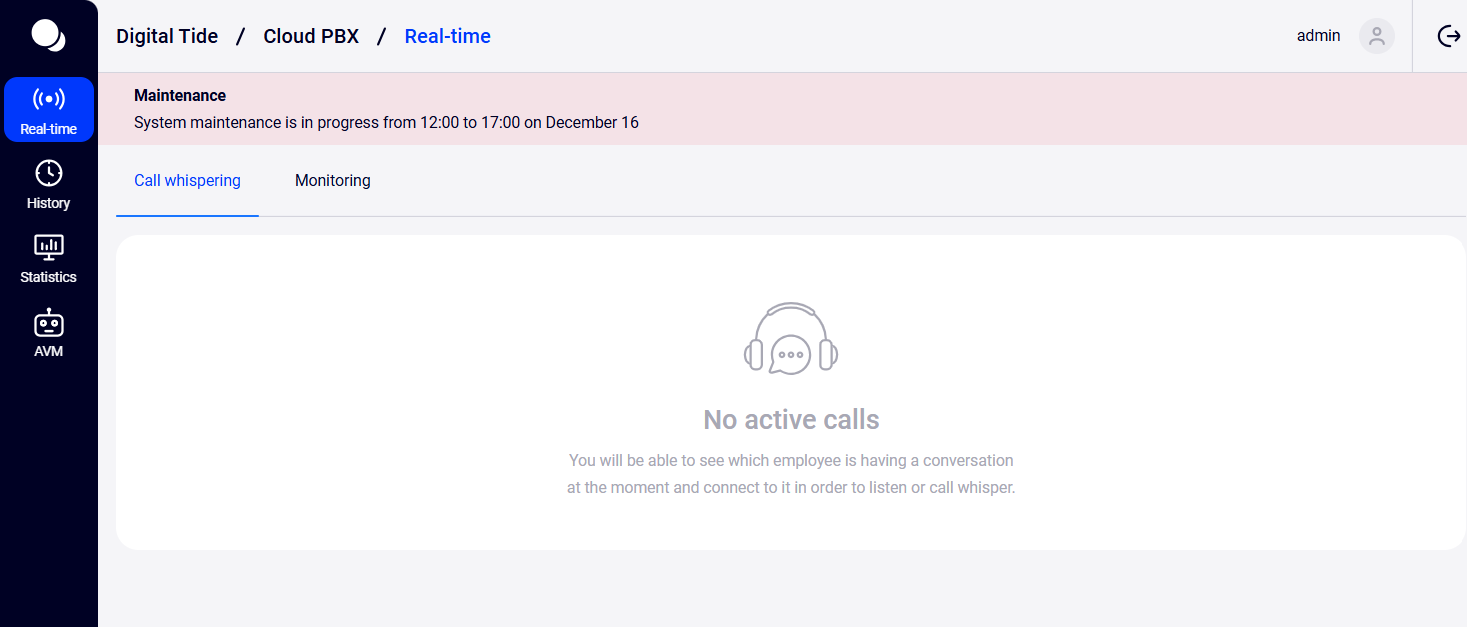
1. System notification is a red bar displaying information.
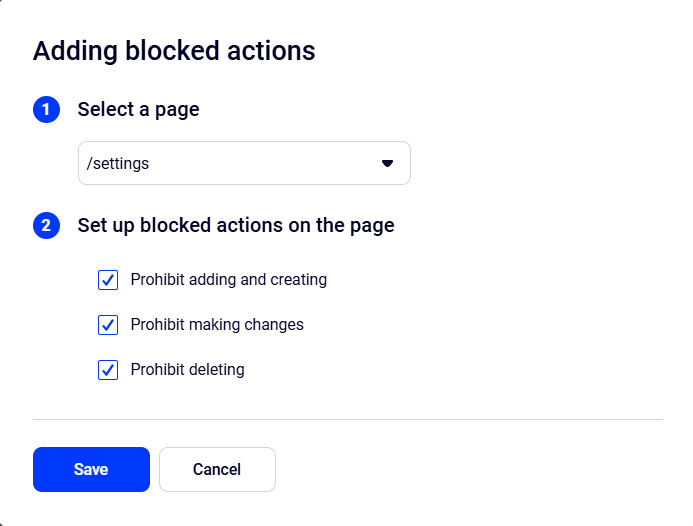
2. Blocking changes to the page prevents adding, creating, editing, or deleting anything on the page.
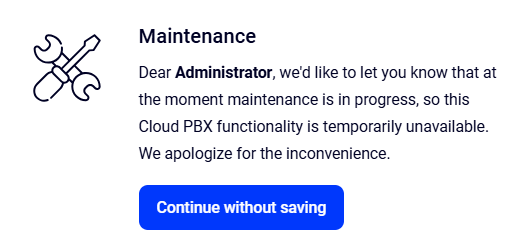
3. Pop-up is a notification that appears when someone tries to perform a blocked action.
Notification and Action Restriction Set Up
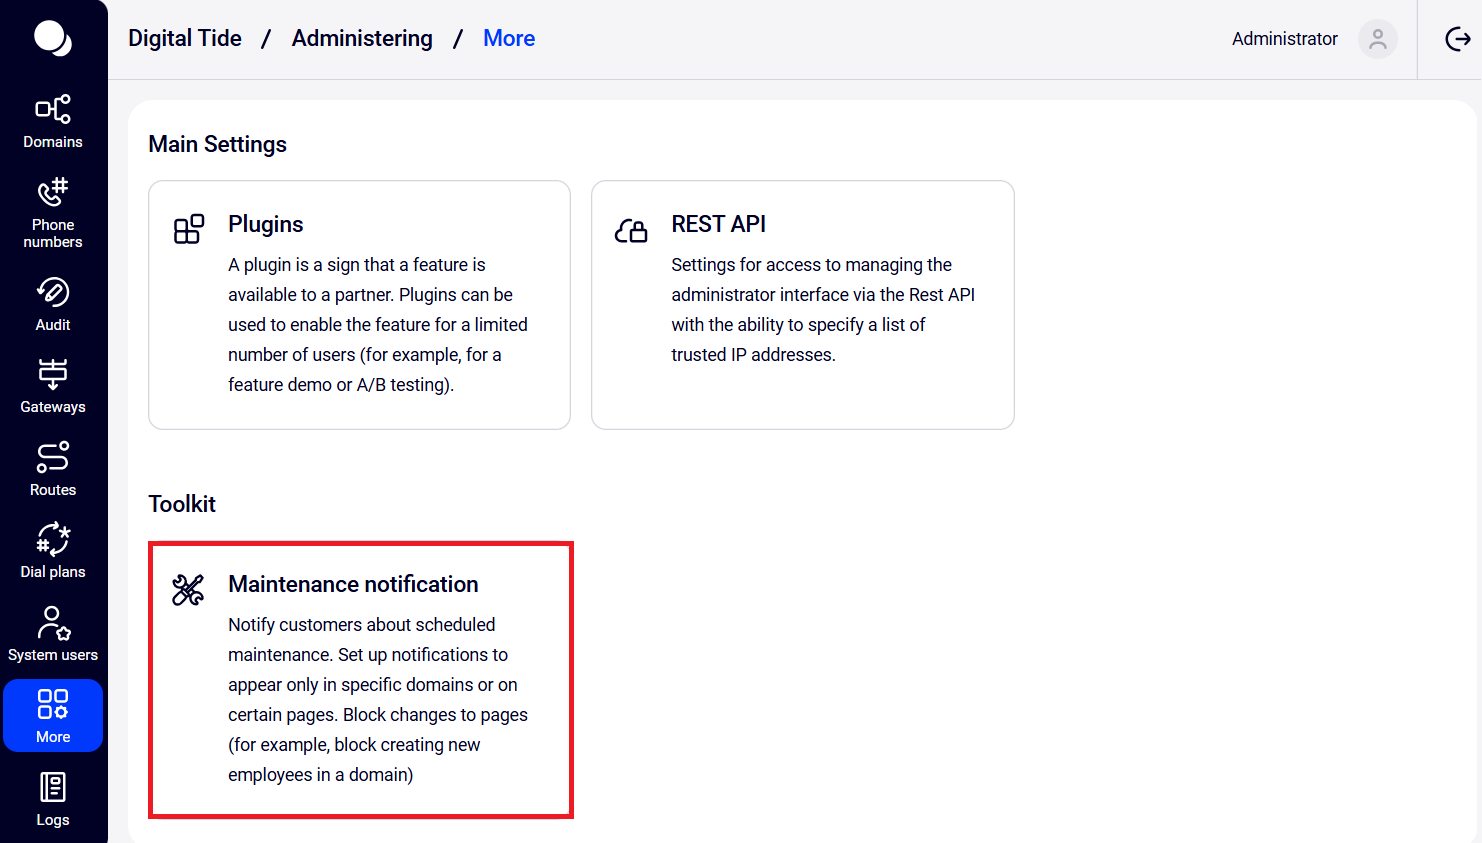
1. Go to More — Maintenance notification.
2. Click Create template.

3. Configure the notification template.
Template basic settings
- Enter a template name, e.g., Billing Update.
- Choose the domains where the template will be active. The template can be enabled on both the system administrator domain and client domains.
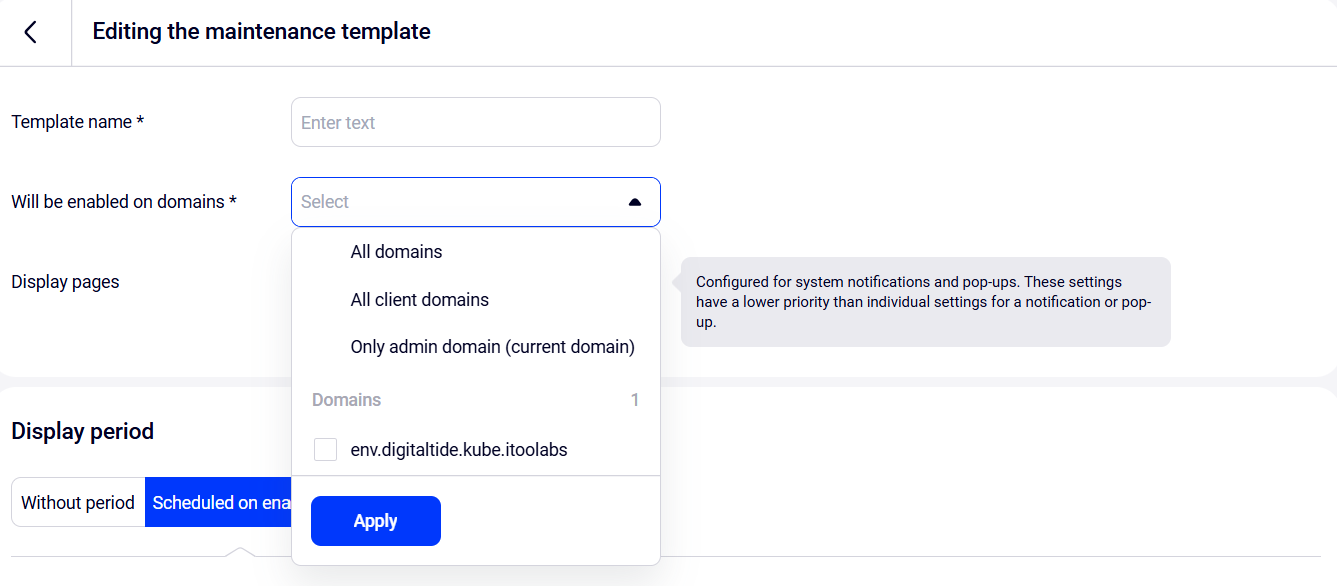
- Choose the pages where it will appear. This setting applies to the entire template, but individual settings for system notifications and blocked actions will take higher priority.

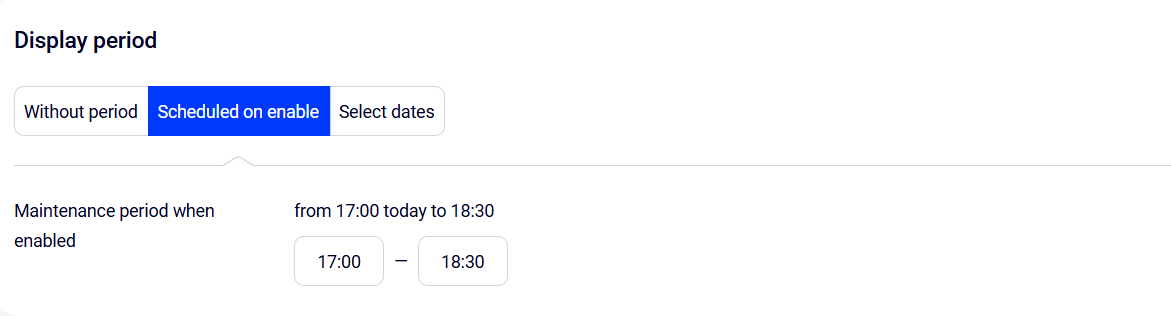
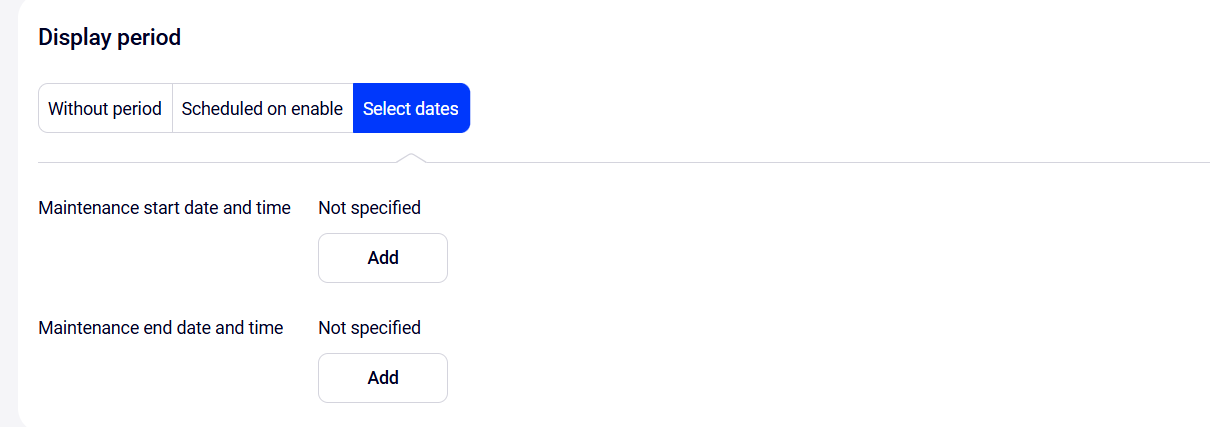
Display period
You can choose how long notifications and action restrictions will remain active: until you manually stop them, for no more than 24 hours, or on specific dates.
- Without period. You can start and stop notifications and action restrictions at any time.
- Scheduled on enable. Best for notifications and restrictions that must start today — the settings will be active for no longer than 24 hours.
- Select dates. This setting allows you to specify any start and end dates for display.
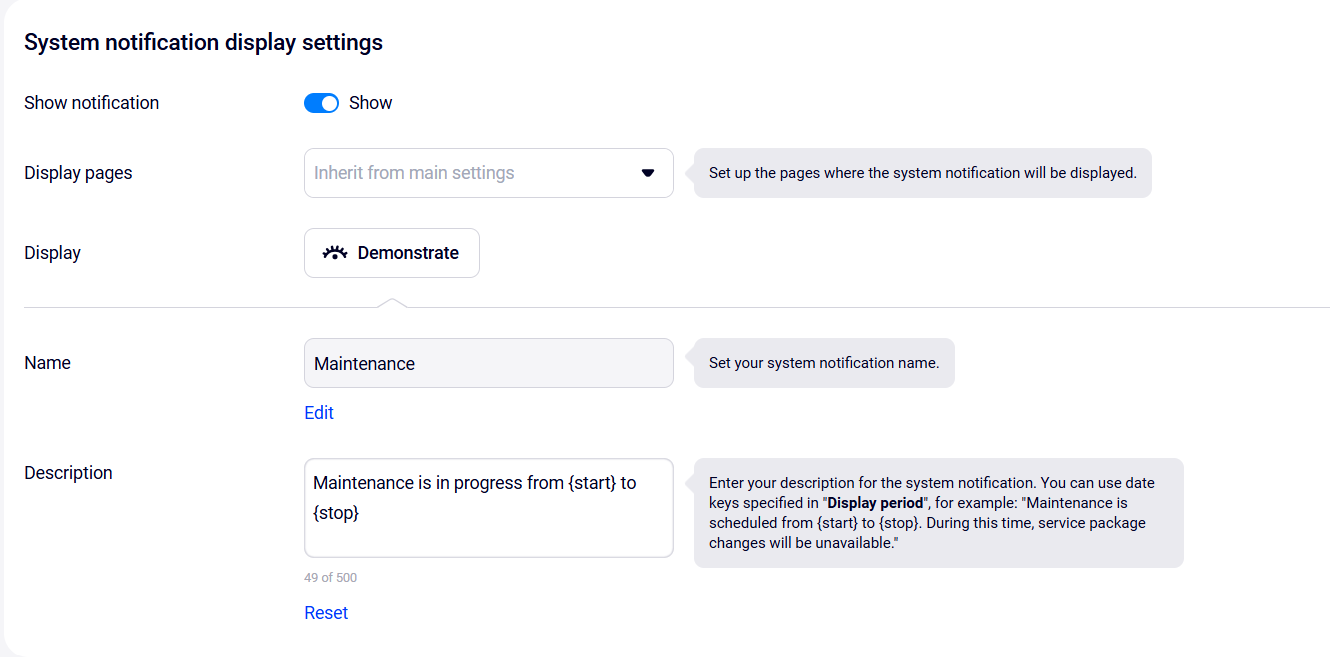
Displaying the system notification
You can set up unique pages to display the system notification — this setting takes priority over the general one.
Enter the name and text for the system notification. If you have previously set a display period, you can specify the {start} and {stop} keys in the description.
You can preview the notification by clicking the Demonstrate button.
Blocking changes to the page
Similarly, set up action restrictions on pages and the pop-up display. If you select display pages here, an additional Blocked actions setting will appear — click Add.
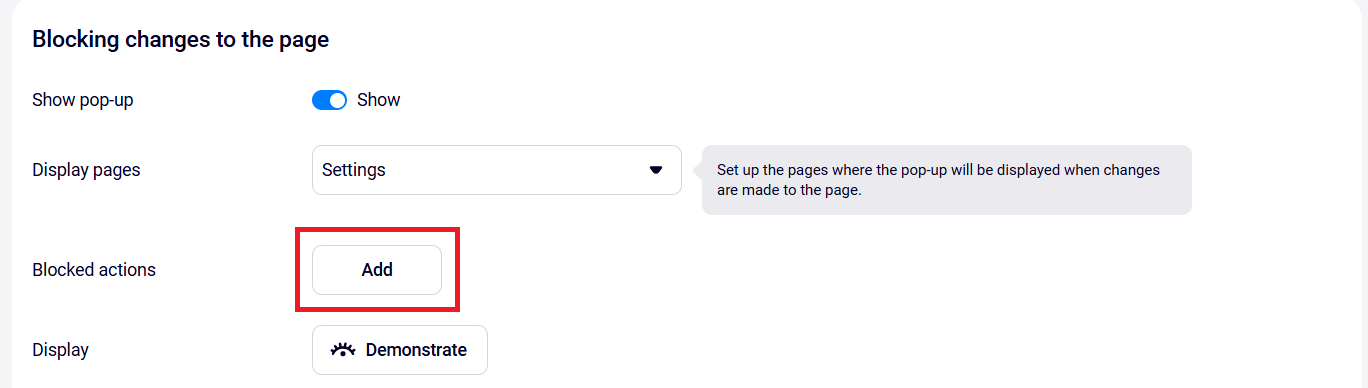
In the window that opens, select the actions you want to block and for which the pop-up will appear.
4. Click Save at the bottom of the page.
5. Enable the template display.
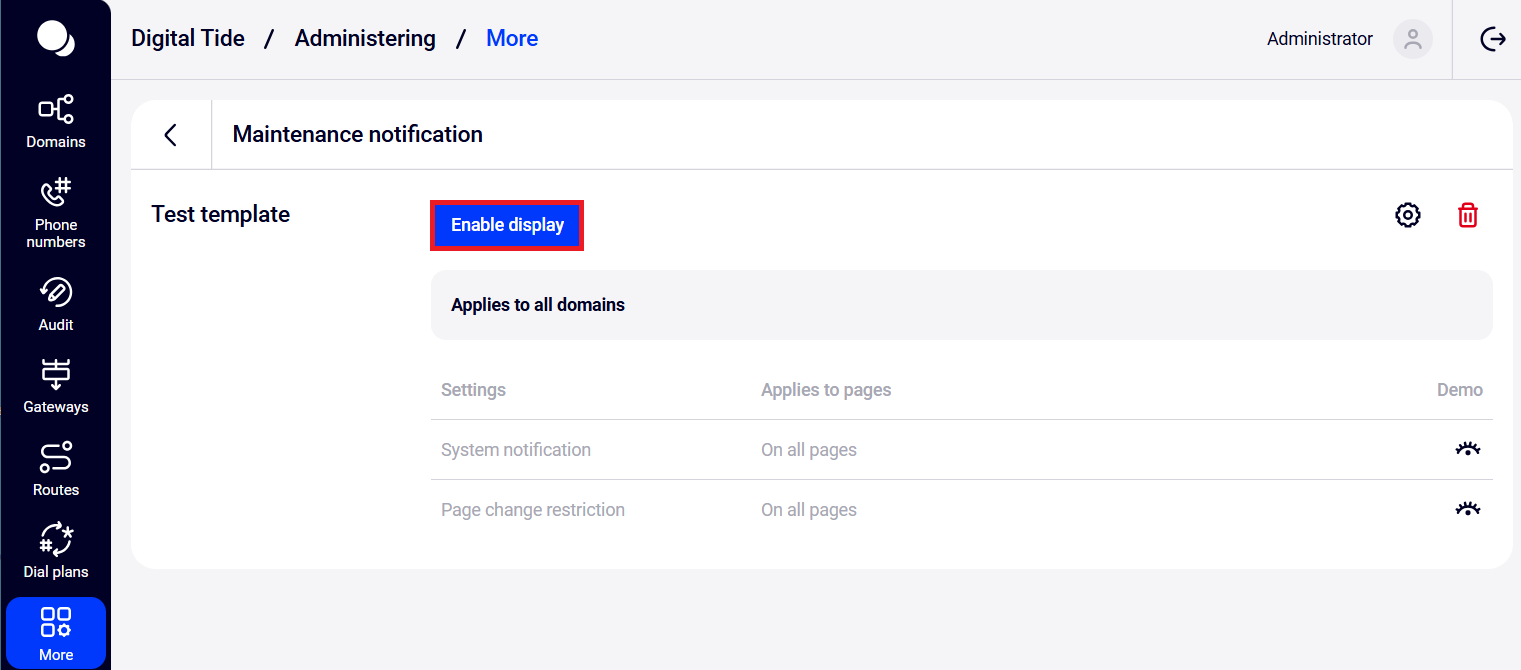
Now, your customers will see notifications in the Cloud PBX interface during the selected period, and the template will display as Active or Pending.

When the display period expires, the template status changes to Display period ended. To reactivate the template, click Disable display, then go to the template settings and set a new period.

Please note: You can set up multiple templates, but only one of them can have the Active status.