Changing Numbers for Outgoing Calls (Caller ID)
To allow your employees to call customers from different phone numbers, set these numbers as outgoing numbers for a specific category of calls. There are three categories of outgoing numbers in Cloud PBX:
- Primary — all calls will be made from this number, except those for which personal and regional numbers are assigned.
- Personal — are used for outgoing calls of selected employees and departments. This allows managers to always call customers from familiar numbers.
- Regional – are used for calls to other countries and calls by direction prefix. Using the prefix, a separate outgoing number can also be set up for calls to a specific city. Calls from regional numbers create the effect of presence in the region, and also help to save on international and long-distance calls.
You can set up the priority of changing personal and regional numbers for outgoing calls depending on your goals. Below we will tell you more about all the settings of the Caller ID.
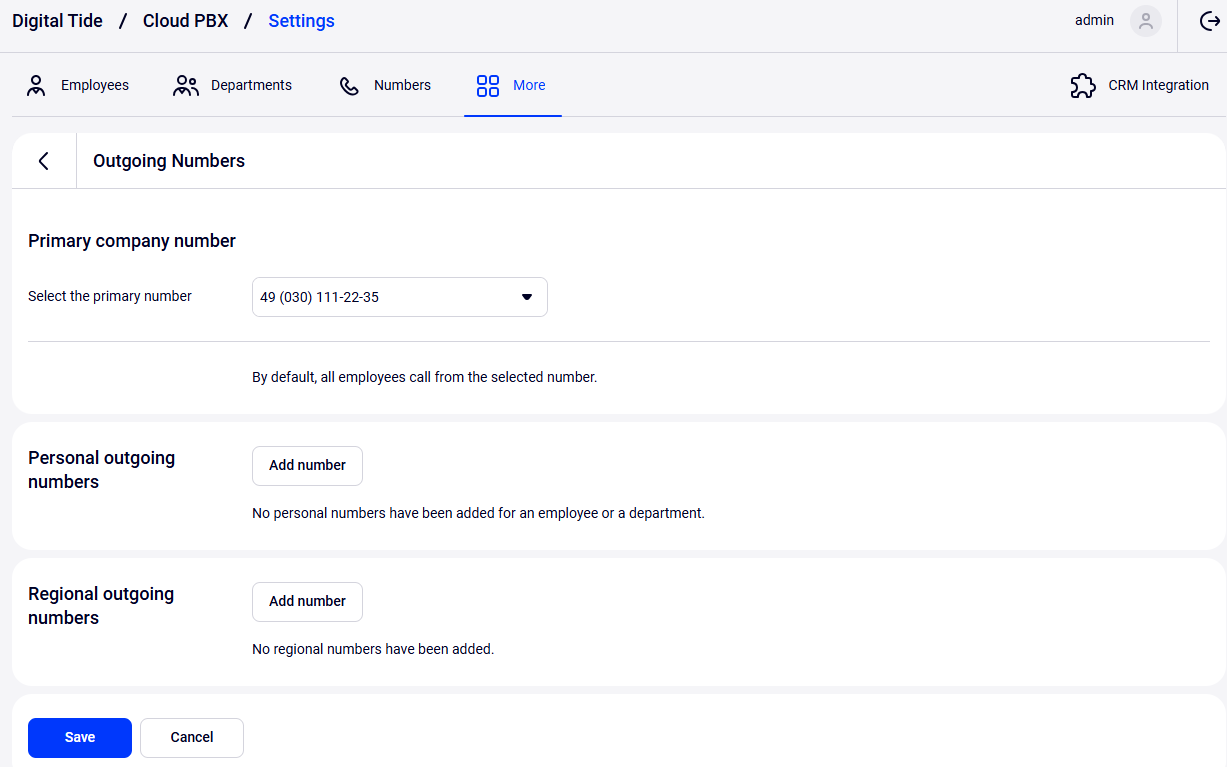
To set up the logic for changing numbers for outgoing calls is available in Settings → More → Outgoing numbers.
Please note
1. A disabled number cannot be selected as a primary, personal or regional outgoing number. For more information on disabling numbers, see the Numbers article.2. One number can be used simultaneously for several employees, departments, and also made both personal and regional at the same time if necessary. For example, if your company has a regional representative in another country, then their personal number in Cloud PBX can also be made regional to be used for all calls to customers in this country.
How to Set up a Personal Outgoing Number
Assign numbers to employees and departments that will be displayed when making outgoing calls.
1. Click Add number in the Personal numbers section.
2. In the pop-up window, select the outgoing number.
3. Select the employee or department for which you want to set up a personal outgoing number.
4. Click Add.
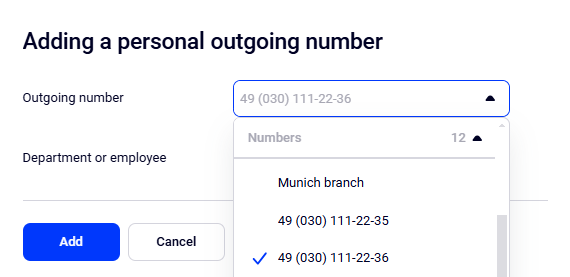
5. Assign personal numbers to other employees. Check if everything is set up correctly. If necessary, edit the settings by clicking on the gear icon. If you want to delete this number from the list of personal numbers, click the trash can icon to the right of the number.
6. Click Save at the very bottom of the screen.
If both personal and department numbers are available for an employee, the personal number will be used for outgoing calls.
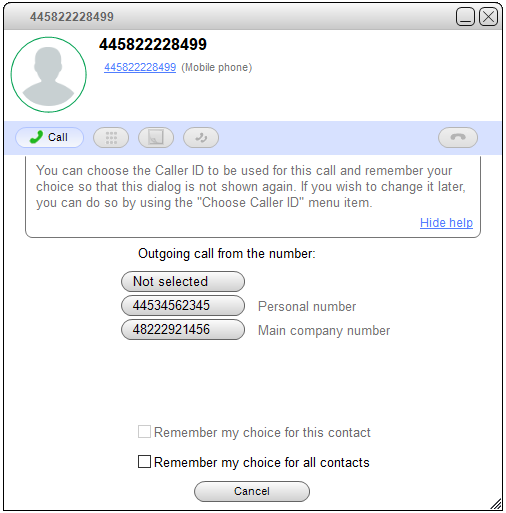
These settings are also relevant for calls via the mobile app. And when calling from a softphone, the employee can select the required number at the time of the call.
How to Set up an Outgoing Number for Calls to a Different Country
If you have numbers from other countries, they can be used when calling there.
In this way, you create the effect of presence in the customer’s country, and you can also save on international calls.
1. In the Regional outgoing numbers section, click the Add number button.
2. In the pop-up window, select the outgoing phone number.
3. Select the “to other countries” direction. In the drop-down list, select the region where the number specified above will be used for calls. Alternatively, click Show the list of regions to see all available countries grouped by region and select the call direction there.

4. Click the Add button.
5. The regional number will be displayed in the table of regional outgoing numbers. Check the number settings — if you need to edit them, click the gear icon. If you want to delete this number from the list of regional numbers, click the trash can icon to the right of the number.
If You Did Not Find the Required Direction in the Cloud PBX Settings
If you did not find the required call direction in the list of other countries, you can assign an outgoing number using the prefix of this direction. For example, you can set a separate outgoing number for calls to local landline numbers.
To set up an outgoing number by a direction prefix:
1. In the “Regional outgoing numbers” section, click the Add number button.
2. In the pop-up window, select the phone number.
3. Select the by direction prefix option.
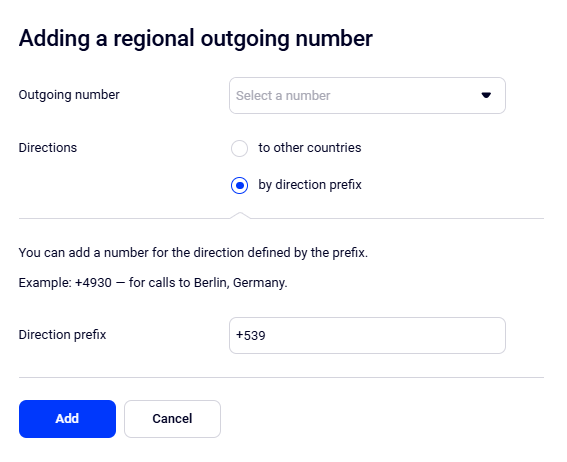
4. Click Add.
5. The regional number will be displayed in the table of regional outgoing numbers. Check the number settings — if you need to edit them, click the gear icon. If you want to remove this number from the list of regional numbers, you can delete it by clicking the trash can icon.
Please note
If the number to which the call is made matches several prefixes at once (+49176, +491765, +4917654), then the one assigned to the longest prefix (in this example, the +4917654 prefix) is selected as the outgoing number.Priority of Changing Numbers for Outgoing Calls
Default Priority of Changing Numbers for Outgoing Calls
By default, the priority for changing an outgoing number looks like this: Regional number set up by a direction prefix → Regional number (for another country) → Employee’s personal number → Department personal number → Primary number.
If a regional number is set up by a direction prefix then this number is used by default when making a call, regardless of other outgoing numbers settings.
This means that if you have a number set up for another country, for example, Germany, and you want to call Berlin from another number, set up a separate outgoing number for Berlin using the city prefix.
If any regional number is set up then this number will be used automatically for any employee’s call to the specified region, even if the employee has their own personal number.
If there is no regional number then the employee’s personal number will be used for calls, even if the department also has its own personal number set up.
If the employee does not have a personal number then outgoing calls will be made from the department personal number, and not from the primary company number.
Alternating the Priority of Changing Numbers for Outgoing Calls
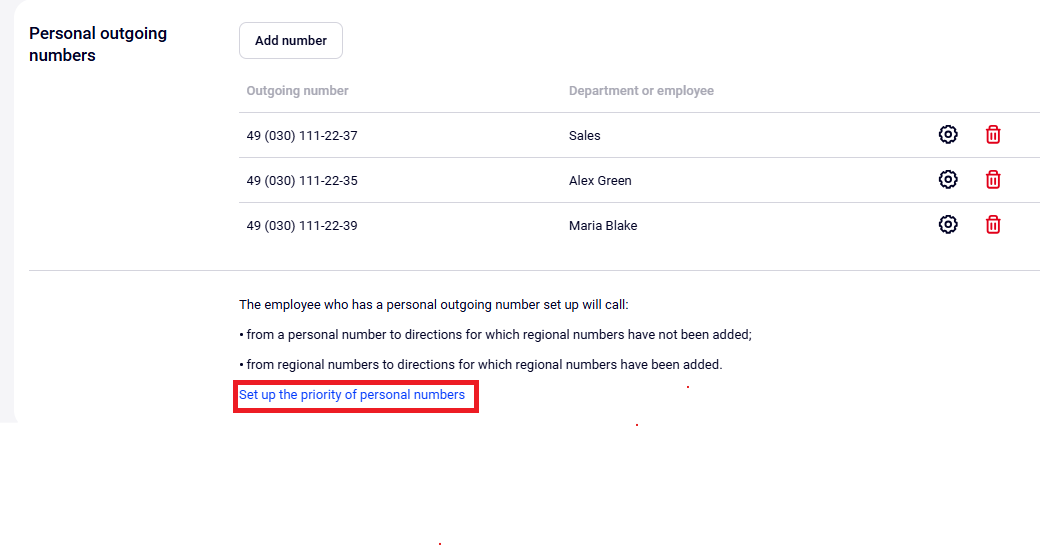
If your customers from other regions call to employees’ personal numbers then the following situations can happen: the customer saves the employee’s number but later the employee calls them from an unknown number (the regional outgoing one) — the customer thinks it’s a spam call and declines it. To avoid it, you can switch the priority of changing numbers for outgoing calls. If the employee has a personal outgoing number, it will be the one shown to the customer. To do this, click the settings icon.
Choose using which numbers will be prioritized for outgoing calls:
- regional — this is the default priority: when any employee calls to a region with a set up regional number, the regional number will be shown to customers, even if the employee has a personal number;
- personal – an employee for whom a personal outgoing number is set up will always call from a personal number, regardless of the direction of the call.
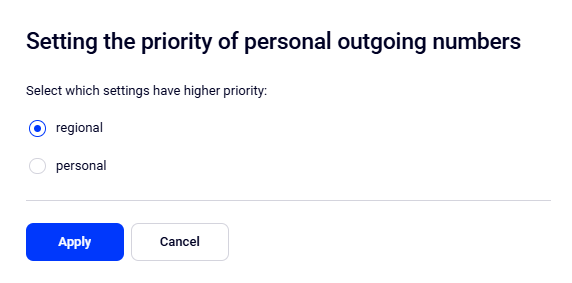
Click Apply.
Check that the settings are correct — the type of numbers with the highest priority will move to the bottom of the page.
For example, if you have made personal numbers a priority over regional numbers, the outgoing numbers settings page will look like this:
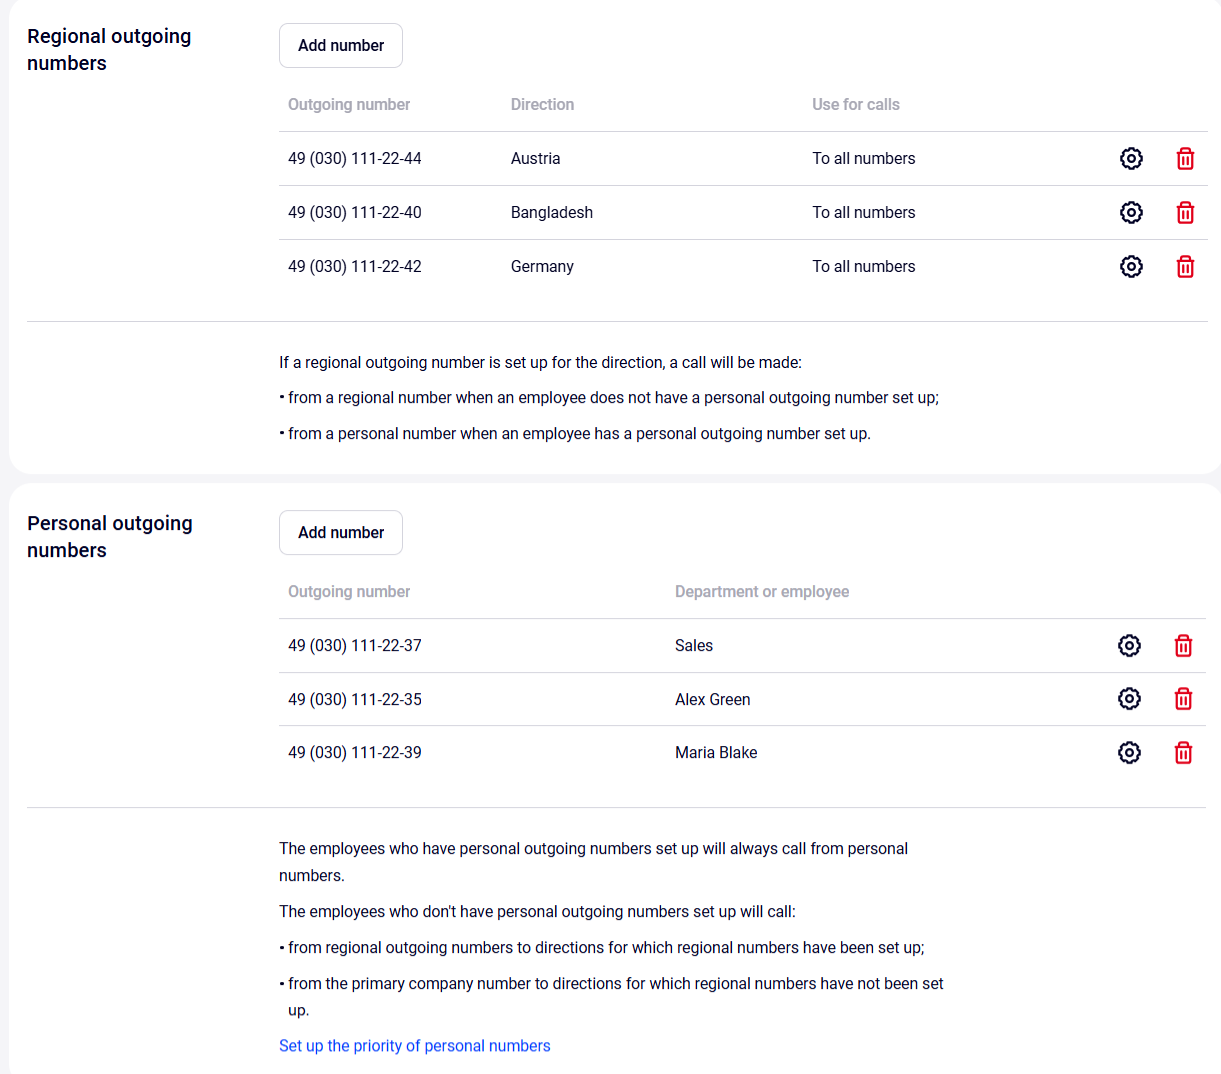
If everything is correct, click Save.