Numbers
Here, you can set up a call-receiving schedule during working hours and choose where to forward calls during off-hours.
Configuring unique settings for each Cloud PBX number and connected numbers from other operators is possible.
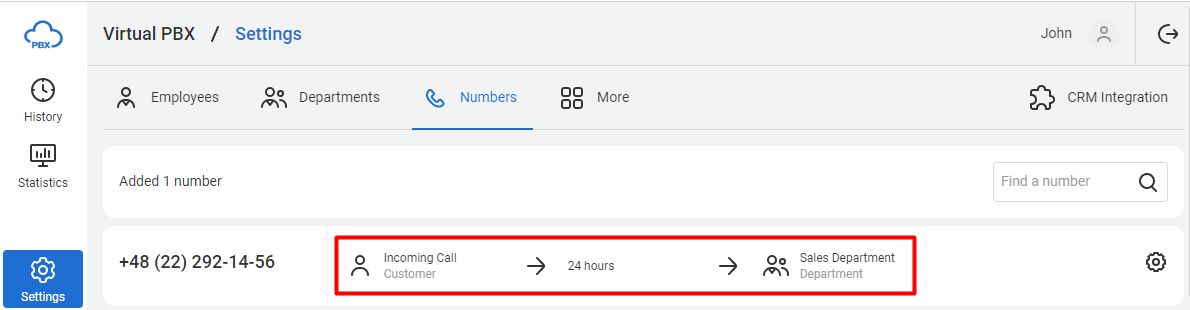
1. Go to the Numbers tab in the Settings section to see a current call-receiving scheme for your numbers.
2. Click the scheme to open call-receiving settings.
3. Choose how your number will operate: around the clock or as scheduled.
We recommend selecting Scheduled so that your customers can hear information about it during off-hours and leave you a voicemail message.
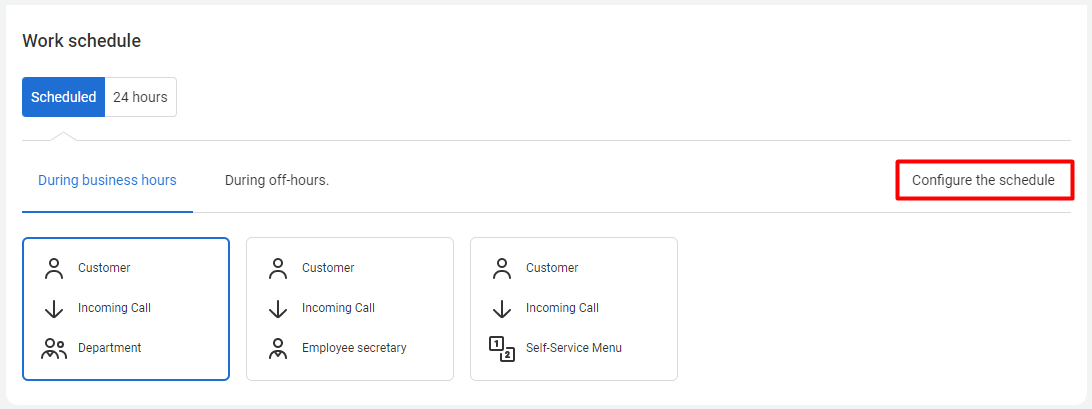
Then click Set up schedule.
4. Set working hours and a time zone of your employees.
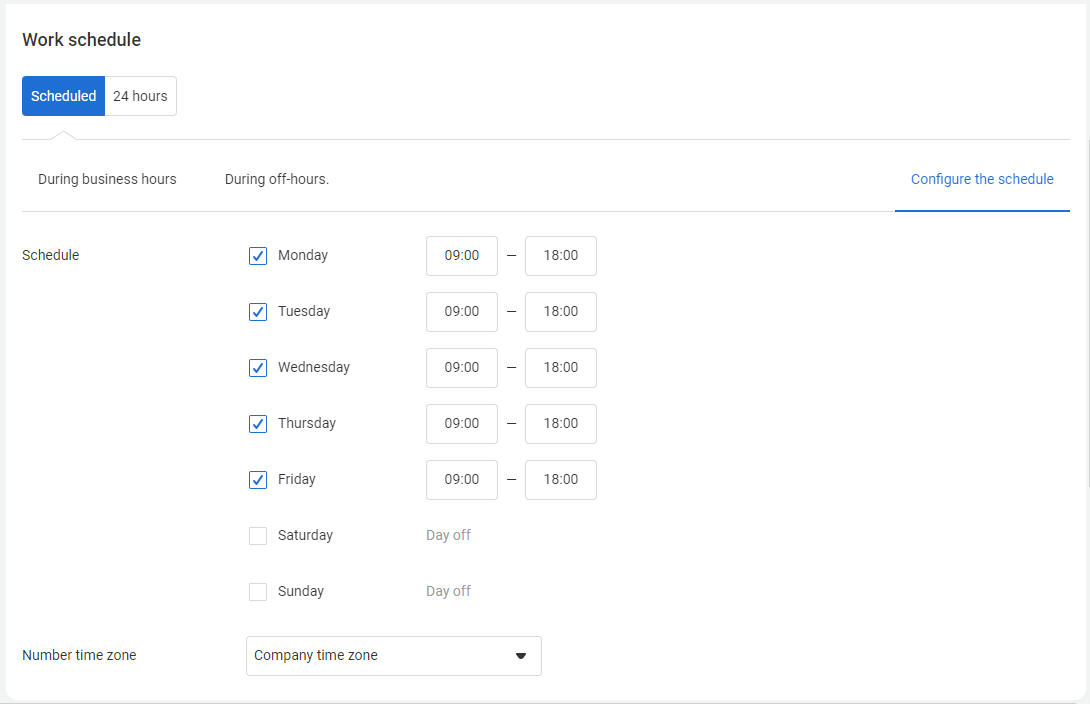
Please note: To set up an overnight work shift, select the day the employee comes to work and specify the start and end times of the shift. For example, if the employee works from 20:00 on October 25 to 8:00 on October 26, you need to set the working hours for October 25 as follows: from 20:00 till 8:00.
If the employee works until midnight, indicate the end time of the shift: 24:00.
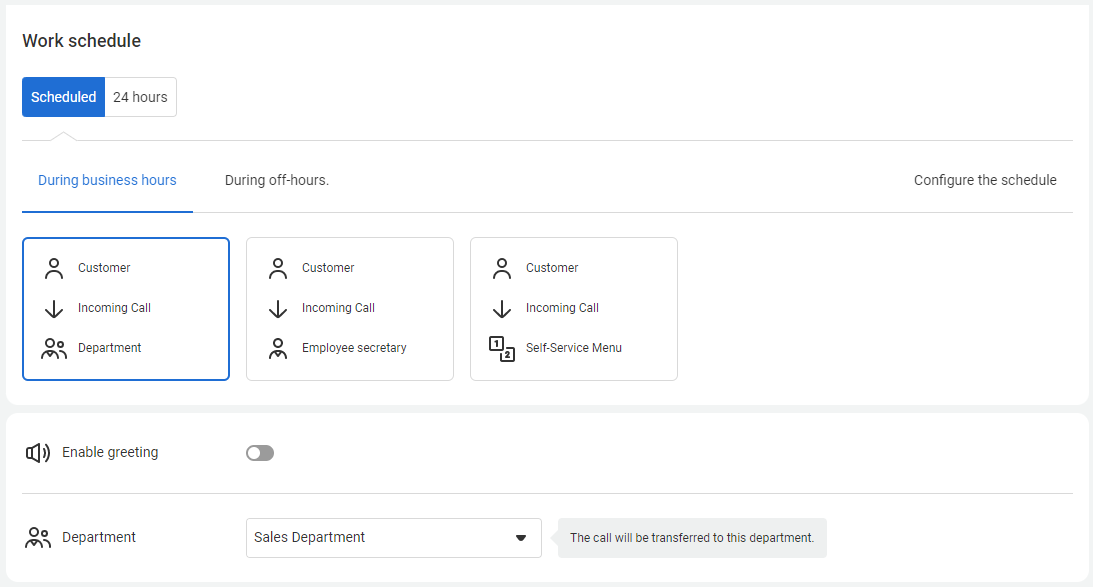
5. Choose a call-receiving logic based on whether your number will operate on a schedule or around the clock.
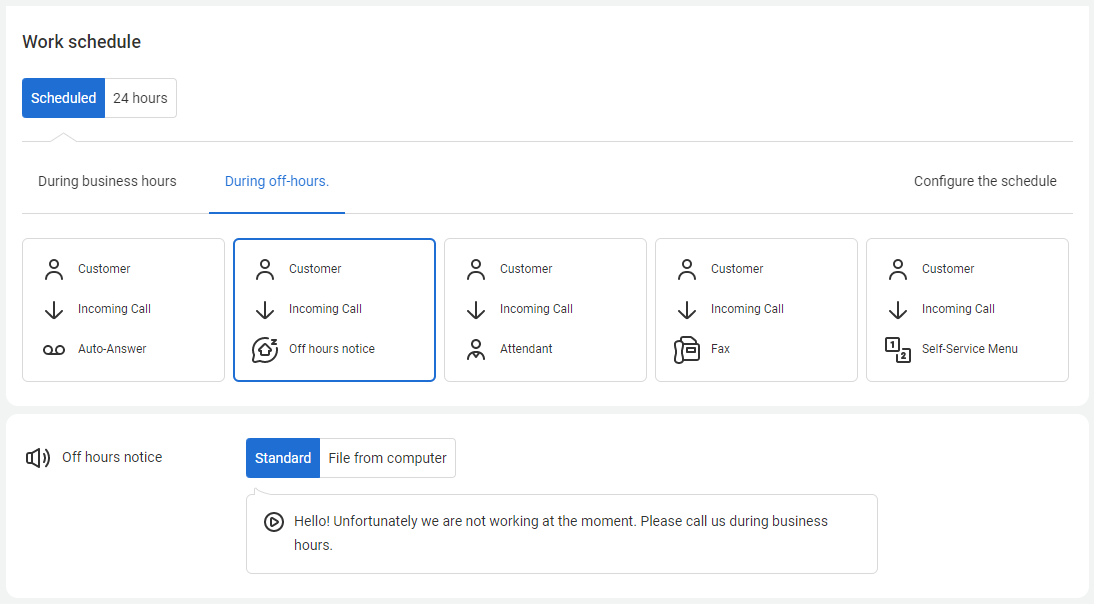
Scheduled
You can configure different call-receiving schemes based on the time in the During working hours and During off-hours tabs.
During working hours, a call can be forwarded to a department, an employee, or an interactive voice response (IVR). You can use a default voice greeting, upload your file, or synthesize speech in Cloud PBX.
During off-hours, you can ask a customer to leave a voicemail message (it will be sent to your email and displayed in the call history), inform them you're unavailable, or try to connect them with an attendant.
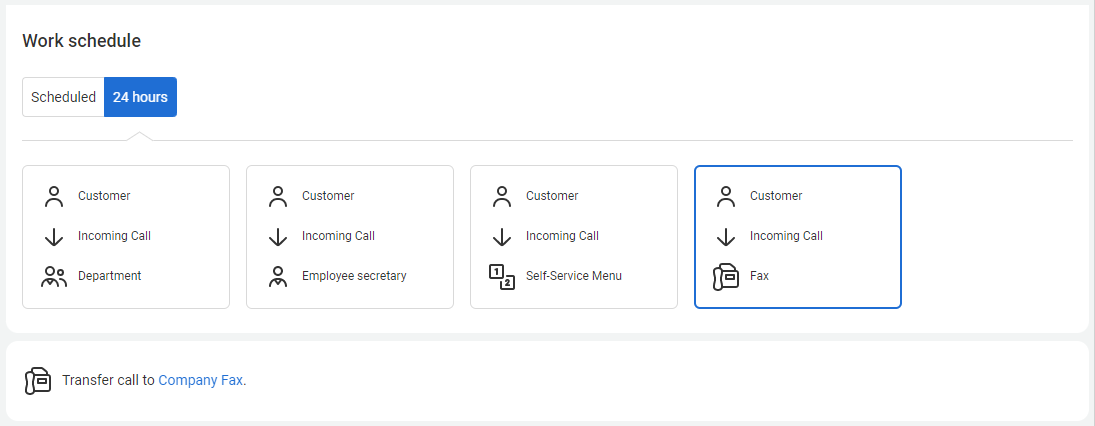
Around the Clock
If you receive customer calls around the clock, you can direct them to a department or secretary, redirect them to a fax machine, or provide a customer with an IVR to choose whom to speak with. In the last option, you must set up commands for multiple buttons.
6. We recommend naming the company numbers to avoid having to remember which number is assigned to a specific branch or department.
Go to Settings — Numbers. Click the gear icon next to the scheme of the number to which you want to give a unique name.

On the number settings page, enter a unique name. It should be short (no more than 60 characters) and informative. For example, “Berlin Office” or “Sales Department.” At the bottom of the page, do not forget to click Save.

In the PBX interface, you will see not the numbers but the names you assigned to them.

The number name will be displayed not only in the numbers settings but also in all sections of Cloud PBX, for example, in the call history, statistics, etc.
7. Click Save at the bottom of the page.
Other Settings
- If you want to add a unique work schedule (for example, taking into account an operational calendar) or additional modes (lunch break, working during off-hours, etc.), you can do this using a flexible schedule setup.
- If you want to set up several numbers in the same or similar way, you can save time by using a bulk number setup.
- We recommend configuring SMS business cards, missed call notifications, CRM integrations, and other services.