Interactive Voice Response (IVR)
A self-service menu helps to handle incoming calls faster and automatically distribute them within the company.
How Does an IVR Work?
Once a customer dials a specific digit in tone mode, the IVR connects them to an appropriate specialist. If the customer knows the employee's extension number, they can dial it during the voice greeting. If they don't know it, Cloud PBX will announce all the options where their call can be directed. Only if the customer becomes confused and doesn't click any buttons, the system will connect them to an operator.

Sometimes, it is necessary to allow the customer to make another selection for the call direction one or more times. The maximum number of consecutive choices is determined by the number of levels in the IVR. You can create a self-service menu with any number of levels in Cloud PBX.
When Multiple Levels Are Needed in an IVR?
Multiple levels in the IVR are useful in the following situations:
- Multiple company offices are located in different places. In such cases, it is easier to have separate numbers for each branch. However, if you route all calls to a single number, you can set up city selection in the first menu, office/store selection in the second menu, and department or service selection in subsequent menus.
- Menu in two languages. The first level provides the option to switch to the menu in another language. For example, “For English, press one.” The next level would be the department selection, followed by routing the call to English-speaking employees.
- Individuals and corporate customers. The first level allows the caller to specify whether they are a private individual or a corporate customer. Depending on the selection, the subsequent levels are tailored accordingly.
How to Configure an IVR?
A self-service menu is configured separately for each number. Go to the Numbers section and select the number you want to configure the self-service menu for. Then select the operating mode of the number and redirect incoming calls to the Self-service menu.
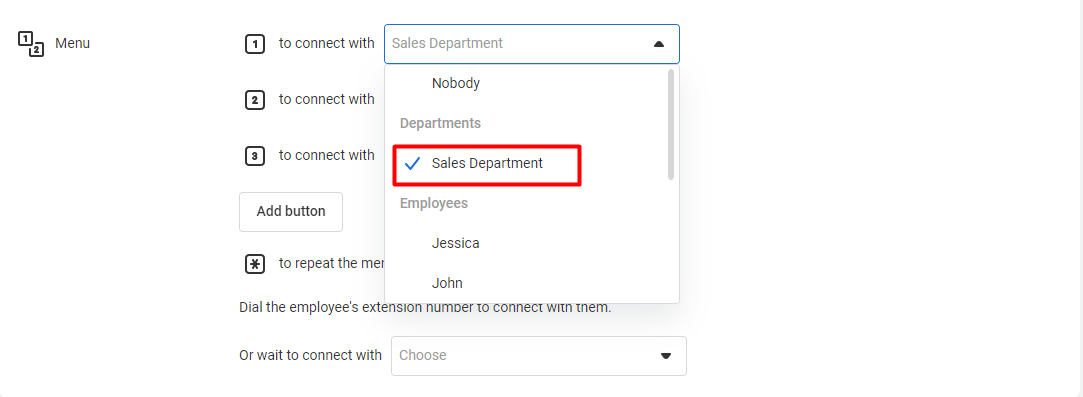
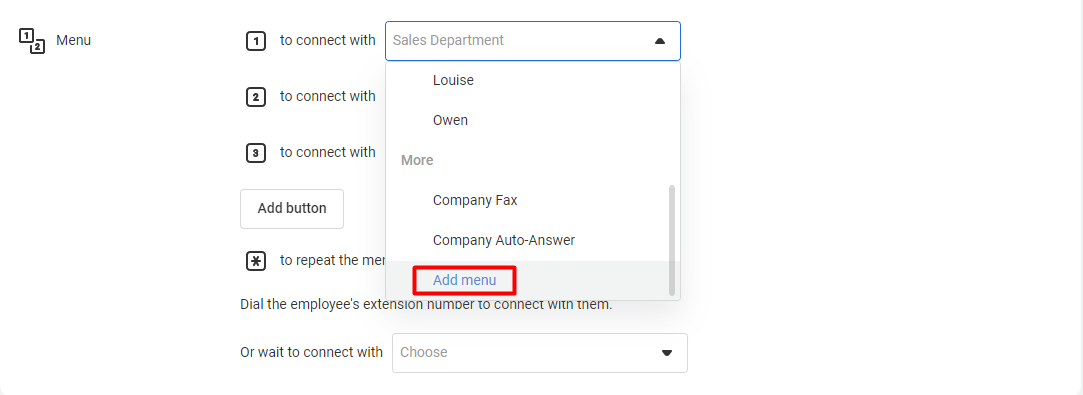
1. To configure the first level of the menu, specify where the call should be directed when each button is clicked. For example, if you want the Sales department to answer the call when button 1 is pressed, open the dropdown list next to the text “1 to connect with…” and select Sales department.
2. Select which departments or employees will receive the call when buttons 2 and 3 are pressed in the same way.
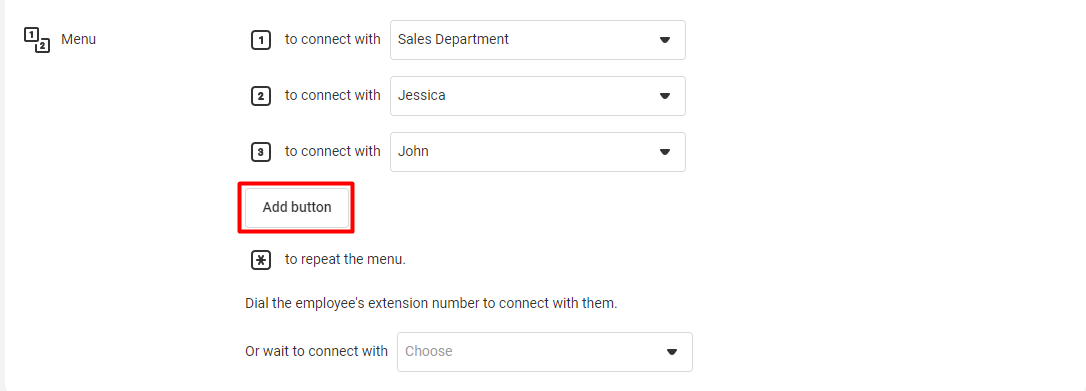
3. If you need more than three buttons to configure the self-service menu at the first level, click Add button. You can assign menu items to each of the ten digits, including 0.
If you want to delete a selection option, click the trash bin icon located to the right of the dropdown list.
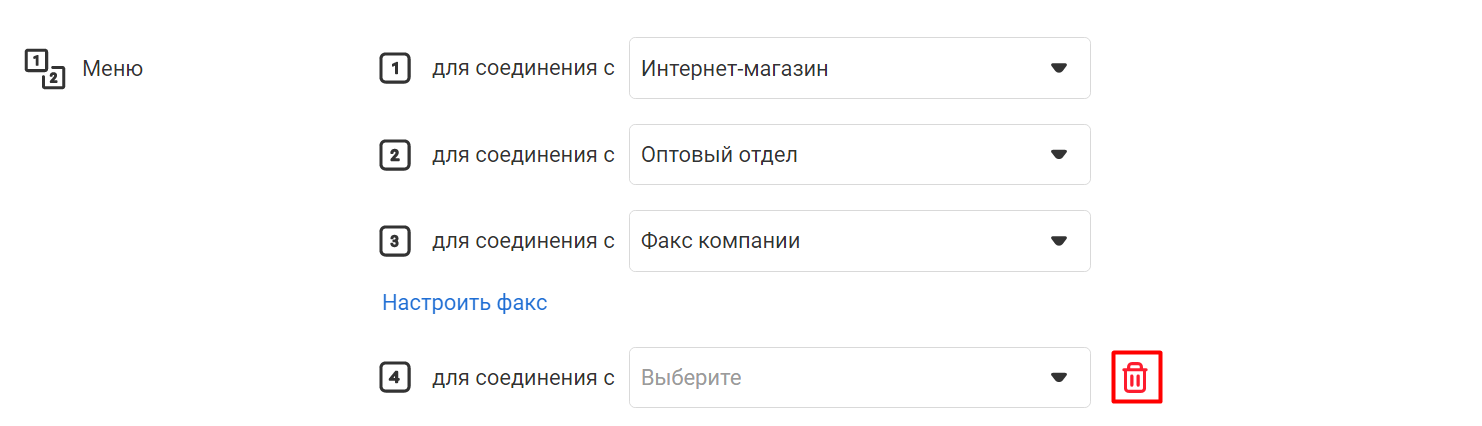
The trash bin icon appears next to the last option to prevent accidental deletion of numbers in the middle of the list. This is done to avoid confusing the caller with the selection options. Imagine using a self-service menu where you can only choose the numbers 2, 5, 9, and 0.
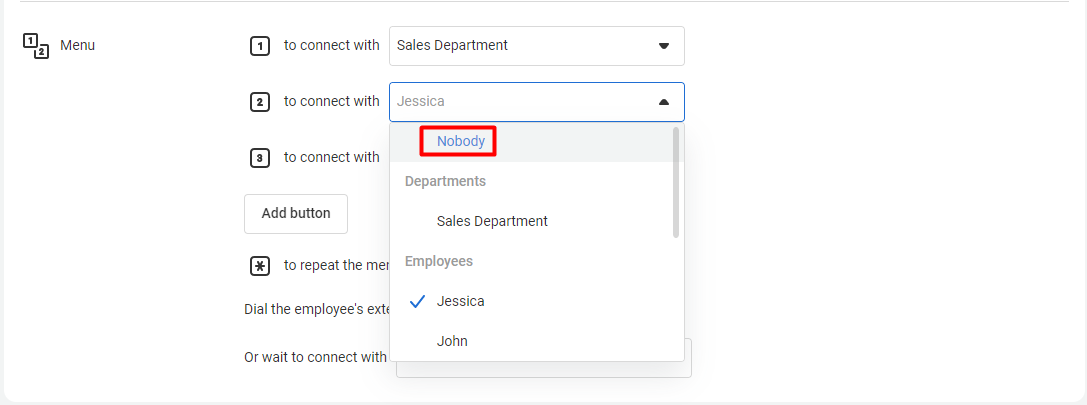
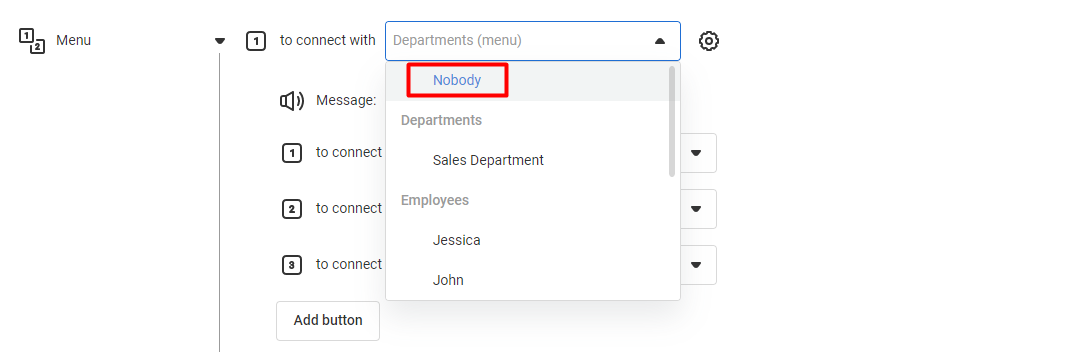
You can't delete the 1, 2, and 3 menu options by clicking the trash bin. If you need to have only two selection options, you can simply choose Nobody for button 3.
Regardless of the self-service menu settings, two buttons always work the same way:
# — for returning to the previous menu. * — for repeating the menu.
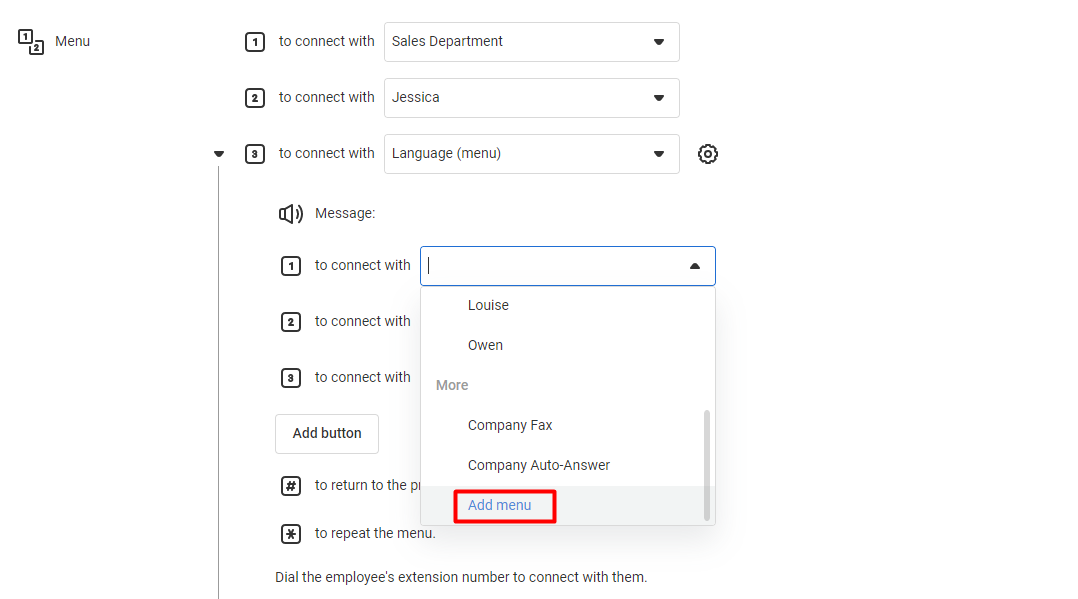
4. Select Add Menu from the dropdown list next to the desired item to create the second level of the menu.
5. Give clear names to each level of the menu to make it easier to navigate in the IVR settings in the future.
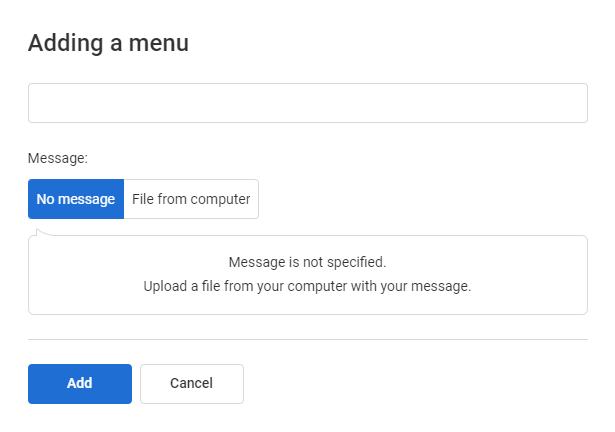
4. The voice greeting is configured separately for each menu level. Select the greeting for the second level and click Add.
5. Configure all the necessary buttons for the level
6. If you need more levels for one or several menu items, select Add Menu again from the dropdown list next to the corresponding button (1, 2, 3, etc.).
How to Change IVR Level Settings?
Edit any menu level by clicking on the gear icon on the right.

In the settings of each menu level, you can:
- Change the level name.
- Edit the greeting message.
- Delete the level if it is no longer needed.

Click Delete menu and remove not only the selected level but also the nested levels within it. Their settings will also be deleted. Therefore, if a specific level is not currently needed but may be required in the future, it is better to disable it rather than delete it.
How to Disable a Self-Service Menu Level Temporarily?
Select Nobody from the dropdown list instead of this menu level.
For instance, when you select Third level again from the dropdown list, all the level settings will be displayed such as voice greeting, button distribution, and any nested levels within it.
How to Easily Navigate Through a Multi-Level Menu?
To facilitate the settings navigation of a multi-level menu, hide the configured levels. Click the arrows next to the number 1 on the selected levels. For example, if you want to hide a level, the system will allow you to see all the options of the second level grouped for better visibility and organization.
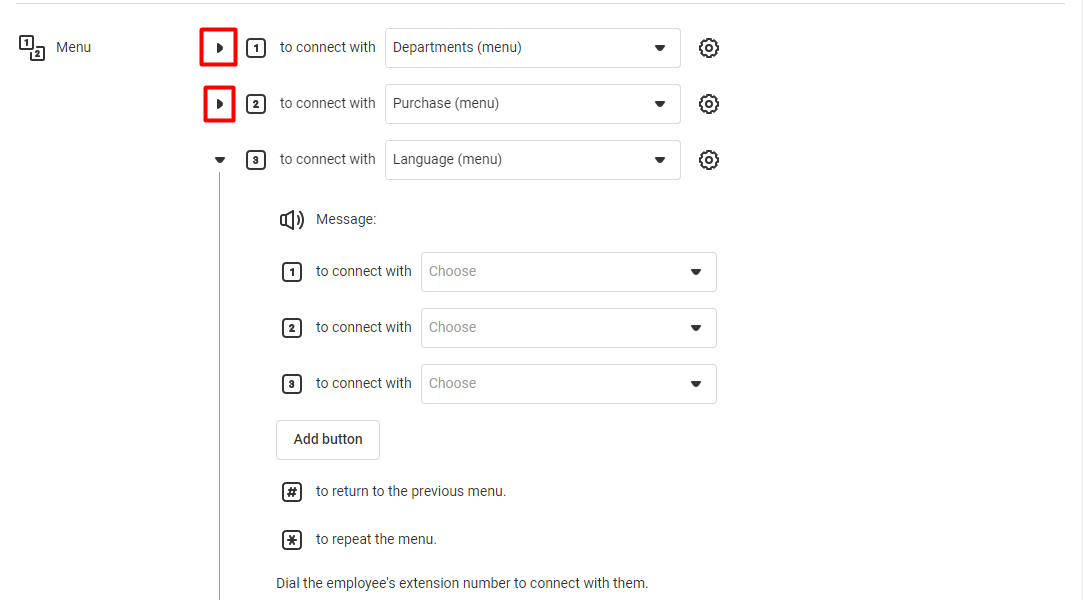
To reopen the level, simply click the same arrow again.