Automated Voice Messaging (AVM)
There is no need to call all customers when a new promotion is launched manually, the terms of service are changed, or any other important event occurs. Record an audio file with a message, upload a list of numbers to call, and start the Automated voice messaging service — Cloud PBX will call each customer on the list and voice your announcement.
How to Set up the AVM
1. In your Cloud PBX settings, go to the More section.
2. In the Service for Sales Department section, select Automated Voice Messaging (AVM).
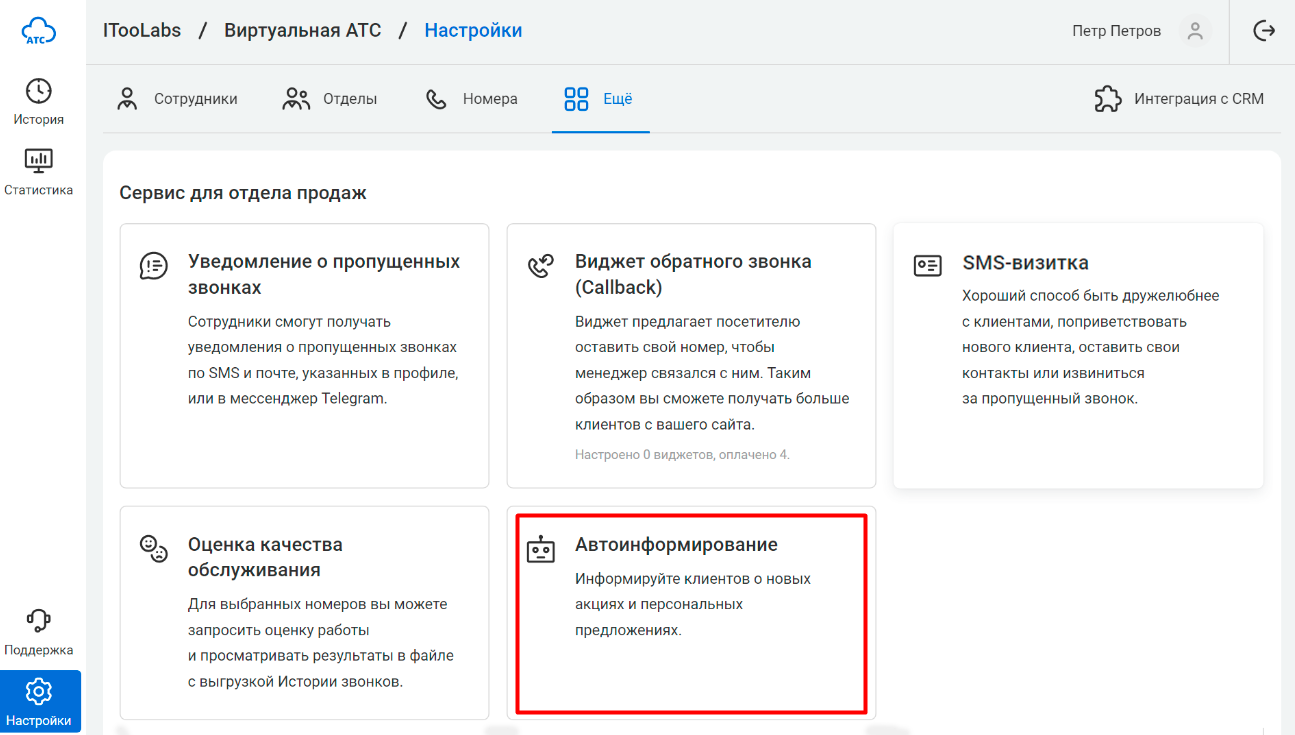
3. Enable the feature by moving the switch to the right and select the numbers from which AVM calls will be made. Click Save.
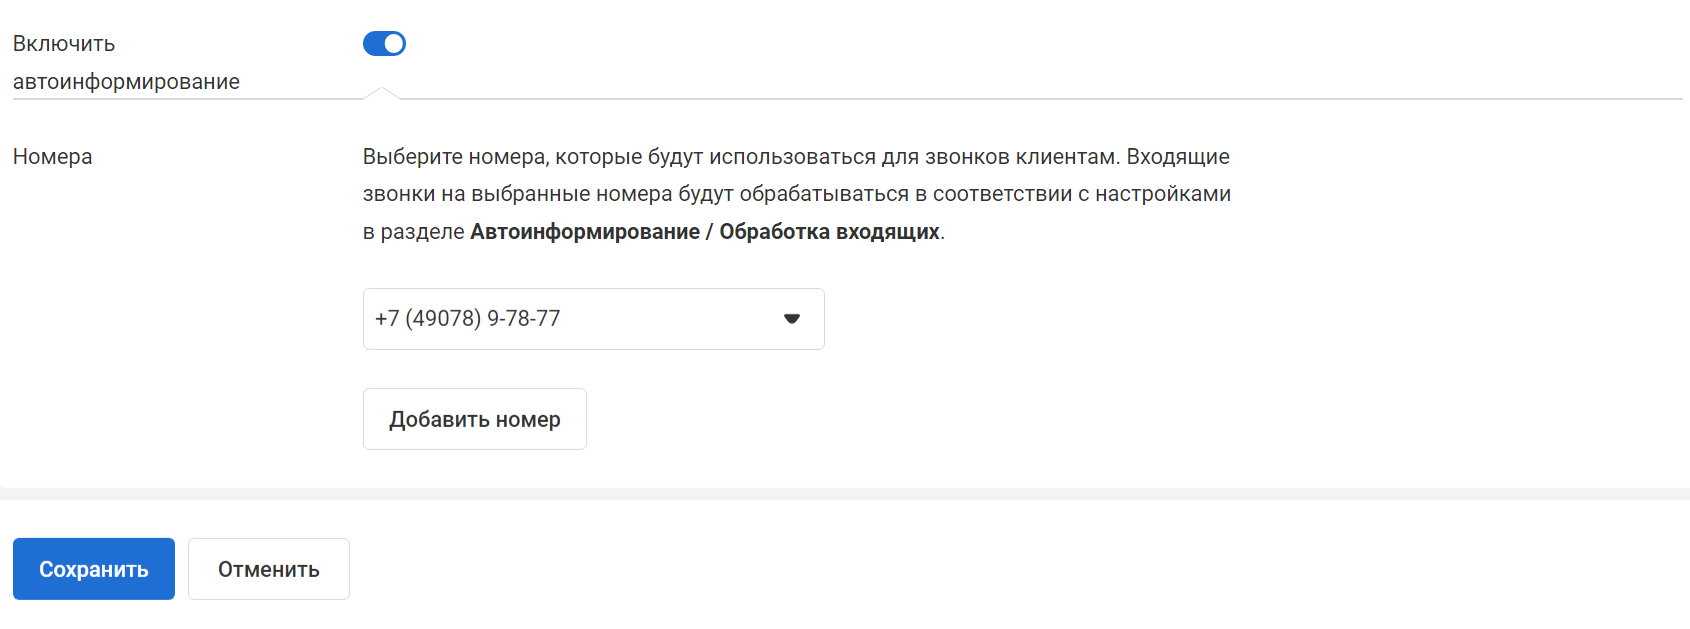
If you have selected several numbers for the AVM, Cloud PBX will use them in random order in each task.
Please note
The numbers you select for the AVM will no longer be used as shared company numbers.4. The Automated Voice Messaging (AVM) icon will appear in the sidebar. Click it.
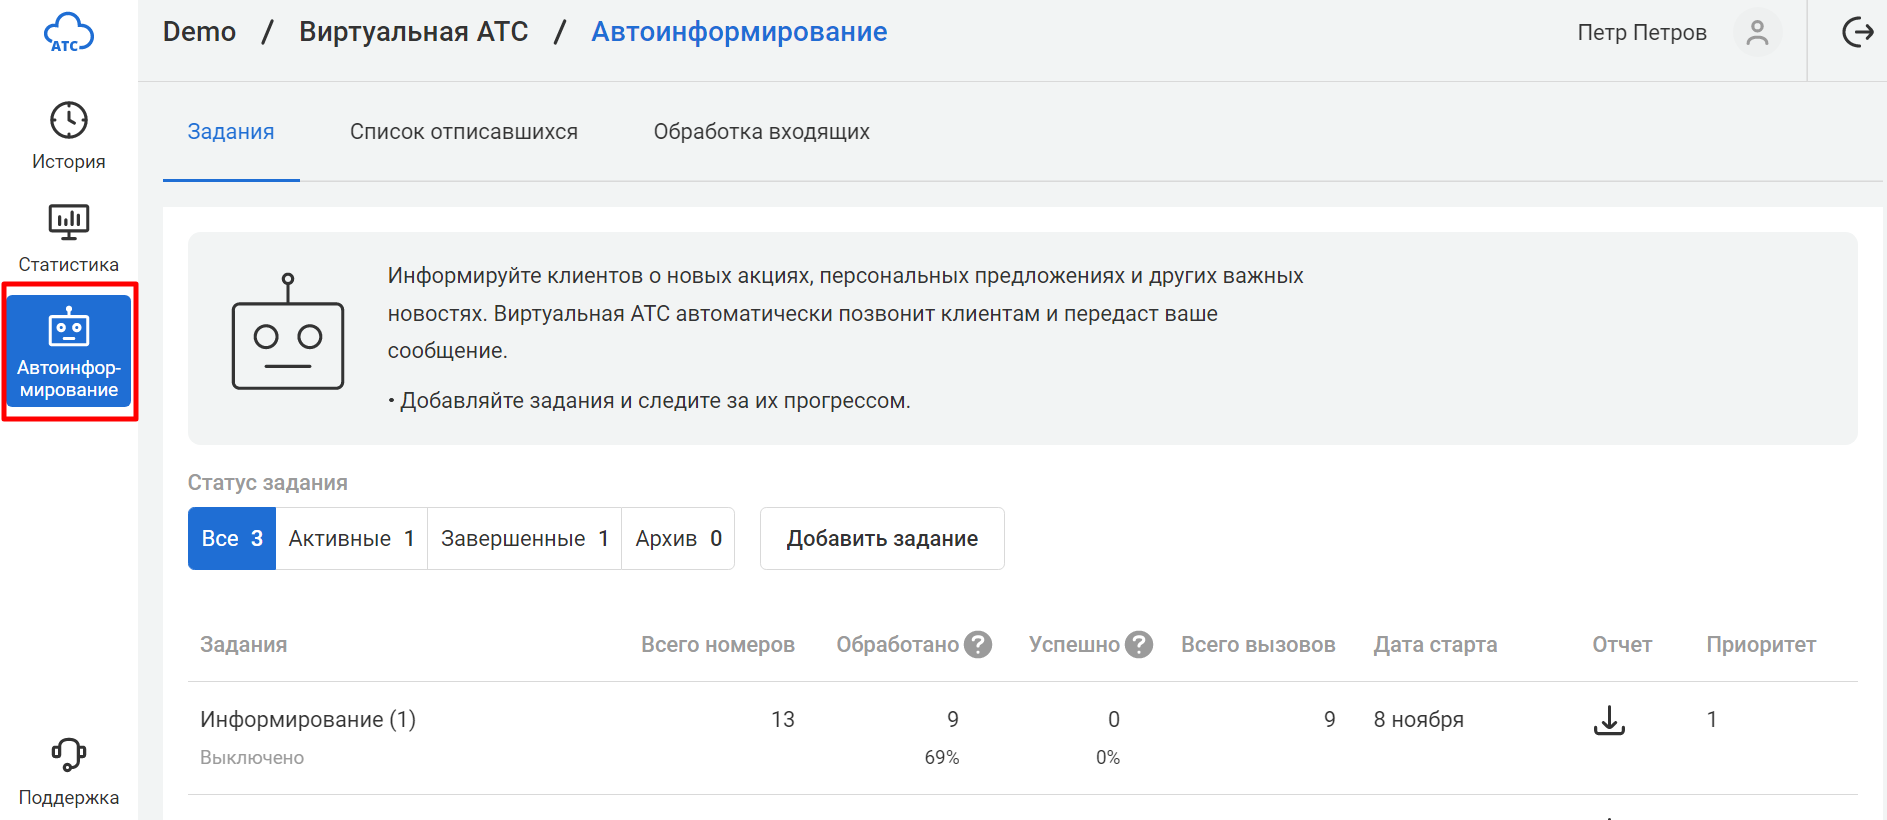
5. Create a new task for the AVM. To do this, on the Tasks tab click Add task.
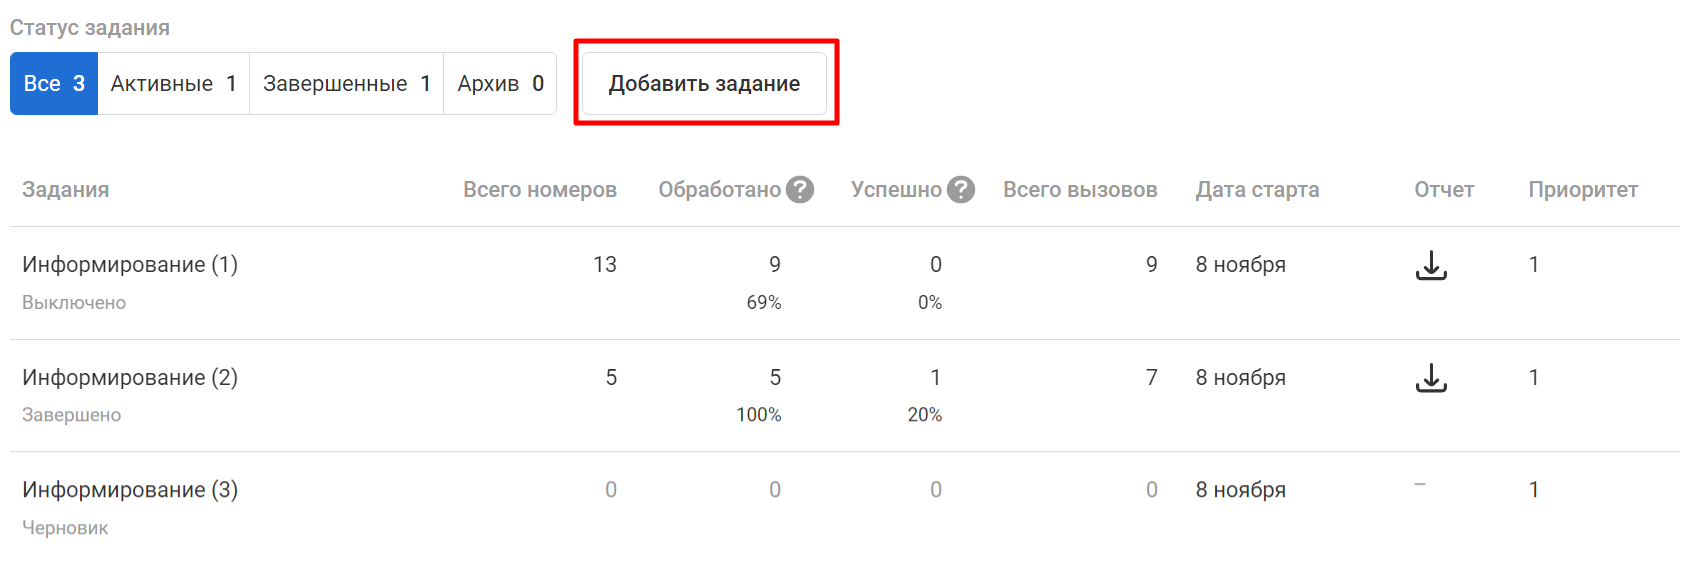
6. Enter the name of the AVM task. The name should be so that you can easily find it in the general list.
7. Turn on the AVM. Then the task will start automatically after you have completed all the settings.
8. If you will have several AVM tasks running at the same time, set the priority of each task on a scale from 1 to 5, where 1 is the highest priority task and 5 is the least important.
The priority will affect how calls are distributed between tasks: Cloud PBX will make more calls with priority 1 and fewer calls with priority 5.

9. Depending on your goals, you can either upload an audio file that will be played by the AVM, or synthesize speech in Cloud PBX.
Upload a file
Please note the technical requirements:
- supported formats: mp3, .wav, .ogg or .m4a;
- maximum file size: 10 MB.
If you want to use different audio files for different customers, upload a zip file containing the required audio files and a .csv, .xls, or .xlsx file. Specify in the zip file which file you need to play for each specific number, in this case:
- If the file is in the .xls or .xlsx format, two columns are needed: one with the customer number in the format of 49ХХХХХХХХХХ, the other with the name of the audio file that will be played for it.
- If the file is in the .csv format, then on each line you need to specify the phone number and the name of the audio file (separated by semicolons).
Synthesize speech
You can create your own text, which will be read by one of the standard voices. For the best quality, follow the rules of spelling and punctuation. Please note: the maximum length of the text should not exceed 500 characters, and the number of speech synthesis attempts is 50 times per day.
Read more about speech synthesis in the article.
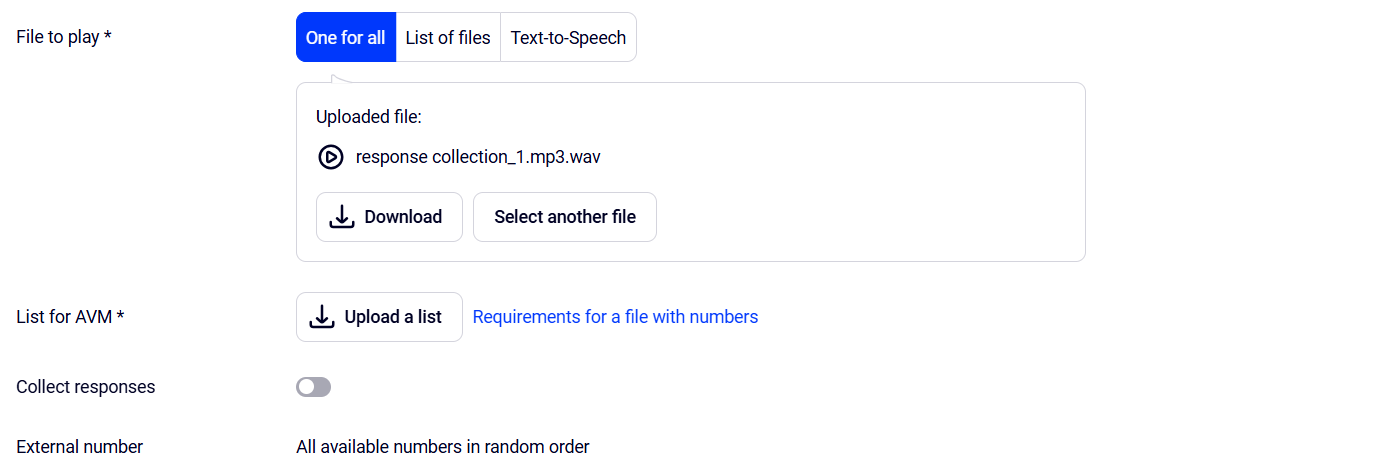
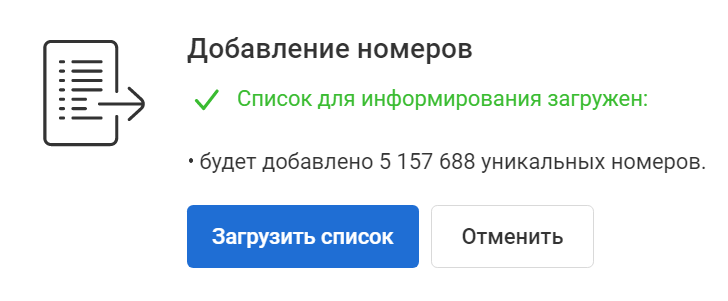
10. Upload a list of customer numbers for the AVM in the .csv, .xls, or .xlsx formats. The number format is 49ХХХХХХХХХХ.
If all customer numbers match the required format, you will see a message indicating that the numbers were added successfully. If errors were made in one or more numbers, Cloud PBX will warn you about it and specify the lines containing numbers in the wrong format.
11. If you want not only to voice an audio message to customers but also to receive feedback from them, enable the function of response collection through the IVR. The customer will hear an announcement first, and then a survey. You will find the survey results in the AVM reports.
Read more about how to create a survey in the article.
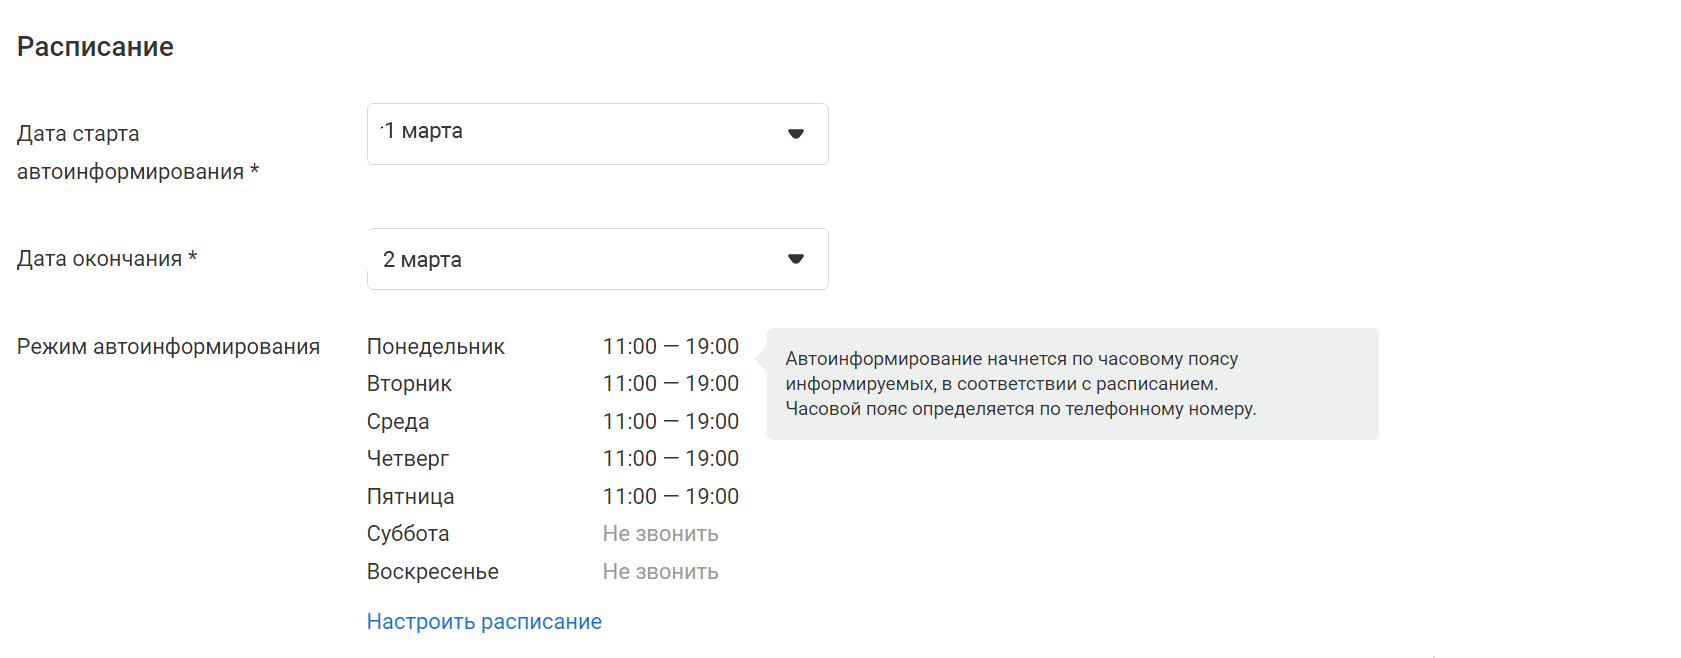
12. Set up the AVM operating schedule:
- select the start date of the AVM (any day in the next 4 months, starting from today),
- specify the end date of the AVM (up to 7 days from the start date),
- set up the AVM mode (Cloud PBX will call numbers from the list on the specified days of the week and hours, considering the time zone in which the customer is located — your call will not wake the customer up and will not cause them inconvenience).
13. If you want Cloud PBX not to call some customers from the uploaded AVM list, add exceptions. You can set up how to handle the unsubscribed list within a task.
By default, all customers added to the unsubscribed list are excluded from the task. If you need to exclude customer numbers only from the temporary list or notify all customers, select the appropriate option.

For more information about creating lists of unsubscribed numbers, see below.
14. Specify how Cloud PBX will call a customer: how many seconds to wait for an answer, how many attempts to make to get through, and after how many minutes to call again. Set the listening time after which the call will be considered successful. If the customer hangs up earlier, the call will not be considered successful, and Cloud PBX will try to call again after the specified time interval.

15.Click Save.
Done! At the specified start date and time, the AVM task will start automatically. You can monitor the completion of the task on the Tasks — Active tab.
Please note
The AVM will begin at the time you specify, considering the customers’ time zone, which Cloud PBX will determine by the phone number. If Cloud PBX will be unable to determine the time zone, the AVM will not be provided to this number.How to Download an AVM report
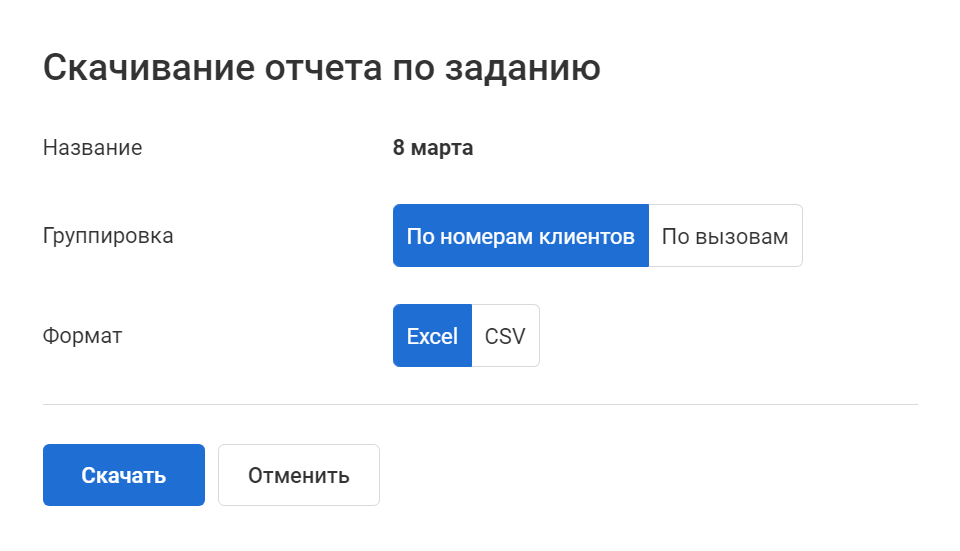
To analyze the results of the AVM, you can download a report on any completed task. To do this, find the task you need on the Completed or All tab and in the Report column, click the Download button.

In the appeared window select how to group the data in the report (by customer numbers or by calls), and the format of the downloaded file.
How to Monitor AVM Results in Real-Time
You can monitor the current status of the AVM task in each time zone so that you know at any time how many customers:
- successfully listened to an AVM message (by answering the call or calling back a missed call from the number used for the AVM),
- did not answer one or more calls, but can still pick up the phone during the remaining attempts to call,
- will not be informed because they ignored all attempts of Cloud PBX to get through or the call is prohibited (if the customer has unsubscribed from audio messaging),
- have not received any calls on the task yet, because the AVM have not got round to them.
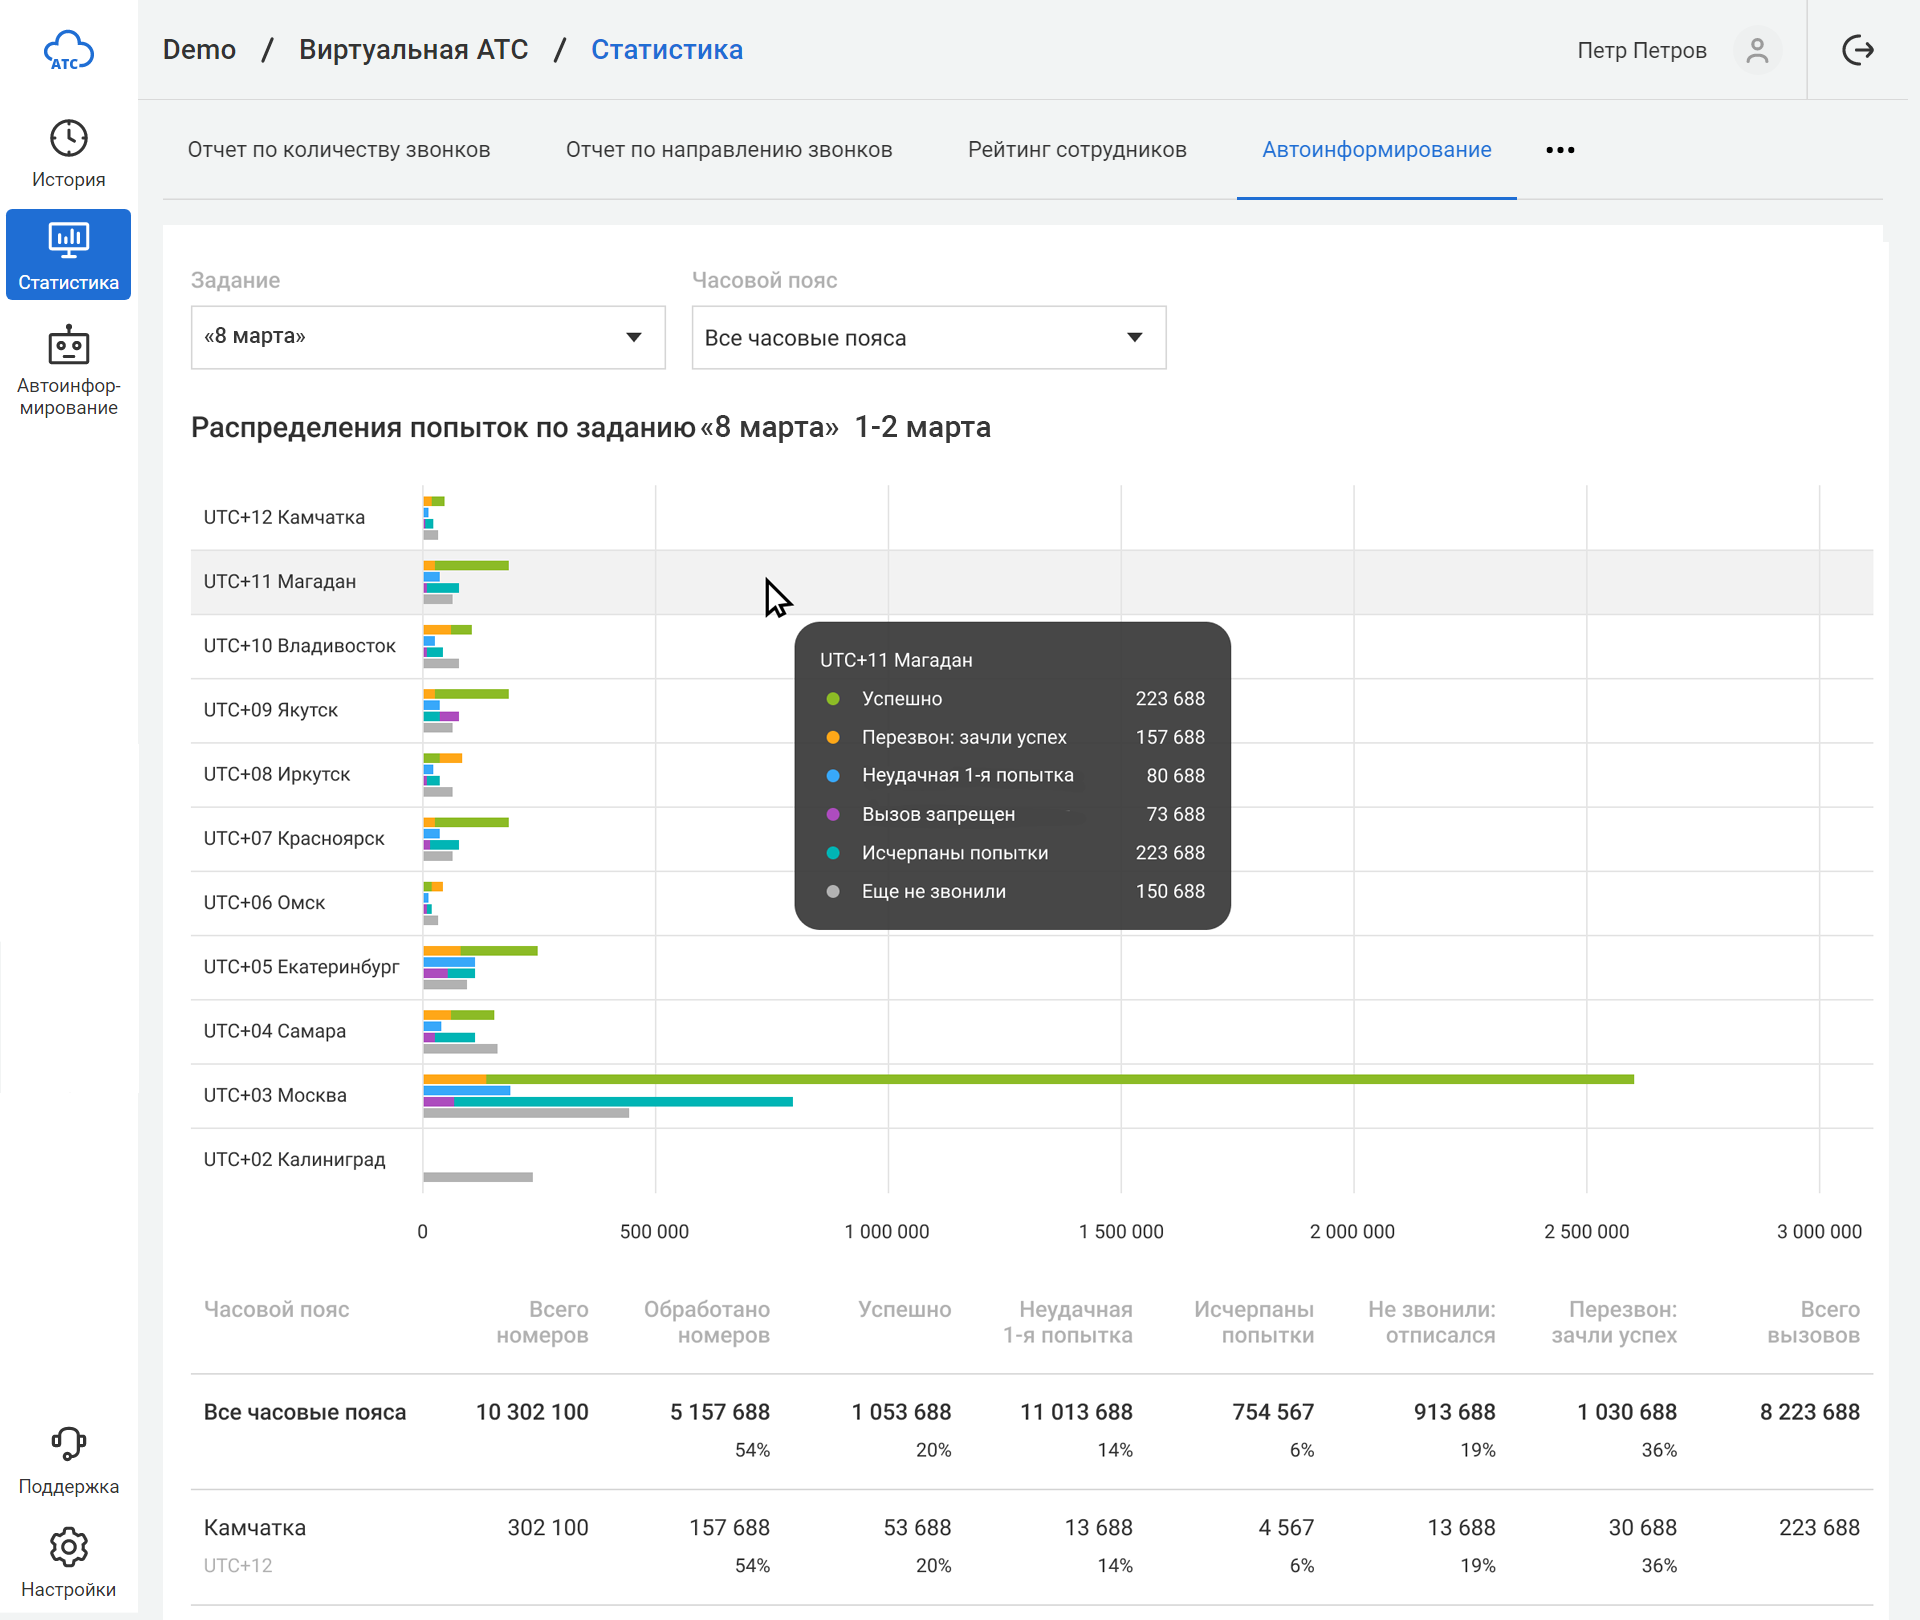
Please note
Time zone reports are only available for tasks created after October 27, 2022.How to Disable an AVM Task
Even if the AVM for a task has already started, you can stop it at any time. To do this, on the Tasks — Active tab, find the task you need, click on it and in the appeared settings window move the Enable AVM switch to the left.

If the Customer Calls Back to the Number Used for the AVM
As stated earlier, the numbers you select for the AVM will no longer be used as shared company numbers.
To ensure that the customer can contact you after an AVM call, decide how incoming calls to such numbers will be processed.
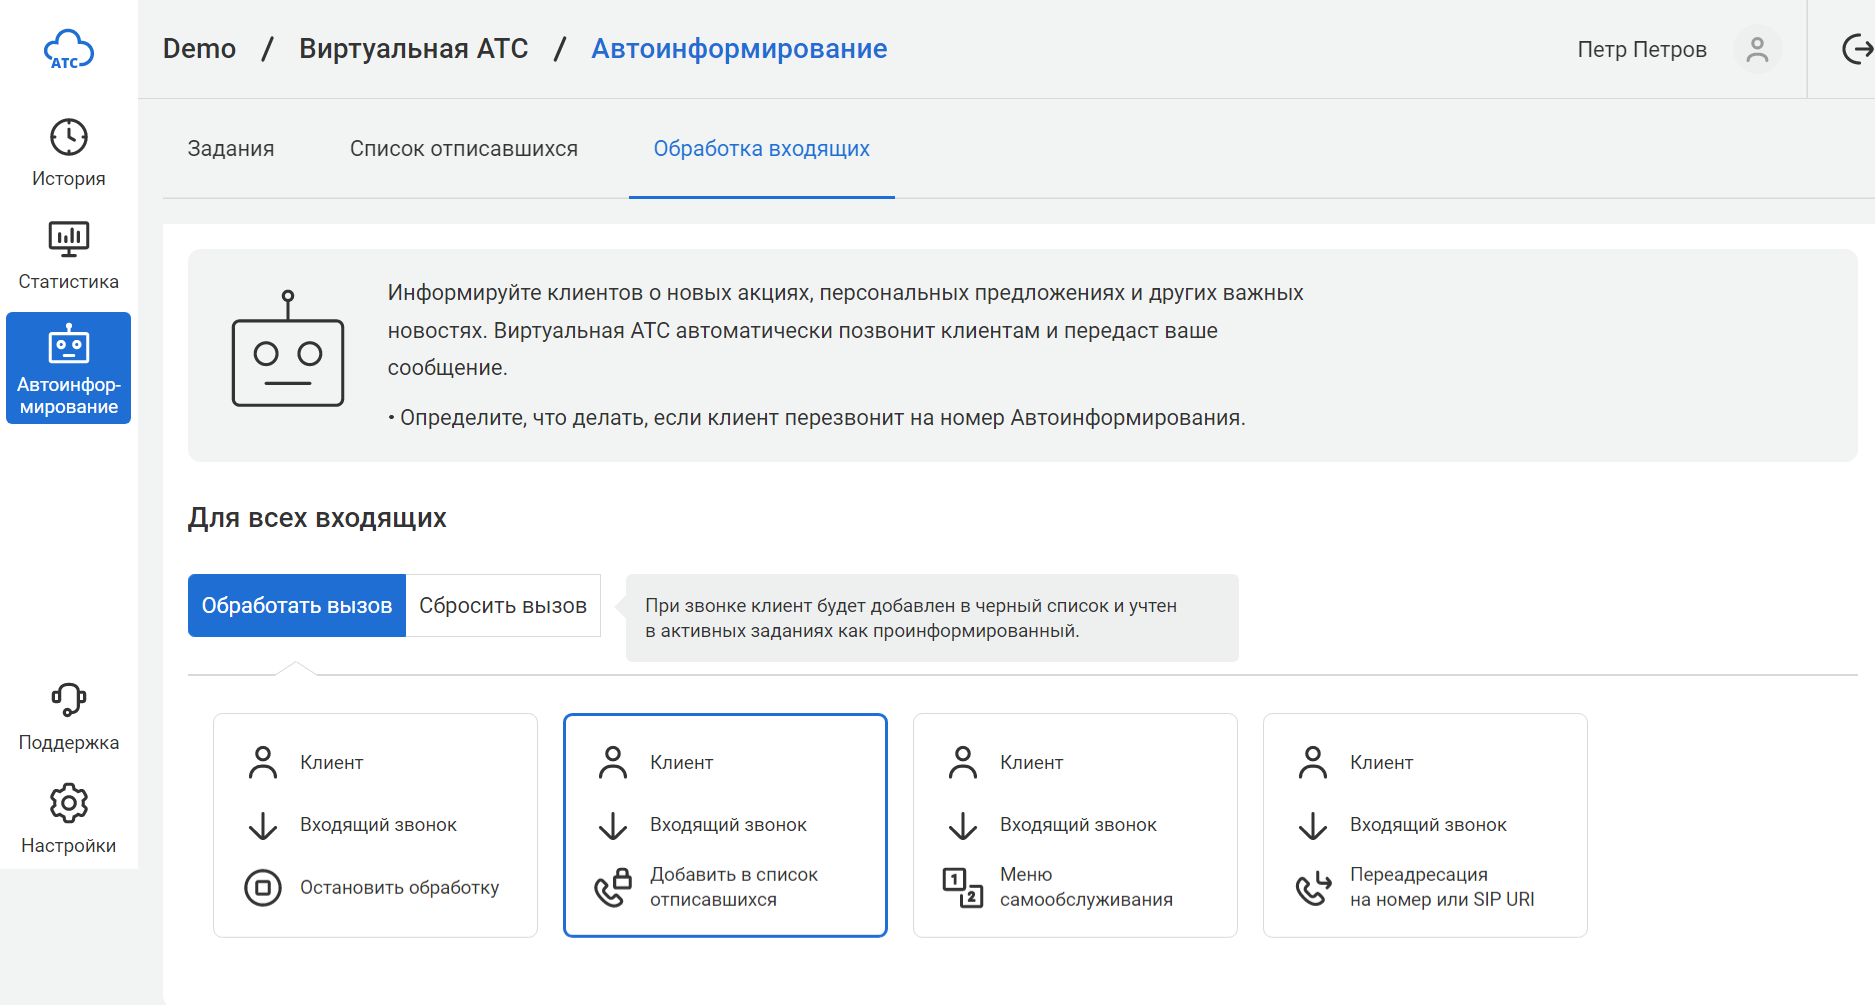
In the AVM settings, go to the Processing incoming calls tab. By default, the Process calls scenario is selected below. This means that when a call comes in, Cloud PBX will take it and perform one of 4 actions:
- stop processing — Cloud PBX will no longer call this customer within all running (active) tasks,
- add to the unsubscribed list — you make sure that the customer has heard your message and will no longer bother them with AVM calls,
- enable IVR — the customer can listen to the message again, contact the manager or unsubscribe from audio messaging,
- enable forwarding to a number or SIP URI — all incoming calls will be automatically forwarded to your call center (to set up forwarding to a SIP URI, specify ext@domain in the Number field, where ext is the short number of the employee or department, and domain is your domain in the company.digitaltide.com format).
If you do not set up call forwarding to an external number or SIP URI, then add a voice greeting for your customers. Thus, when calling the AVM number, customers will be able to choose further actions in the IVR themselves or make sure that Cloud PBX will not call them again if the number is automatically added to the unsubscribed list f during the call. You can upload your audio file or use Text-to-Speech.
If the above options for processing incoming calls do not suit you, you can select the Reject calls scenario — then, when calling the number to which the AVM is connected, the customer will hear a busy signal.
Who Does Not Need to Receive AVM Calls?
You can create a list of numbers to which you do not need to send automated voice messages, even if these numbers are on the list for the task. For example, these could be VIP clients whom you always prefer to call personally, or customers who have not agreed to receive news messages.
To add exception numbers, in the AVM settings, go to the Unsubscribed list tab.
Numbers can be added manually or uploaded from a file. To add numbers manually, click the Upload list button.

Select how long you want numbers to remain on the exclusion list (temporarily or permanently) and enter one or more numbers in the 49ХХХХХХХХХХ format.
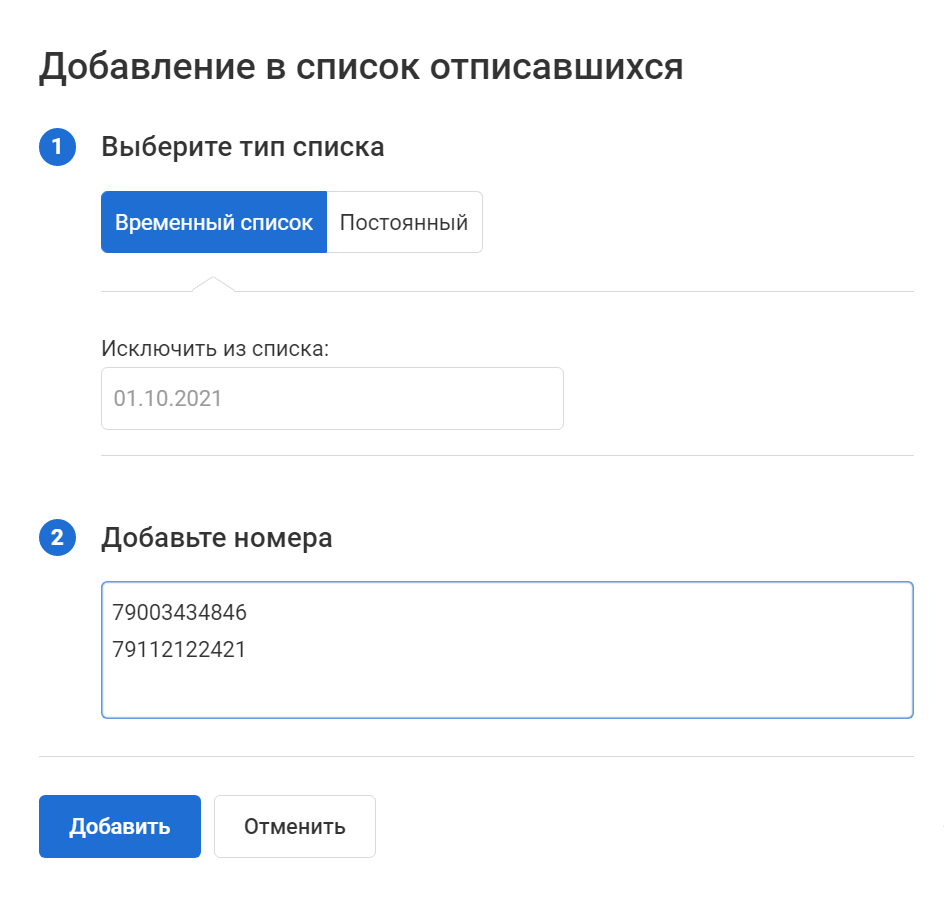
To upload the list of numbers from a file in the .csv, .xls and .xlsx formats, on the Unsubscribed list tab, click the Upload from file button.
The unsubscribed list will automatically include customers who called back to the AVM number and selected the Unsubscribe from audio messaging option in the IVR.
A list of all unsubscribed numbers can be downloaded in the .csv format.