How to Install a Callback Widget on a Website
1. Go to Settings, go to the More section and find the CallBack widget option.
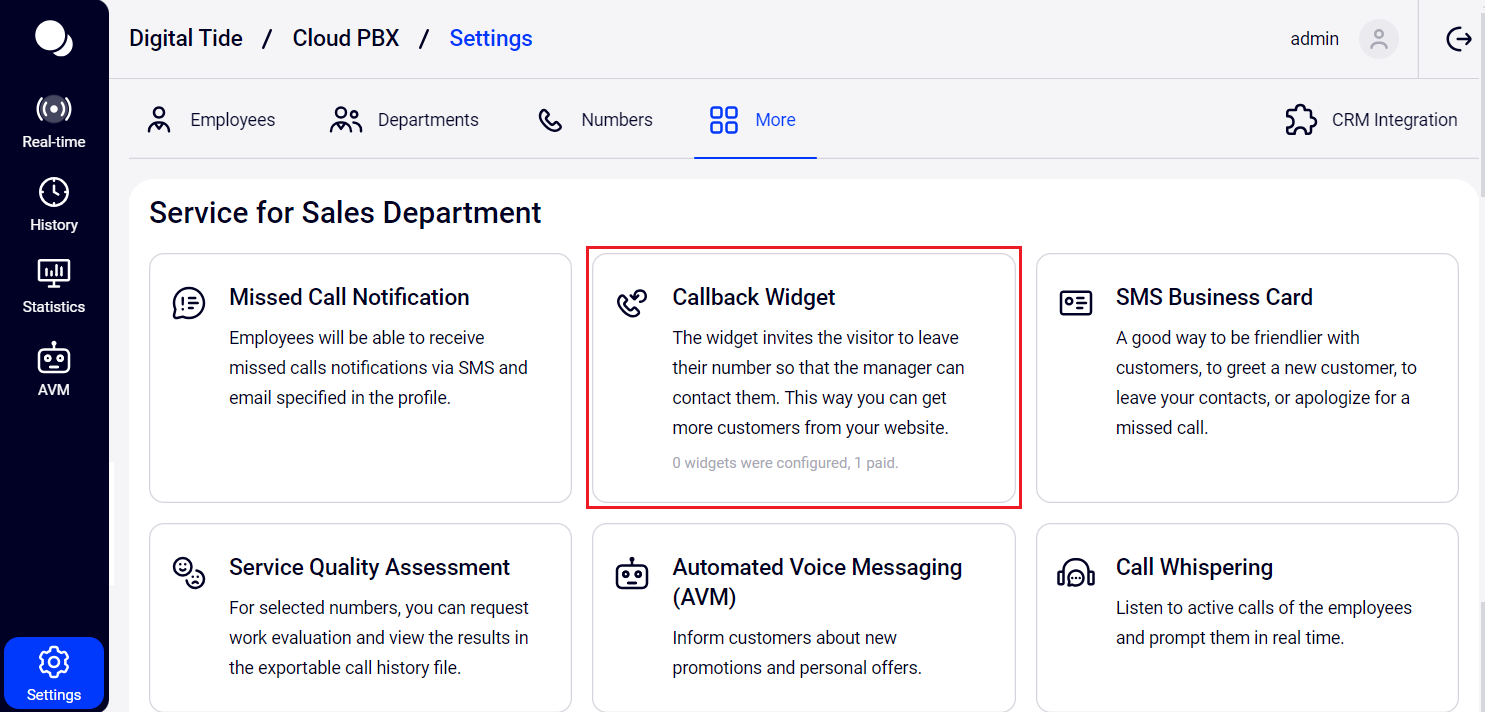
In the appeared window at the bottom of the page click Add widget. Next, you will be taken to the window for creating a callback widget. Specify any widget name and turn on the Enable callback widget switch to open its settings.

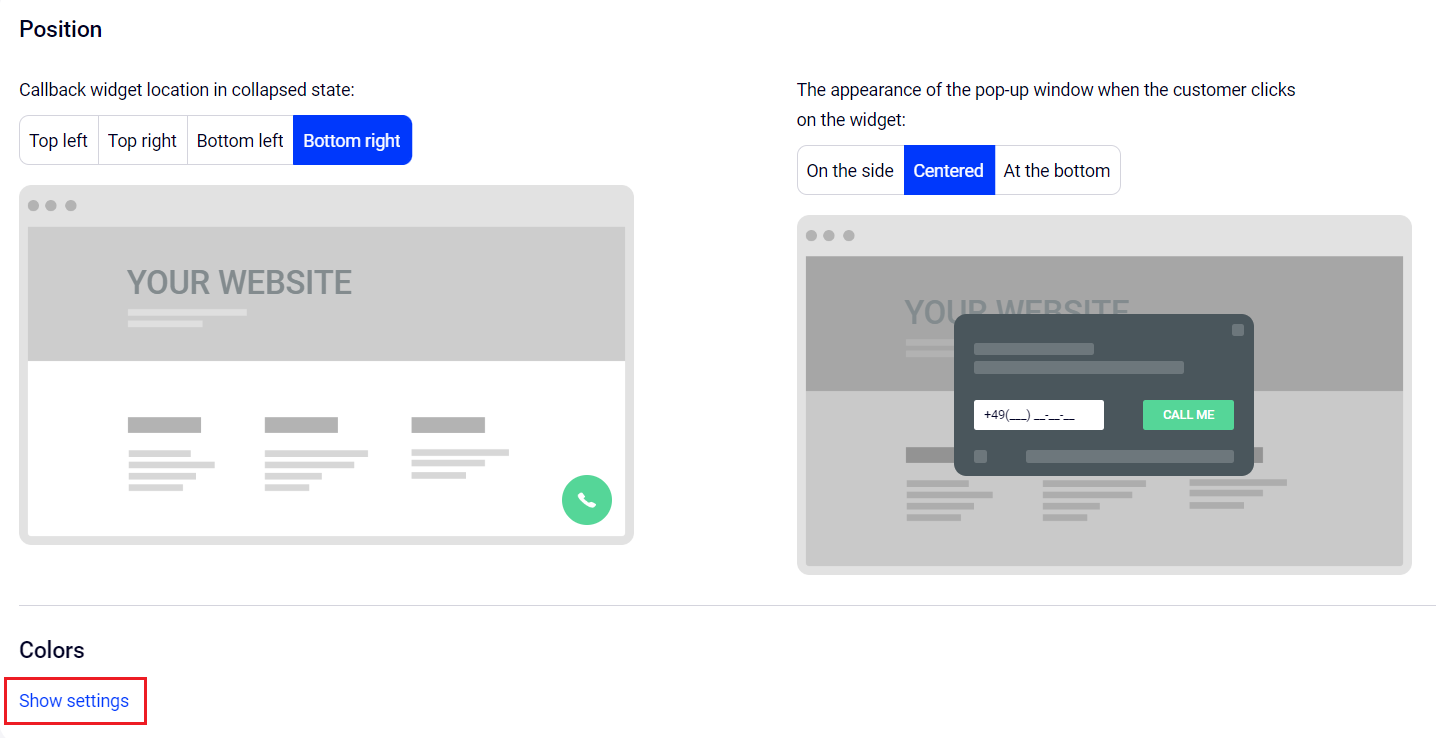
2. Set up the widget display:
- Select in which corner of the site the callback widget will be located when collapsed.
- Select the location of the pop-up widget on the site: bottom, right or center
- Select the colors of the widget elements. To do this, click the Show settings line.
Choose the color for the call request button, the background of the pop-up window and the text inside it. You can choose colors to match your corporate style or make the widget stand out on your website pages.
If the palette does not contain the shade you need, enter its code in the field located under the palette.

3. Specify the schedule for your managers to receive calls during working and non-working hours. Select employees or departments to answer calls requested through the callback widget.
If employees cannot always answer from a softphone or desk phone, you can specify an external number.
If employees are unable to quickly answer calls requested through the widget, Cloud PBX may not connect the customer to the operator automatically but send a letter to the employee informing them that the site visitor requested a callback.

4. Set up the work of the callback widget during off-hours. Even if all your employees have a day off, the widget will continue to collect numbers of clients who want to receive a callback. If a website visitor orders a call during off-hours, the widget will inform them about the date and time when your employee will reach out.
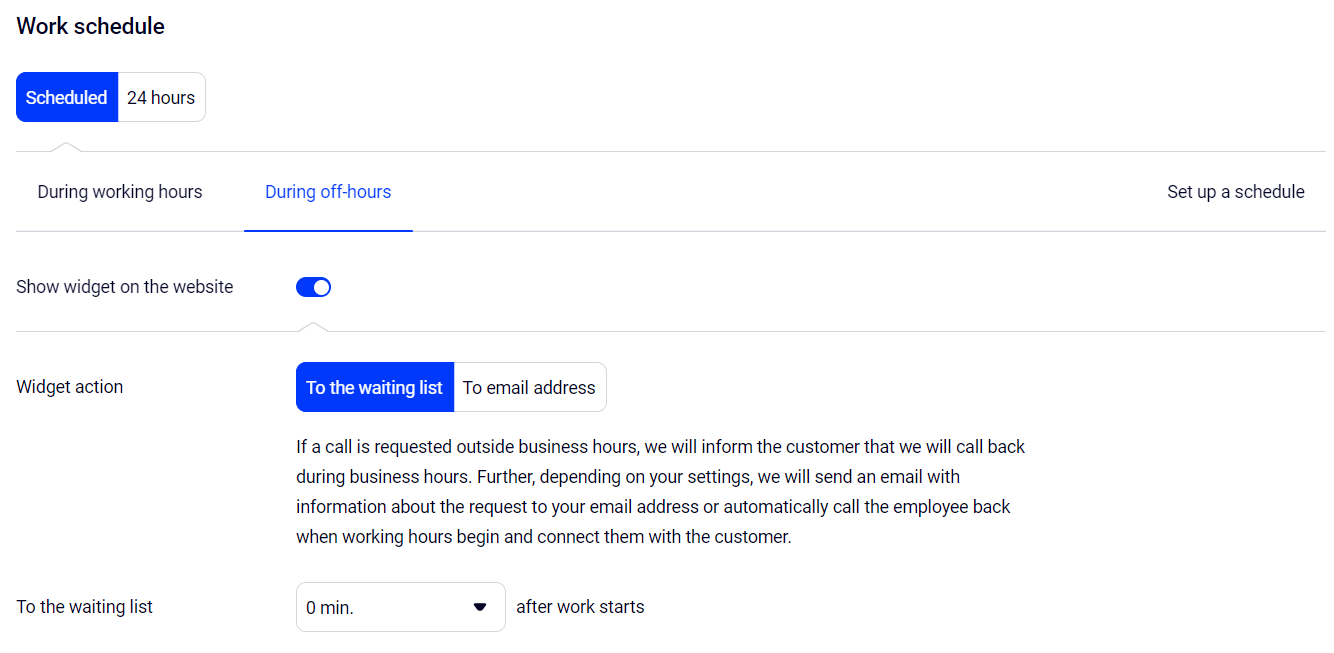
You can also configure the widget to appear on your website only during your company's business hours.
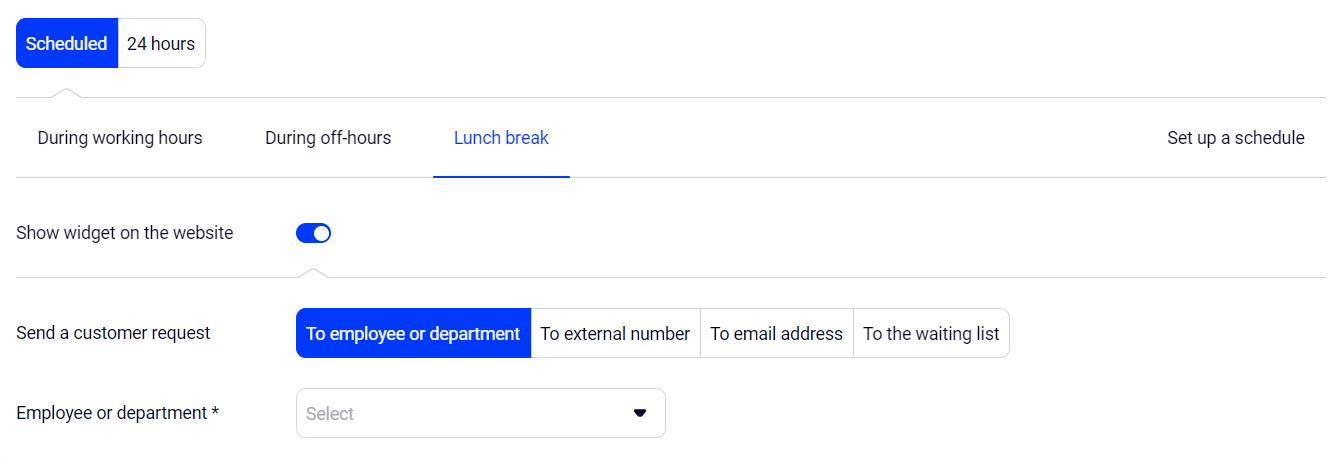
5. If your company works on an operational calendar, with lunch breaks or other schedule features, you can take this into account in the widget settings. Click Set up a schedule.
The widget schedule settings have the same capabilities as the number schedule settings. Therefore, to customize the widget according to your schedule, we recommend that you read the Flexible schedule settings for a number article.
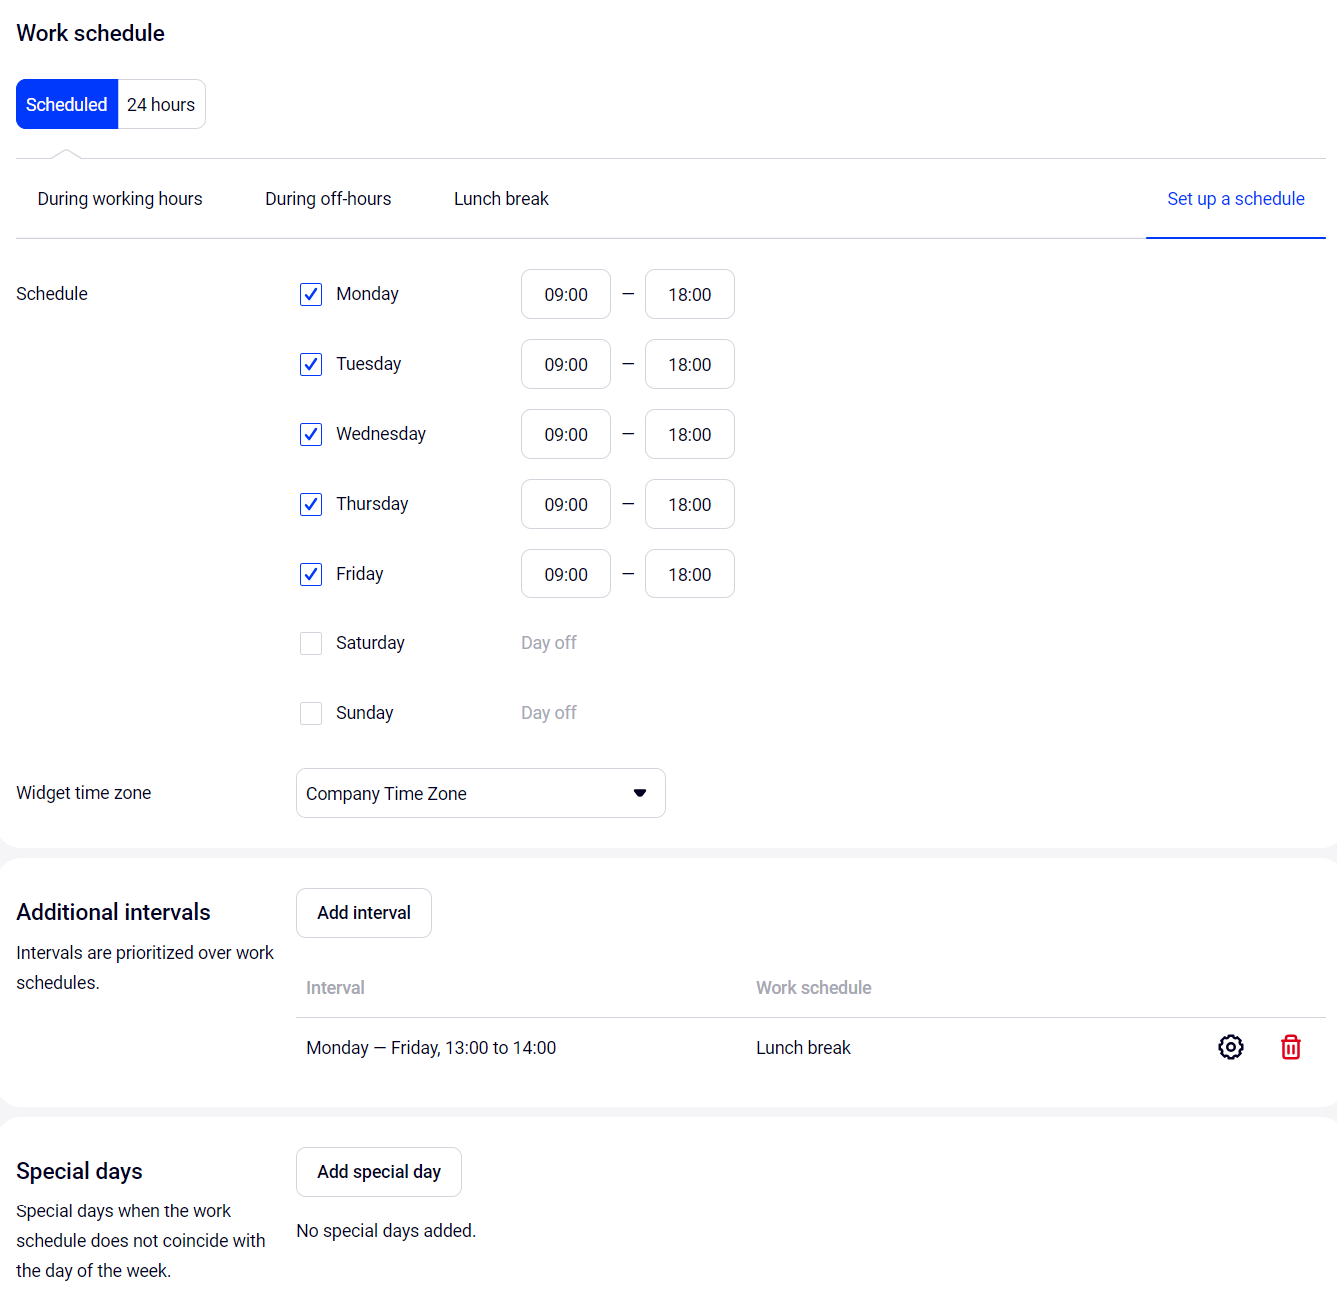
On any of the extra intervals or special days, you can choose where to direct customer requests:
- to an employee or department;
- to an external number;
- to an email address;
- to a waiting list.
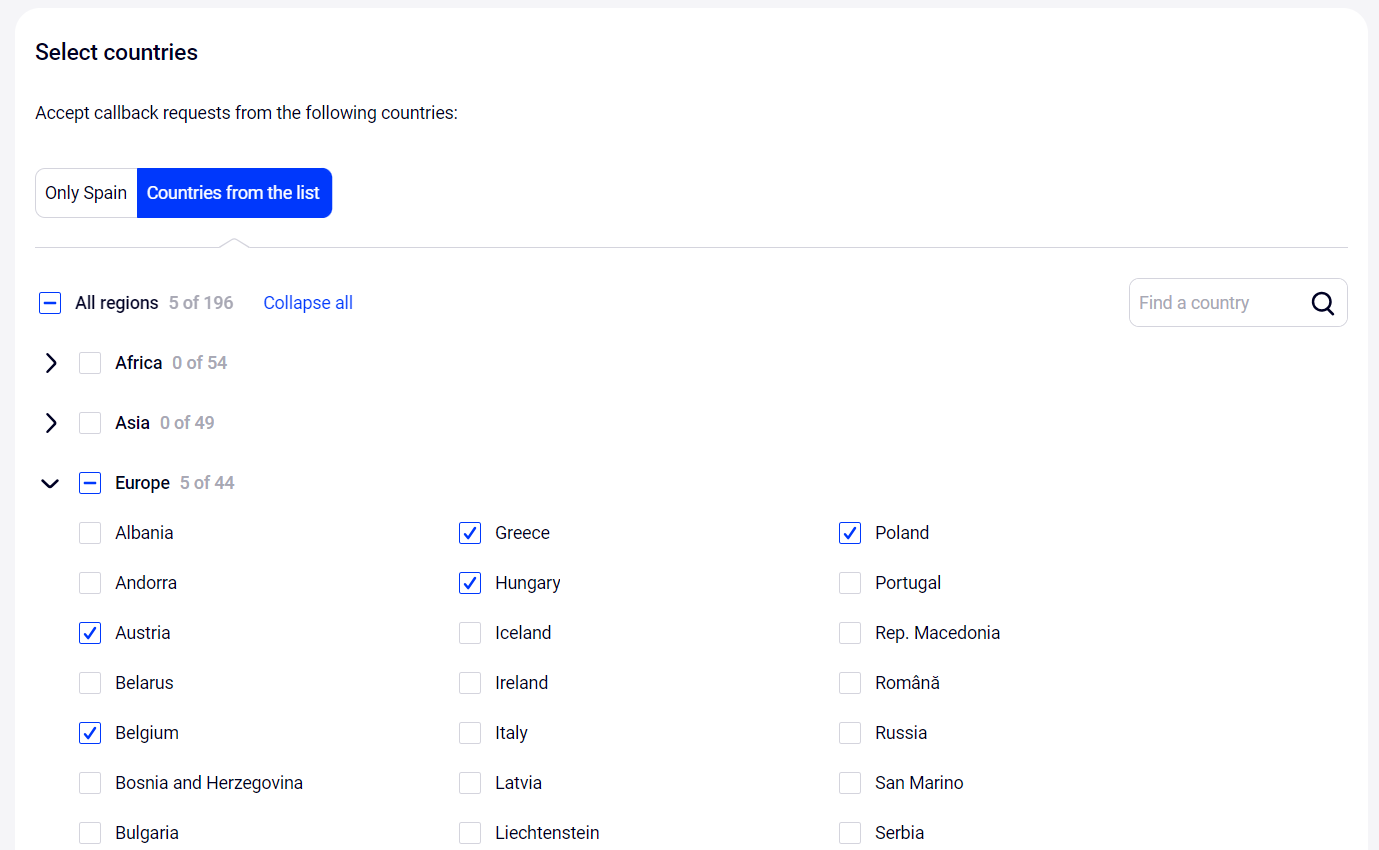
6. Specify the customers from which countries can request a callback from your website. If a user from a country outside your company's service area tries to request a callback, Cloud PBX will notify you as soon as the customer enters the phone number in the widget.
For example, if you sell products in the EU, you need to open the drop-down list of countries in Europe and select the countries you need.
7. Set up the Lead Catcher feature so that a pop-up window with an offer to request a callback from the website appears automatically when a visitor stays on the website longer than a certain time period, has already viewed several pages or wants to leave the site.

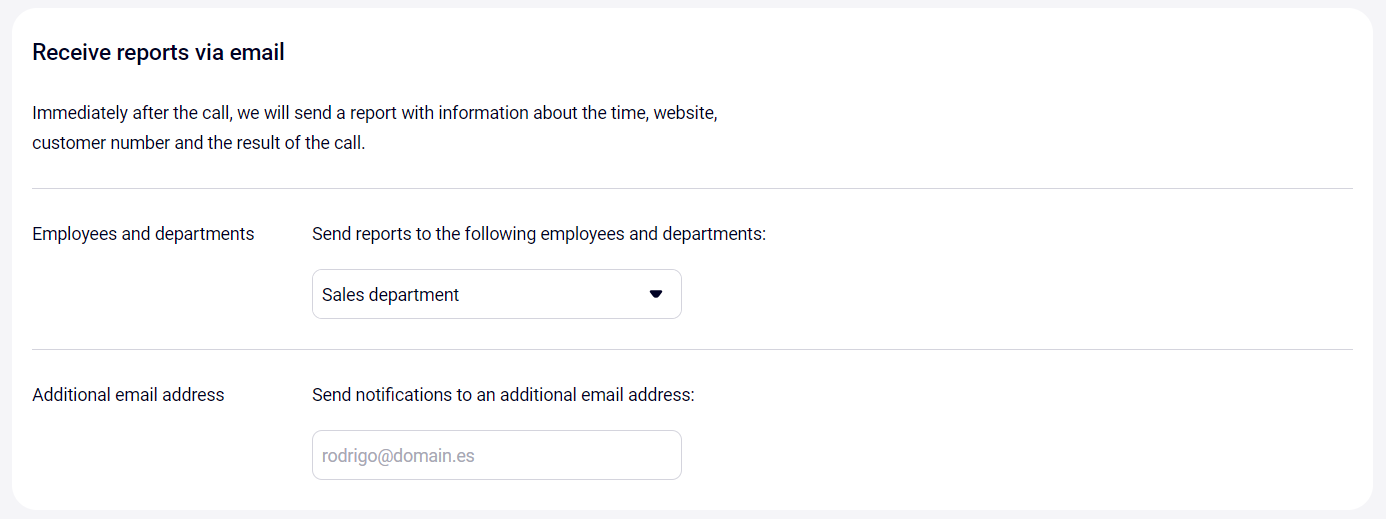
8. You can receive reports on each call requested using the callback widget. To do this, select which of the employees (or departments) your Cloud PBX will send these reports to.
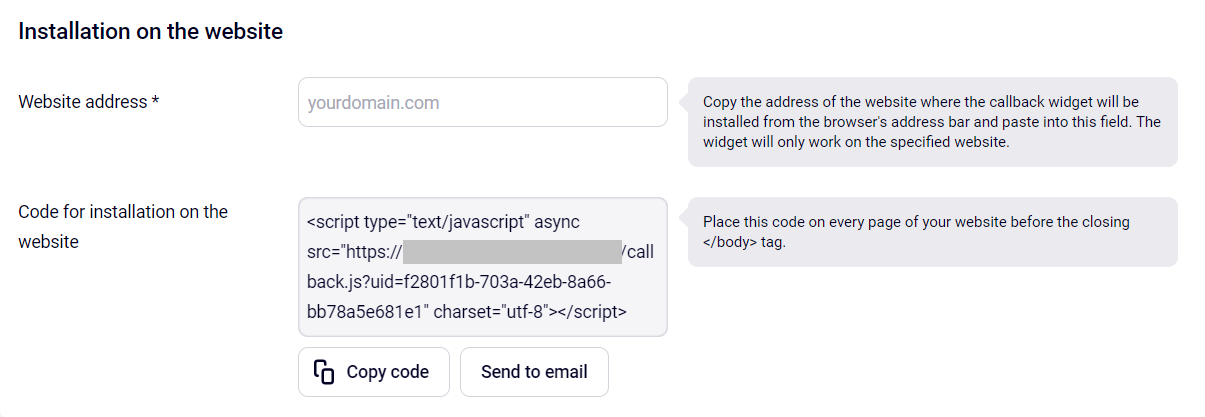
9. Specify the website address where the callback widget will be installed.
10. Copy the code for installing the widget on the website and send it to your webmaster. You can also paste the code on your website yourself (the place where you need to paste the code is specified in the comments to the Code for installation on the website field in your personal account).
11. Save the changes. using the call reception scheme, check that you have set up the widget schedule correctly. Prepare your employees to receive calls requested through the widget.
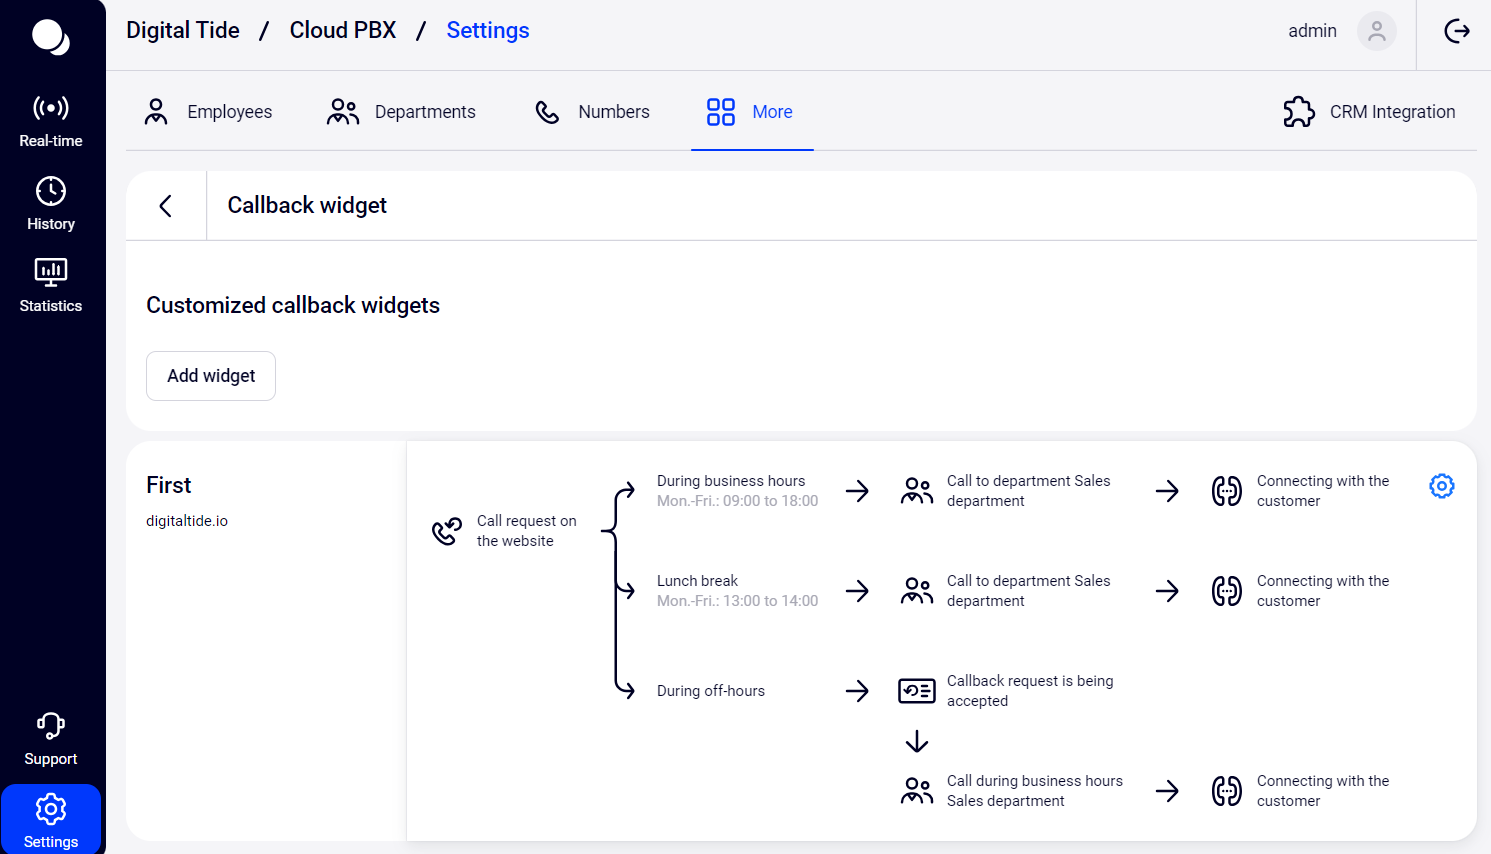
12. You can purchase and set up multiple widgets and install them on one website or on several different ones.
Please note
You can request a call back from the website only to a cell phone number of your country’s telecom operator. If you have added a subscriber's number to the black list, they will not be able to call you, even if they request a call back through the widget on the website — Cloud PBX won’t let unwanted calls through.Return to the the Callback widget description.