Call History and Recordings
Cloud PBX will help your team control sales calls. Call history (call details) is one of the most important sections of Cloud PBX where all your employees’ calls are displayed.
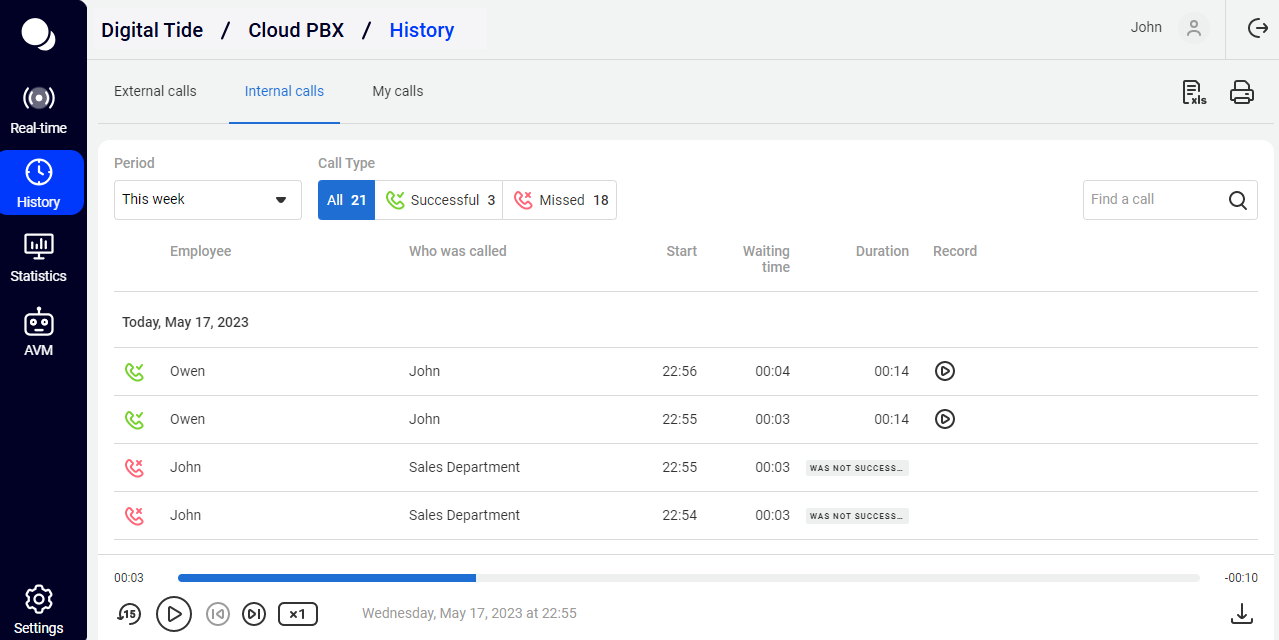
Our call history captures all incoming and outgoing calls made from mobile phones, SIP phones and softphones, including calls between employees of the same PBX using extension numbers and calls between employees from different branches.
Here you can:
- filter calls by any period, customers, employees, call types and duration, etc. for the required period;
- view basic statistical data according to the applied filters;
- monitor calls that need special attention (missed calls that were not called back or were called back unsuccessfully; calls with service quality assessment);
- listen to call recordings and download them to your computer;
- print call details;
- export the call history to Excel for generating customized reports;
- make notes for calls when it is important not to forget details.

To make a note, while listening to a conversation recording, click the icon next to the Download button.
Please note
1. The ability to view Call History depends on access rights level. 2. The call start time is shown in the company's time zone. For more information about time zone selection, please see Time Zone.How to Quickly View Employee’s Call History
Click the employee’s name in the table or enter it in the Find a call field and you will see the call history of the specified employee for the selected period.

How to Quickly View Call History for a Customer
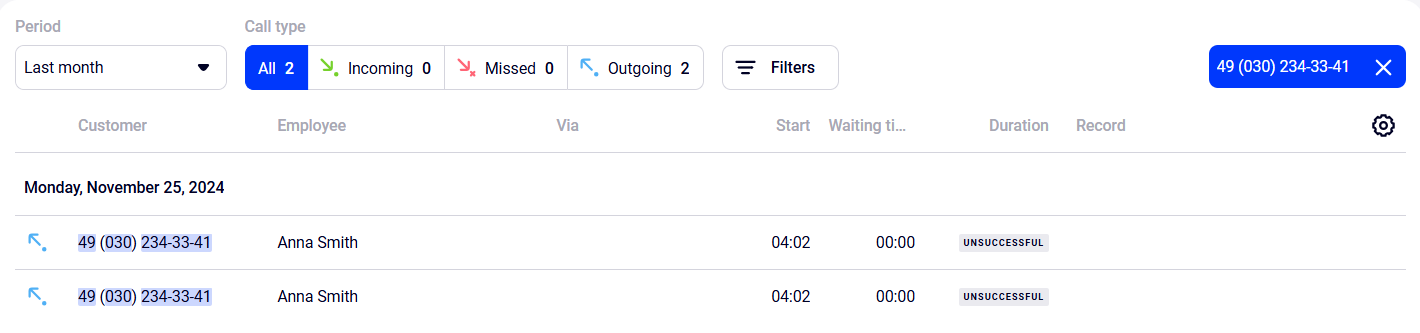
Click the customer's number or enter it in the Find a call field and you will receive all of their calls to your company for the selected period.
To display customers’ names in the history, add them to the contacts.
How not to record the boss’s calls and notify a customer about the recording?
How to Use More Filters
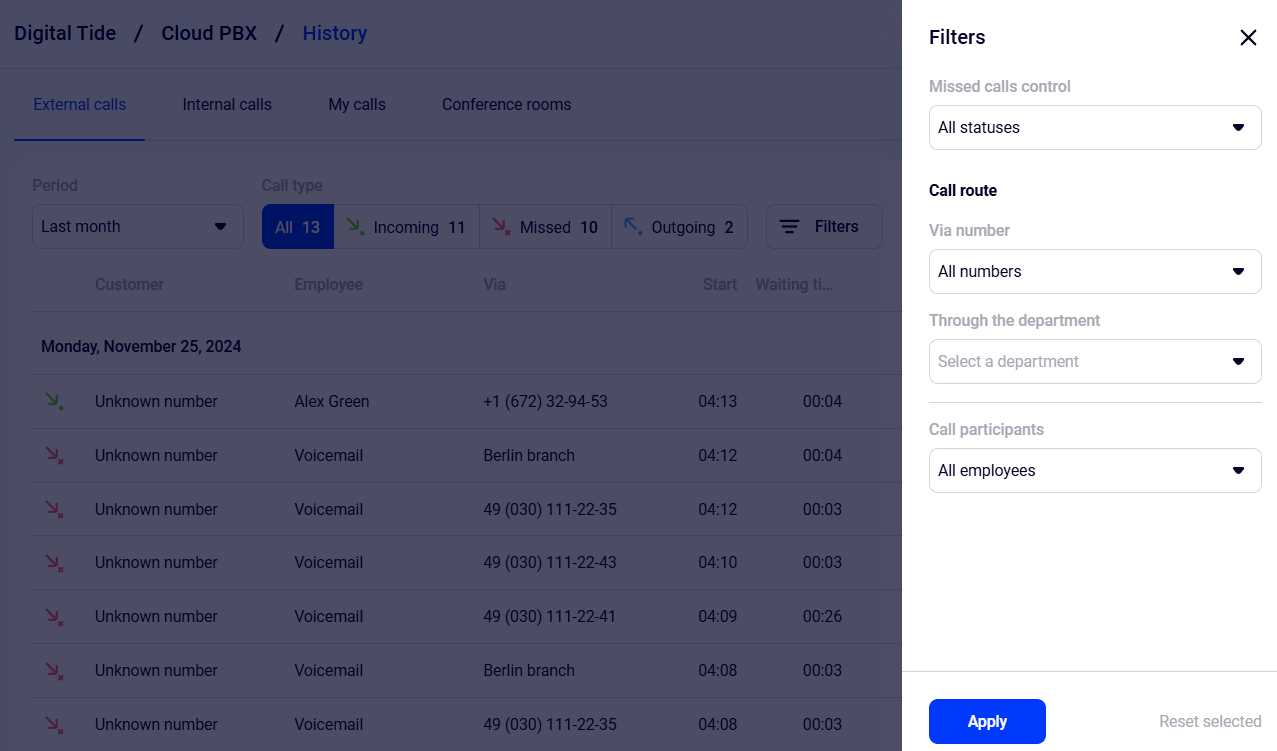
Click Filters to open the filter panel. It can filter calls not only by customers, employees, and numbers, but also: * by departments; * by missed call processing statuses; * by call duration; * by call start time.
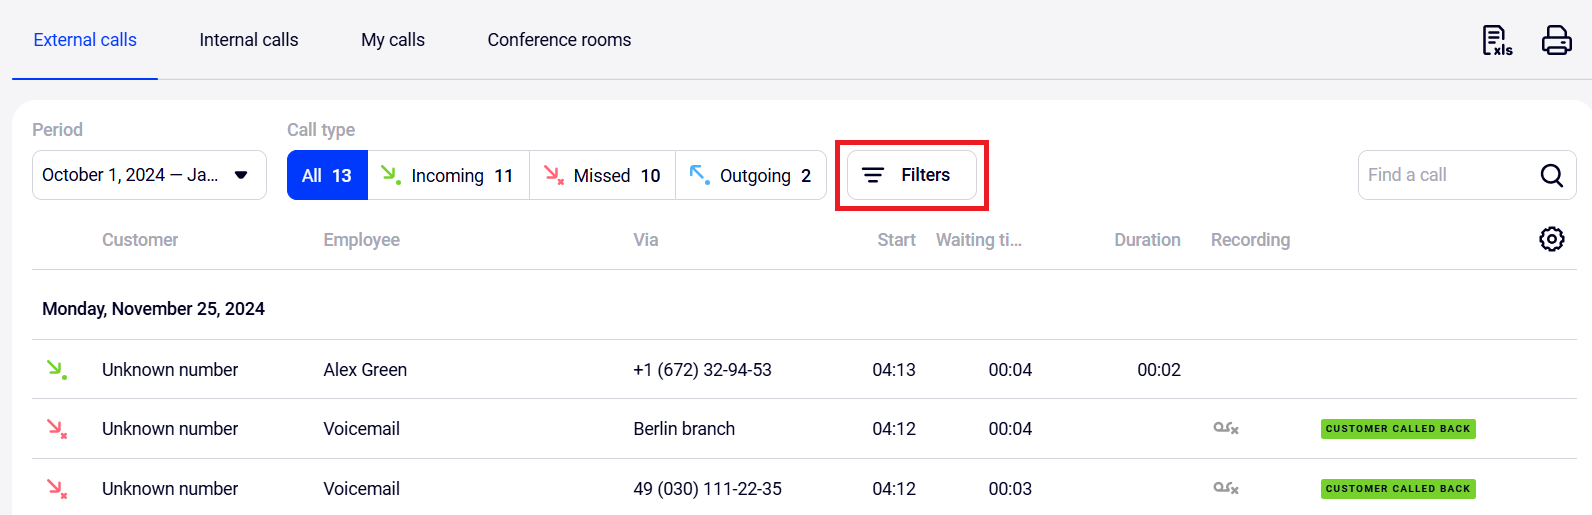
A sidebar with filters will open. Select required filter values and click Apply. Only the calls that match the specified parameters will remain in the table.
Make it easier
If you view Call History on a wide screen (more than 1836 pixels wide), the filter panel will be open by default.How to Filter Missed Calls
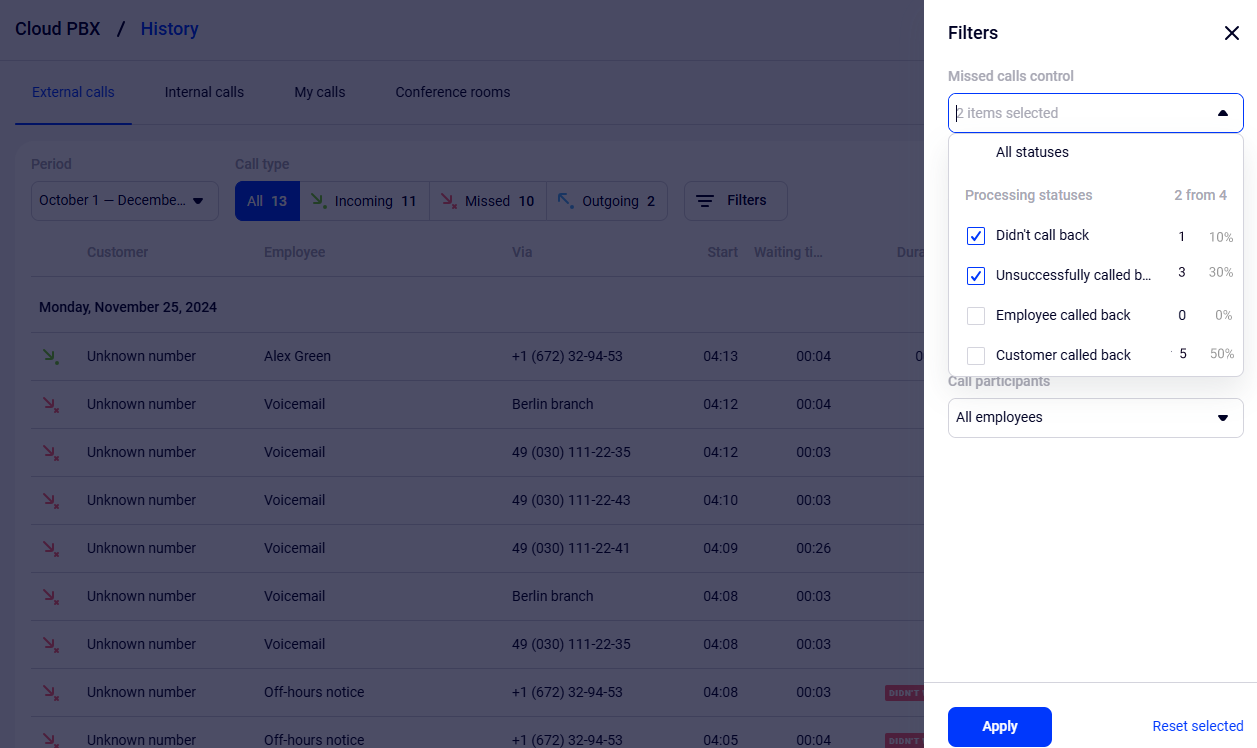
To monitor in real time which unanswered calls have already been processed and which have not, use the Missed Calls Control filter and color markers in the missed status table.
Please note
The Missed Calls Control filter appears in the filter panel when the All, Incoming, or Missed call types are selected. When the Outgoing call type is selected, the Missed Calls Control filter is not available.Using the Missed Calls Control filter you can easily find missed calls that employees did not call back or could not get through to.
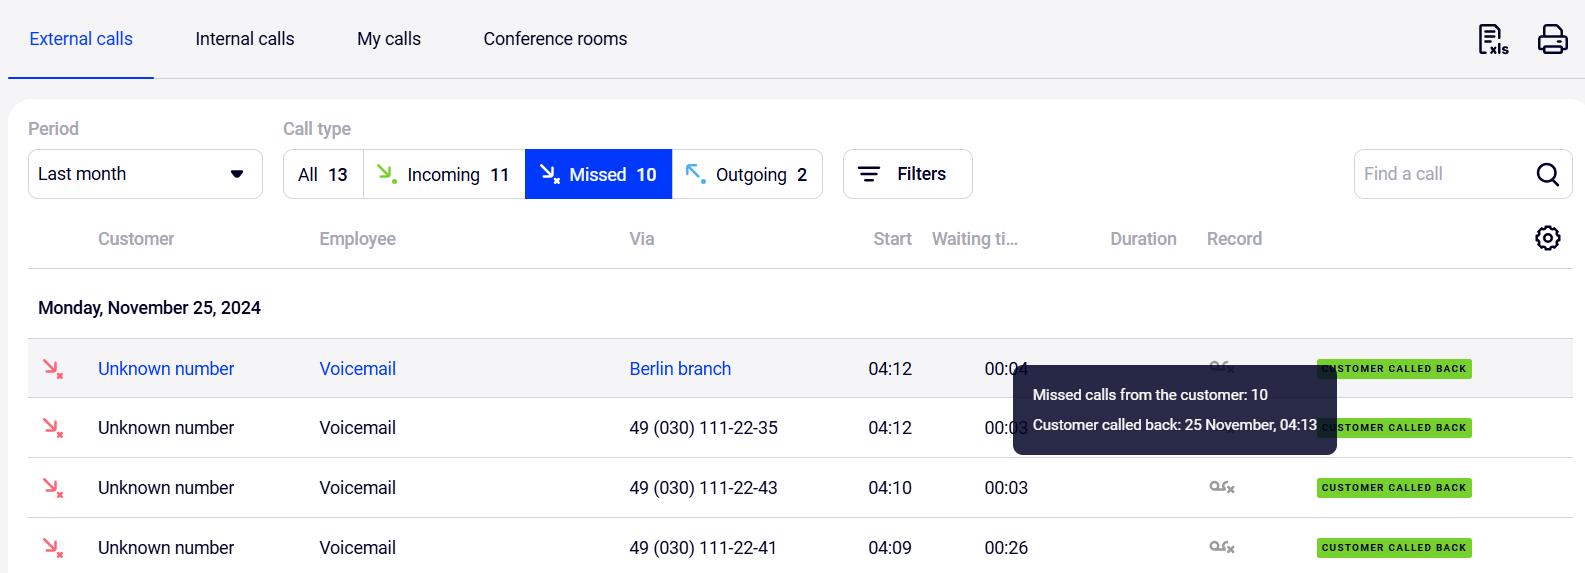
Colored markers of missed call processing statuses are located in the very right column of the table. These markers will help you understand the status of each unanswered call: whether the employee called the customer back or the missed call remained unanswered.
Please note
To see the updated missed calls processing statuses, refresh the page.How to Filter Calls by Duration
To exclude spam calls, identify suspiciously short or overly long conversations that require attention by using the Call duration filter.
When setting up a filter, you can select standard values or add your own. For the latter in the drop-down list of the Call duration filter, click Add duration.
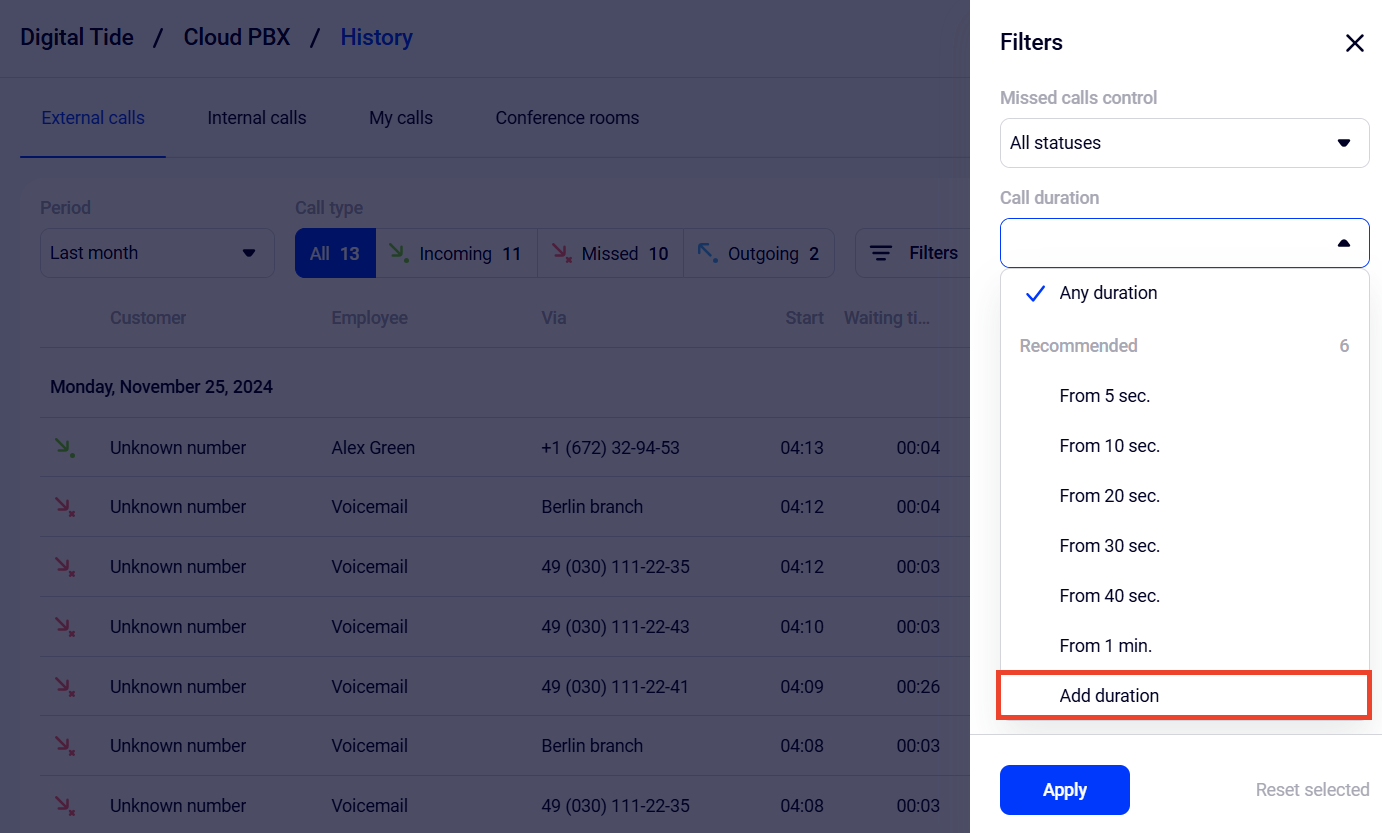
In the window that opens, specify the required call duration (from 1 second to 60 minutes) and click Add.
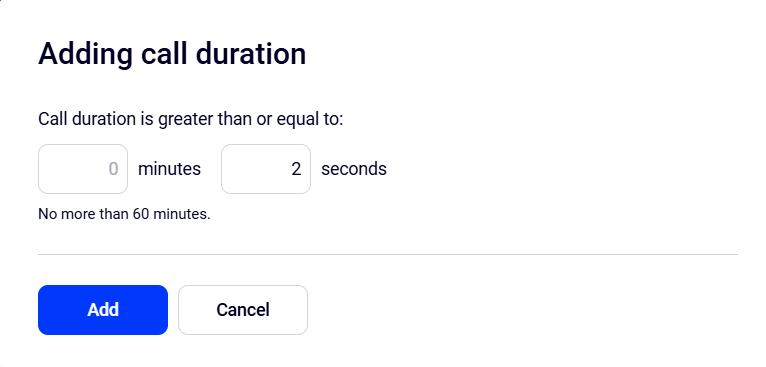
After this, the Added section will appear in the drop-down list, where all the created values will be located.
After selecting the required call duration from the drop-down list, click Apply. Only the calls that exceed the specified time will remain in the table. In our example, these are all calls from 1 min. 30 sec.
To change or delete an added call duration, in the Call duration filter hover over the required value and click the gear icon to the right of the time.

In the window that opens, correct the duration or delete it by clicking the trash can icon.
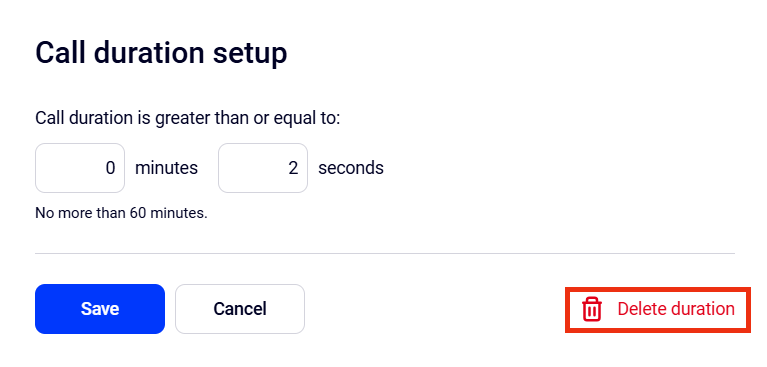
Confirm deleting the added call duration.
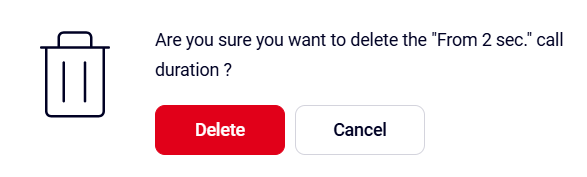
How to Filter Calls by Call Start Time
Evaluate employees' real performance by calls received during business hours. To do this, set the business-hours interval in the Call start time filter.
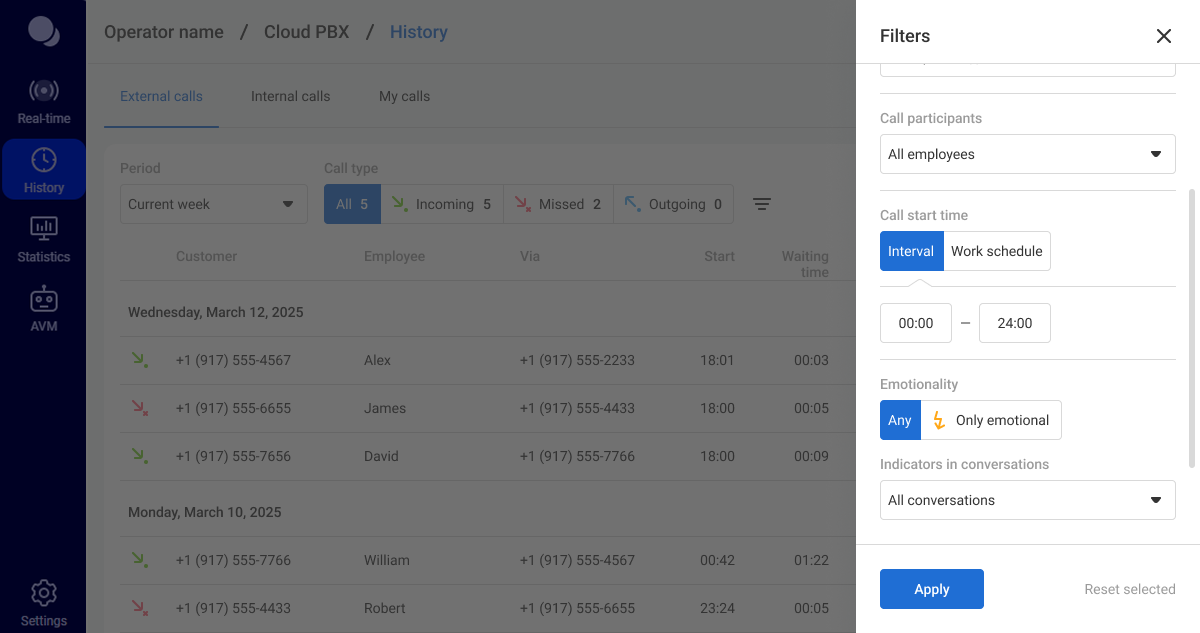
To avoid entering the same interval manually every time, save it as a work schedule. Go to the Work schedule tab and select a recommended schedule from the drop-down list, or create your own.
Please note
Only Administrators and Heads of Department can create, edit, and delete work schedules (as well as System Administrators if the branch system is enabled in Cloud PBX). Anyone with access to Call History can view work schedules.To create your own work schedule, click Add schedule.
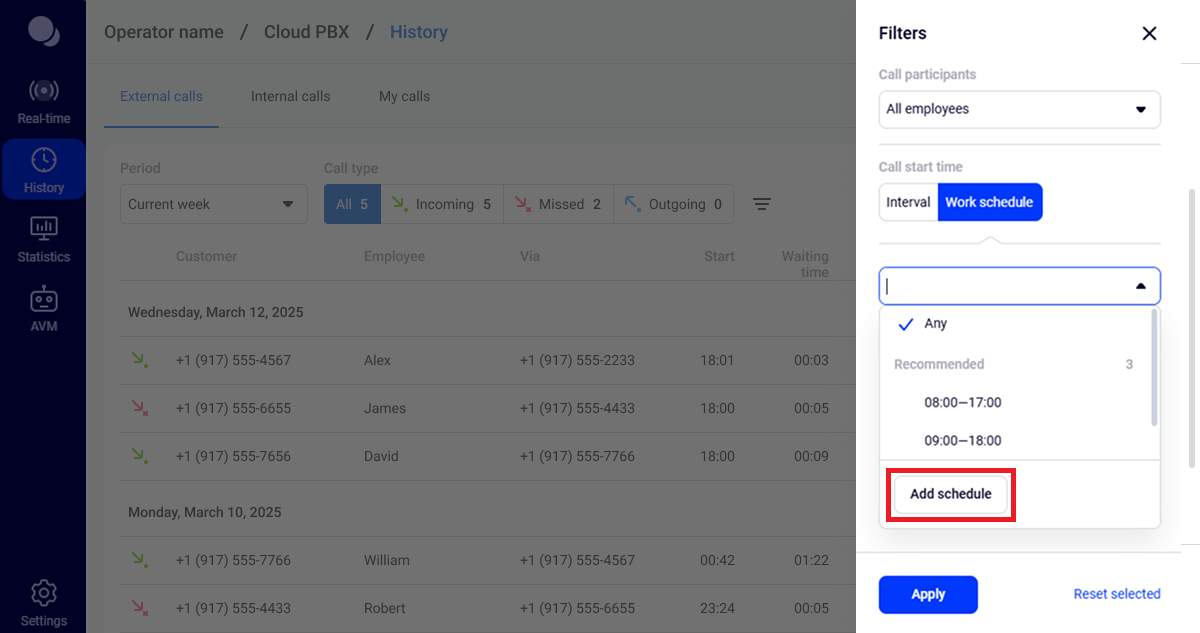
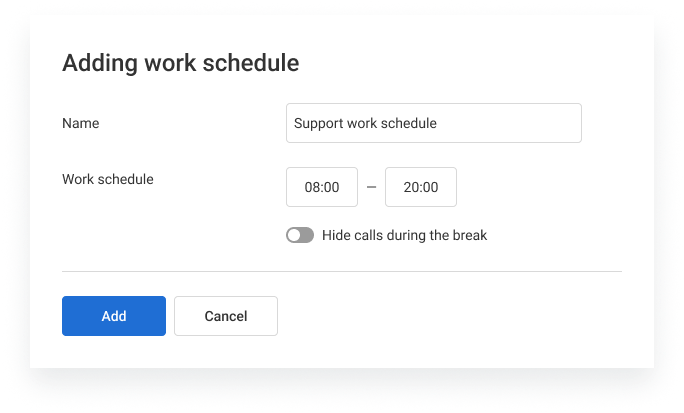
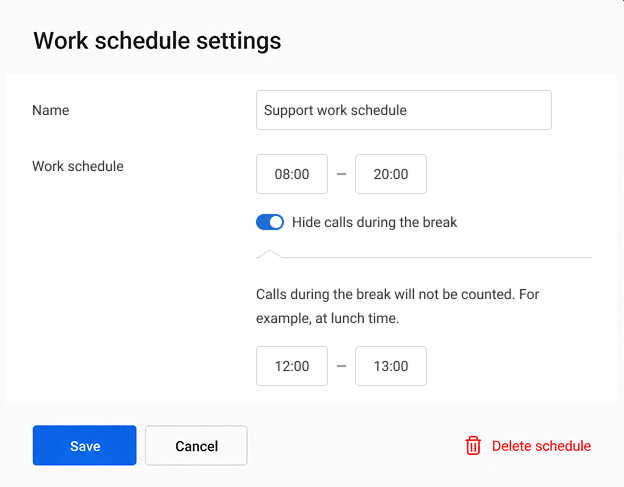
In the window that opens, enter the schedule name and employees' working hours.
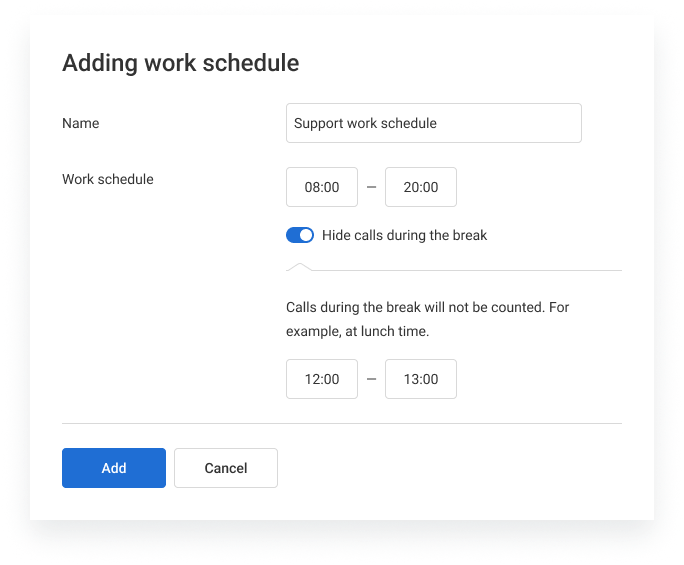
You can also specify a lunch break. To do this, move the Hide calls during the break toggle to the right and enter the required interval. Then, when the Call start time filter is used in Call History, calls that started during the break will not be displayed. Click Add.
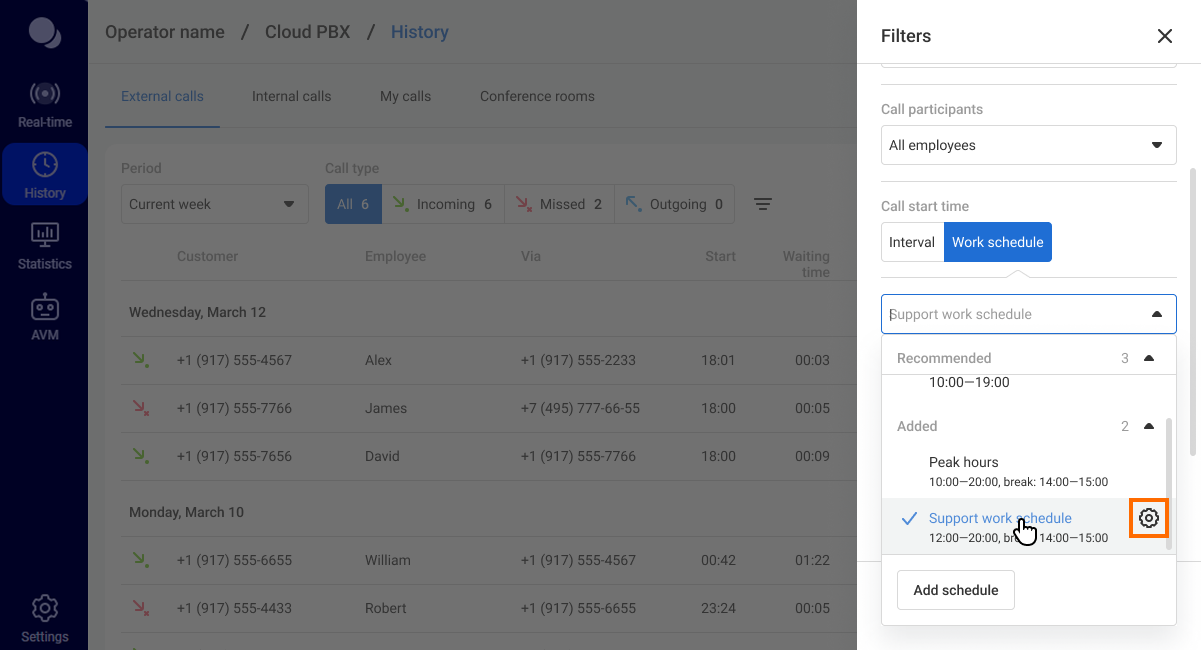
The schedule name will appear in the drop-down list. If you need to change the schedule settings, hover over the required item in the list and click the gear icon.
To delete a work schedule, click Delete schedule in the lower-right corner.
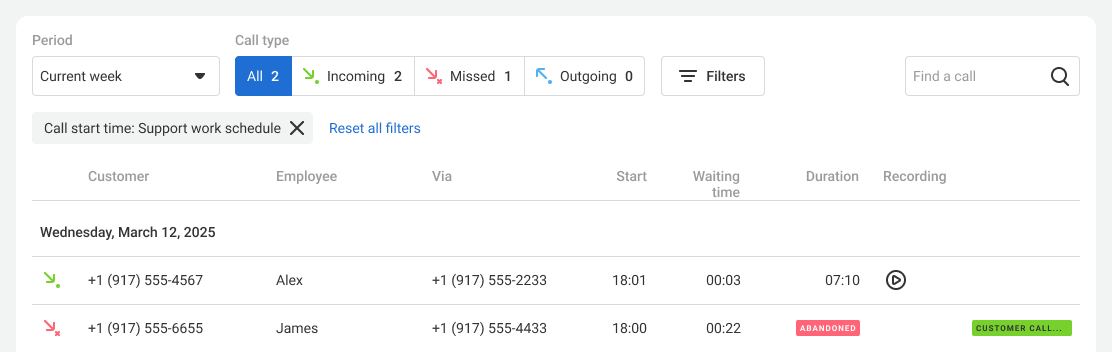
When the filter is set up, click Apply at the bottom of the filter sidebar. Call History will show calls that started during the selected work schedule.
Make it easier
We also recommend tracking how many calls come in outside business hours. If there are many such calls, you may need to change employees' working hours or split them into several shifts.How to Filter Calls by Departments and Employees
When you select the Through the department filter, you will see incoming calls that were directed to the specified department, and outgoing calls of this department employees from shared company numbers. In this filter you can select not only active, but also deleted departments that worked with calls during the selected period.
In the Call participants filter you can not only select each employee individually, but also set up a filter for all employees of the required department at once. When you select all employees of the department, all calls involving each employee will be displayed in the history, including direct calls to extension numbers. The Call participants filter also shows call attempts, which helps you monitor the total number of incoming calls for each employee.
Please note
You cannot filter calls by employees deleted from Cloud PBX. If you need to get the call history of a deleted employee, do not use the filter by employees.How to Filter First Calls from Each Customer
Use the unique call filter: it counts customers. For example, if Customer A calls the company 3 times and Customer B calls 4 times, there will be 7 calls in total, but only 2 unique calls.
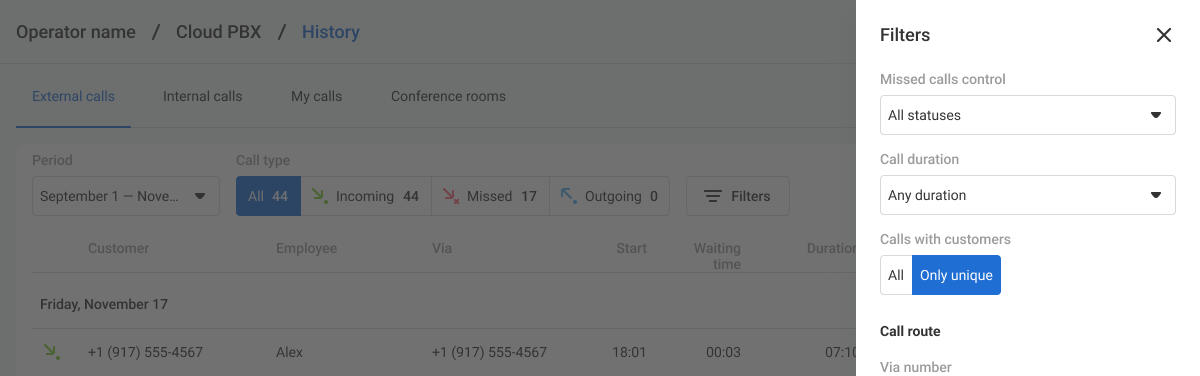
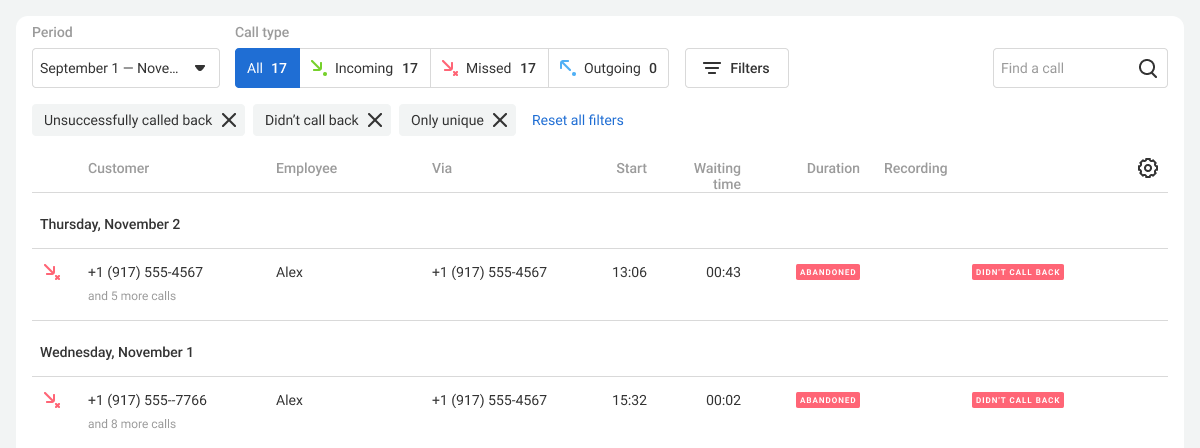
If your company does not use a CRM, the unique call filter can help you find out: How many leads called the company. On the Incoming tab, each unique call is a customer who called the company for the first time during the selected period. To find all missed leads, select the Didn't call back and Unsuccessfully called back statuses in the Missed сalls сontrol filter.
How effectively employees call customers. On the Outgoing tab, the quantity of unique calls shows how many customers employees managed to call.
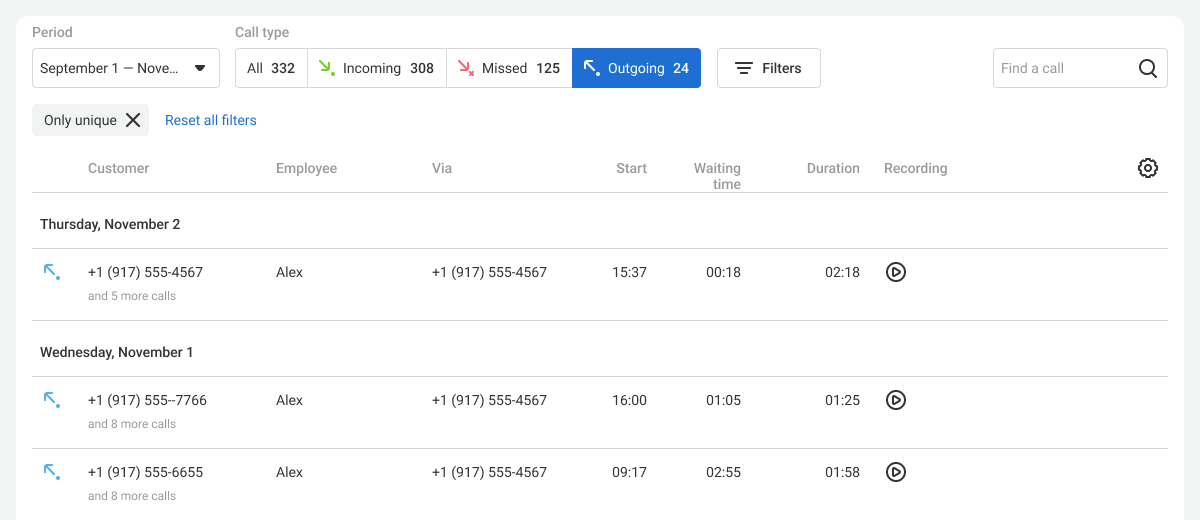
The unique calls filter also shows the total number of calls for each customer. To view the full communication history with a customer, click their number.
How to Reset Filters
To make sure you can see at any time the principle by which calls are sorted, the selected filter values are pinned above the call table. Each set parameter is in a separate gray badge. To quickly cancel the selection of an unnecessary filter value, click the cross in the corresponding badge. The table will be updated according to the remaining parameters.
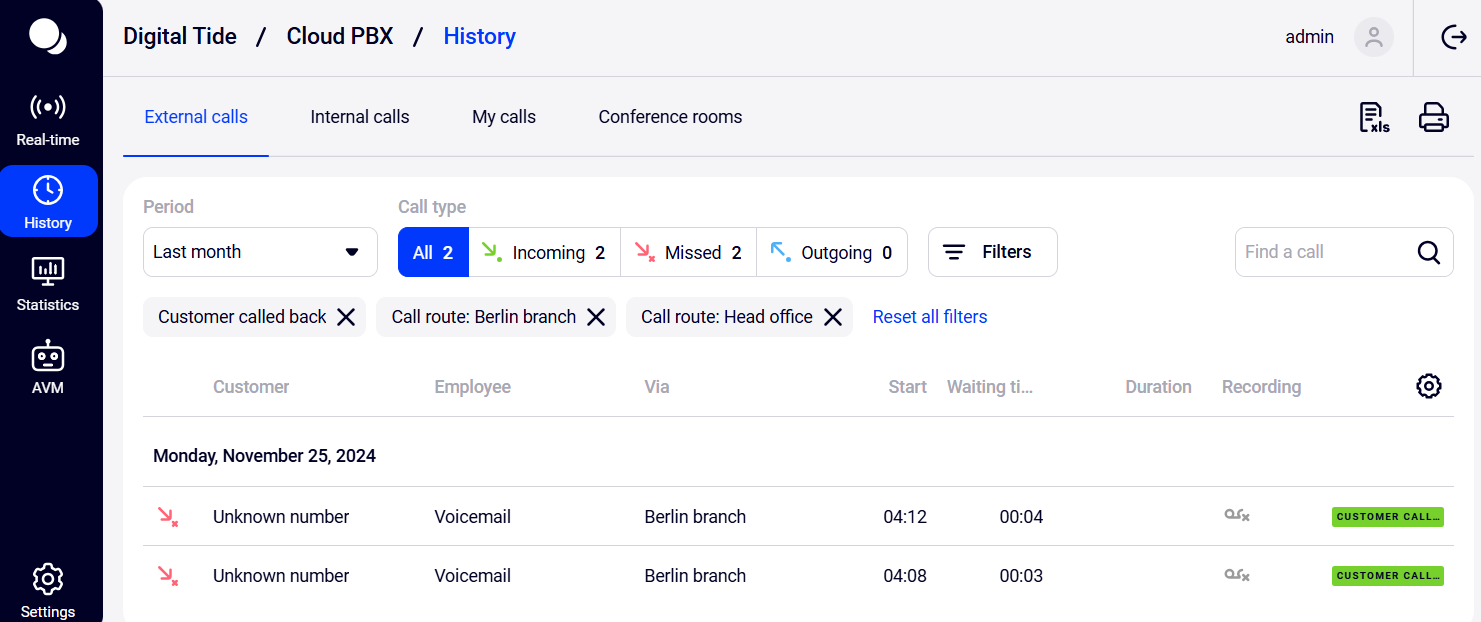
If you want to cancel all selected filters at once, click Reset selected next to the gray filter badges or in the Filters sidebar.
How to Track Who Answered the Call and Who Ended It
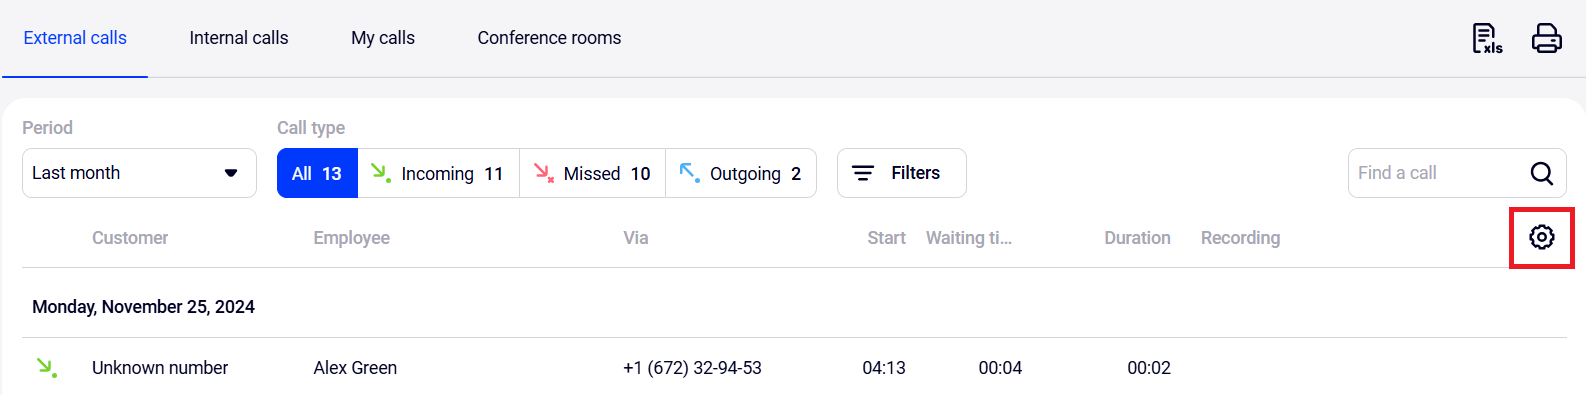
Sometimes it is important for a manager to see in History not the employee who ended the call, but the one who answered it. By default, the column displays the one who ended the call. To change this setting, click on the gear icon under the search bar.
In the window that opens, select the The employee who answered the call display option and click Save.
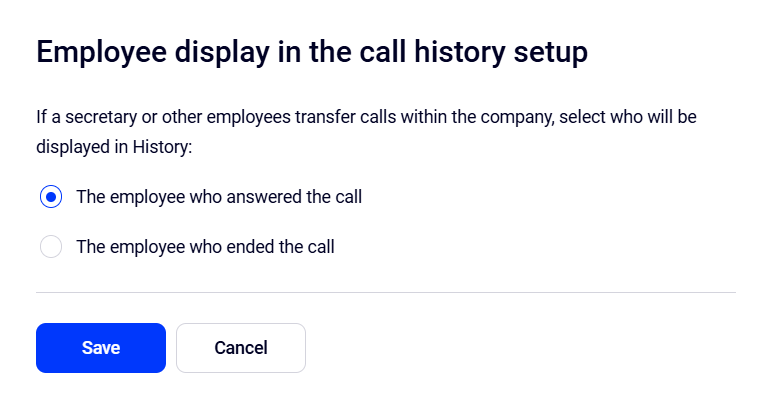
With this Employee column display you can monitor the work of secretaries and administrators — filter and listen to all the calls they have taken to make sure that these employees are following the communication standards of the company.
Also, if a lot of irrelevant calls are transferred to employees, you can figure out who exactly does it. With the default settings of the Employee column, filter calls by employees who complain about irrelevant requests, and then change the display of the Employee column and see those who answered these calls.
Please note
The Employee column settings affect whose name you will see on the External calls and Internal calls tabs.Cloud PBX remembers the employee display option that you selected in the corresponding column. Even if you log out of your personal account, the Employee column settings will be saved the next time you log in. Only users with the Head of Department and Administrator roles can set up the Employee column. Users with other access levels always see the employee who ended the call in History.
How to Export Call History to Excel
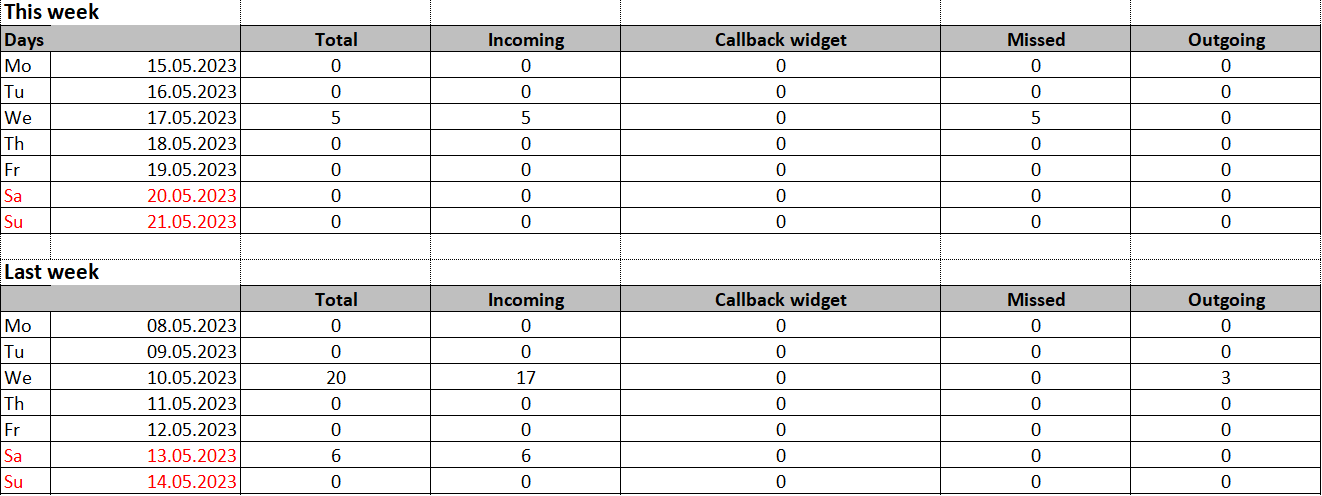
To export the call history to Excel, click the icon in the upper-right corner above the call list.
By exporting the data to Excel, you can build more advanced reports when needed.
How to Download All Call Recordings via FTP
You can download call recording files for extended storage purposes, as they are retained on the server for one year from their creation. Besides, you can easily integrate such recordings into CRM and other systems.
You can use any FTP client for downloading. It's better to:
- enable passive mode for file transfer.
- increase the server response timeout to the maximum or disable it.
Any Cloud PBX user with the Administrator status can download the files.
Access parameters:
- Server address: ftp://records.secure.cloud-pbx.io.
- Login: your account login with the Administrator status in the owen@company.cloud-pbx.io format.
- Password: your password.
- Port: 21.
The files are located in Recordings catalog and organized in subcatalogs based on the date in the YYYY-MM-DD format:
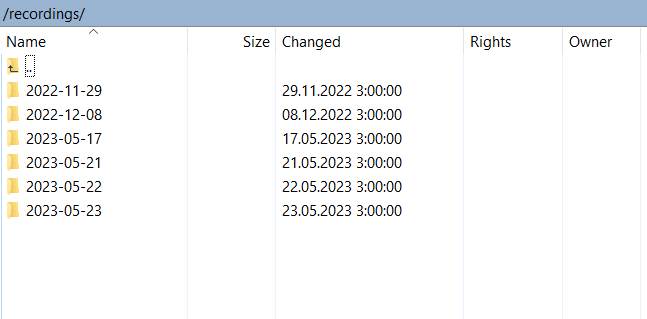
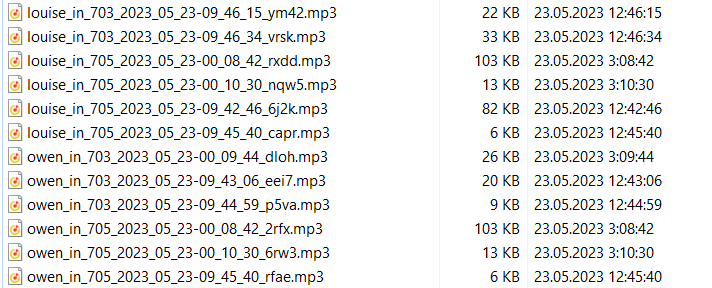
Inside the folders, the recording files have names following the anna_out_2022_10_10-12_49_26_490302343341.mp3 pattern where:
- owen — the name of the employee who handled the call (pbx_voicemail_vm means that the message was sent to the voicemail).
- in — the call type (out for outgoing, in for incoming).
- 2022_10_10-12_49_26 — the date and time.
- 490302343341 — the customer's phone number.