Calls from Kommo (WebRTC)
The capabilities of the Kommo and Cloud PBX standard integration are greatly enhanced with WebRTC technology. With this feature, you don’t need a softphone, desktop, or mobile phone — simply open your browser, log in to Kommo, and start making calls without any additional apps.
With WebRTC, you don’t need to switch between devices or windows — manage leads and communicate with customers in a single interface. This is very convenient and can save up to 10% of your work time.
Technical Requirements
- The Kommo call widget works only in Google Chrome (preferred) and Mozilla Firefox.
- A headset connected to your computer is required to handle calls.
Enabling WebRTC
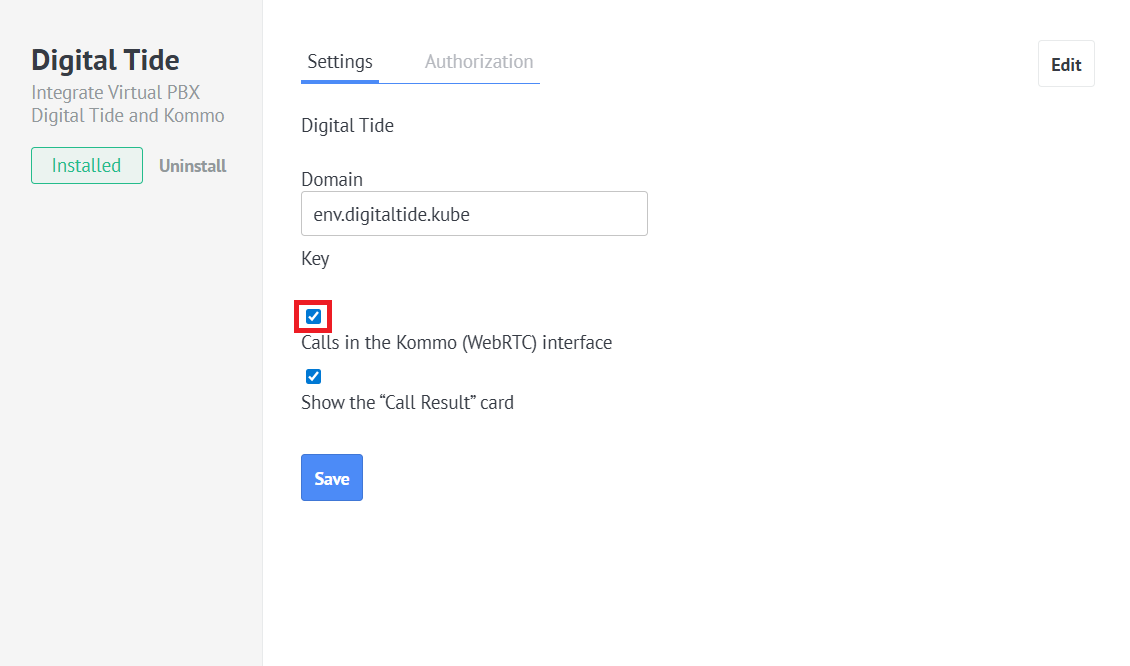
In Kommo, go to Settings — Integrations — Calling, select your Cloud PBX, check the box next to Calls in the Kommo (WebRTC) interface, and save the settings.
If the connection is successful, a handset icon will appear in the bottom left corner. You can now make, receive, and transfer calls directly in the Kommo interface.
Please note
- With WebRTC enabled, you can handle calls not only in the Kommo interface but also on any other device — whichever is the most convenient for you in each particular case.
- If a call is answered on an external device, the call control buttons in the widget become inactive, but you can still view all customer information and create contacts within the widget.
Integration Capabilities
1. Handling Incoming Calls in the Kommo Interface
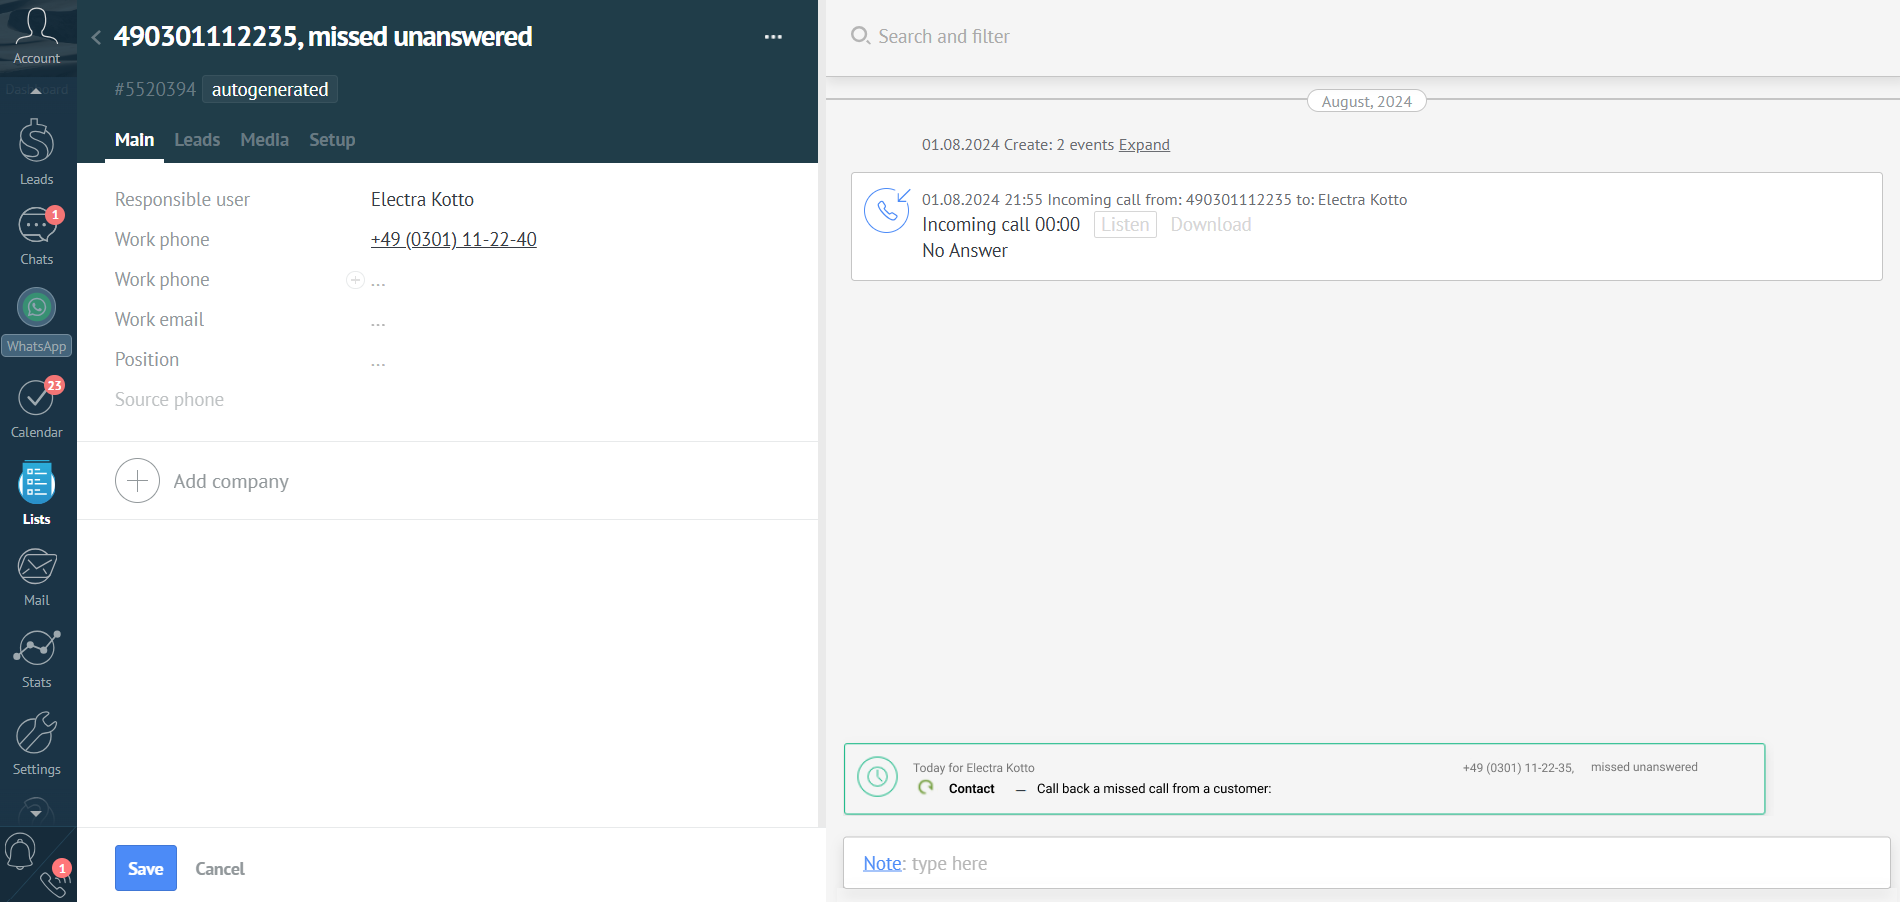
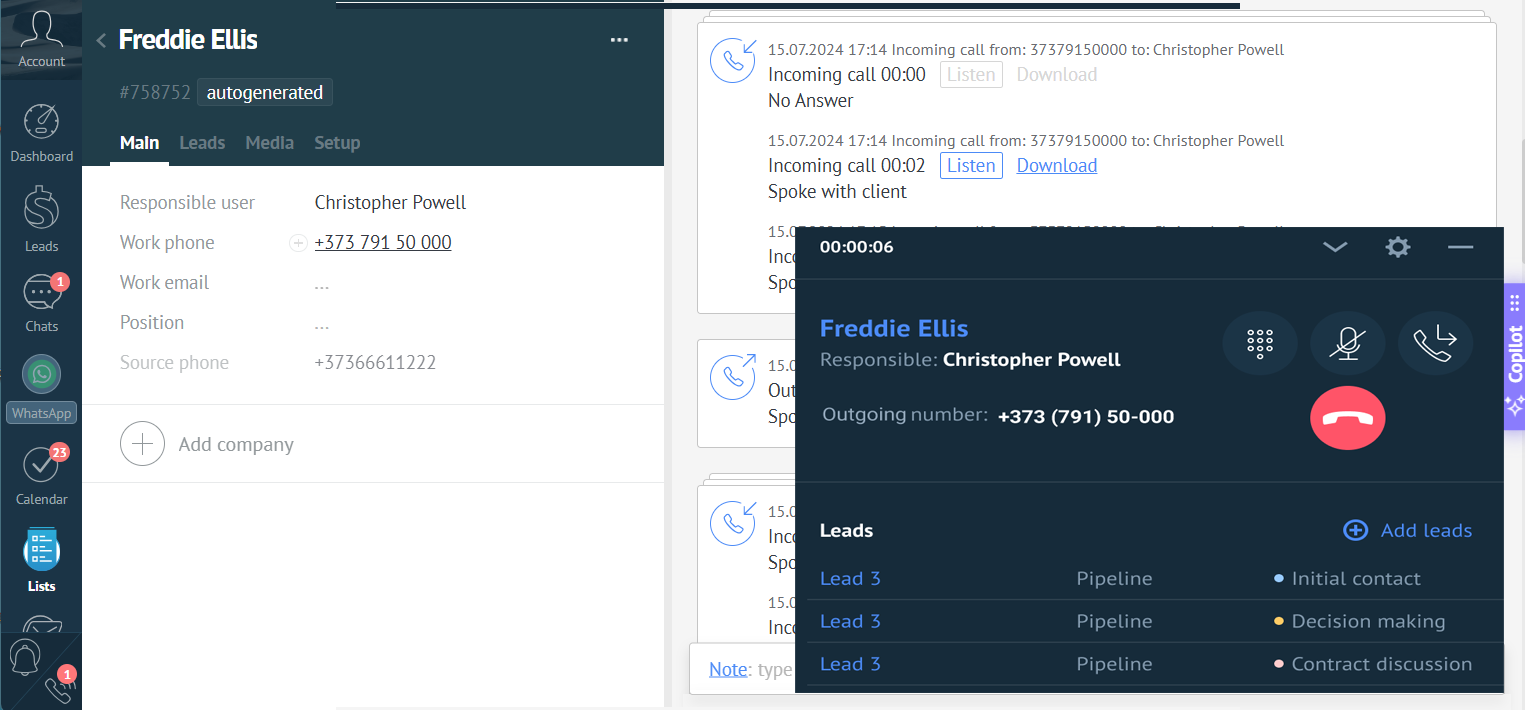
When you receive an incoming call, not only does a pop-up card with the customer information appear, but you can also answer the call by clicking the green handset in the widget.

2. Outgoing Calls via Widget
- Calling a previously saved contact: click the phone number in the customer card or in the Contacts List. Clicking the number allows you not only to copy and edit, but also call the contact directly from Kommo.
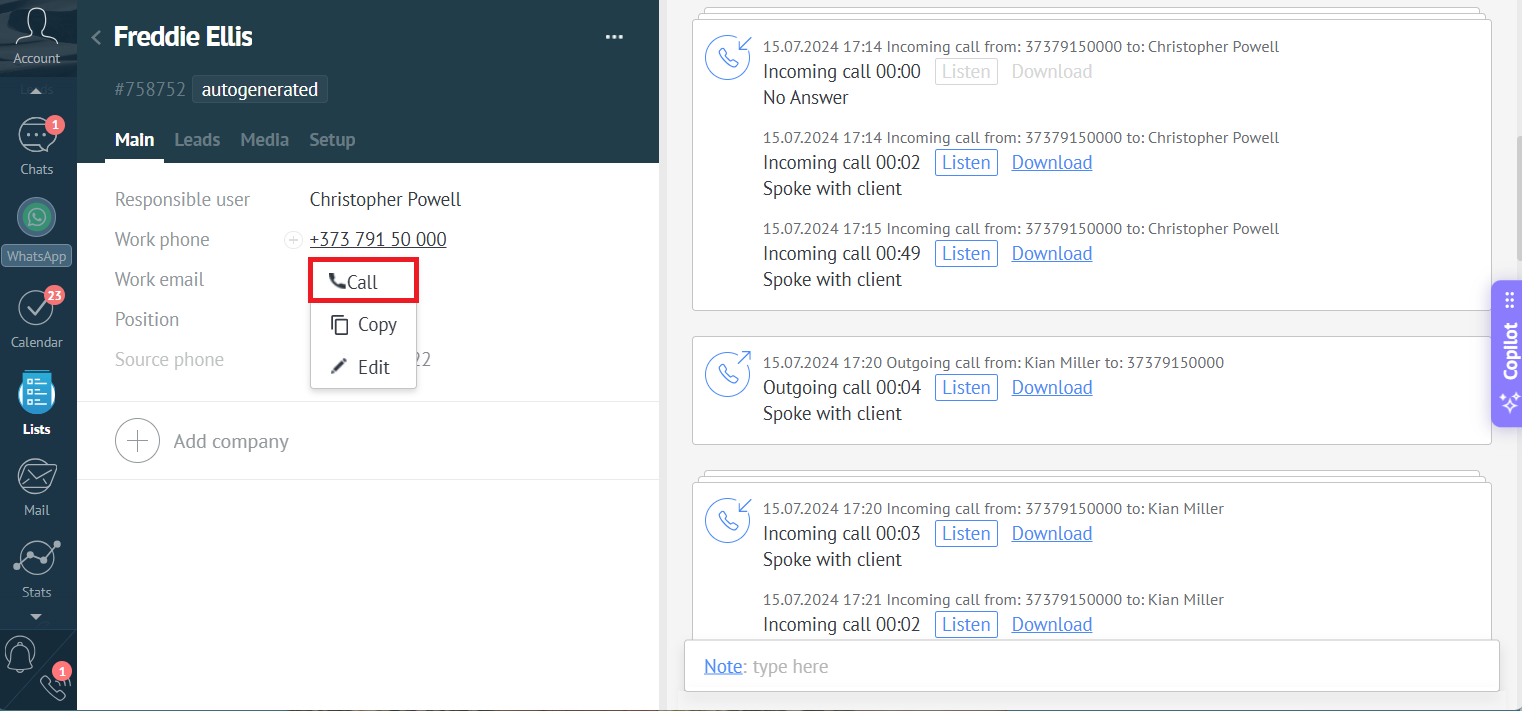
In this case the widget will open, where you can manage the outgoing call (e.g., transfer it to another employee).
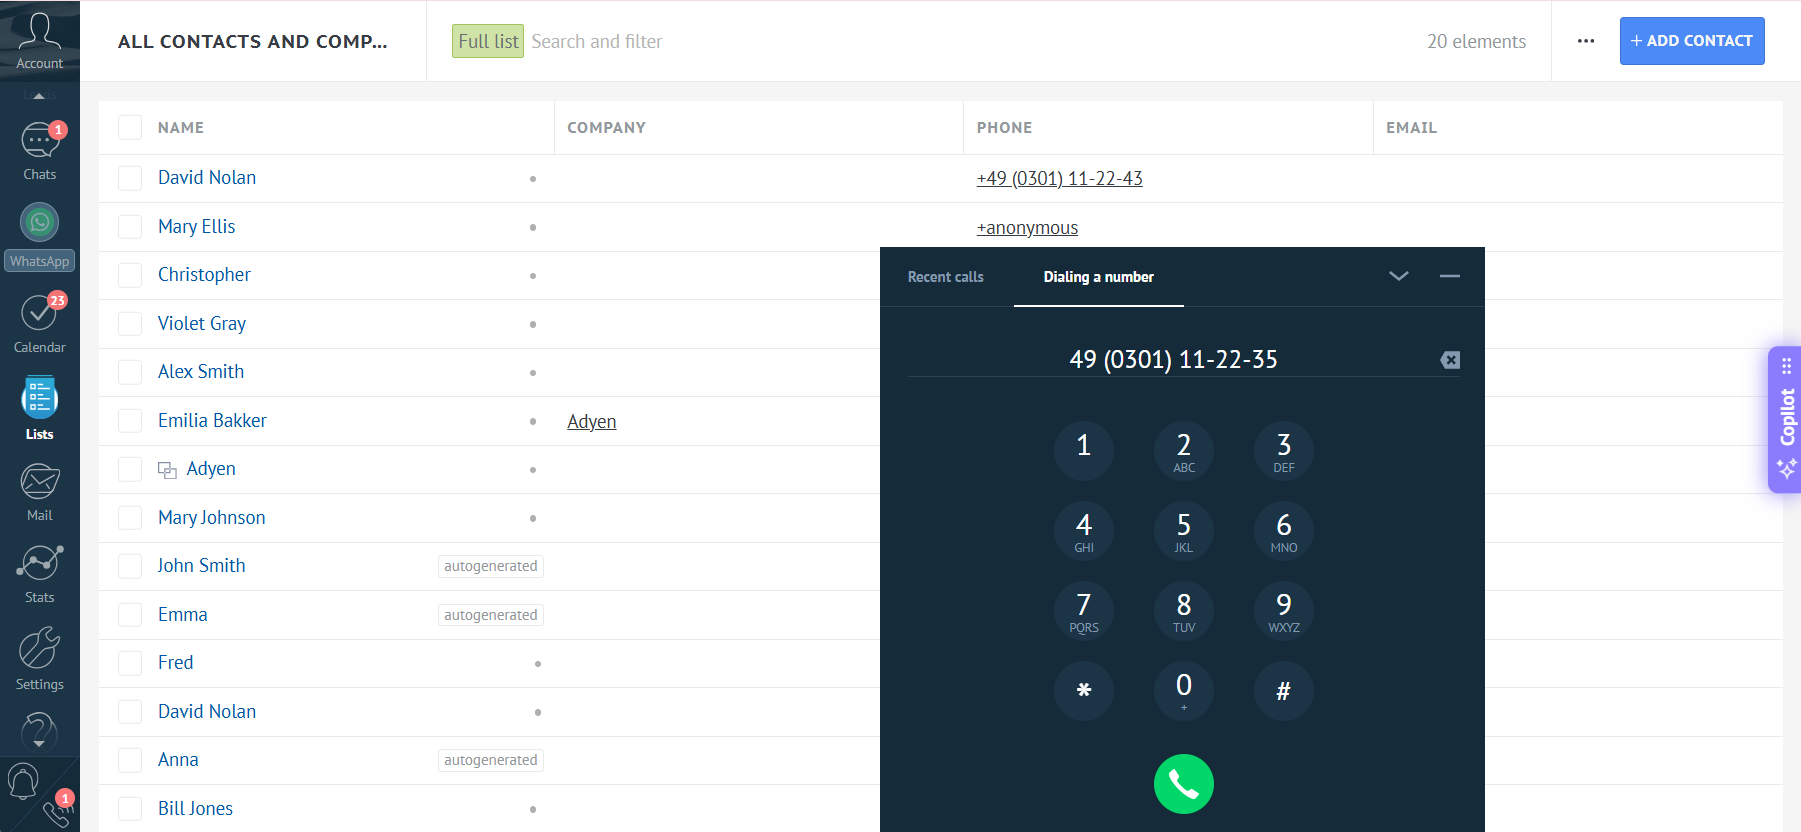
- Calling the customer who is not in Kommo: click the handset icon in the bottom left corner to open the widget and manually enter the number (using the keyboard or the widget buttons).
3. Transferring a Call in Kommo
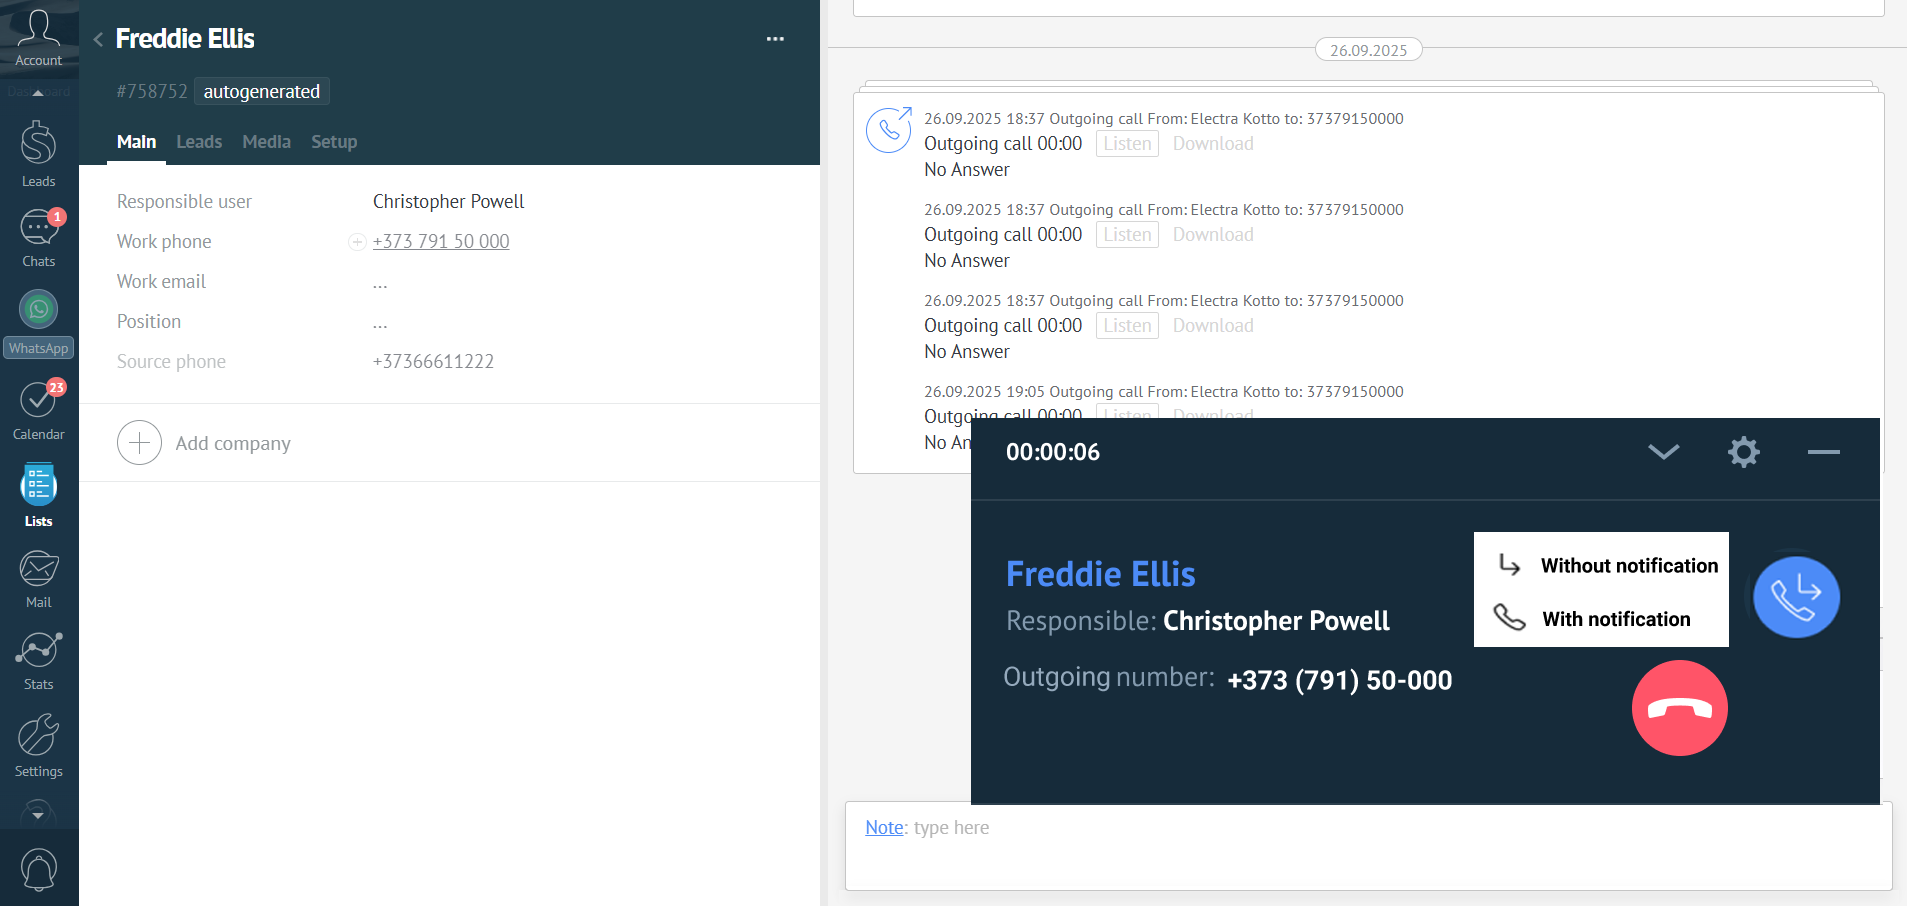
During a conversation, if a manager needs a colleague’s assistance, the call can be transferred to another employee or any external number. Click the transfer button in the widget, select an employee from the list or enter a number, and choose whether to transfer the call using a warm or blind transfer.
4.Saving Call Results
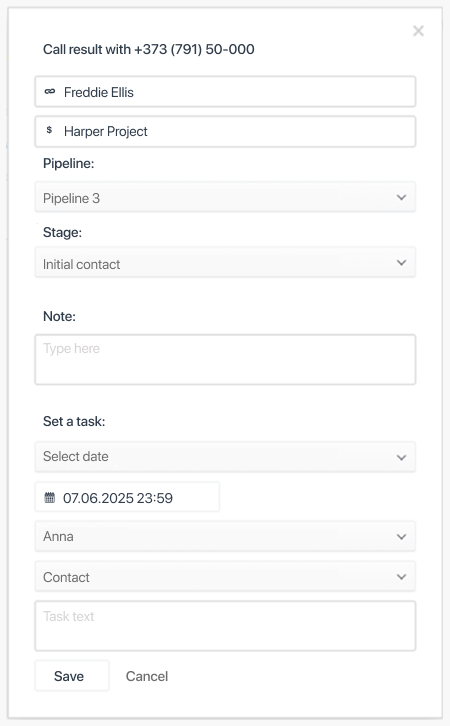
When the call ends, a special window appears where you can:
- change the pipeline and stage of a previously saved lead,
- create a new lead based on the call (it will be linked to the selected contact),
- add a note to the lead,
- assign a task for the contact.
If you don’t need to make any changes, simply close the call result window.
5. Auto-dial List
If a manager needs to call a lot of customers, they can save time by creating an auto-dial list of contacts in Kommo and launching it via the widget.
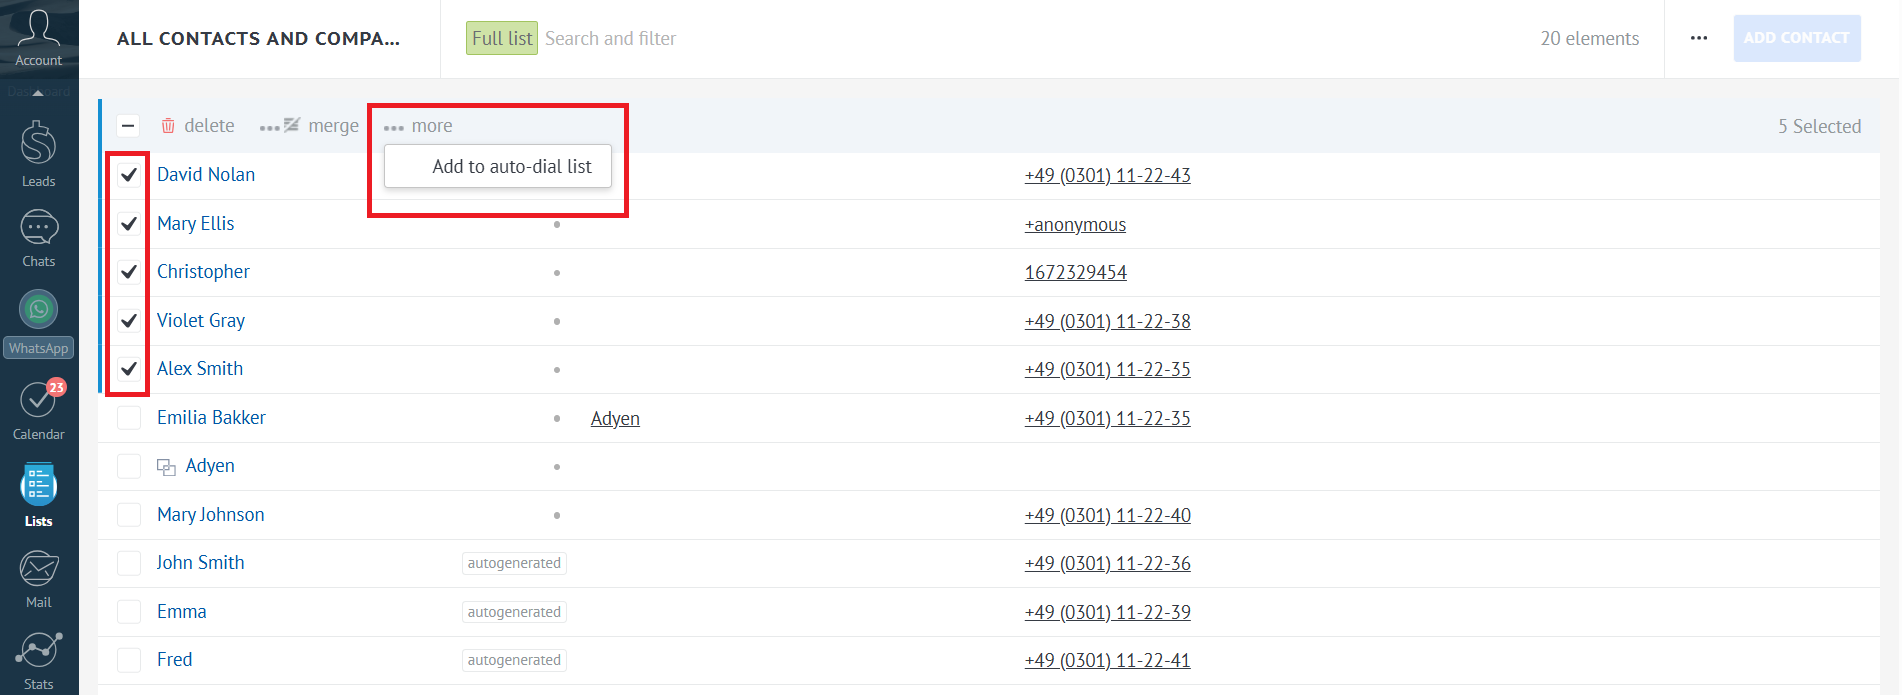
To create a call list, select several names in the contact list, click More, then Add to auto-dial list.
The widget will display the customer list for automatic dialing. As soon as you are ready, click the start button, and Cloud PBX will begin dialing the first contact of the list.
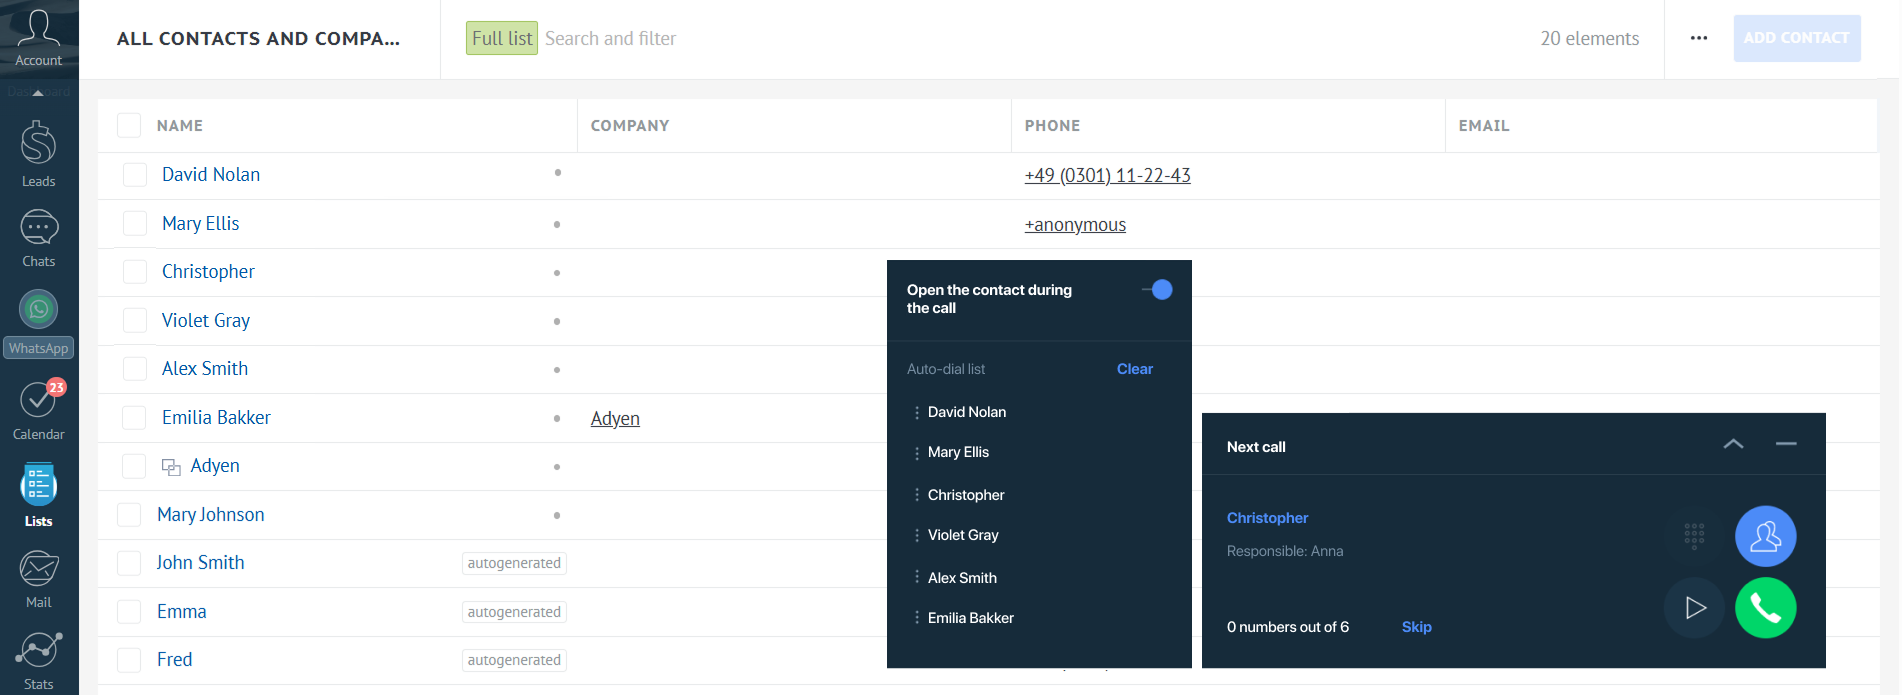
Before each call from the auto-dial list, the manager has 10 seconds to prepare (or to call immediately by clicking the green handset). The manager can pause the auto-dial or skip the next contact. The widget shows the remaining amount of contacts to call.
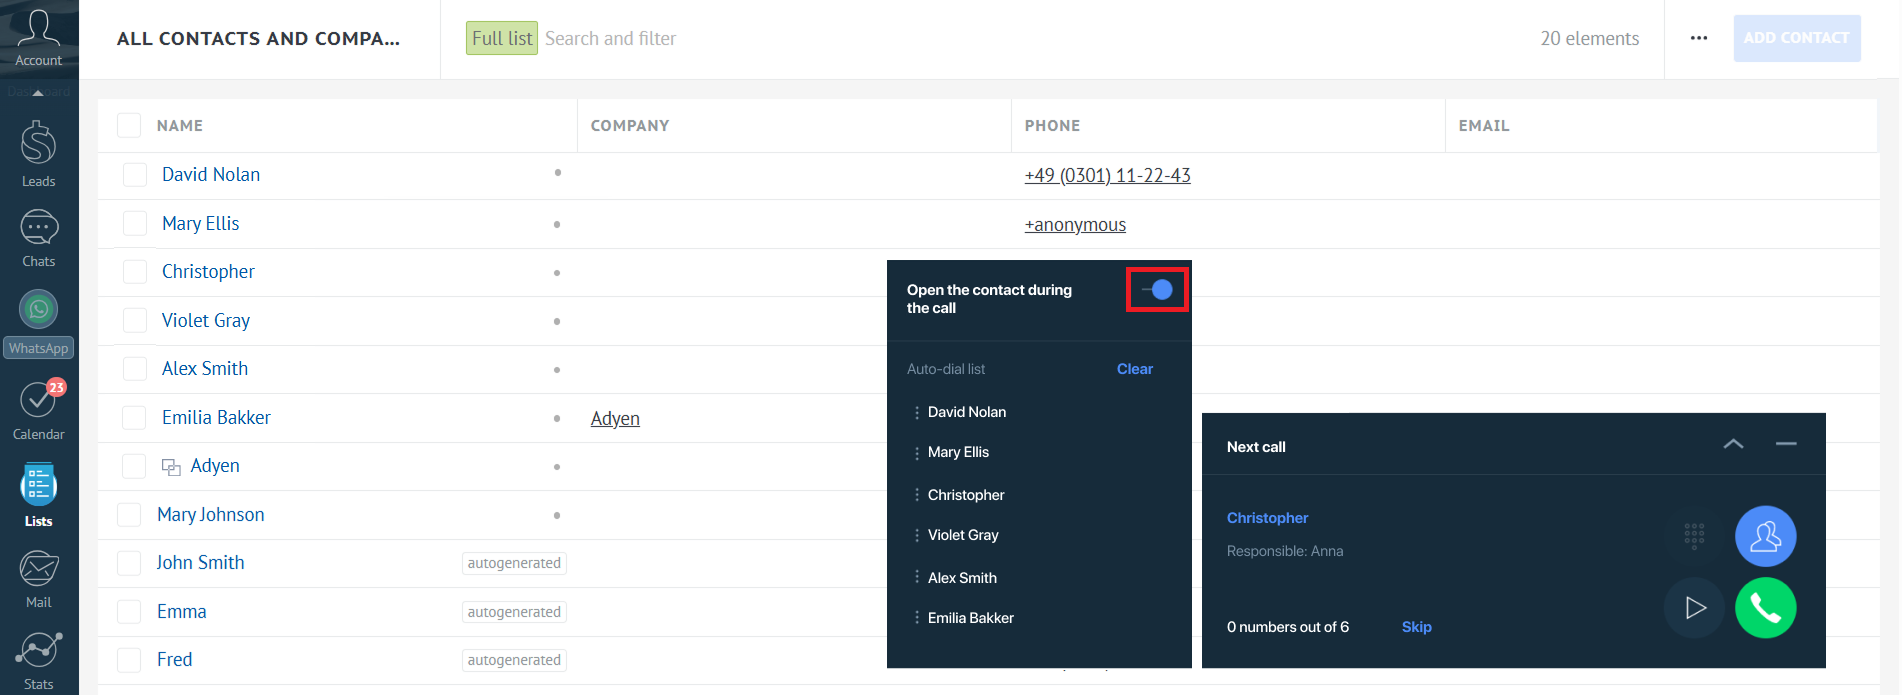
If you want the contact card to open automatically at the start of each call, enable this option.
The widget allows flexible management of the contact list for auto-dialing— reorder contacts, automatically open the card of the contact being called, etc.
6. Other Kommo Integration Features
- Automatic creation of leads, contacts, tasks, and records in the unsorted.
- All calls and their recordings are logged in the customer card.
- Automatic connection of a customer to their personal manager.
- Call analytics in the Kommo interface.
- Automatic tagging.
For more details on PBX and Kommo integration capabilities, see this article.
Questions and Possible Issues
- If I answer an incoming call on my cell phone instead of the Kommo interface, will it be saved in Kommo?
Yes, such calls will be saved in Kommo.
- If I make a call from my softphone instead of the Kommo interface, will it be saved in Kommo?
Yes, such calls will be saved in Kommo.
- Calls from Kommo are not working / the handset icon is missing in the bottom left corner. What should I do?
- Try refreshing the Kommo page.
- Try restarting the browser completely.
- Make sure that calls in Kommo are enabled (the checkbox is ticked) in the Cloud PBX widget settings (within the Kommo interface).
- Make sure that users are correctly matched in the Kommo integration settings (within the Cloud PBX interface). If a CRM user is not matched to a Cloud PBX user, they will not be able to make calls from Kommo.
- Calls from Kommo work only in Google Chrome and Mozilla Firefox. If you use Firefox, we recommend testing calls in Chrome.
If you have done all the above but calls still do not work, send a request to our support with a detailed description of the issue. If the handset icon appears in the bottom left corner but calls cannot be made, specify the time when you tried to make the call and the number you dialed. Also, please attach a screenshot of the technical information from your browser. It’s easy to do by following these instructions:
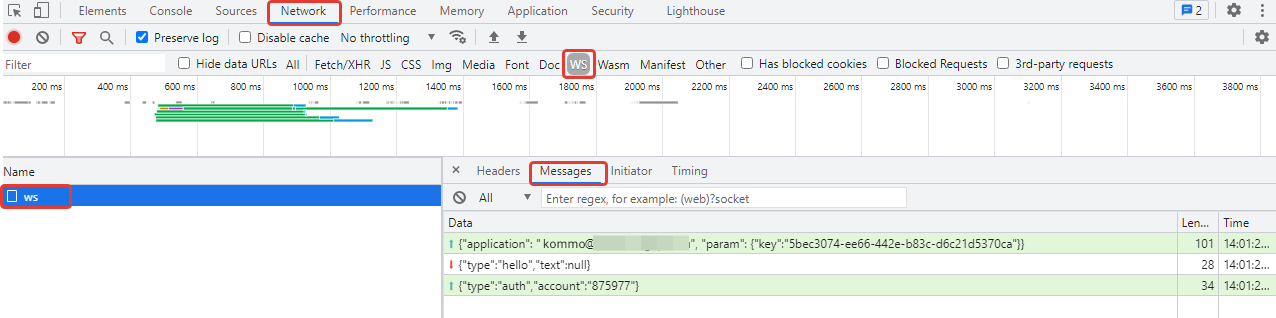
- Open the developer console (F12 or Menu → More tools → Developer tools).
- Go to the Network tab.
- Then WS.
- Go to the Frames tab.
- Take a shot of the appearing screen and send it. It looks like this: