Cloud PBX and Kommo Integration Guide
Please note
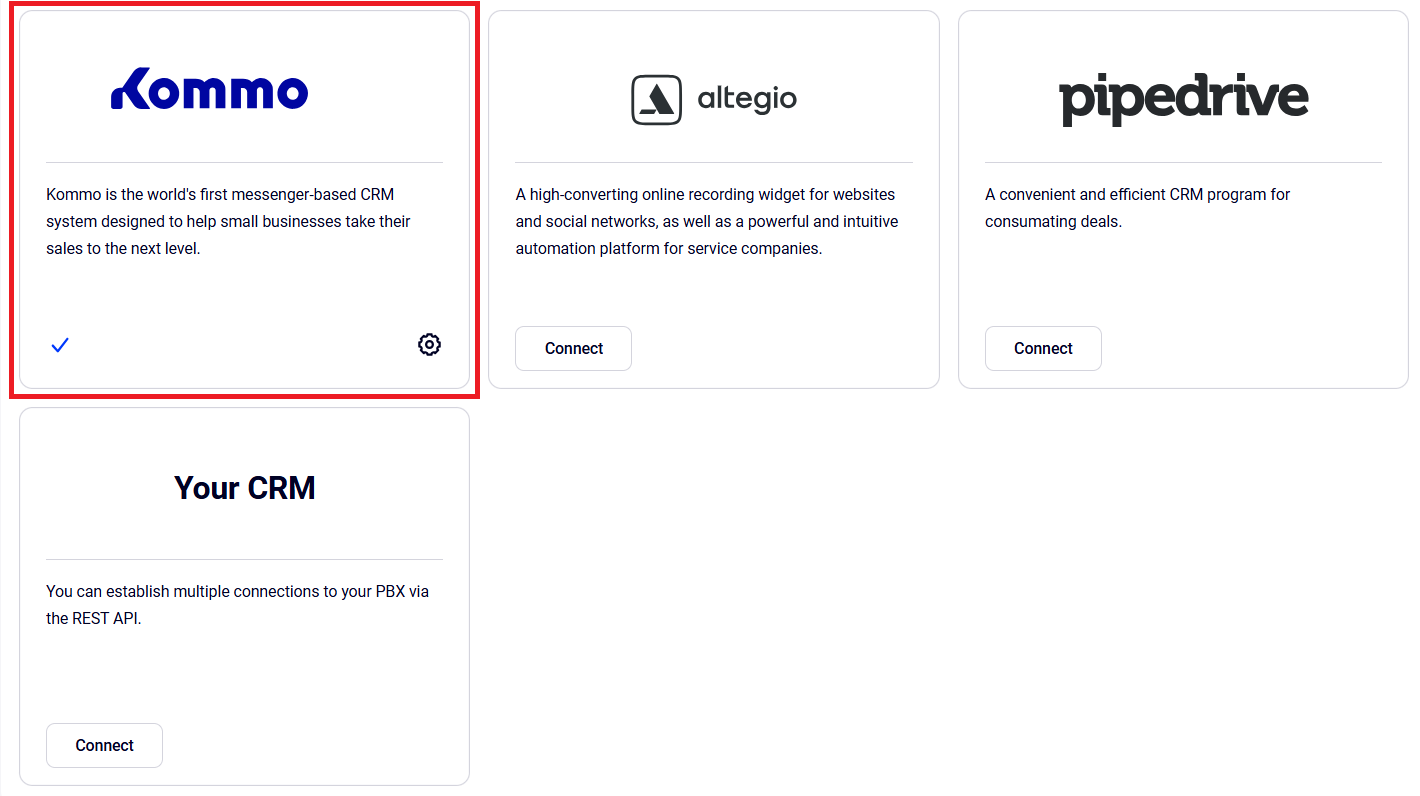
Integration can only be set up by users with administrator rights in both systems.1. In your Cloud PBX, go to the CRM Integration menu. Find the Kommo widget and click it.
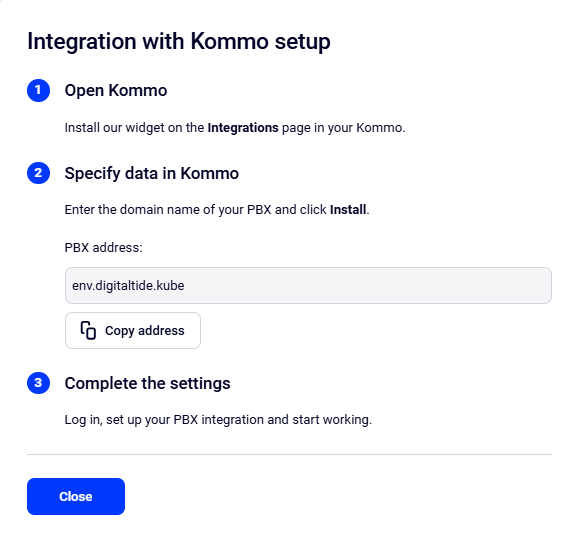
In the window that opens, copy your Cloud PBX domain name.
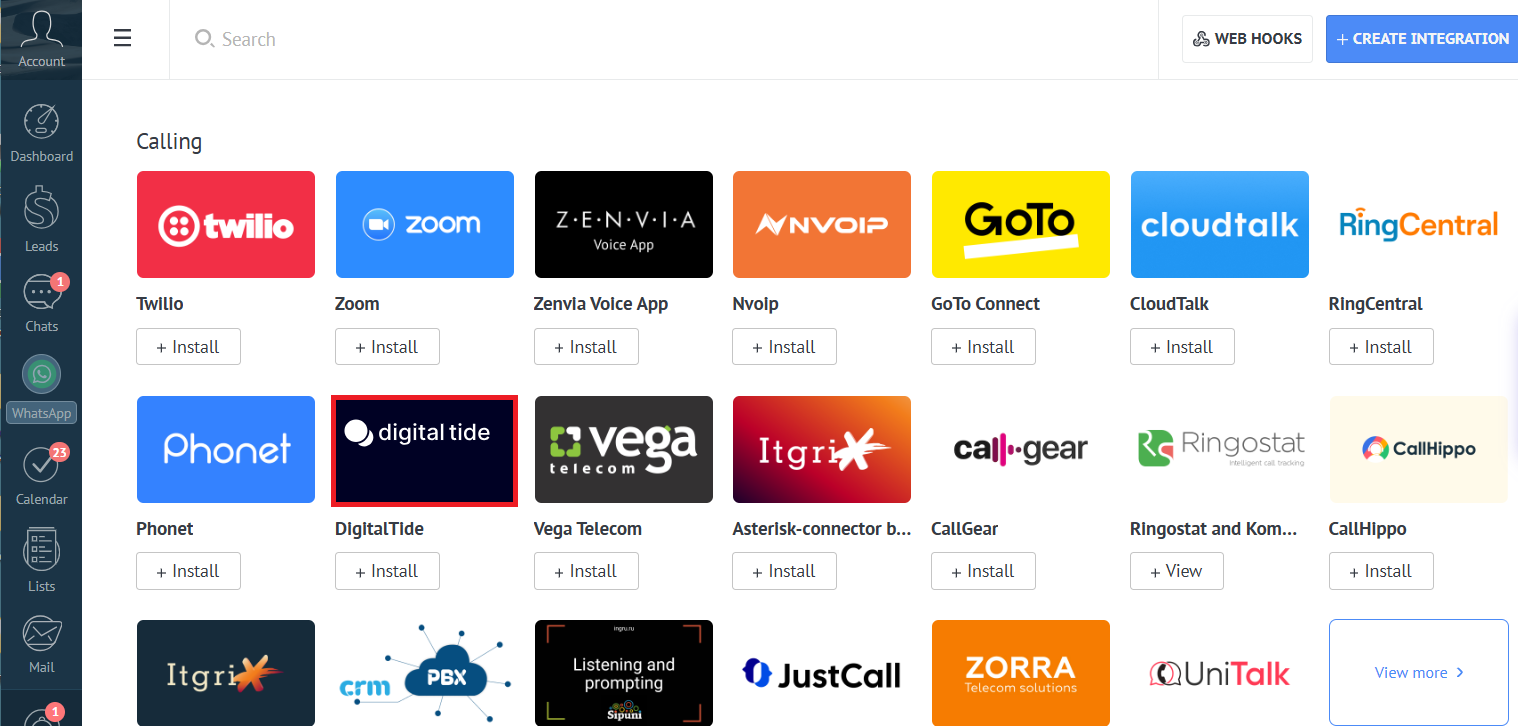
2. In your Kommo interface, go to Settings — Integration — Calling. In the list of available integrations, find the widget of the required operator or enter the operator’s name in the search field. Click Install.
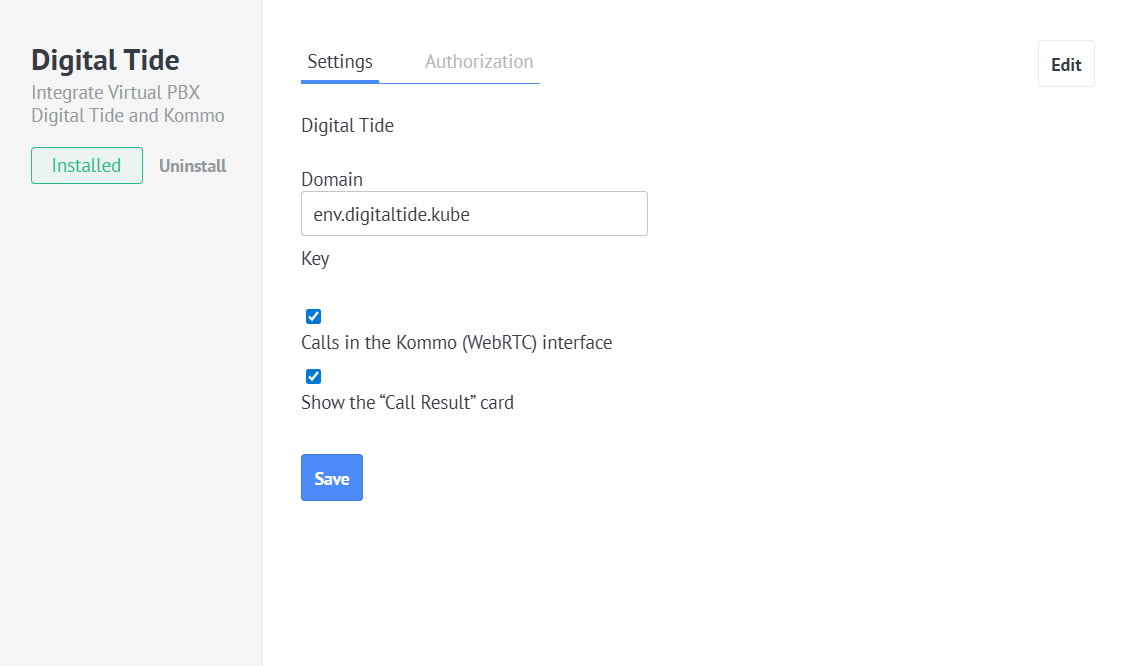
3. In the window that opens, paste your Cloud PBX address. If you want to make calls directly in the Kommo interface, try the WebRTC feature (check the box). Click Save.
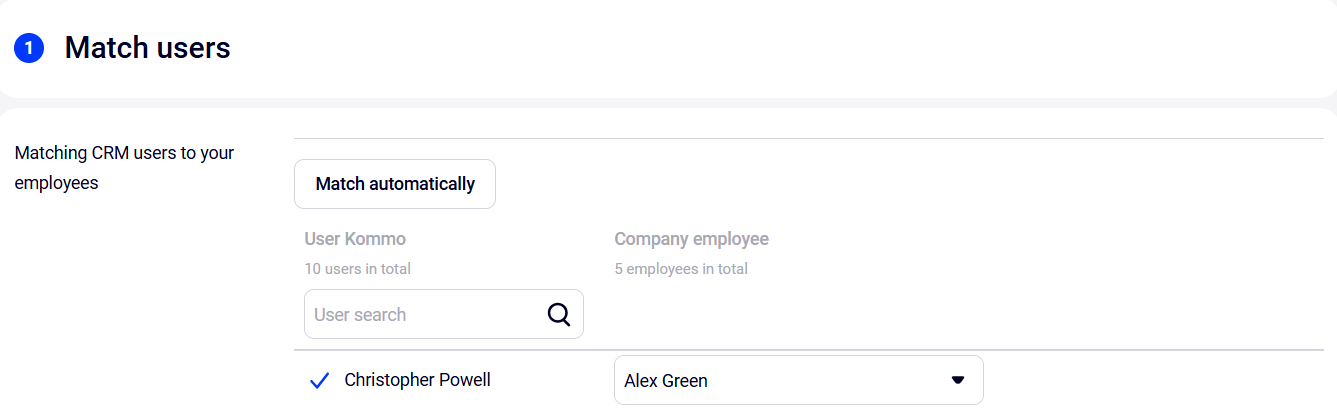
4. In the next step, match all Cloud PBX users with Kommo users and click Apply.
This is necessary so the systems can accurately identify employees and correctly log events associated with them. Only matched users’ calls will be recorded in Kommo. If you add new employees later, don’t forget to make the matching in the integration settings of your Cloud PBX account.
5. Set up Kommo and PBX integration scenarios (rules). Some integration scenarios are connected automatically and can’t be edited. To receive calls in Kommo through the built‑in widget, enable the appropriate setting. For more details about calling via the Kommo widget, please see this article.

In the window that opens, you can configure when the call result card appears — select the call duration for which the card should be displayed.
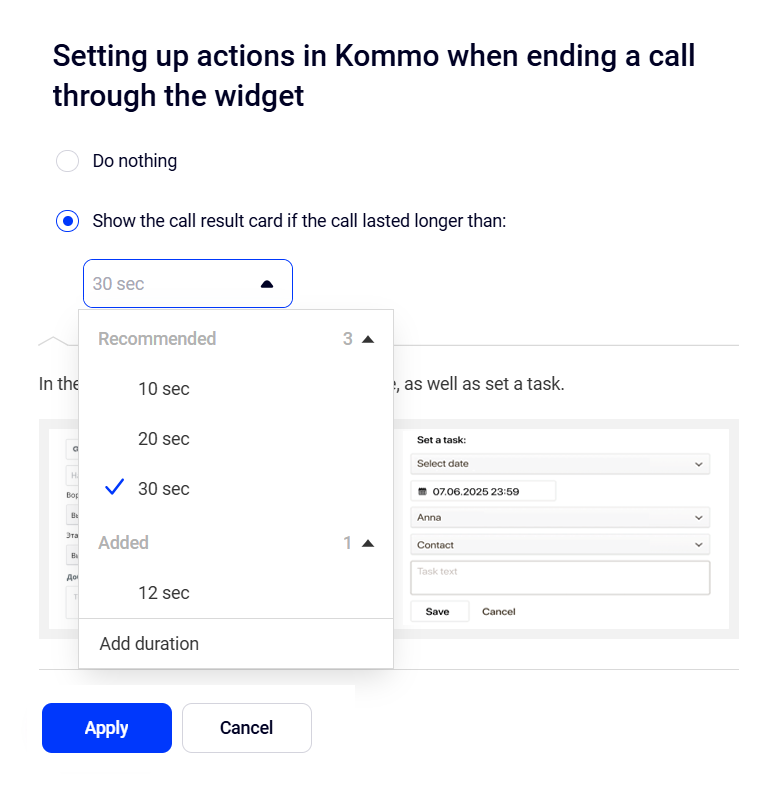
More details about the call result card.
Click Apply.
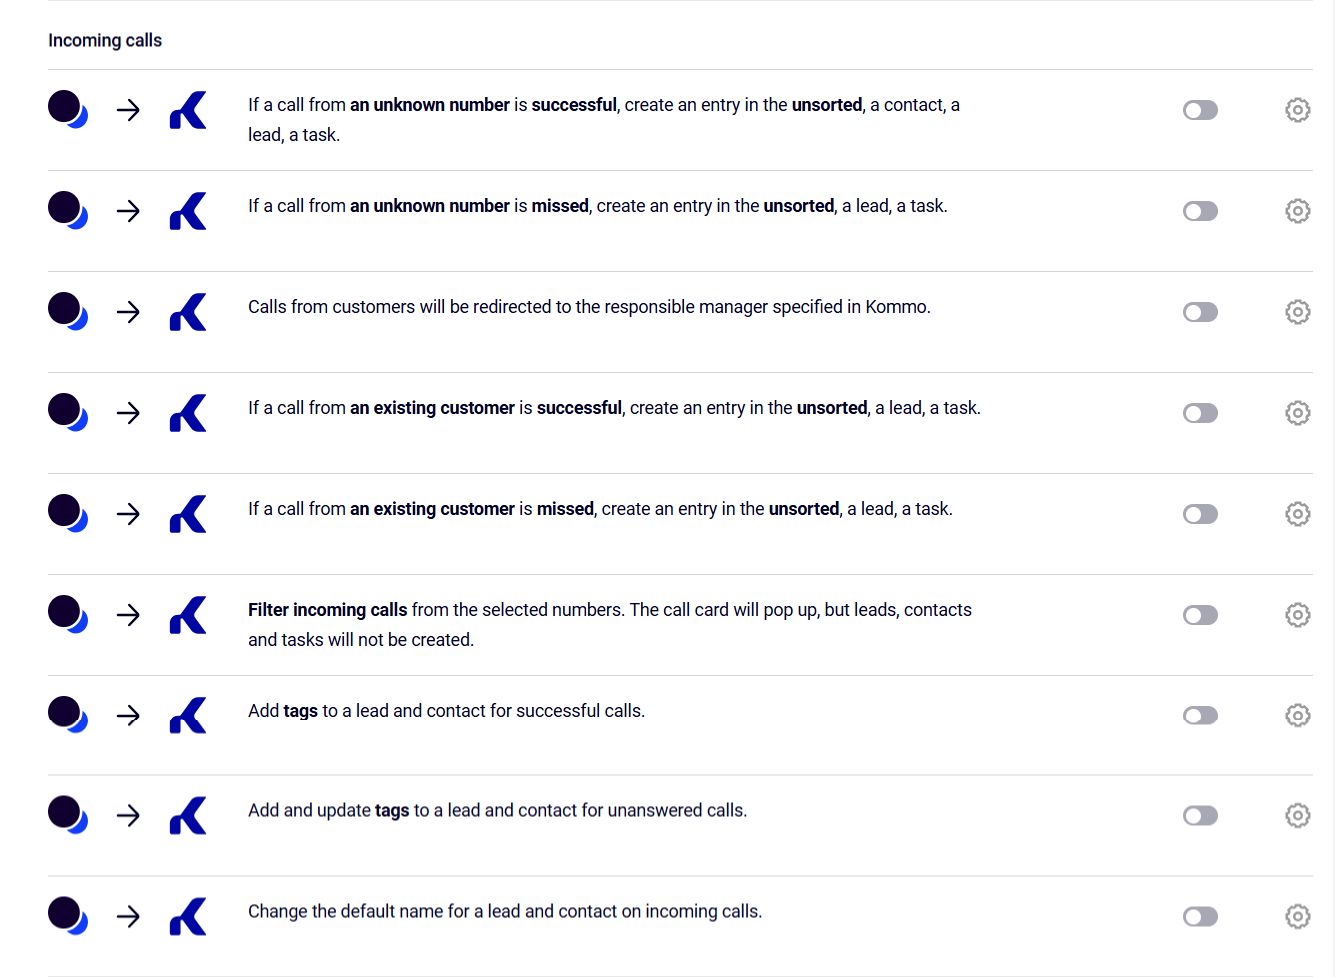
6. Scenarios give you flexibility to configure the integration to match your current business needs.
You can configure integration scenarios separately for incoming calls
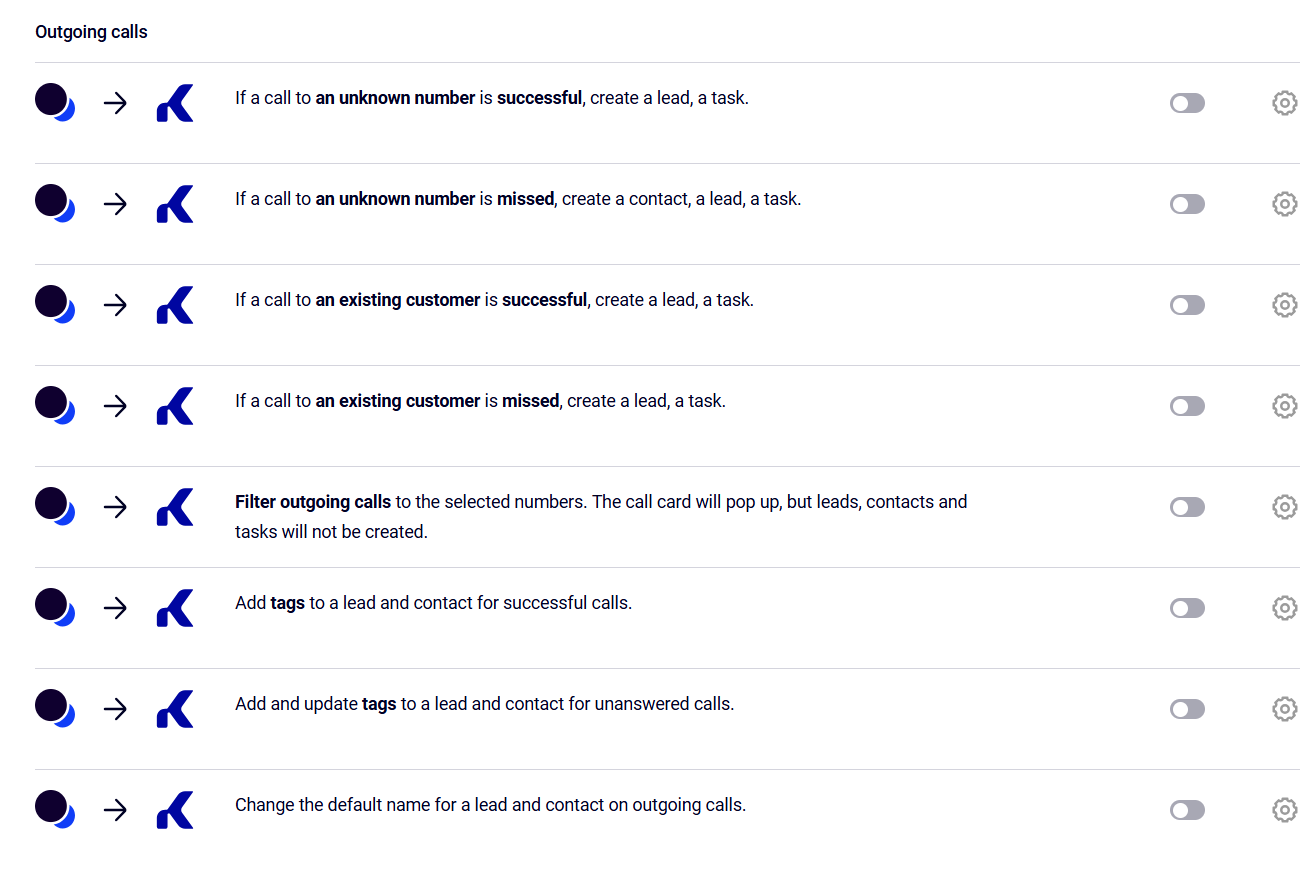
And for outgoing calls
7. Next, let’s go over the scenario configuration logic.
You can enable creating a contact, an entry in the unsorted, a lead, or a task separately for successful and missed:
- incoming calls from an unknown number;
- incoming calls from an existing customer;
- outgoing calls to an unknown number;
- outgoing calls to an existing customer.
Each call type can have its own integration rules.
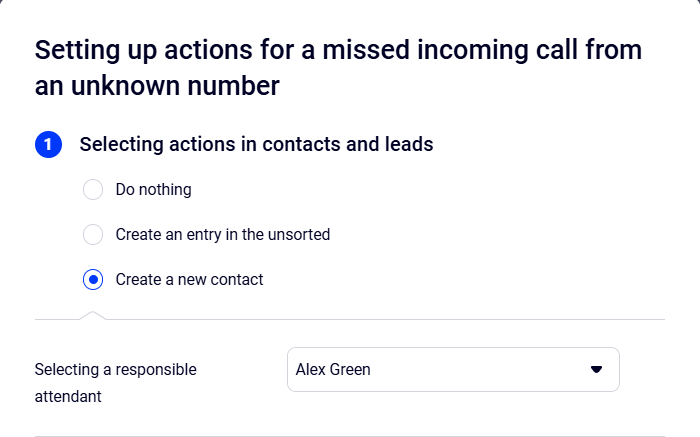
Creating Contacts
For incoming calls from unknown numbers, contacts can be created automatically in Kommo. To process missed calls from unknown numbers, you can also assign an attendant in the integration scenario settings to be responsible for calling these numbers back.
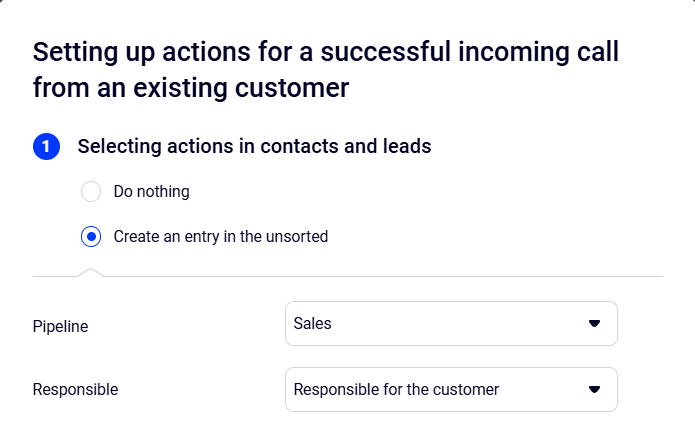
Creating Entries in the Unsorted and Leads
The example below shows how these entities are created for incoming calls from existing customers.
In the Unsorted entry settings, you can select the pipeline and the responsible person: either the employee who answered the call or the one responsible for the customer.
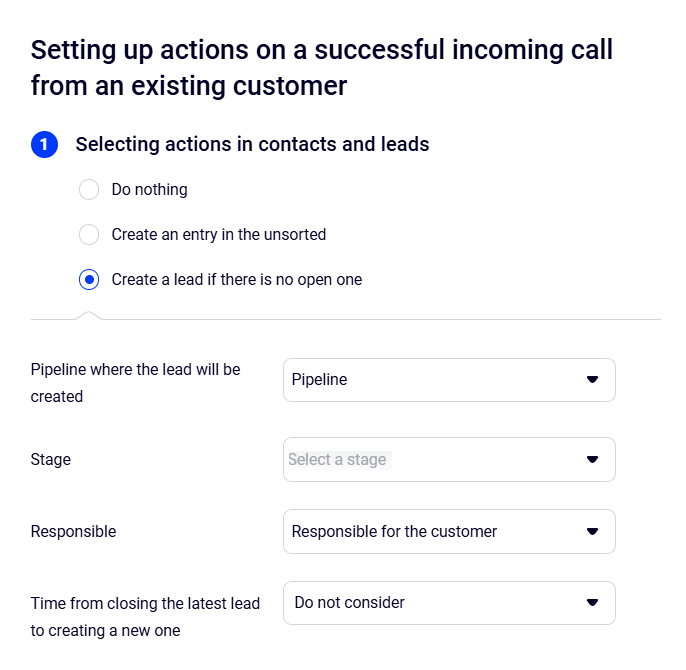
When creating a lead, you can choose:
- The pipelines where Cloud PBX will check for existing open leads with the calling customer to prevent duplicates.
- The pipeline and stage where the new lead will be created.
- The responsible person: the employee who answered the call or the one responsible for the customer.
- The waiting period after a deal is closed — if the customer calls during this period, a new lead will not be created in the CRM. More details about preventing duplicate deals.
Other Settings
In the scenario settings for incoming and outgoing calls, you can also:
- set up tagging for successful and missed calls, which will be used in smart routing. Tags capture key call details in lead and contact cards. See more details about tag setup and smart routing.
- edit name templates for lead, contact, and task cards. See more details about template setup.
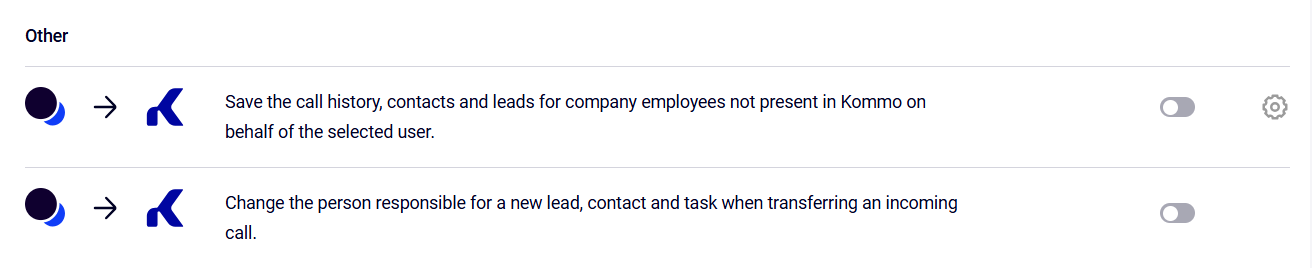
Also, you can configure additional scenarios:
- when transferring a call, you can change the person responsible for a contact, deal, or task to the one who was the last to speak with the customer);
- the call history of your employees who are not in Kommo will be saved under a selected user. This option can be used if not all managers are matched or if you have employees who do not work in Kommo but may call customers. For example, a courier does not need a Kommo account but they are still involved in the sales process and may call the client. To track this stage, select the user under whose name the call history and recordings will be saved in Kommo.
Hiding Customer Phone Numbers
Kommo can hide customers’ real phone numbers from employees. You can configure hiding from specific managers and departments, or from all employees. Real phone numbers will be masked with “*”. Only departments, roles, or employees included in the trusted list will be able to see the numbers. This helps protect your contact database from data leaks.
Once configured, employees not on the exception list will no longer see full phone numbers in contact cards, leads, or the call history. At the same time, calling functionality remains unchanged — they can still make calls with a single click on the Call button.
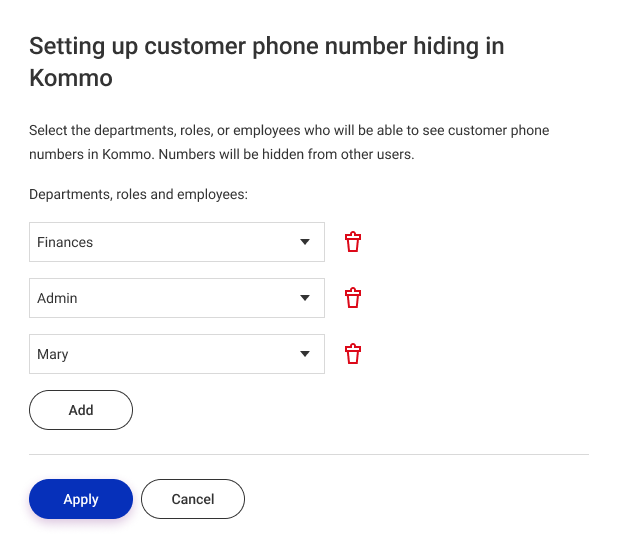
You can configure number hiding in the Settings tab — CRM Integration — Kommo — For all scenarios. Find the setting Customer phone numbers are not visible to employees within Kommo and enable it.

In the window that opens, select the departments, roles, or employees who should be able to see customer phone numbers. If none are selected, leave the fields empty — numbers will be masked for all users.
Please note
To activate the changed scenario settings, don’t forget to click the Save button at the bottom of the screen.Once you have set up all required scenarios, start using the Kommo and Cloud PBX integration.
See also
- How to change the list of numbers in integration scenarios, to set up scenarios for selected numbers that differ from the main scenario.