Provisioning
If your company has hundreds of SIP phones, manually setting them up for calls in Cloud PBX can take several days or even weeks. With provisioning, all devices are set up automatically in just a few minutes, without errors or extra steps.
Please note
To enable provisioning, please contact technical support.How to Set Up Provisioning
1. Create Employee Accounts in Cloud PBX
To add dozens of people at once, you can upload a spreadsheet with their information — please see the Adding Employees article for details.
2. Link SIP Phones to Employee Accounts
You can do this manually for each phone or upload a spreadsheet with MAC addresses of the phones and employee logins.
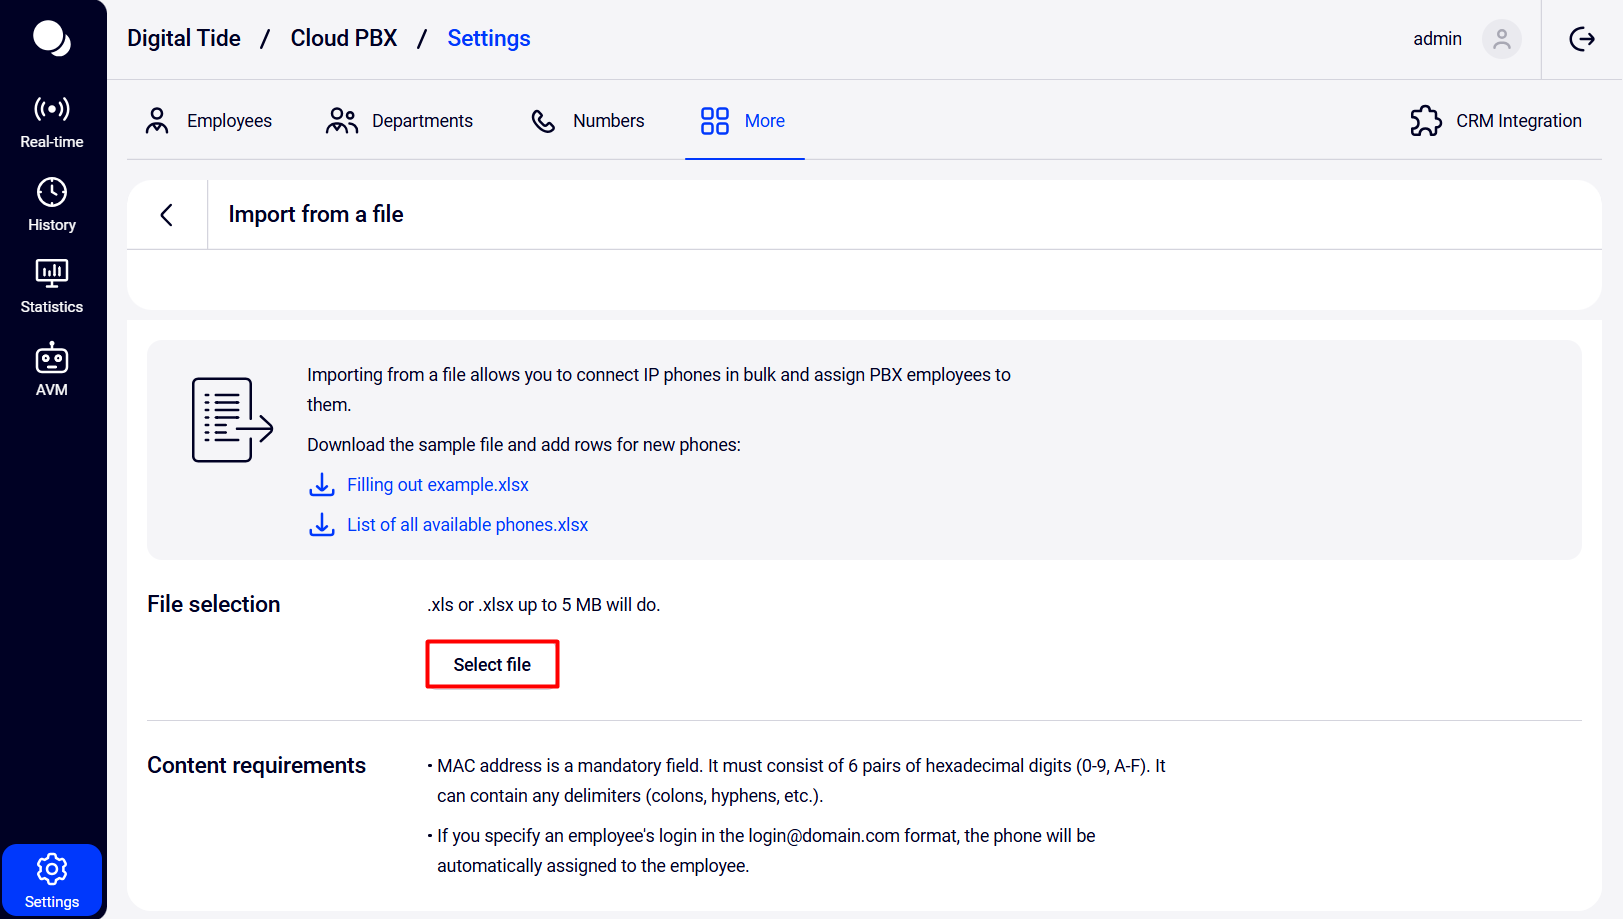
To upload a spreadsheet, go to the Provisioning section, click the three dots → Import from file.
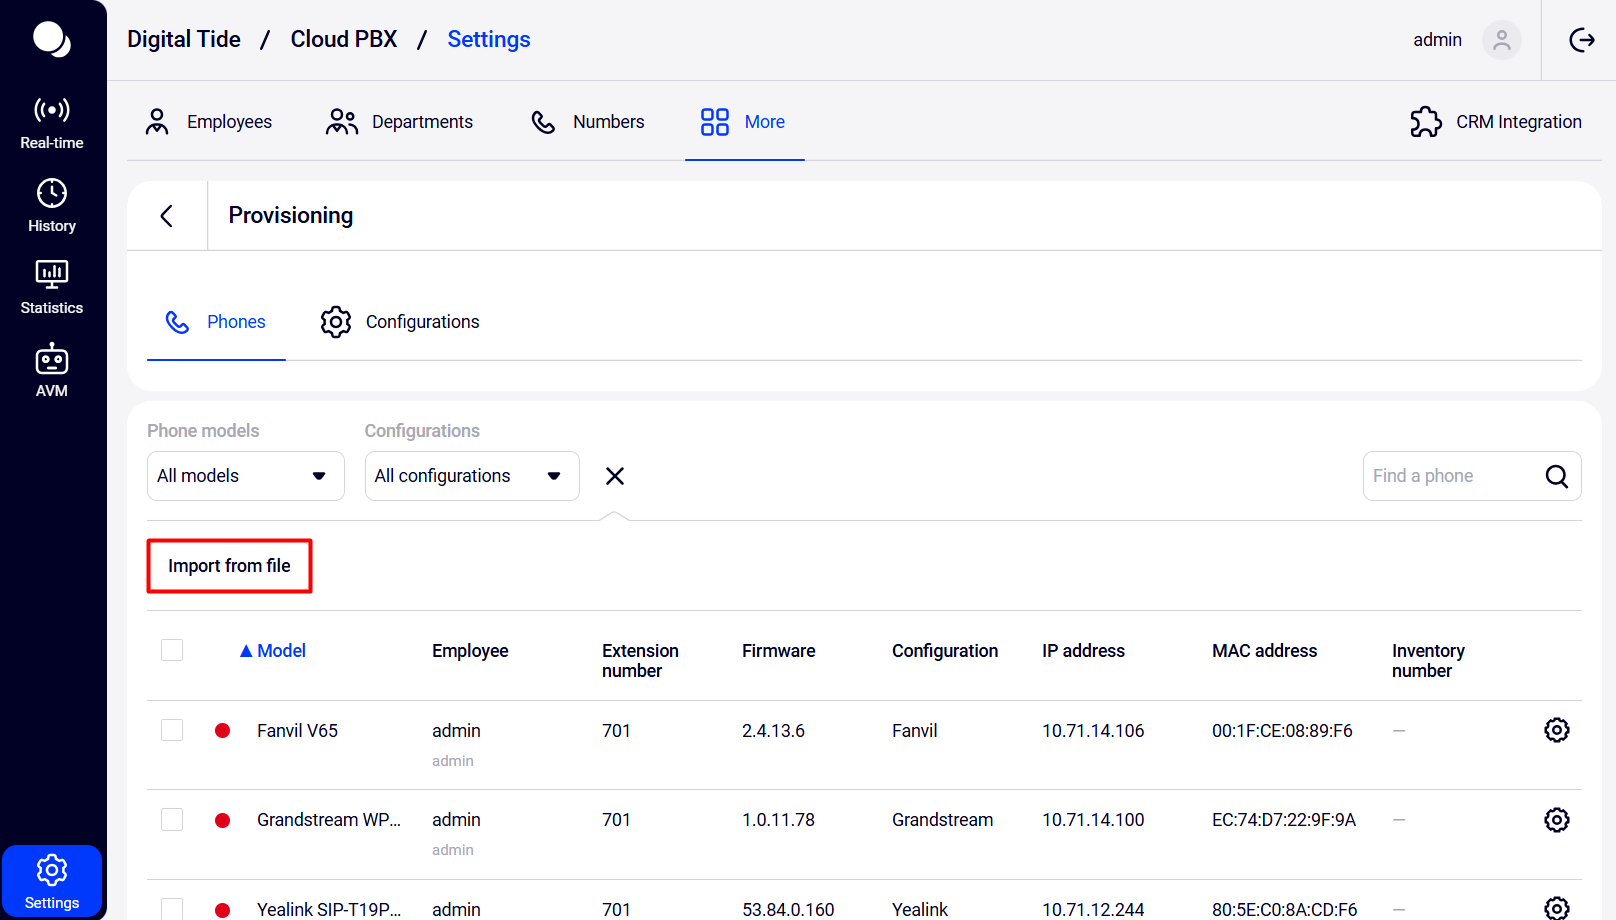
Download the spreadsheet template, fill it out according to the requirements, and upload it to Cloud PBX.
3. Make Sure DHCP Is Working
Phones usually receive an IP address and network information via DHCP, which must be enabled on your router or DHCP server.
Make sure that:
- DHCP server is enabled. The status is usually displayed as a separate line or toggle in the Network section or in LAN settings.
- There are free IP addresses in the pool. The status of free/used IPs is usually displayed in the DHCP Clients section — make sure the total number of connected devices does not exceed the pool limit.
- Phones receive an IP when connected to the network. This can be seen on the phone screen or in the DHCP client list.
4. Add Option 66 to DHCP Settings
This parameter specifies where the phone should request its configuration. In the option, specify the URL of the provisioning server:
https://{your Cloud PBX address}/provisioning
How to set it up:
- For MikroTik: go to IP → DHCP Server → Networks → DHCP Options.
- For Windows Server: DHCP Manager → Scope Options → 066 Boot Server Host Name.
- For other DHCP servers: look for Option 66, Boot Server, or TFTP/HTTP Server in your DHCP server settings and specify the required URL.
5. Connect the Phone to the Network
If everything is set correctly, the phone will:
- Receive an IP address.
- Read the server address from DHCP.
- Request the configuration from the server.
- Automatically set up itself for calls through Cloud PBX.
Please note
If the phone does not receive the configuration automatically, contact technical support. Prepare the following information:- Time when the phone was connected.
- Device MAC address (usually specified on its sticker).
- IP address the phone received (if any).
- Provisioning server address set in Option 66.
- Phone model and manufacturer.
- Photo of the SIP phone screen or a screenshot of the web interface.
Managing SIP Phones
There are two main sections in provisioning:
- Phones: for viewing and managing connected SIP phones, assigning them to employees, and configuring device settings.
- Configurations: for selecting and editing automatic setup templates for various phone models.
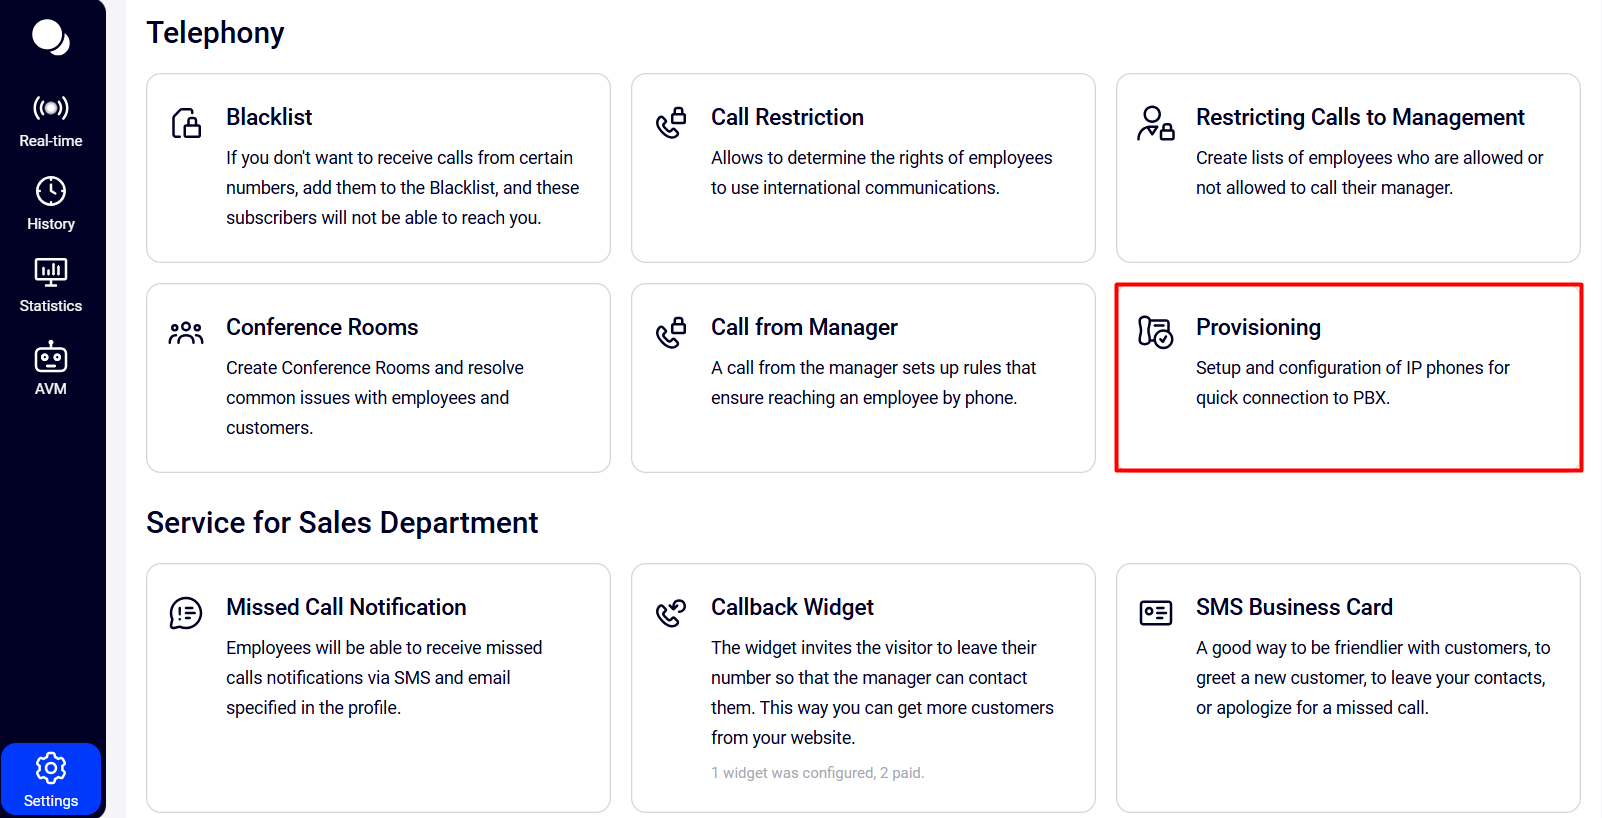
Go to the Provisioning section.
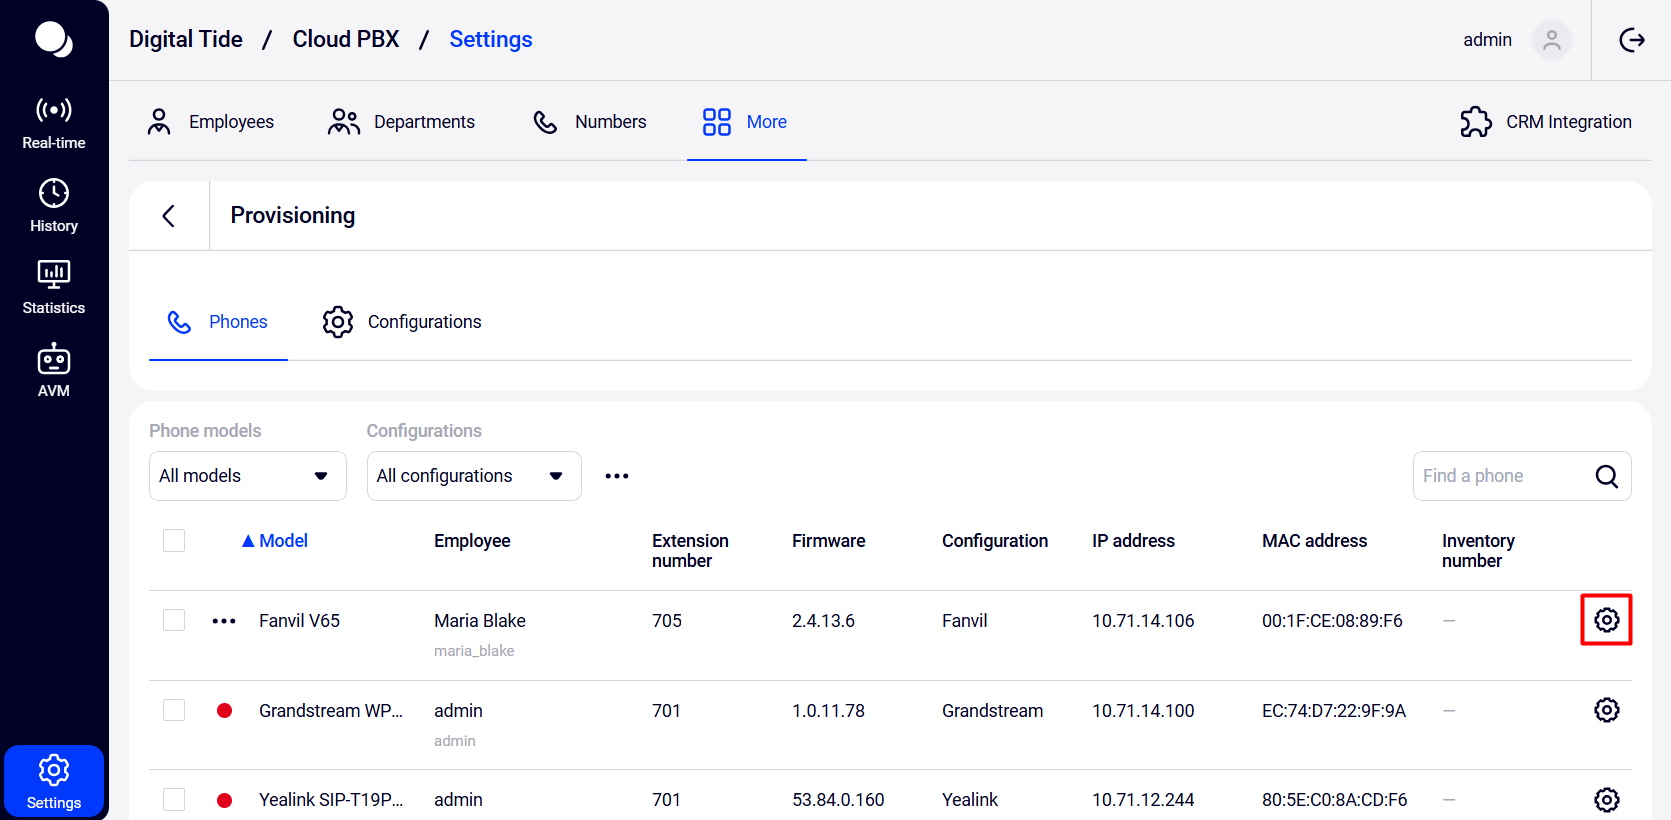
Phones Section
The summary table in this section lists all connected SIP phones and their technical details.
If a phone is not yet assigned to an employee, click Select an employee in the row of that SIP phone.
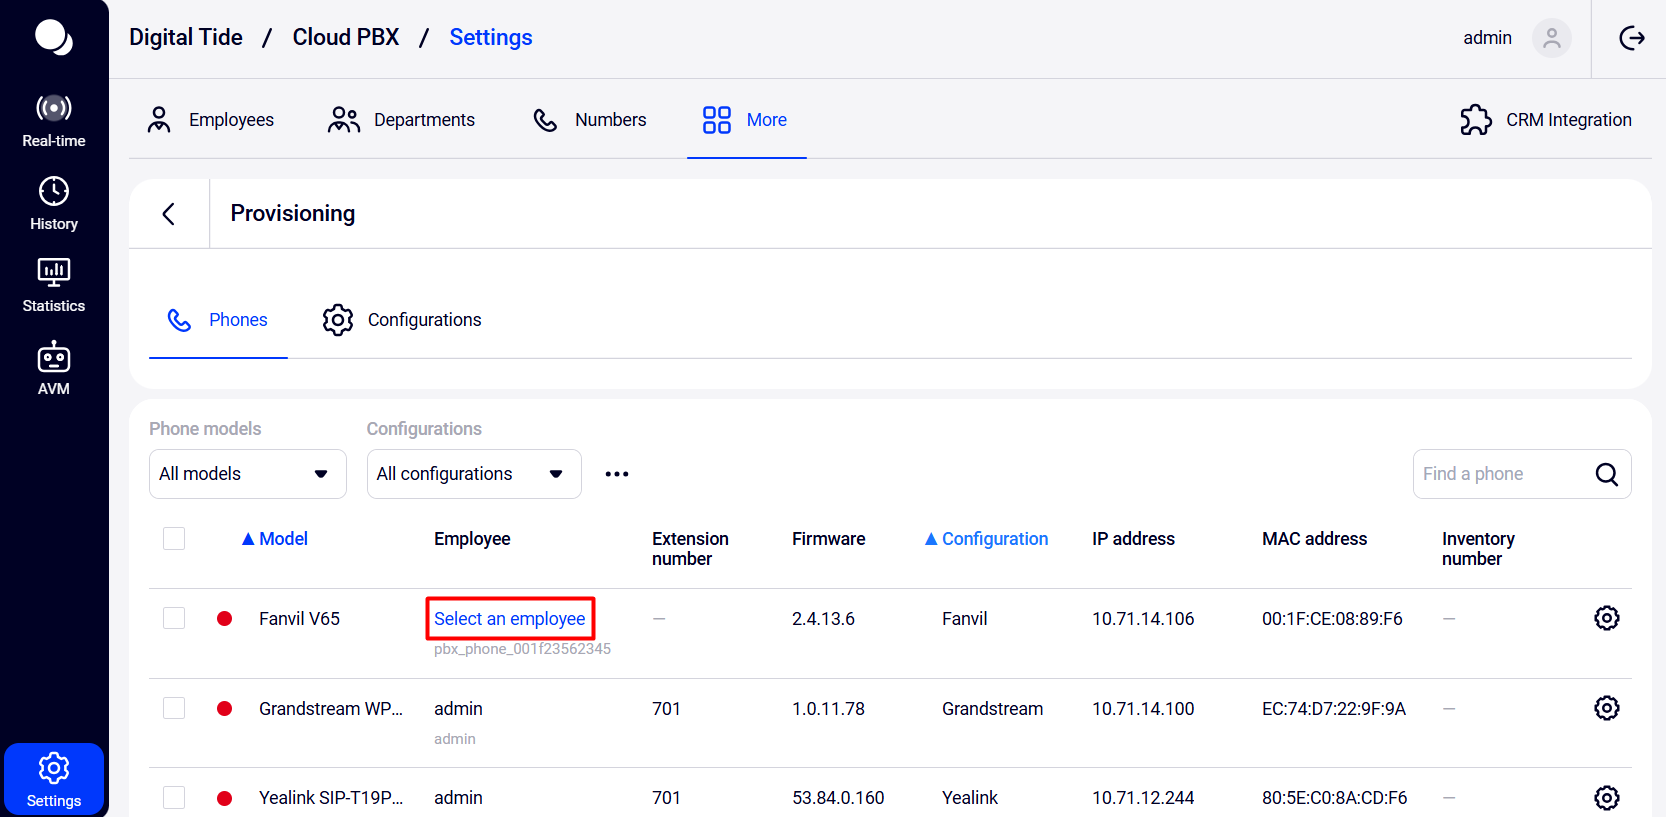
In the dropdown, select a Cloud PBX user.
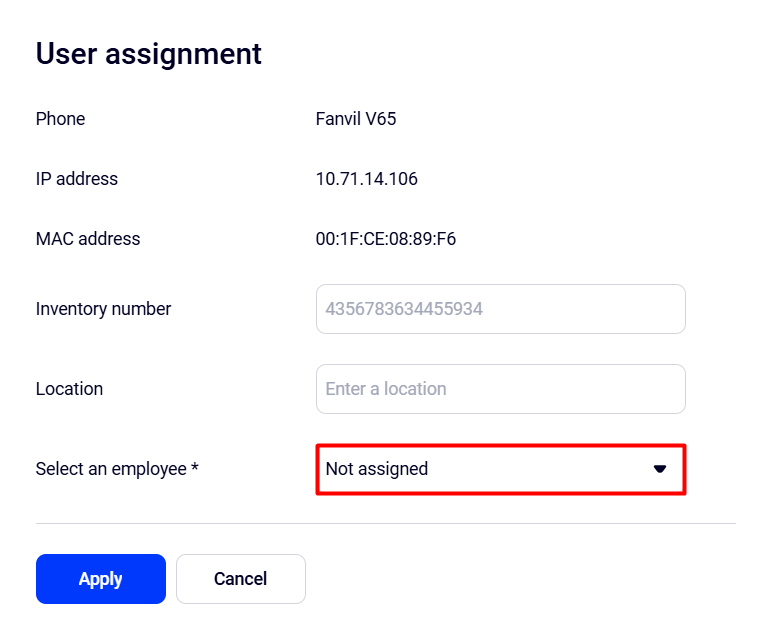
To view detailed technical information about a SIP phone or edit it, go to the phone settings.
There are several subsections:
- Account details. Here you can specify the phone name and inventory number.
- Usage. Here you can assign the phone to an employee and define its location.
- Configuration. In this section, you can change the configuration, update firmware, restart the phone, or view the password.
- Registrations. Here you can view registration data or delete a registration.
Configurations Section
This section contains a table with templates used for the automatic setup of SIP phones from different manufacturers.
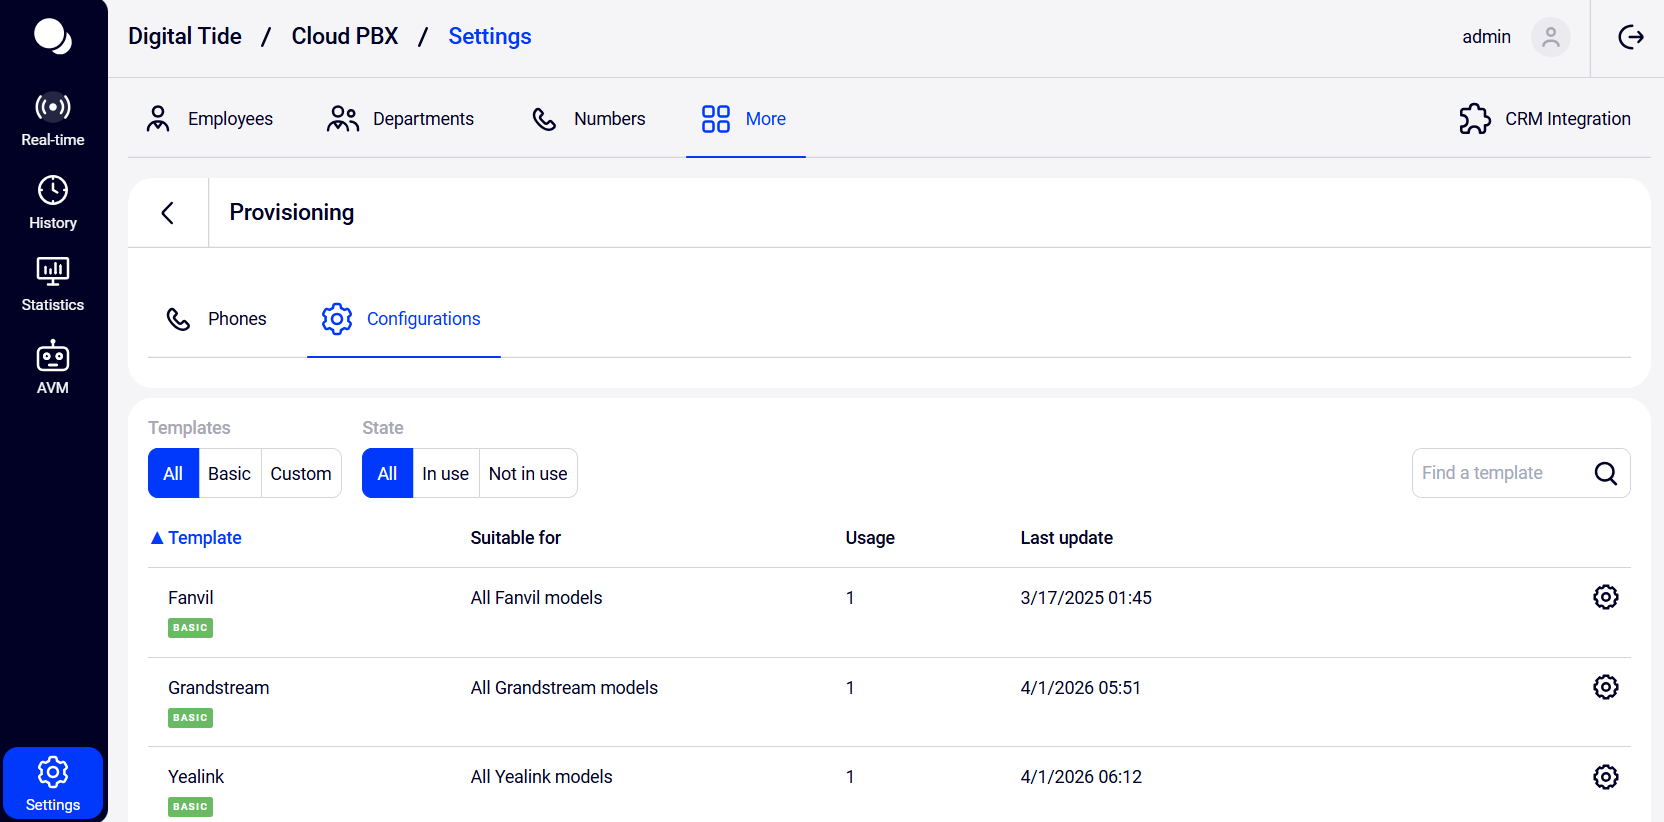
If the provisioning settings don’t include the parameters you need, you can manually add them by editing the configuration template.
Supported Phone Models
- Yealink: T19P E2, T21, T46G
- Fanvil: X5U, V67
- Grandstream: GXP1630, GRP2602W, WP825