How to Sync Customer Data with Bitrix24
To save employees from manually entering customer information into Bitrix24, Cloud PBX can automatically sync this data with the CRM. This helps save managers' time and reduce typos.
What Data Can Be Sent from Cloud PBX
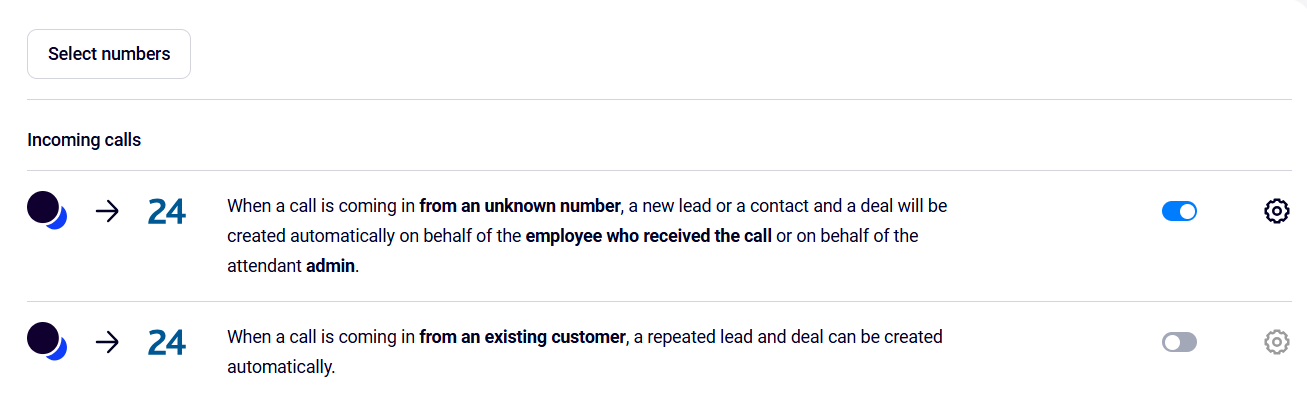
If automatic creation of leads, deals, and contacts is enabled, Cloud PBX is already sending data to Bitrix24: the customer’s phone number and the name of the responsible employee.
To make customer management even more efficient, you can also send the following info to Bitrix24:
- the Cloud PBX number that received the call;
- customer status — New Client or Repeat Lead;
- the name of the employee in the CRM who answered the incoming call;
- the department name that handled the incoming call;
- the Cloud PBX number name that received the call.
These data points help you:
- assign responsible employees and create tasks within the CRM;
- analyze department workload;
- filter leads, contacts, and deals by a single attribute (for example, by the department that handled communication with the customer).
If Bitrix24 is running in Classic CRM mode, the data is sent to the lead card. In Simple CRM mode, it is sent to the deal and contact cards.
To set up data syncing:
1. Add Bitrix24 fields for receiving external data.
2. Select in Cloud PBX what should be sent to those fields.
Now, let’s walk through each step using the lead card settings as an example. Configuration for deals and contacts works the same way.
1. Adding Fields in Bitrix24 to Sync Additional Data
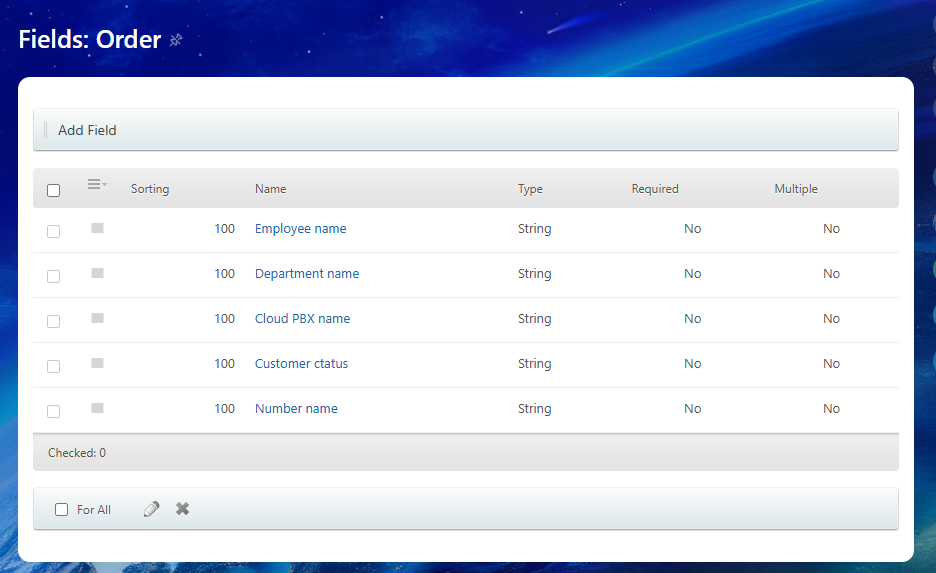
Cloud PBX can send five additional data types. A separate field must be created in Bitrix24 for each data type.
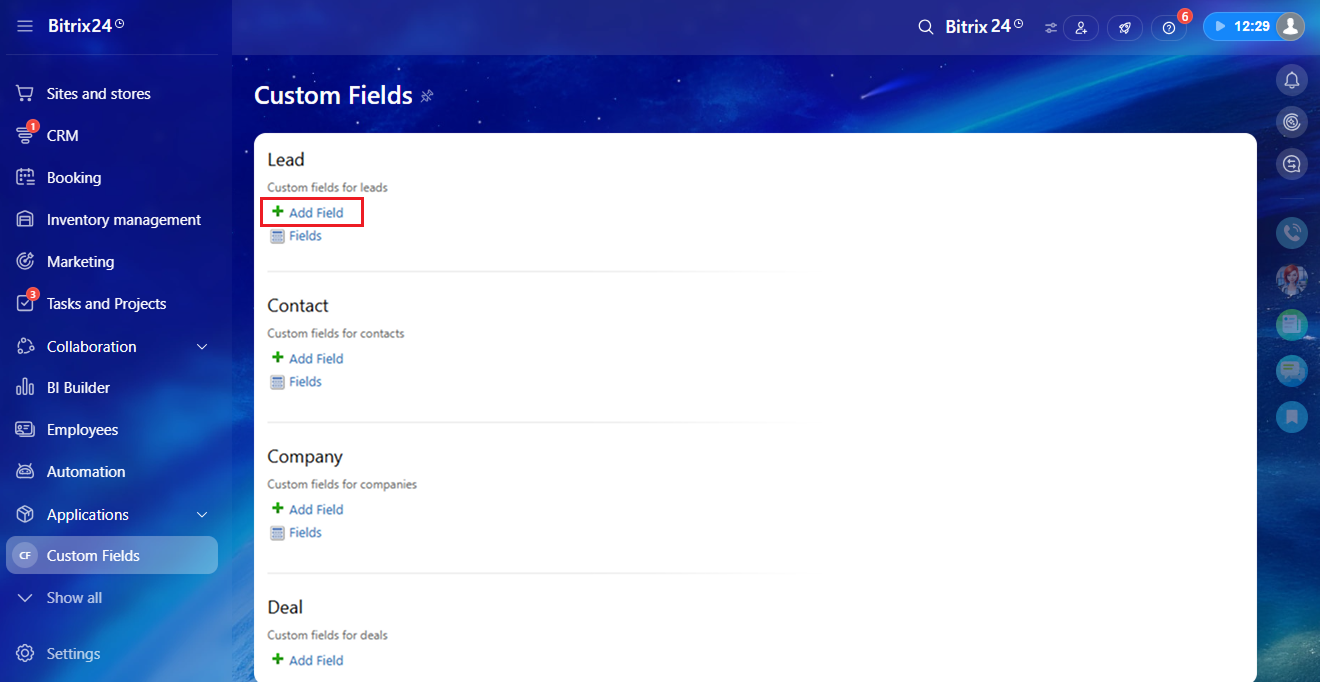
1. In Bitrix24, go to Custom Fields — Lead and click Add Field.
2. Enter a field name and select the String field type.
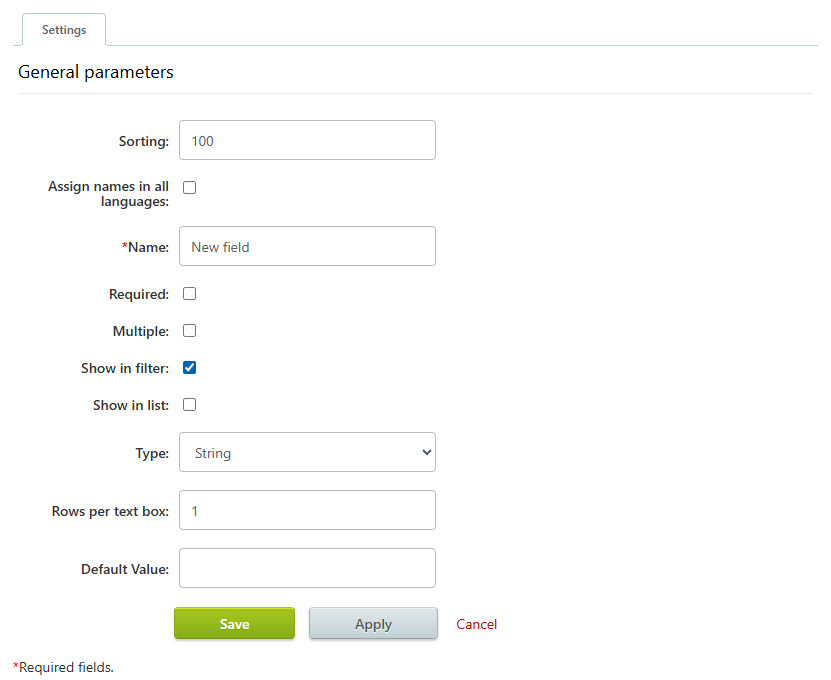
3. Click Save. The list of custom fields will update.
Repeat the same steps to add all the fields you need.
Please note
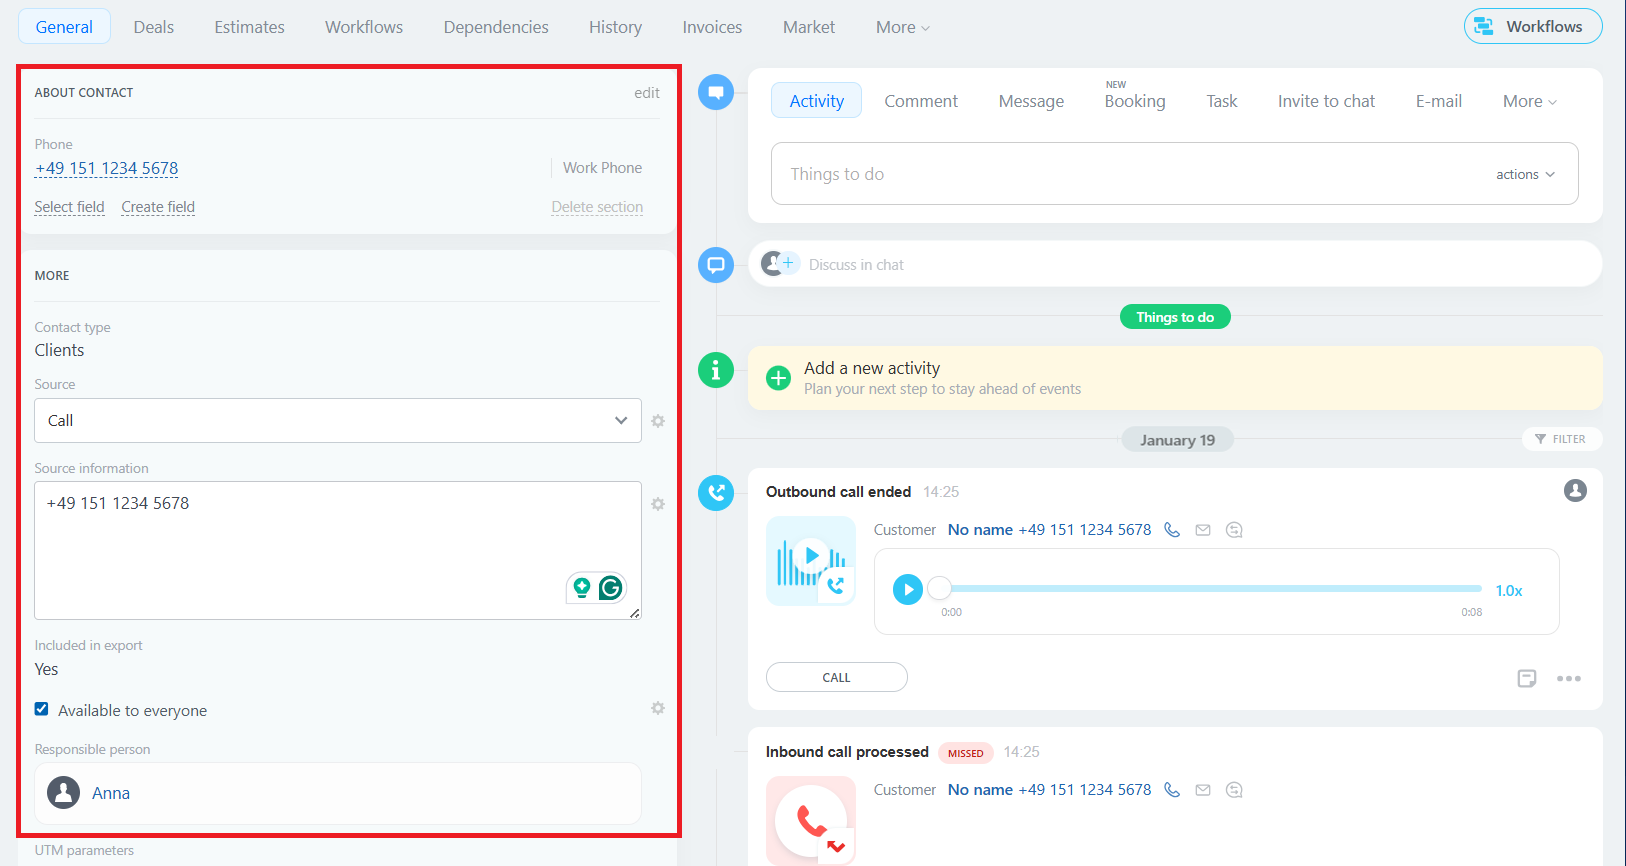
To display the new fields in the lead card:1. In the lead card, find the information section and click Select field.
2. In the window that opens, select the required fields and click Select.
2. Setup of Sending Additional Data from Cloud PBX
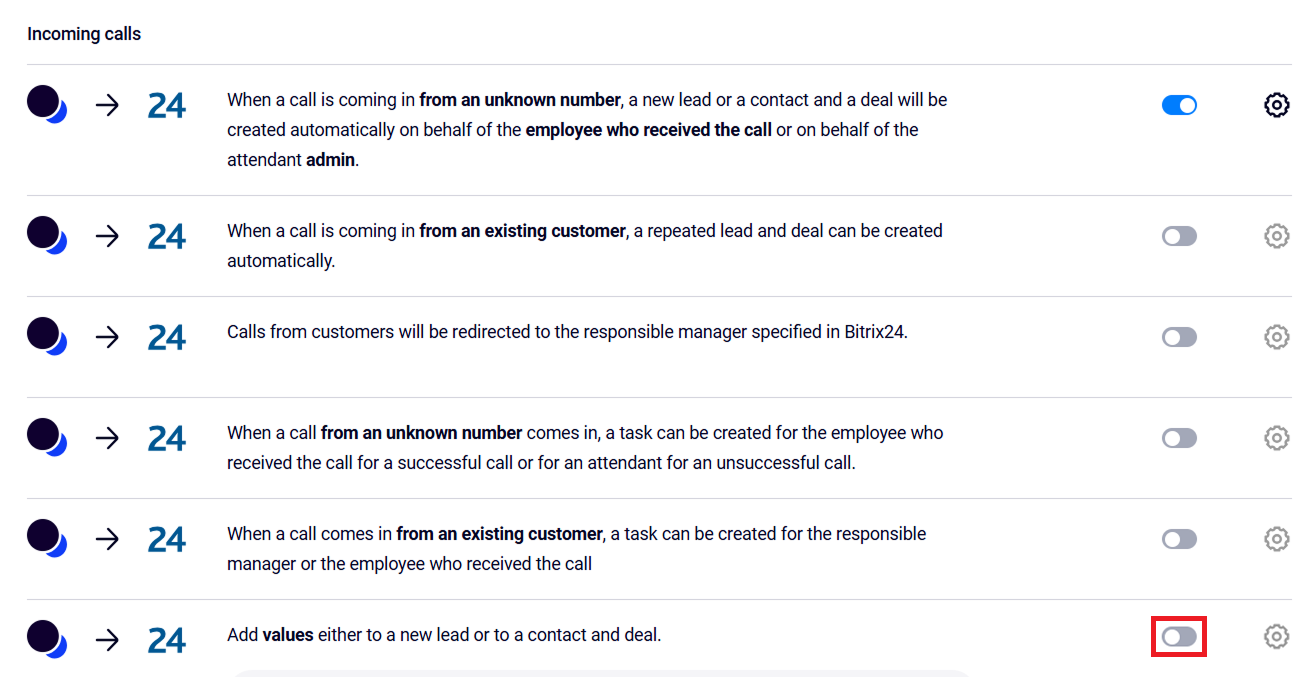
1. In the Cloud PBX interface, go to: Settings — CRM Integration — Integration with Bitrix24 — integration scenarios for incoming calls. Enable automatic creation of leads, contacts and deals in the Cloud PBX interface.
2. Enable the Add values either to a new lead or to a contact and deal option below.
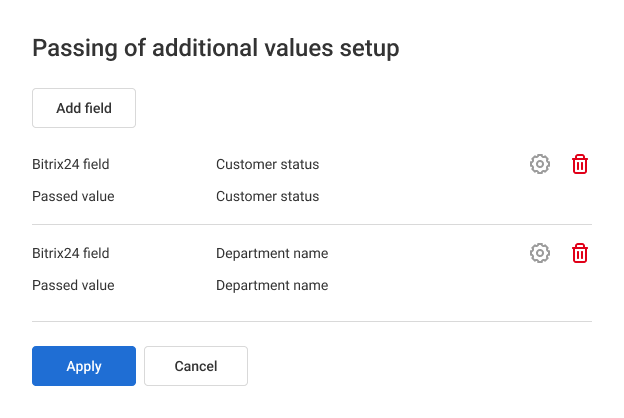
3. Click Add field.
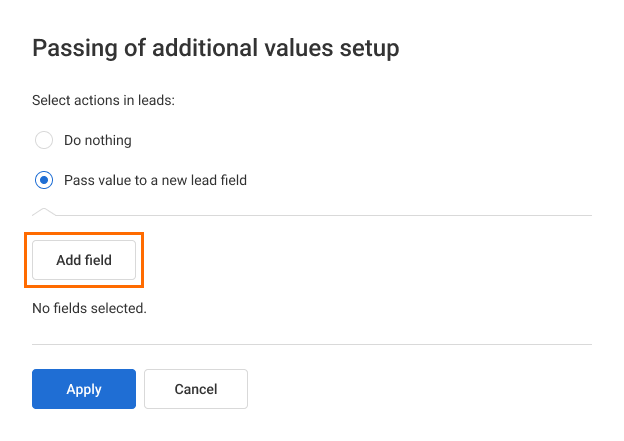
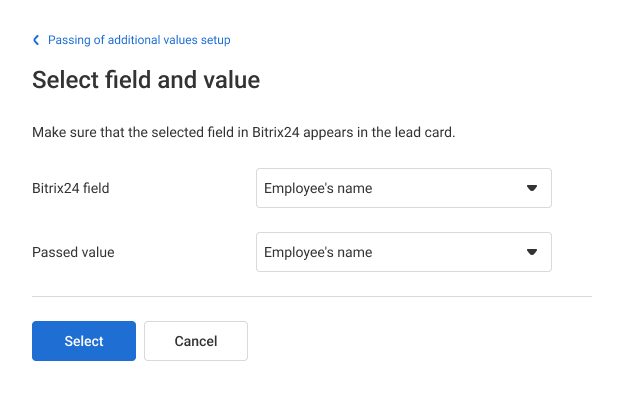
4. From the dropdown list, select the field in Bitrix24 and the data you want to send to it. Click Add.
Repeat these steps for each created field.
5. After mapping all custom fields with the data to be sent, click Apply.
5. Click Save at the bottom of the page.
Errors When Sending Additional Data
If one of the configured custom fields is deleted in Bitrix24, an error will appear in the Cloud PBX integration scenario list:

To resume data sync, add the field in Bitrix24 and remap it to the appropriate value in Cloud PBX.