Calls From Bitrix24 (WebRTC)
Cloud PBX and Bitrix24 Integration enables calling customers and receiving incoming calls directly in your browser. No additional software is required: you can work within the familiar Bitrix24 interface.
Why It Matters
- Save up to 10% of your workday: no switching between tabs or apps. Calls, customer cards, and deals all remain in one workspace.
- Start conversations faster: no searching for phone numbers across systems. All key details are already in the contact card or on the Kanban board.
- Use any computer: even one without a softphone installed.
What You Need to Get Started
- A headset connected to your computer.
- A browser with WebRTC support: Google Chrome (recommended), Mozilla Firefox, Opera, Microsoft Edge Browser, Safari.
Please note
- Use the latest browser version.
- On your first call, check the browser's permission to use the microphone.
- In Safari and Firefox, you need to grant microphone permission every time you open Bitrix24.
How to Enable Browser Calls
1. Review your Cloud PBX and Bitrix24 integration settings.
2. After updating or configuring the integration, open Cloud PBX interface and enable the widget call scenario. The WebRTC feature will turn on automatically.
How to Manage Calls in Bitrix24
In Bitrix24, you can take incoming calls and make outgoing calls, transfer conversations to colleagues, and choose an outgoing number. Let’s take a closer look at each option below.
Handle Incoming Calls
When a call comes in, the customer card with key information appears, and you can answer the call immediately.
If you miss a call, it is automatically logged in both Bitrix24 and the Cloud PBX so that a manager can call the customer back later.
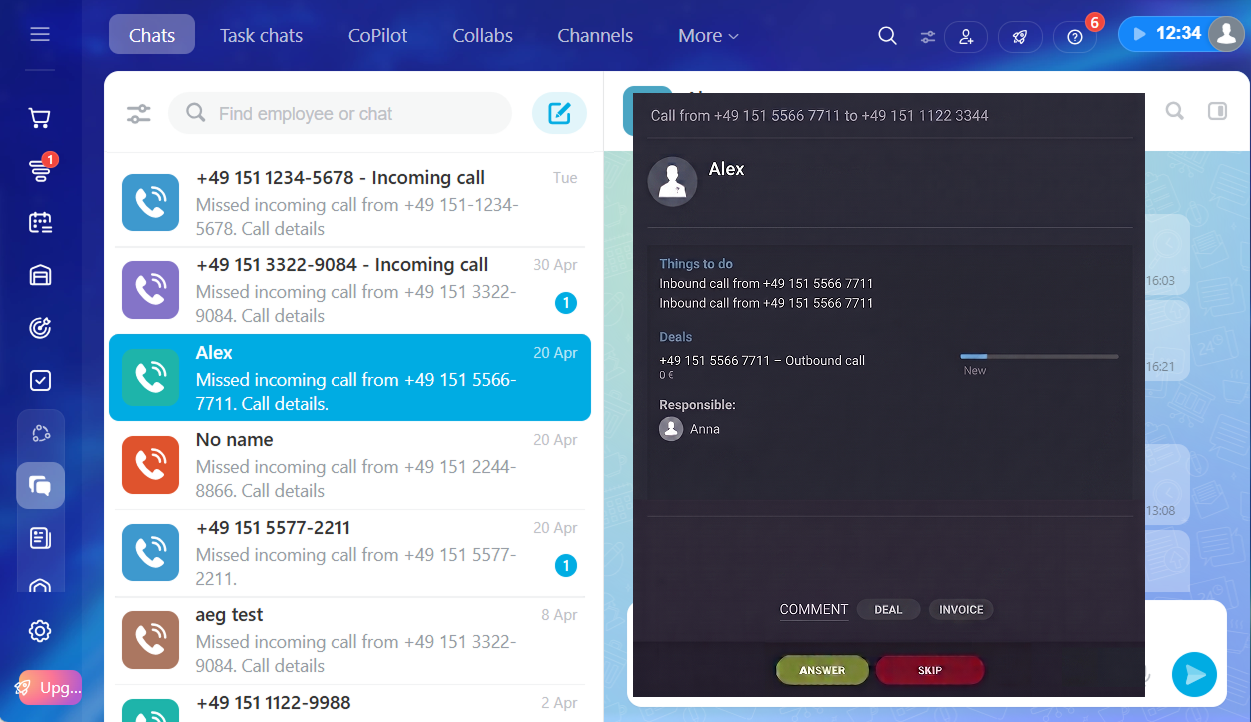
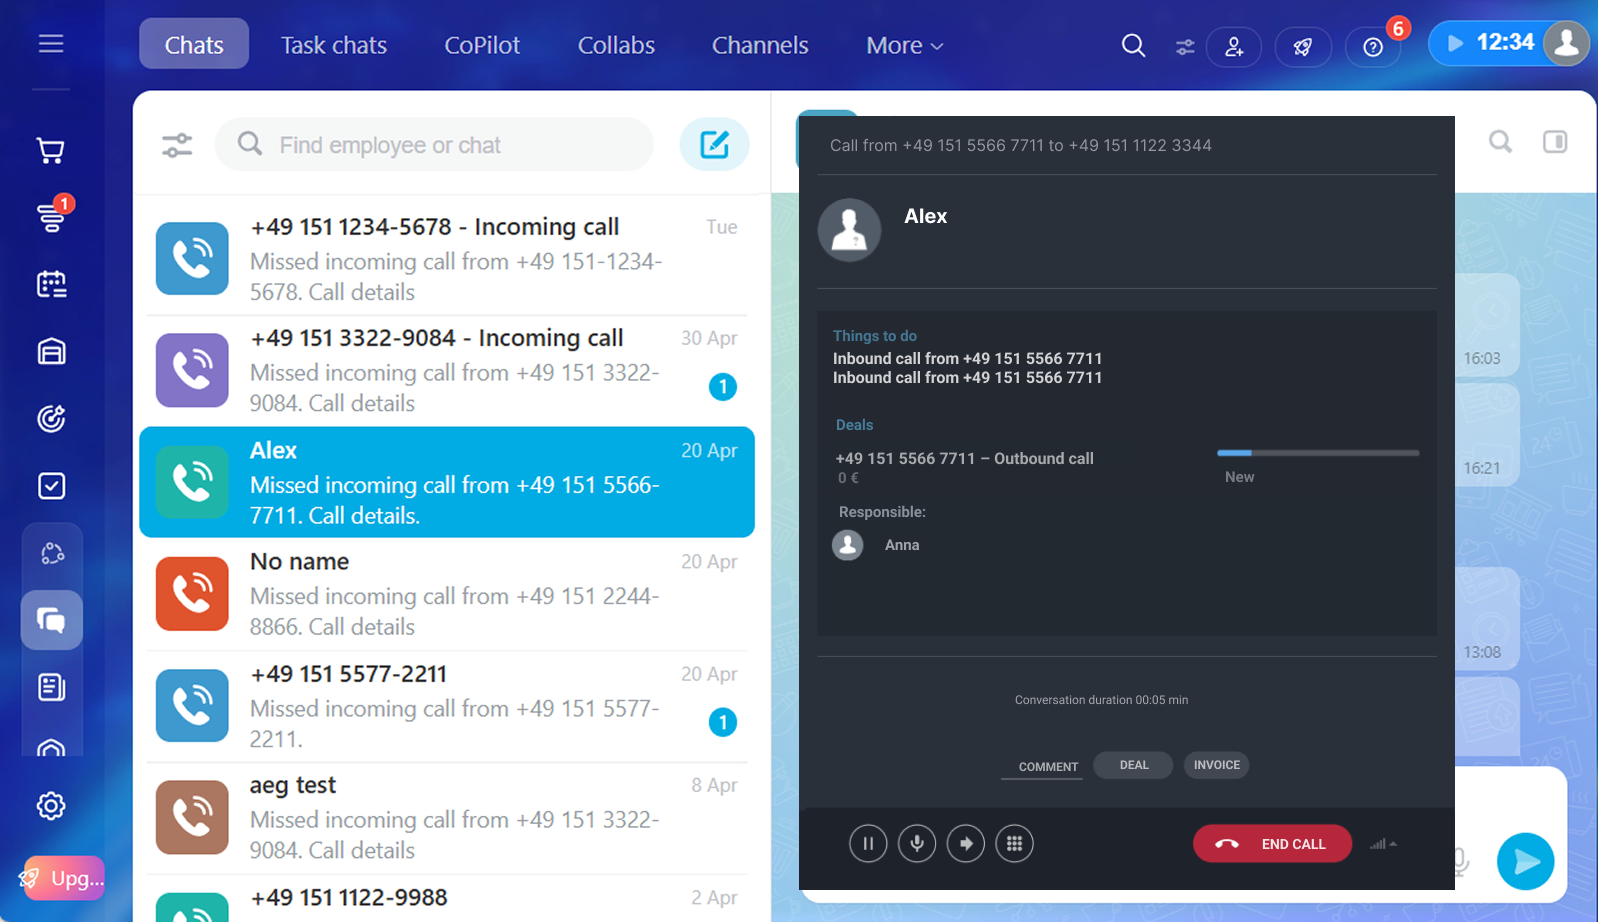
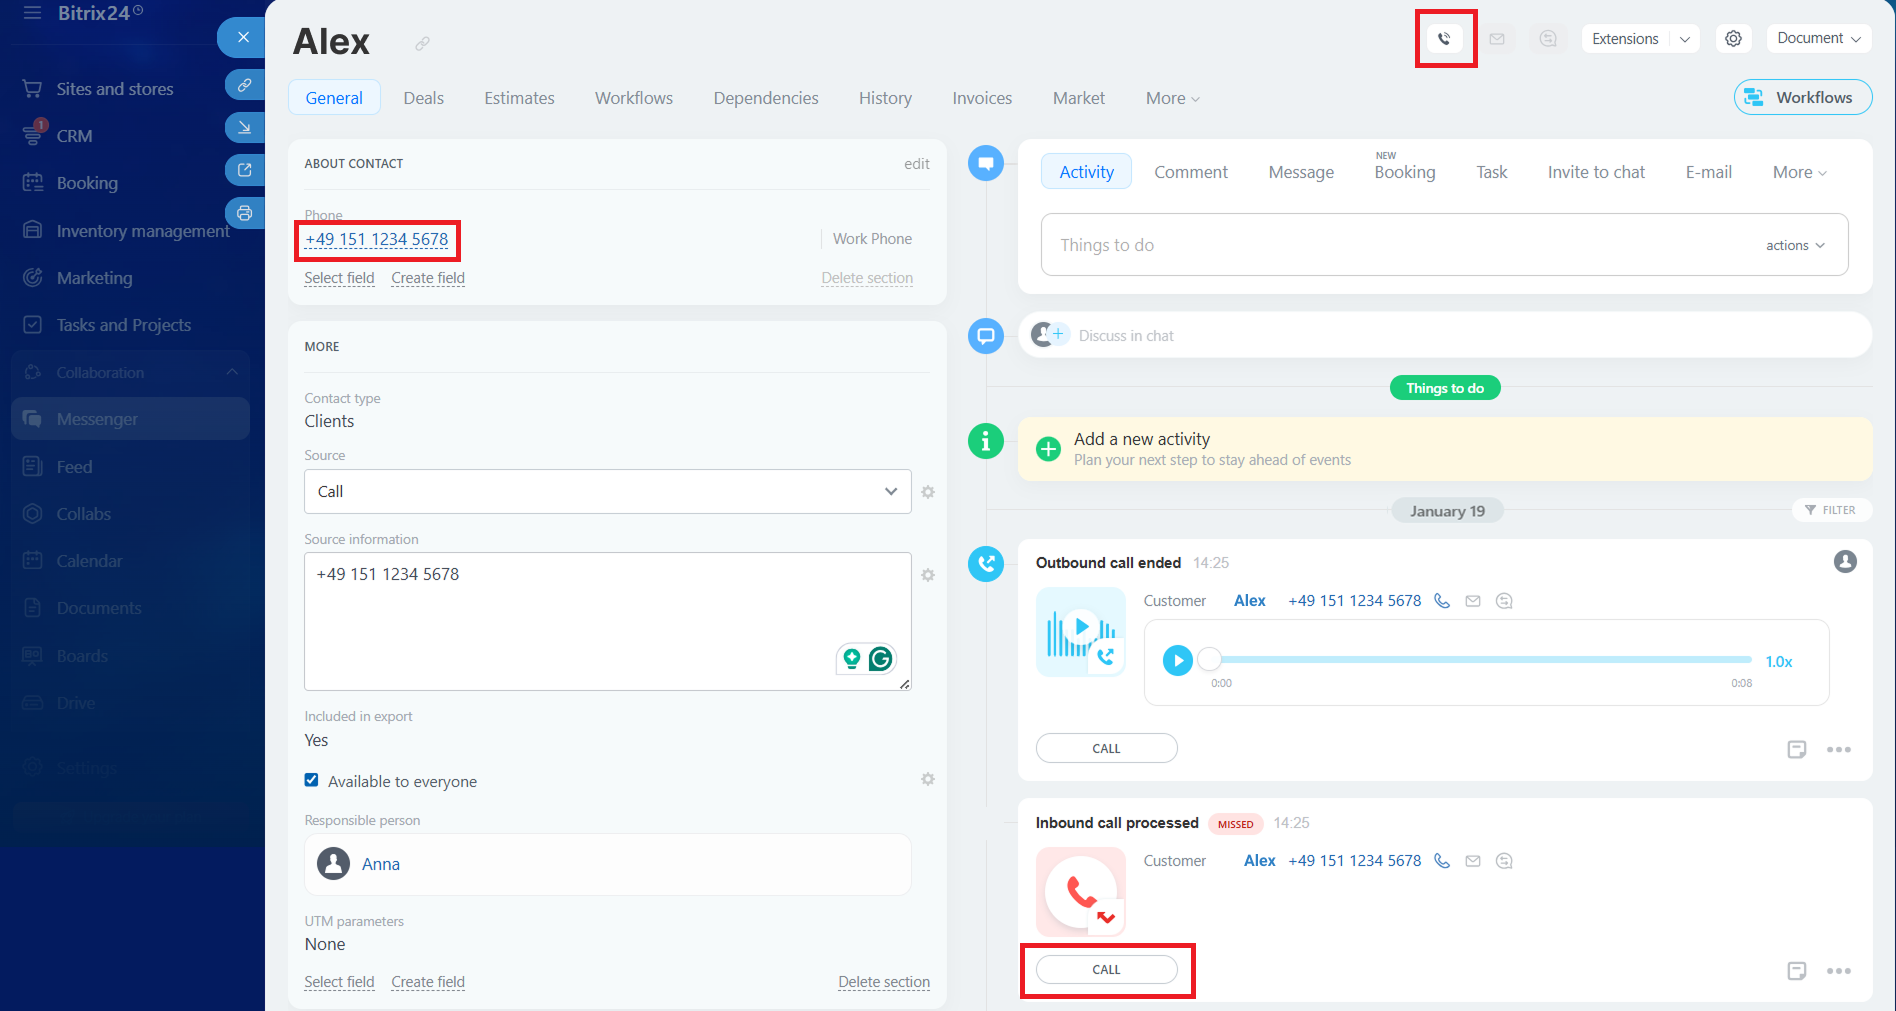
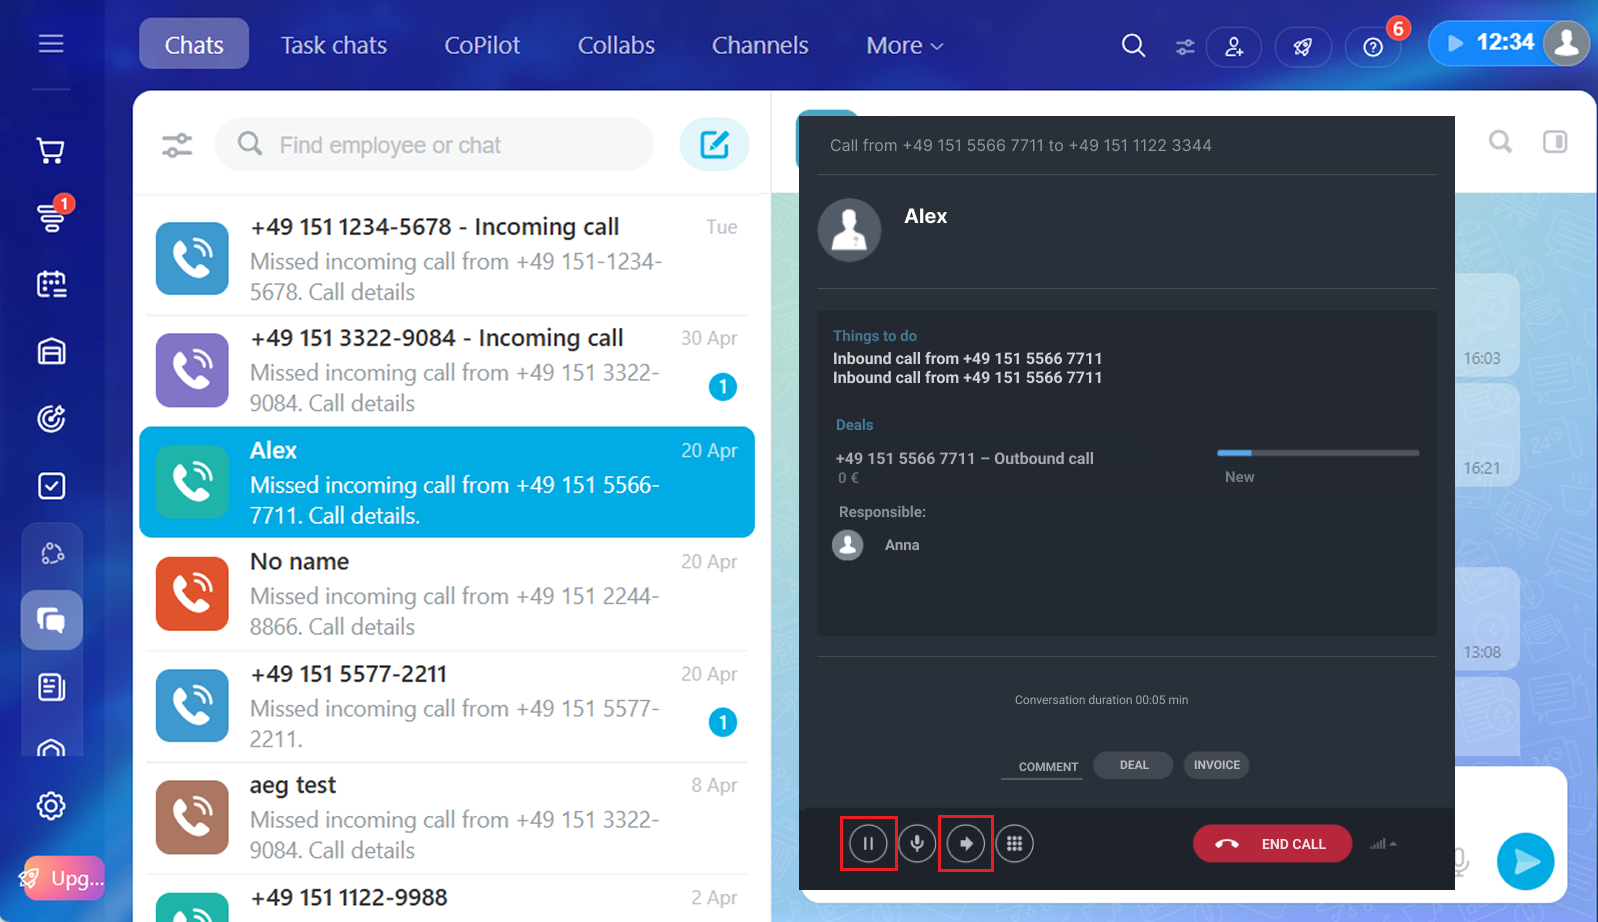
During the conversation, you can open the customer card, review deal details, create a new deal or task, and leave a call comment — all without leaving the call screen.
Call your customers
The Bitrix24 and Cloud PBX integration simplifies daily workflows and helps managers close more deals. There are several ways to call directly from Bitrix24:
- From a contact card: click the phone number or the handset icon.
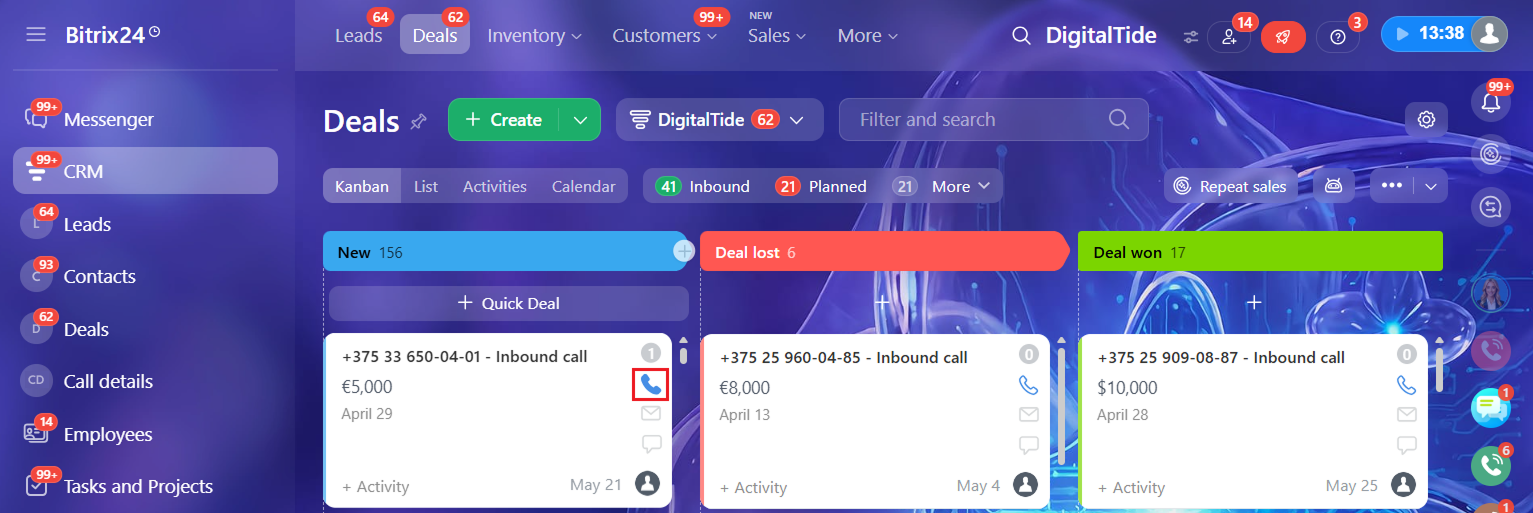
- From the Kanban board: click the handset icon next to the relevant deal.
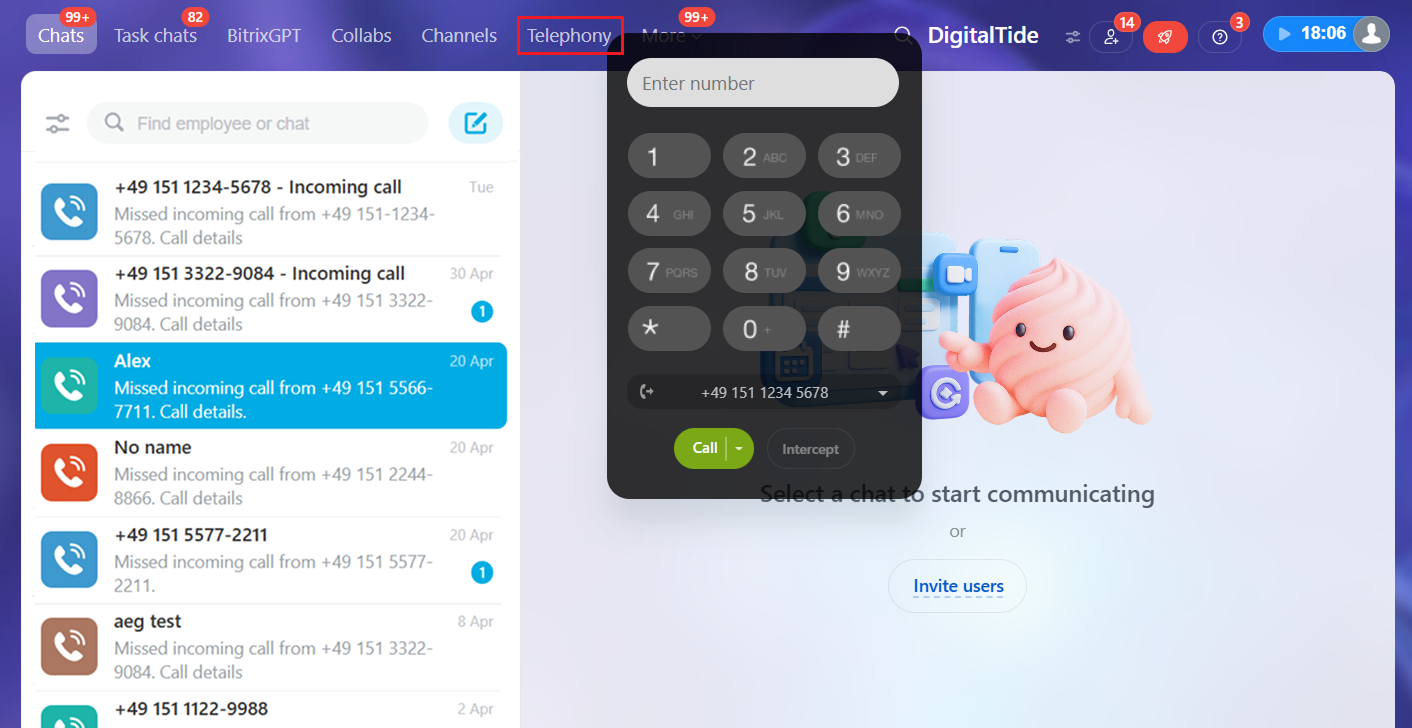
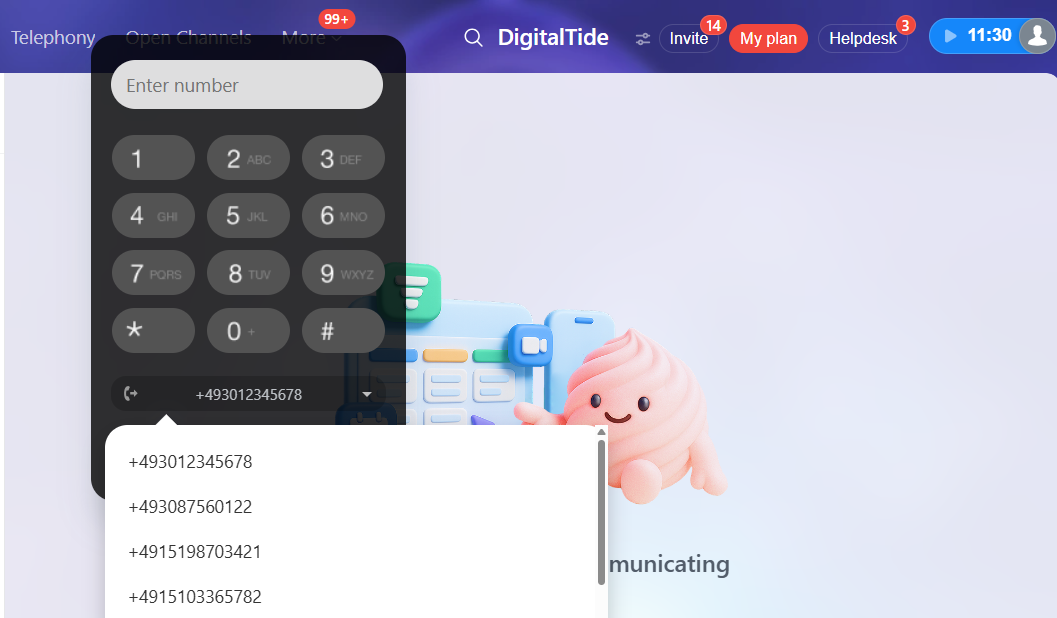
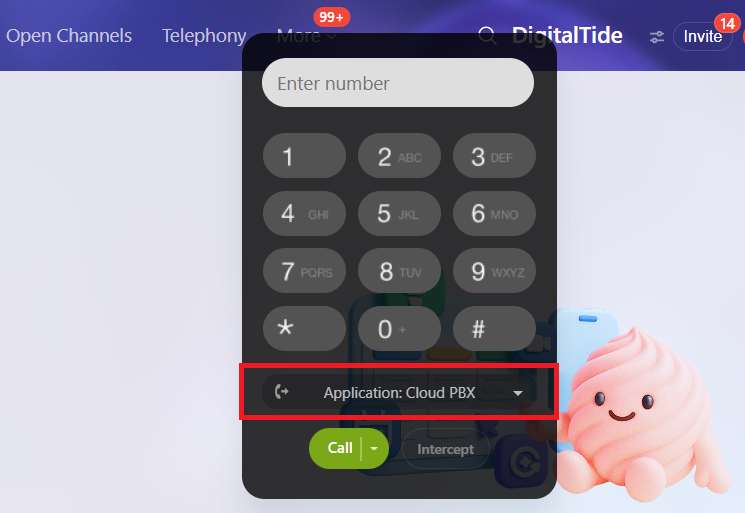
- From the dialer: click Telephony in the chat panel and enter the number in the dialer.
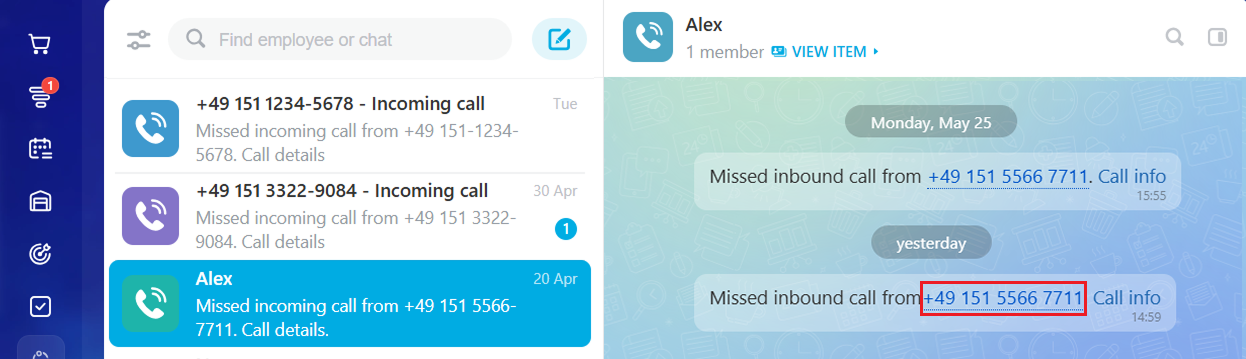
- From a chat: click the customer’s number in the missed call notification inside the chat.
Please note
Do not close the Bitrix24 tab during the call, as it will disconnect your call.Transfer Calls to Colleagues
If a manager needs help during a conversation, they can transfer the call to another employee in two ways:
* Select a colleague from the contact list.
* Enter their extension in the *#707# format.

The transfer works only if the colleague is also connected to Cloud PBX and Bitrix24. For mapping users, please see this article.
If the colleague you’re transferring the call to is already on another call, they won’t be able to answer.
Choose Outgoing Numbers in the Widget
Set up outgoing numbers so that your managers can make calls more easily.
By default, when you call via the WebRTC widget, the number defined in the Cloud PBX Caller ID rules is used. But once you choose another number, you’ll need to select it again for every next call. Additional settings are required to keep a single number as the default.
How to Set a Default Outgoing Number in the Widget
You can set the number an employee uses most often as the default — the system will automatically use it for calls. Go to Configure telephony — Telephony users.
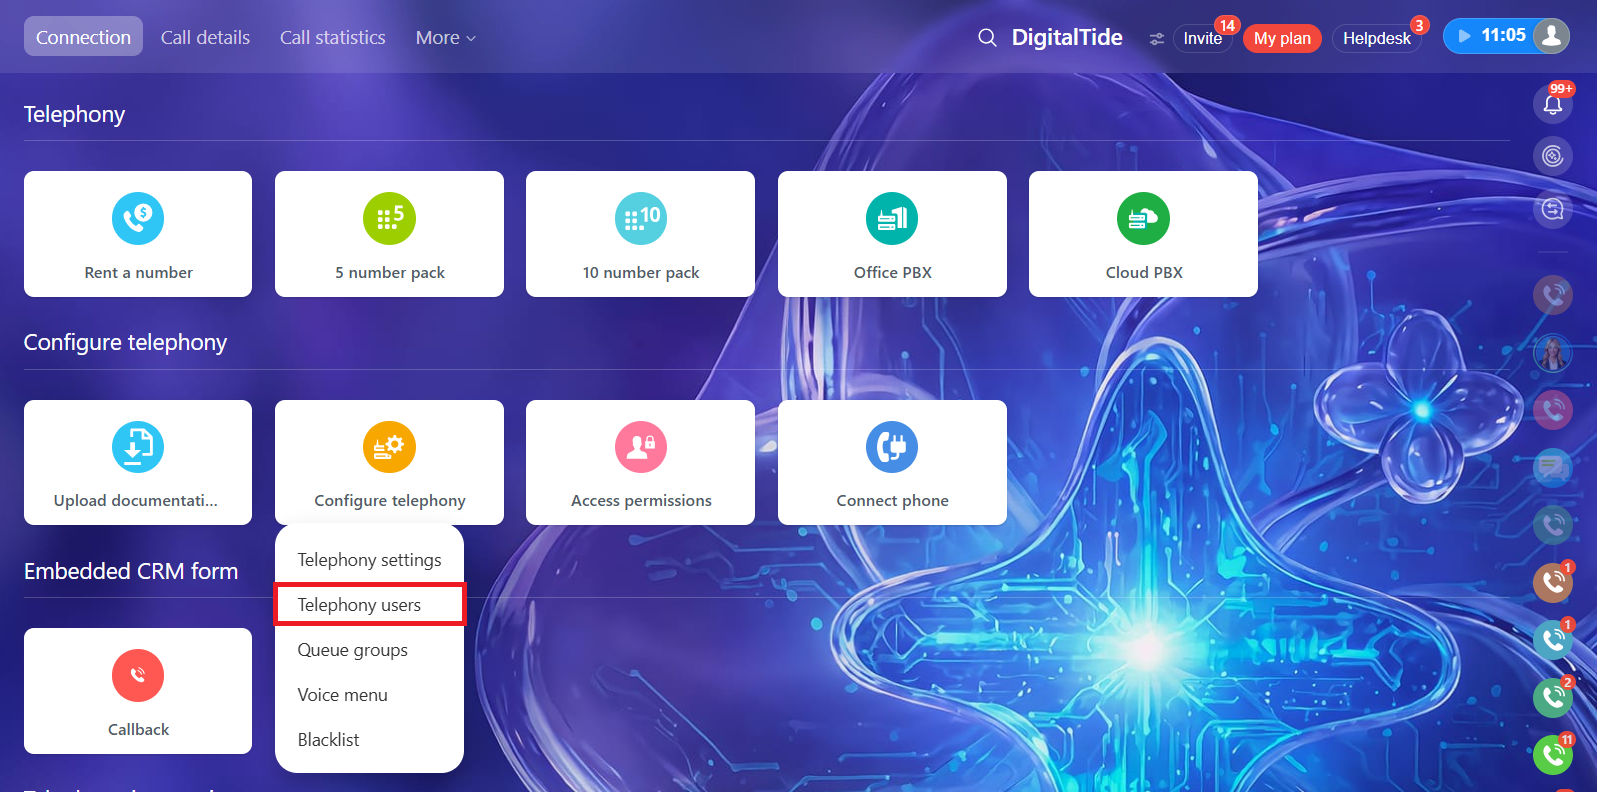
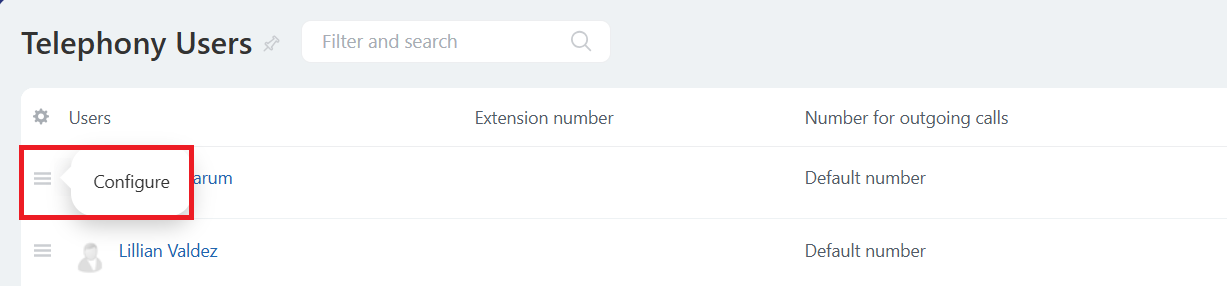
Select the employee, click the three lines to the left of the name, and open the settings.
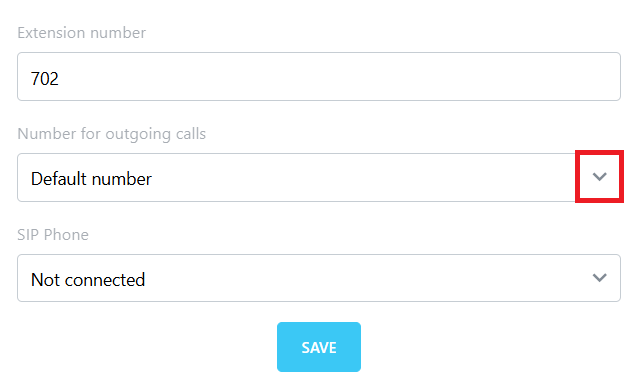
In the window that opens, choose the default number. Other numbers remain available for manual selection.
To show only the numbers employees need for work, hide unnecessary options. This reduces mistakes when selecting a number and speeds up request handling.
Hiding Unnecessary Outgoing Numbers in the Widget
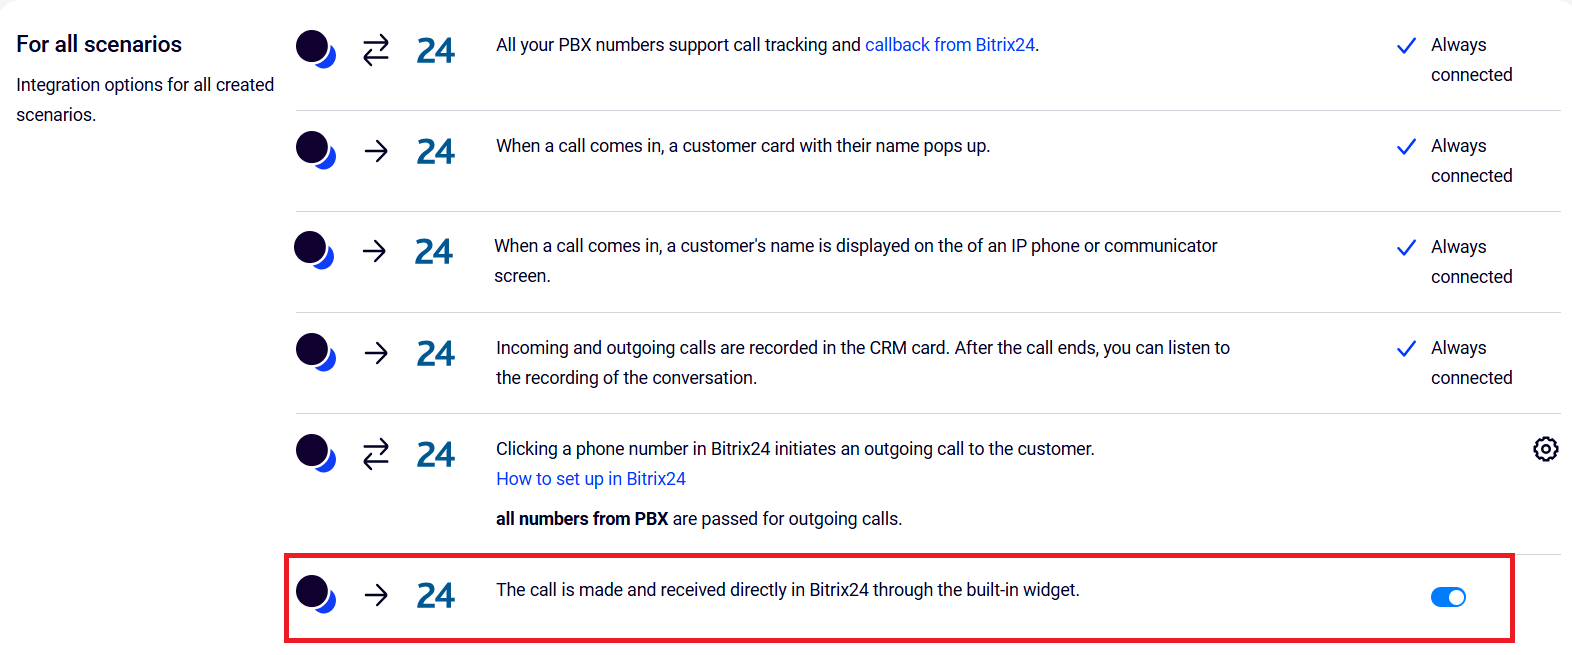
To hide numbers in the widget that employees should not use: 1. In Cloud PBX, go to CRM Integration — Bitrix24. In the For all scenarios part, click the gear icon next to the widget scenario.

2. Choose what categories of outgoing numbers will not be displayed in Bitrix24: personal numbers and/or department numbers.
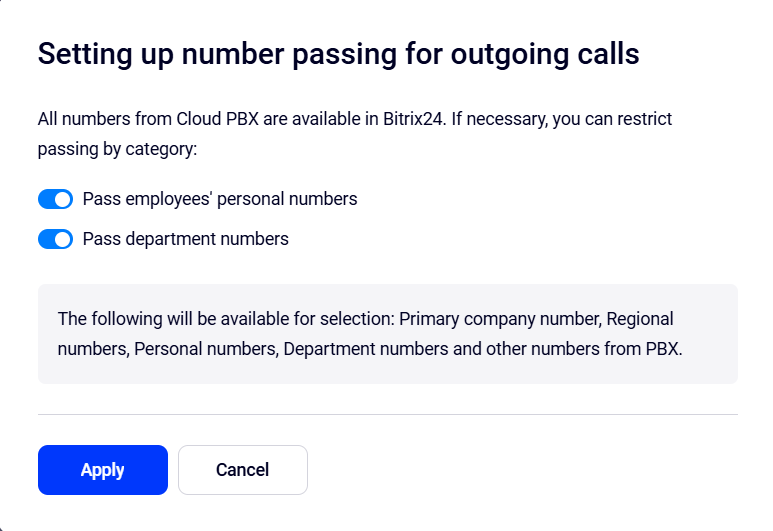
Please note
This setting applies to all Bitrix24 sections at once. If you use call tracking or the Bitrix24 callback widget, do not hide number categories used in these features — even if employees do not plan to call from those numbers.This setting affects only the list of outgoing numbers in the widget. It does not change Cloud PBX routing rules. If Cloud PBX rules allow a manager to call from a number hidden in the list, the system will automatically use that number for a call via the Cloud PBX Application.
FAQ
– Will my calls be saved in Bitrix24 if I answer outside the browser?
Yes, calls from a cell phone or softphone are also saved.
– What should I do if calls aren’t working?
- Refresh the Bitrix24 page.
- Check if calls are enabled in Cloud PBX widget settings.
- Make sure CRM users are correctly mapped to Cloud PBX users.
– It didn’t help. What’s next?
Contact support and attach a screenshot of the technical information from your browser. Follow these steps:
* Open Developer Tools (press F12 or go to Menu – More Tools – Developer Tools).
- Click the Network tab.
- Then click WS.
- Select the connection named “ws/?domain=<your Cloud PBX name>…”
- Open the Messages tab.
- Take a screenshot of the screen and send it to us.
The Outcome
WebRTC helps managers spend less time on technical tasks and more time talking to customers. All calls and deals are automatically saved in the CRM, so nothing gets lost. Based on our data, managers say the workflow feels easier, and supervisors have better visibility into the sales pipeline.
For more details about other Cloud PBX and Bitrix24 integration features, please see this article.