Flexible Setup of Waiting for Response Time
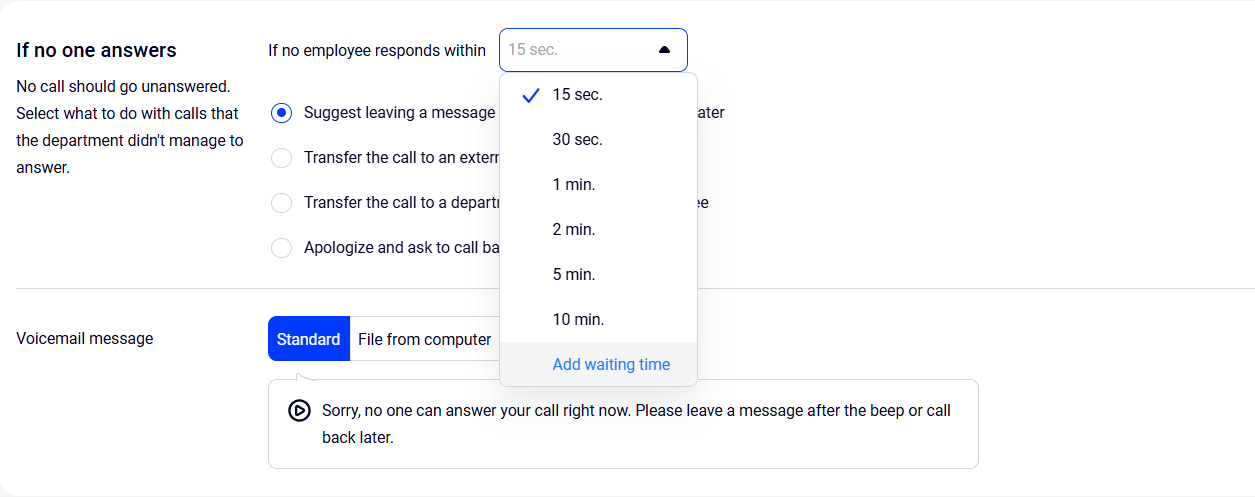
To avoid missing calls from customers, set up the waiting time for an employee to respond taking into account the specifics of your company operation. Let's look at the example of department settings in the If no one answers section:
1. When setting up the waiting for response time in a department, you can select standard options or add your own intervals. To do this, in the If no employee responds within section, click Add waiting time in the drop-down list.
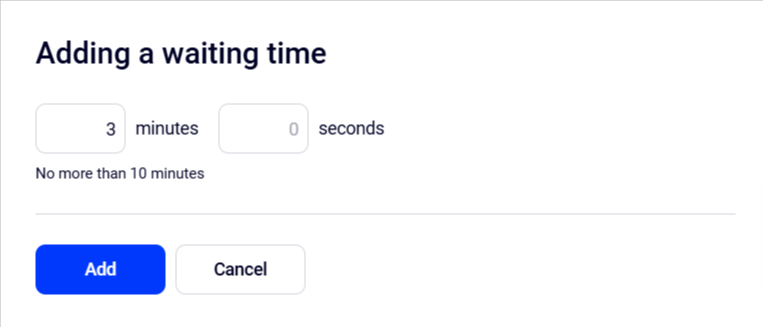
2. In the window that opens specify the required waiting time (for the If no one answers settings this is no more than 10 minutes) and click Add.
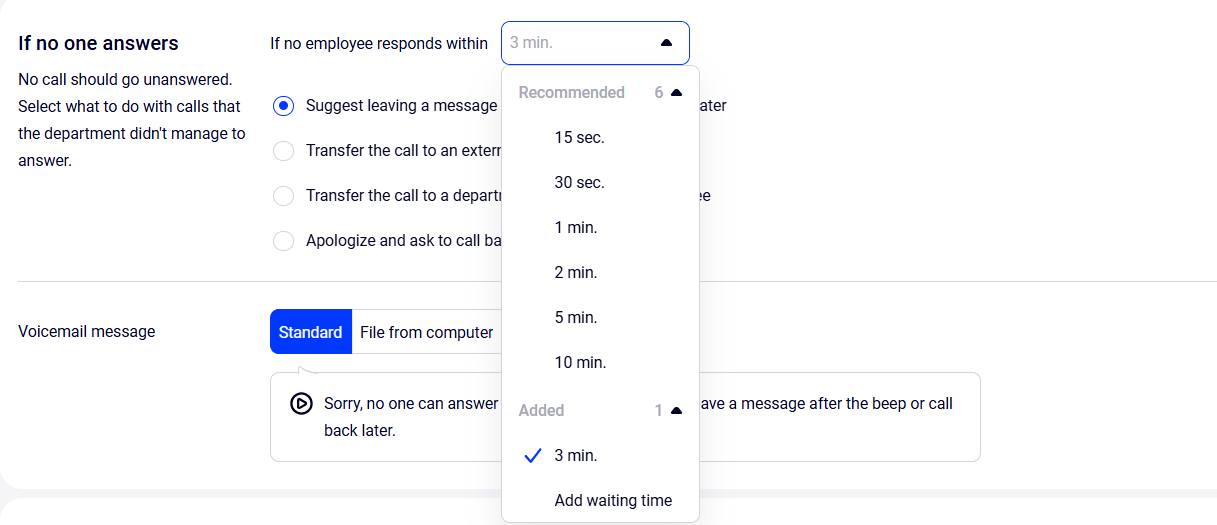
3. After this, the Added section will appear in the drop-down list, with all the time intervals you have created.
Please note
Intervals created in one place will be available in other waiting time settings in Cloud PBX.There are different waiting time limits in different Cloud PBX sections. In each section with waiting time settings, only the options that do not exceed the set limits are available.
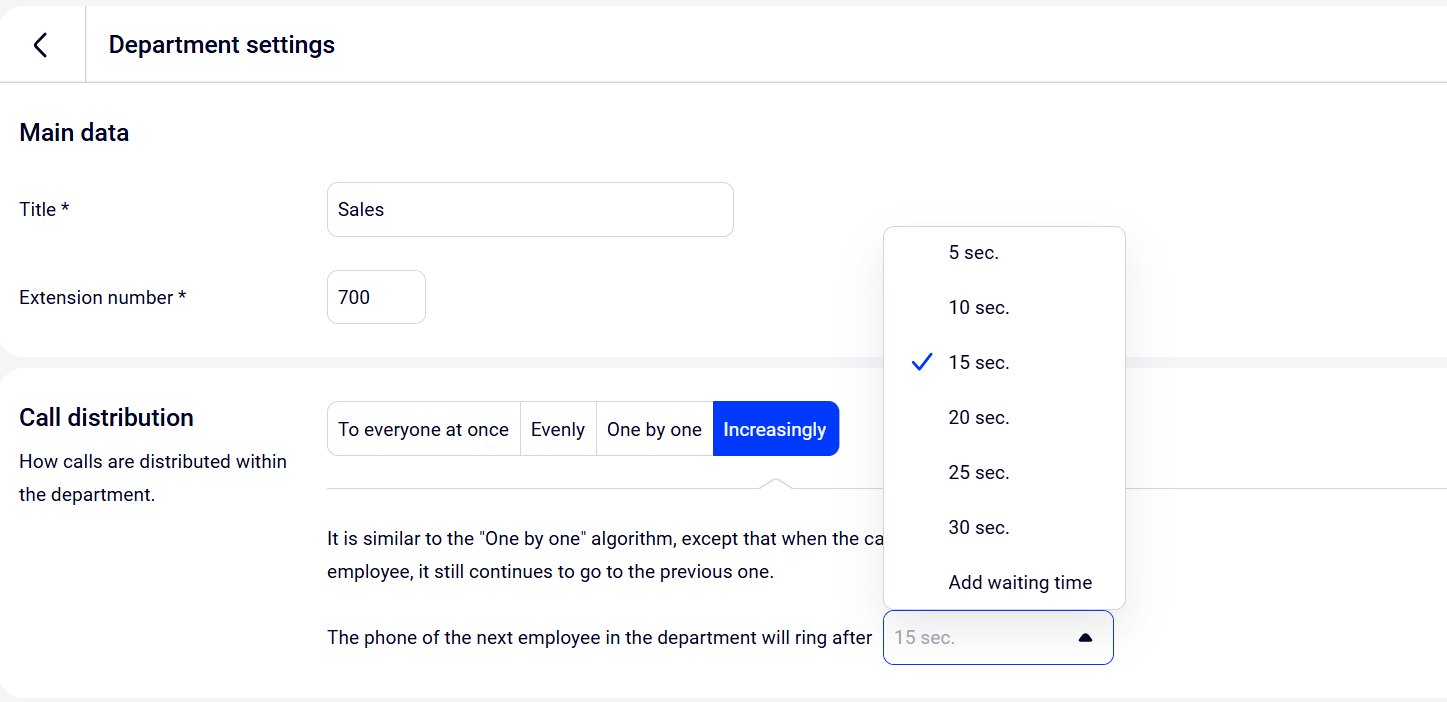
For example, in the settings of the Call distribution section with the limit of up to 30 seconds, the waiting time that we specified earlier in If no one answers (3 minutes) is not displayed since this time doesn’t fit the permitted limit.
To delete the added waiting time, click the trash can icon to the right of the interval in question.
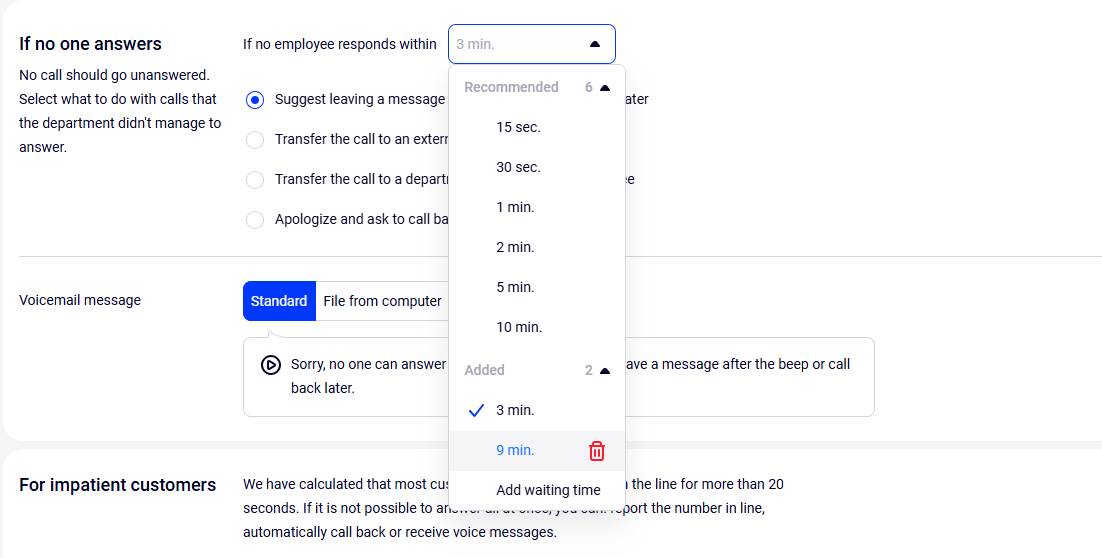
And confirm the deleting of the added waiting time.

Please note: if you delete a waiting time, then the default waiting time (1 minute) will be set everywhere it was used.
You can add your own waiting time in the employee’s profile, departments, callback widget and CRM integration settings.