Flexible Schedule Setup for a Number
You can flexibly set up a call reception schedule for each of your shared numbers, taking into account all the specifics of your company work: working hours and off-hours, lunch breaks, attendants for off-hours, holidays and early-closing days, etc.
Select the number for which you need to set up a schedule. In the Work schedule section go to the Scheduled tab and click Set up a schedule.
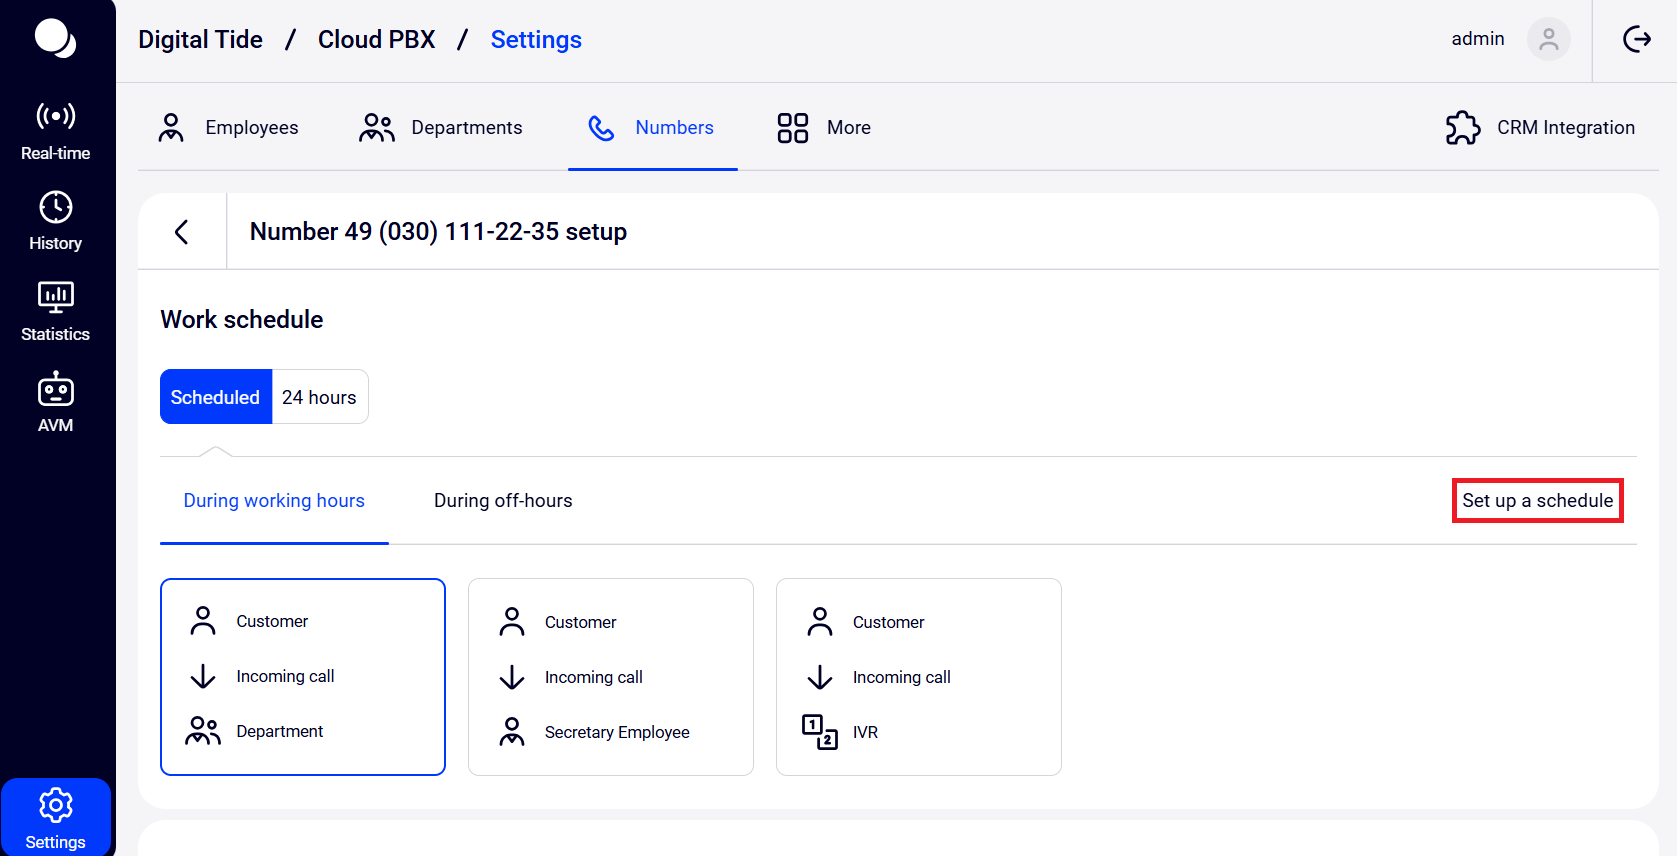
Specify the work schedule of your employees who receive calls for this number — their working hours and days off.

By default, the schedule for each number is set in the company time zone. But if the number you are setting up should receive calls in a different time zone, specify it in the number schedule.
Please note
To set up a work shift that ends at midnight, enter 24:00 in the till field.For example, if an employee works 24 hours, you need to set up working hours for the working day as follows: from 00:00 till 24:00.
Below you will find instructions for flexible schedule setup.
How to Set Up Call Receiving During Lunch Break
If your company operates with a lunch break, you can specify this in schedule settings.
1. In the Additional intervals section, click the Add interval button.

2. In the window that opens, go to the Lunch break tab and specify:
- days of the week when the number receives calls with a lunch break,
- break time.
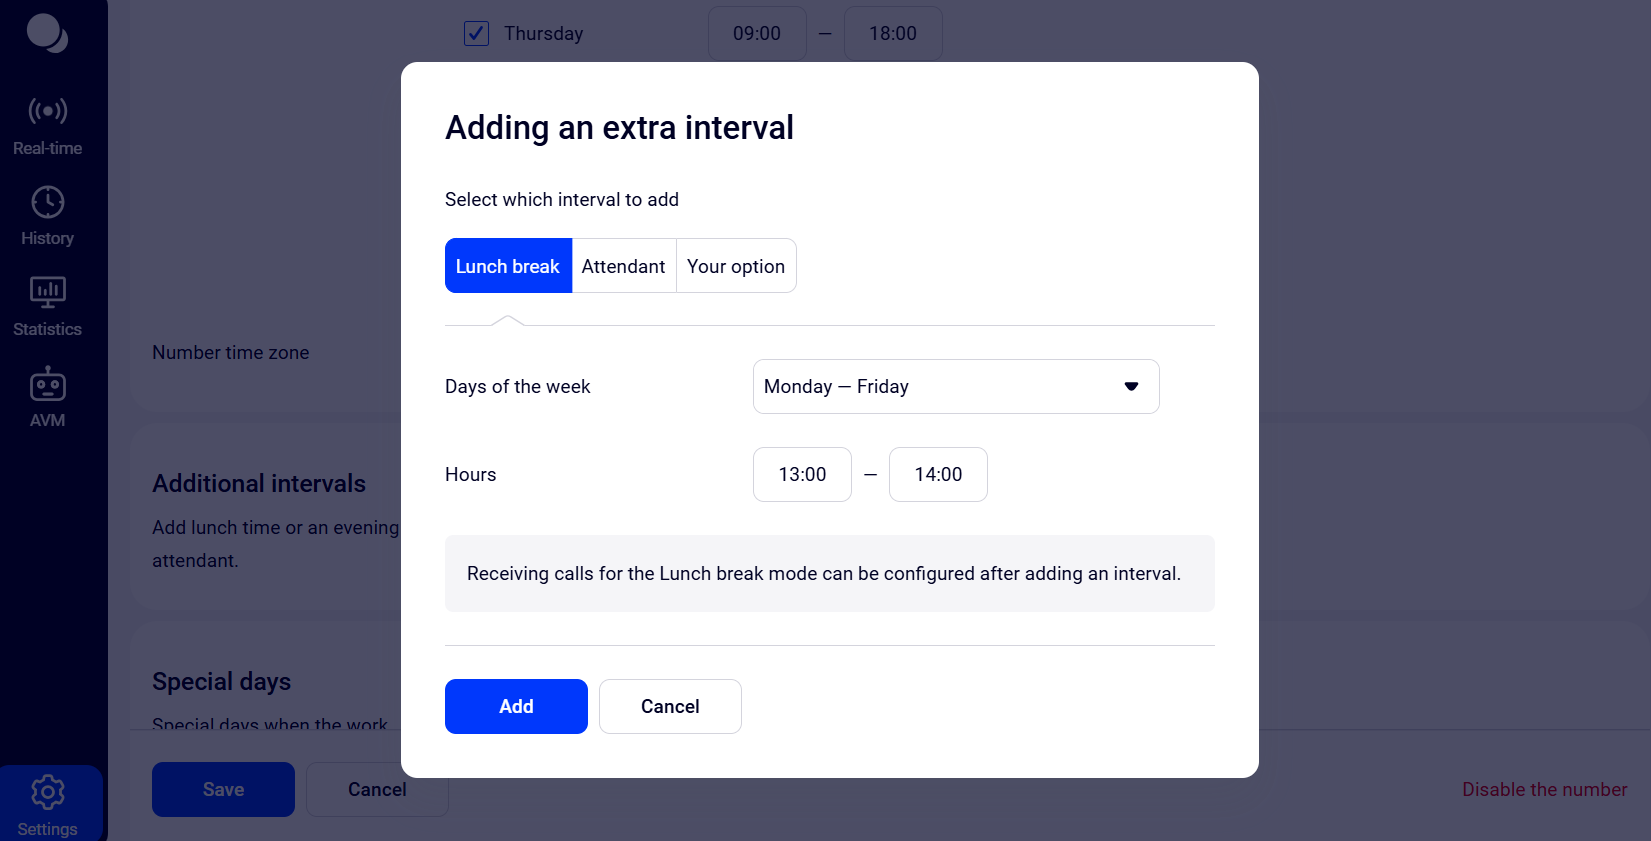
3. Click Add.
4. Now set up a calling route for the lunch break. To do this, go to the top of the settings screen. In the schedule options click Lunch break and select what Cloud PBX should do if a customer calls during the break:
- forward the call to the attendant,
- direct to the IVR,
- offer to leave a message to a voicemail,
- inform about off-hours,
- offer to send a fax.
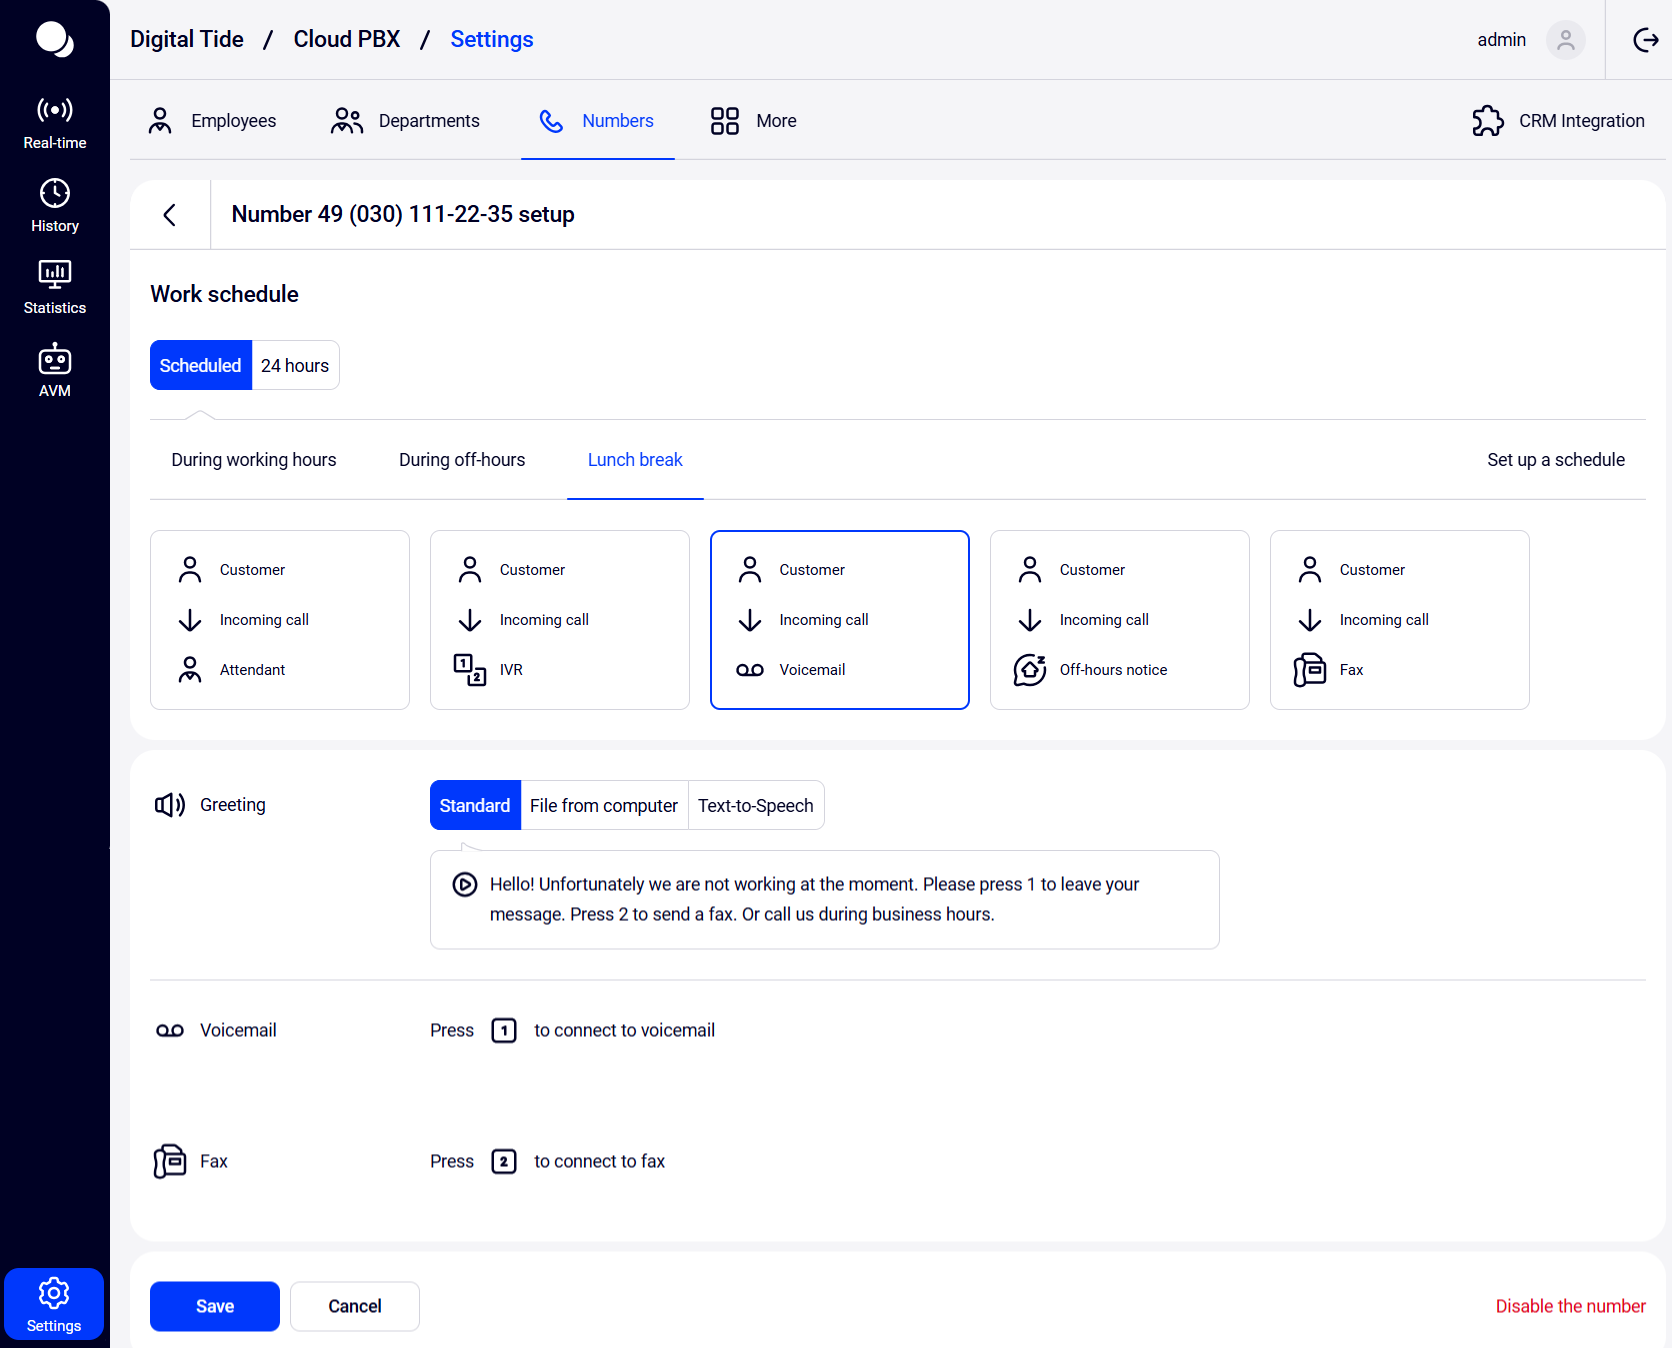
5. Click Save at the very bottom of the page.
Done!
We recommend using a separate notification for the lunch break so that the customer understands that the waiting is due to the lunch break, which means that they will be called back soon. You can upload your own file or create a notification using the Text-To-Speech feature.
How to Set Up Call Reception for an Attendant
If during evening hours you leave an attendant who continues to receive customer calls, please specify it in the schedule settings.
1. In the Additional intervals section, click the Add interval button.

2. In the window that opens, go to the Attendant tab and specify the days of the week and time when the attendant receives calls after the end of the working day.
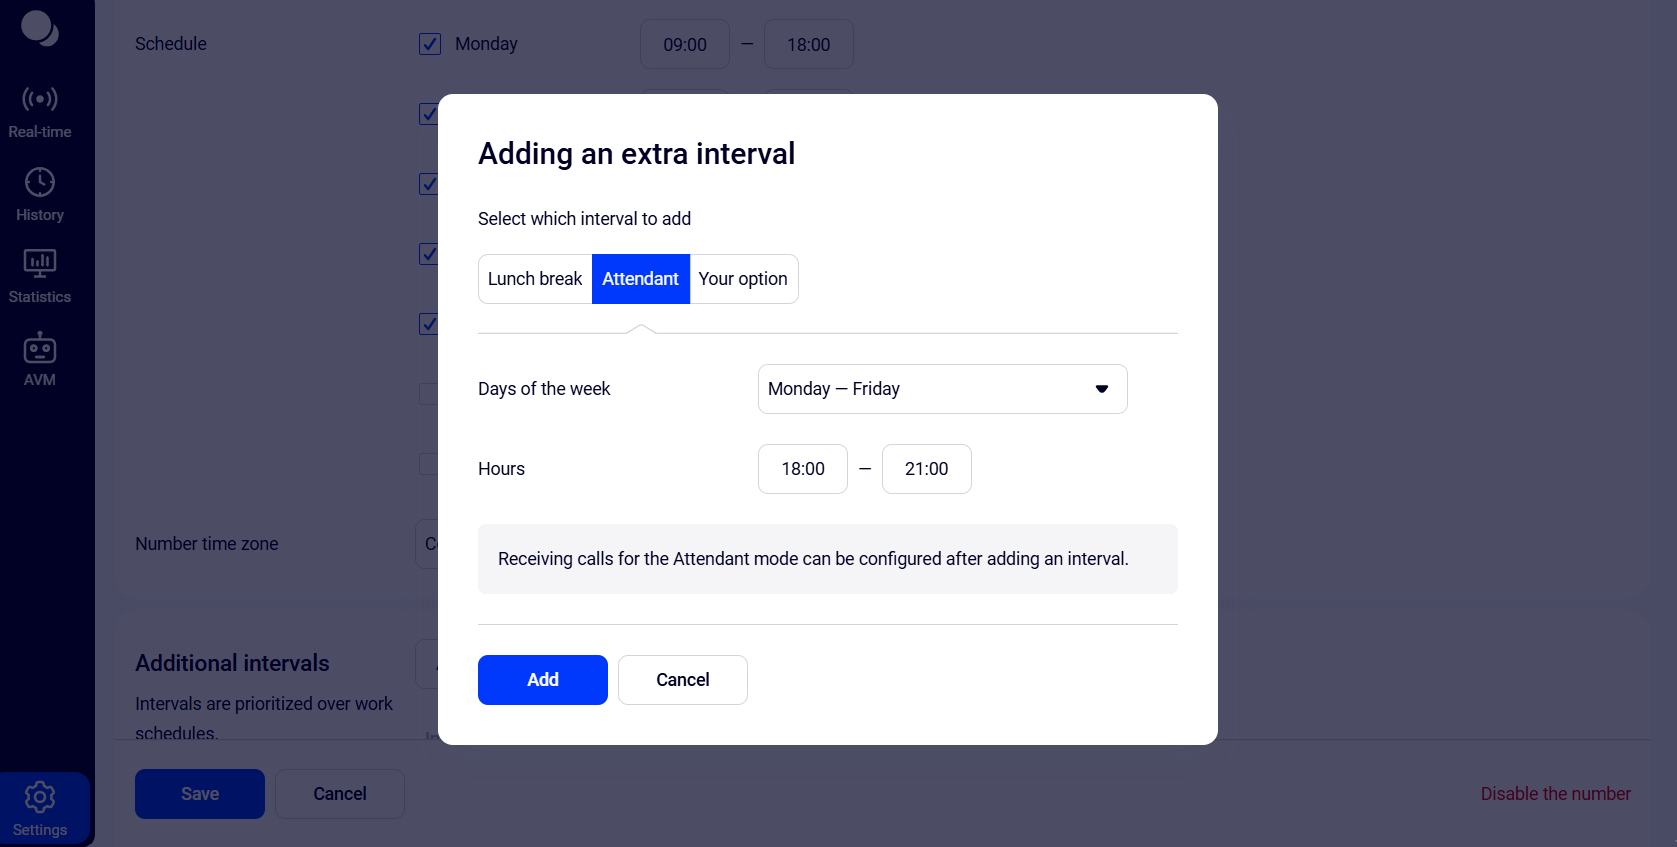
3. Click Add.
4. Now set up the calling route for forwarding to a responsible employee. To do this, go to the top of the settings screen. In the schedule modes, click Attendant and select the required route — forwarding the call to an attendant.
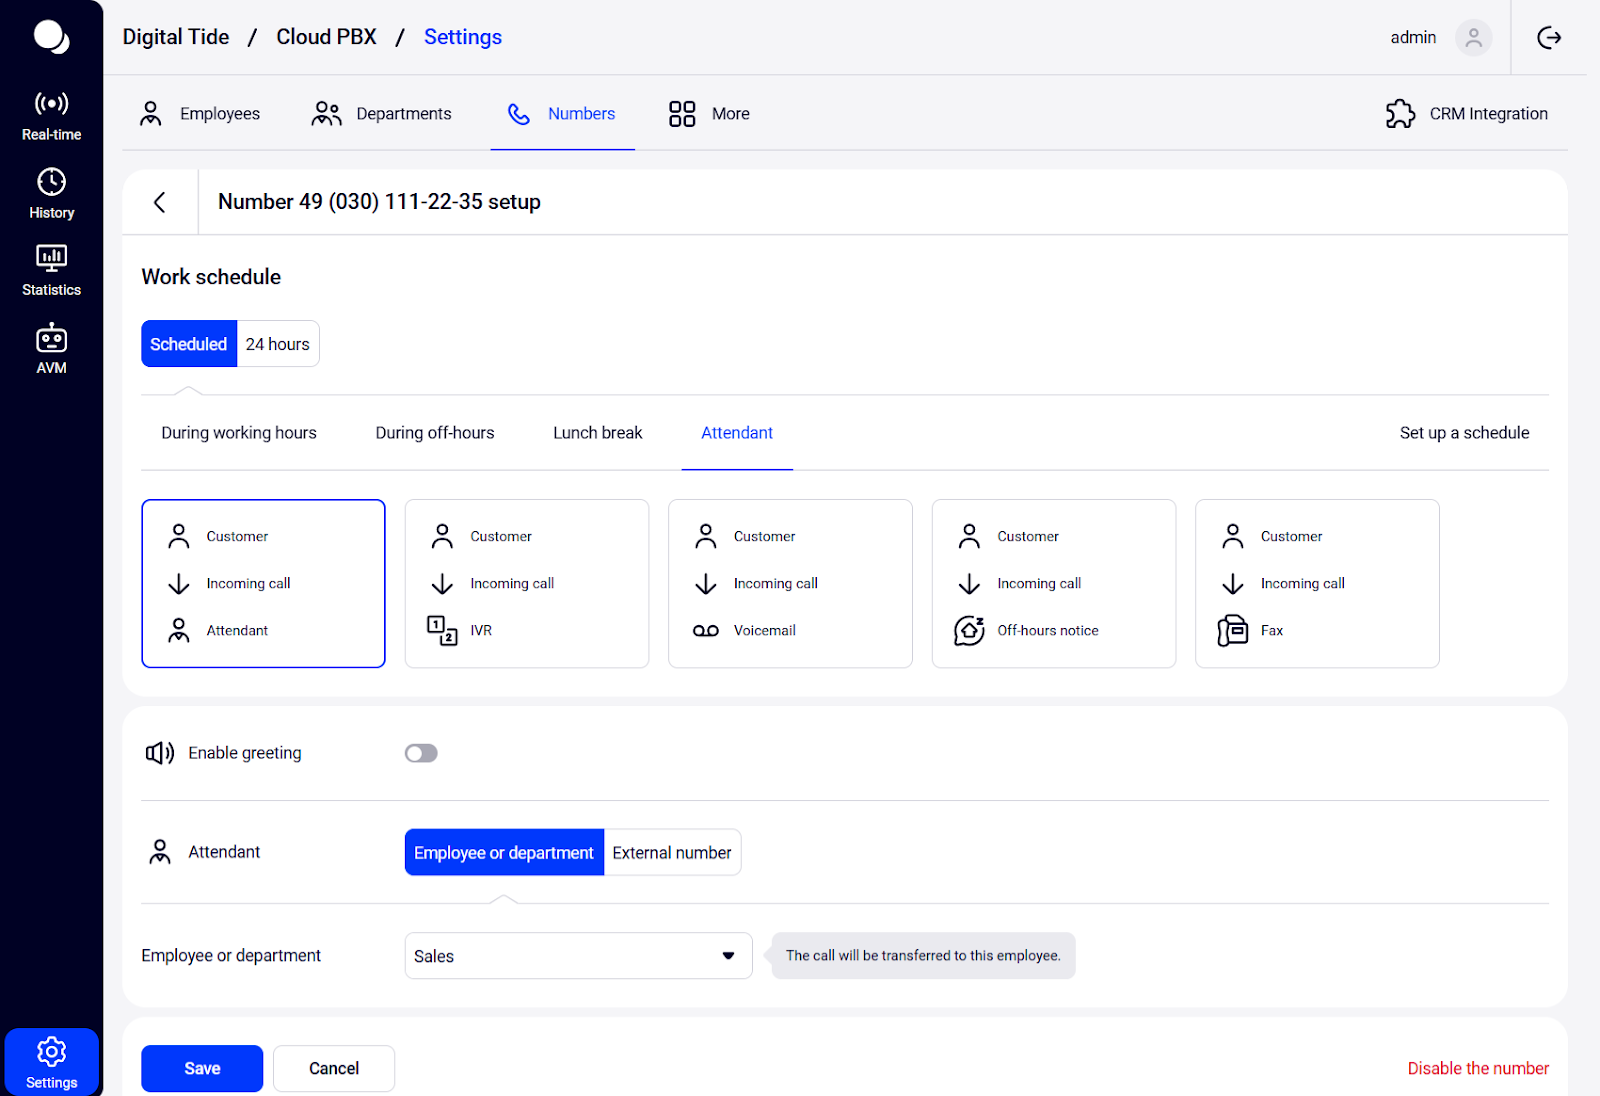
5. You can use the default message about forwarding to the responsible employee, upload your own file, or create a notification using the Text-To-Speech feature. If you don't want to notify the customer about the forwarding, turn off the greeting by sliding the switch to the left.
6. Select who will receive calls on behalf of the attendant — a specific manager or department. You can also set up forwarding of such calls to an external number.
7. Click Save at the very bottom of the page.
Done!
How to Create a Custom Schedule
If your company work is organized in a more complex way and the correct schedule can not be created by only specifying the lunch break and attendant time, you can create your own additional interval and set up rules for processing incoming calls for it. You can have as many custom additional intervals as you like.
1. In the Additional intervals section, click the Add interval button.

2. In the window that opens, go to the Your option tab and specify the days of the week and hours when the number should operate on a special schedule.
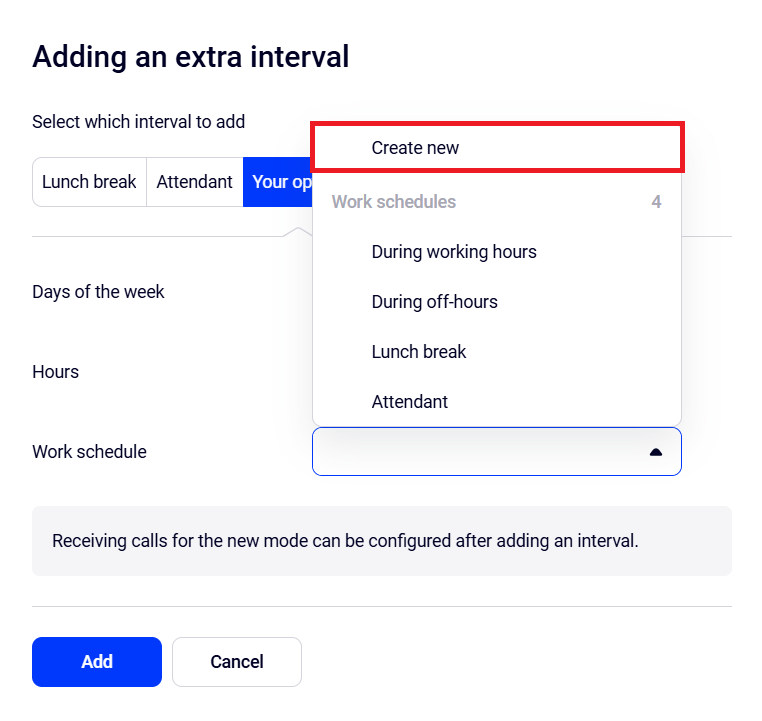
In the Work schedule field, select Create new.
3. In the window that opens, enter the new interval title and click Create.
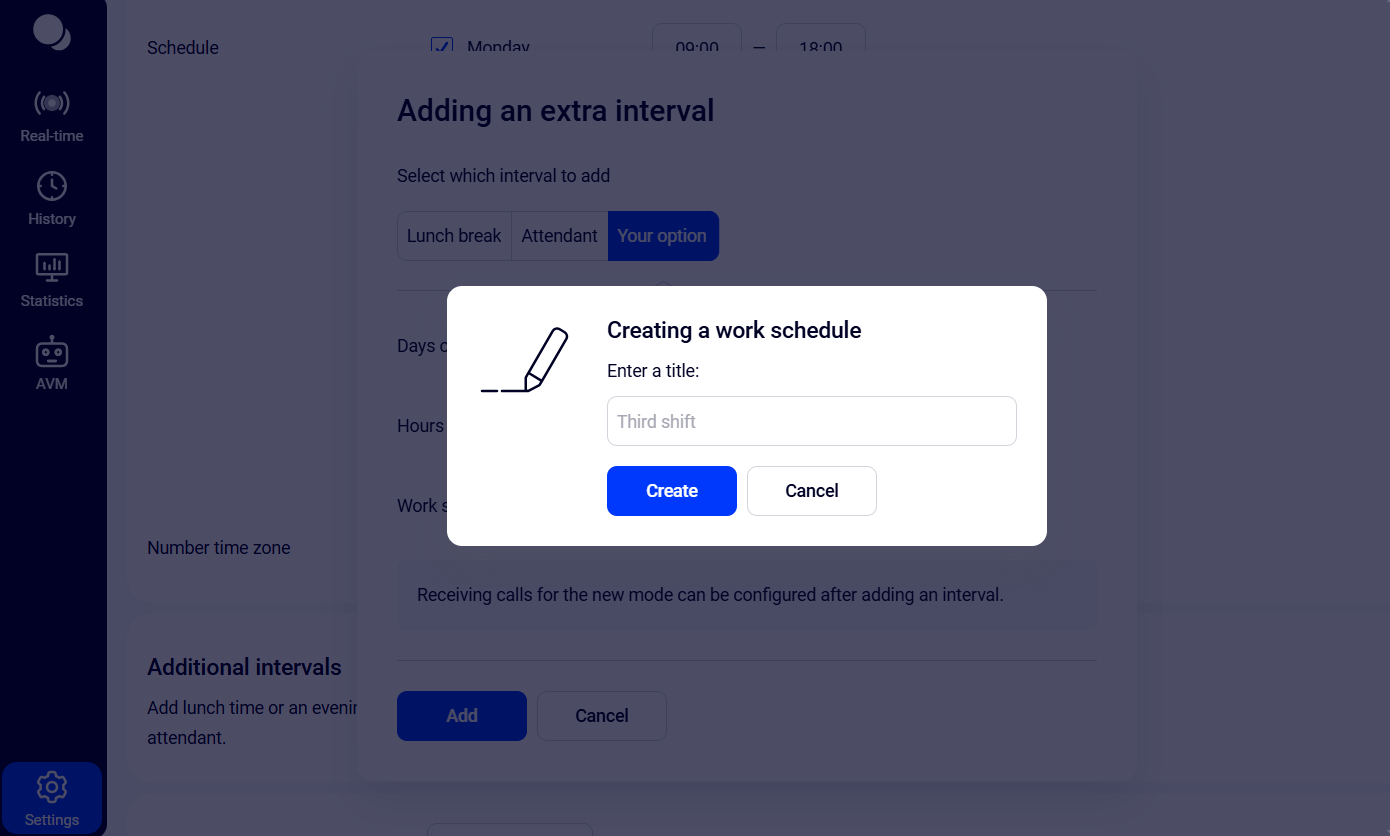
4. In the adding an extra interval window, click Add.
5. Now set up the calling route for your interval. To do this, go to the top of the settings screen. In the schedule options, find your option (in our example it is Third Shift) and select what Cloud PBX should do if a customer calls at the specified time:
- forward the call to the attendant,
- direct to the IVR,
- offer to leave a message to a voicemail,
- inform about off-hours,
- offer to send a fax.
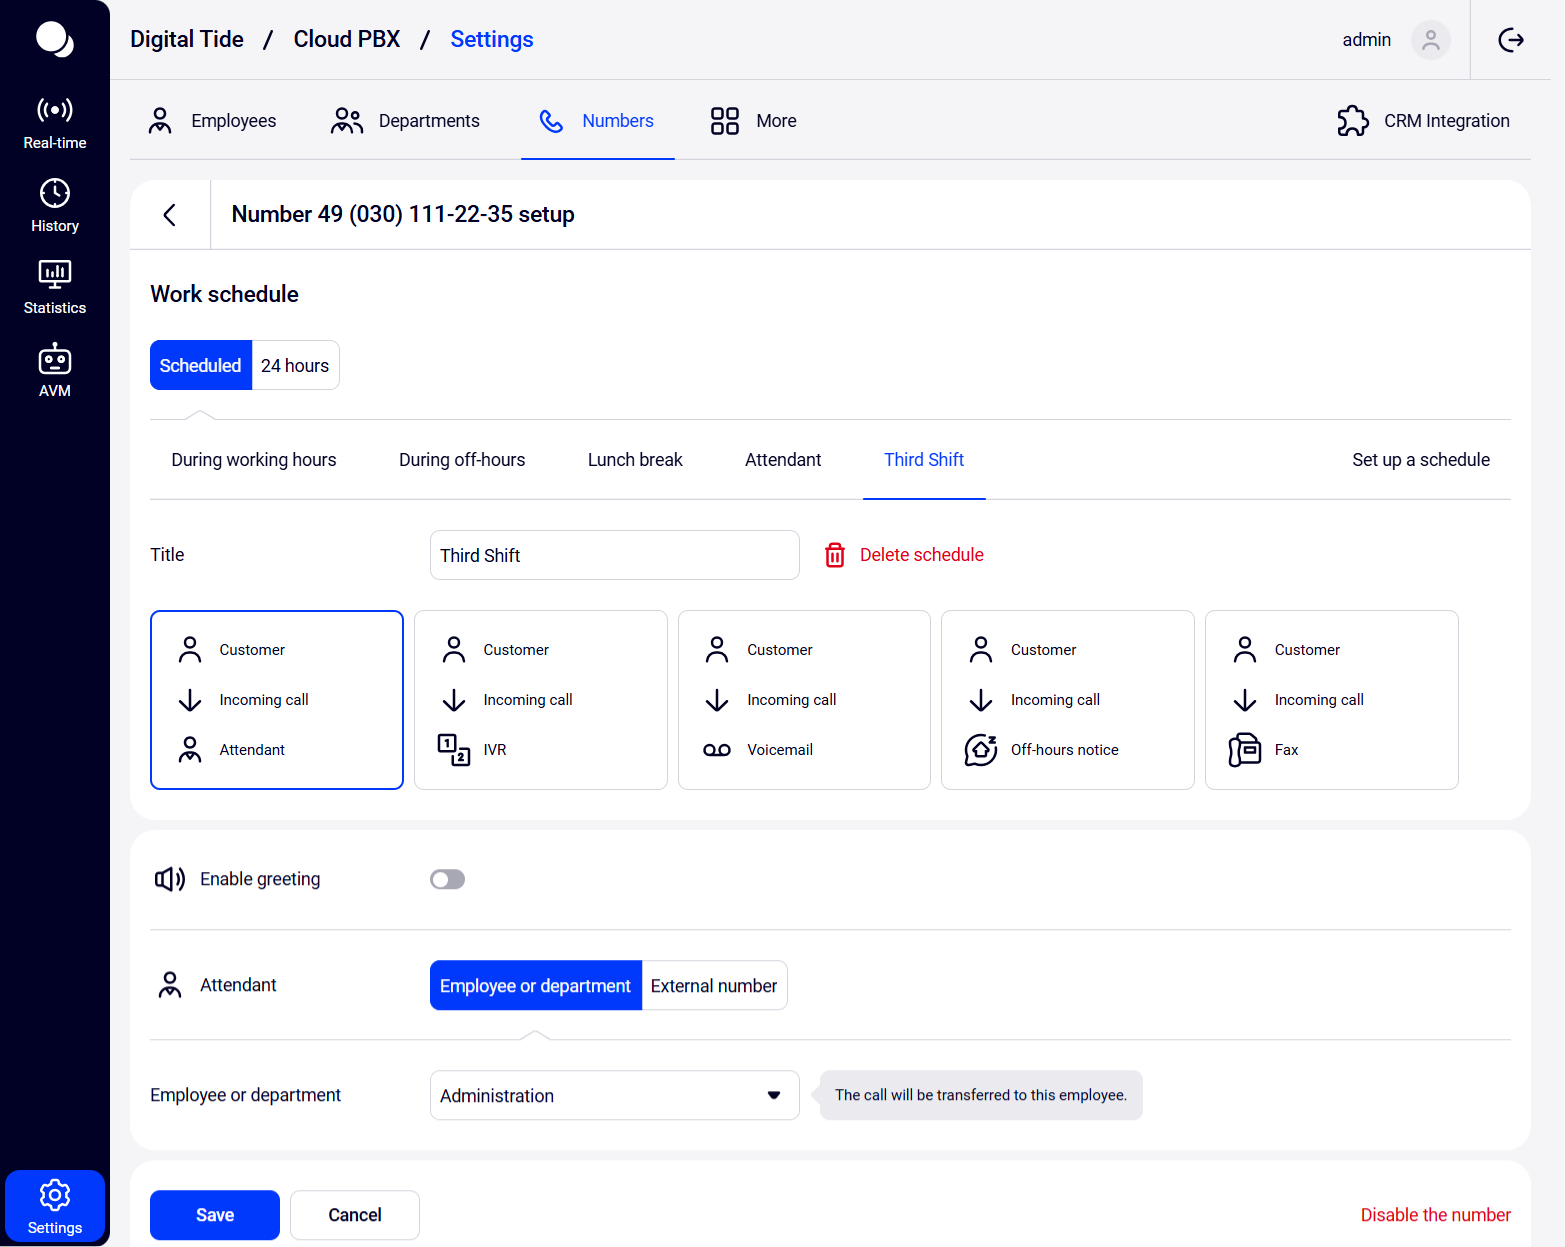
6. You can use a standard message that Cloud PBX will play to the customer who calls during the specified interval, upload your own file, or create a notification using the Text-To-Speech feature.
7. Click Save at the very bottom of the page.
Done!
How to Delete an Additional Interval
If the additional interval, created in the schedule, is no longer relevant, you can delete it from the work schedule.
1. In the Numbers section — Shared company numbers select the number, one of the schedules of which you want to delete, and go to its settings.
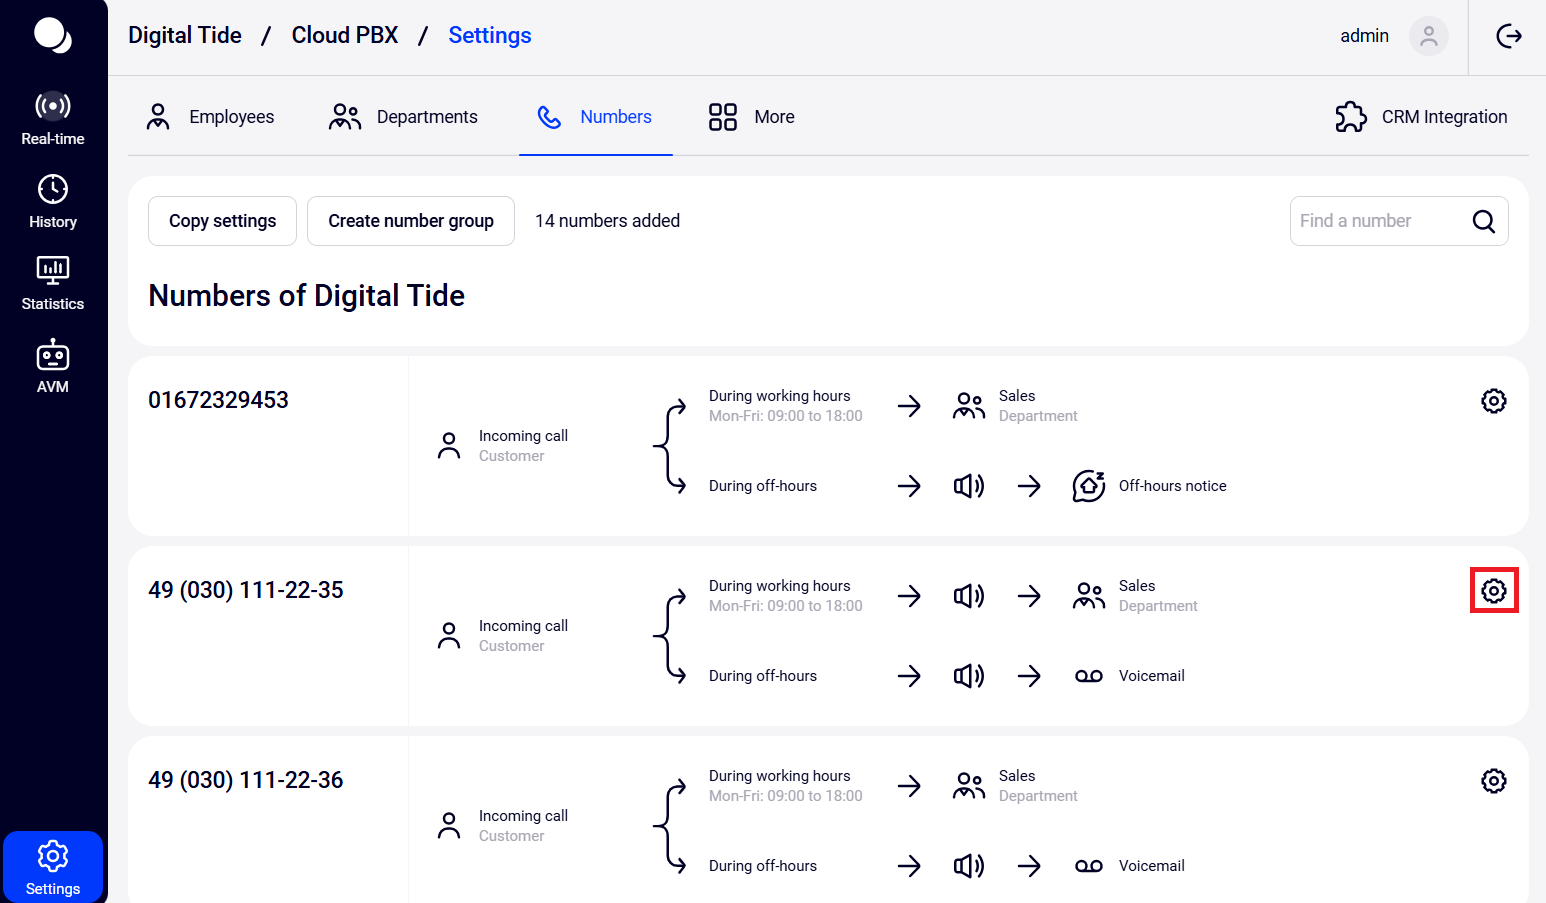
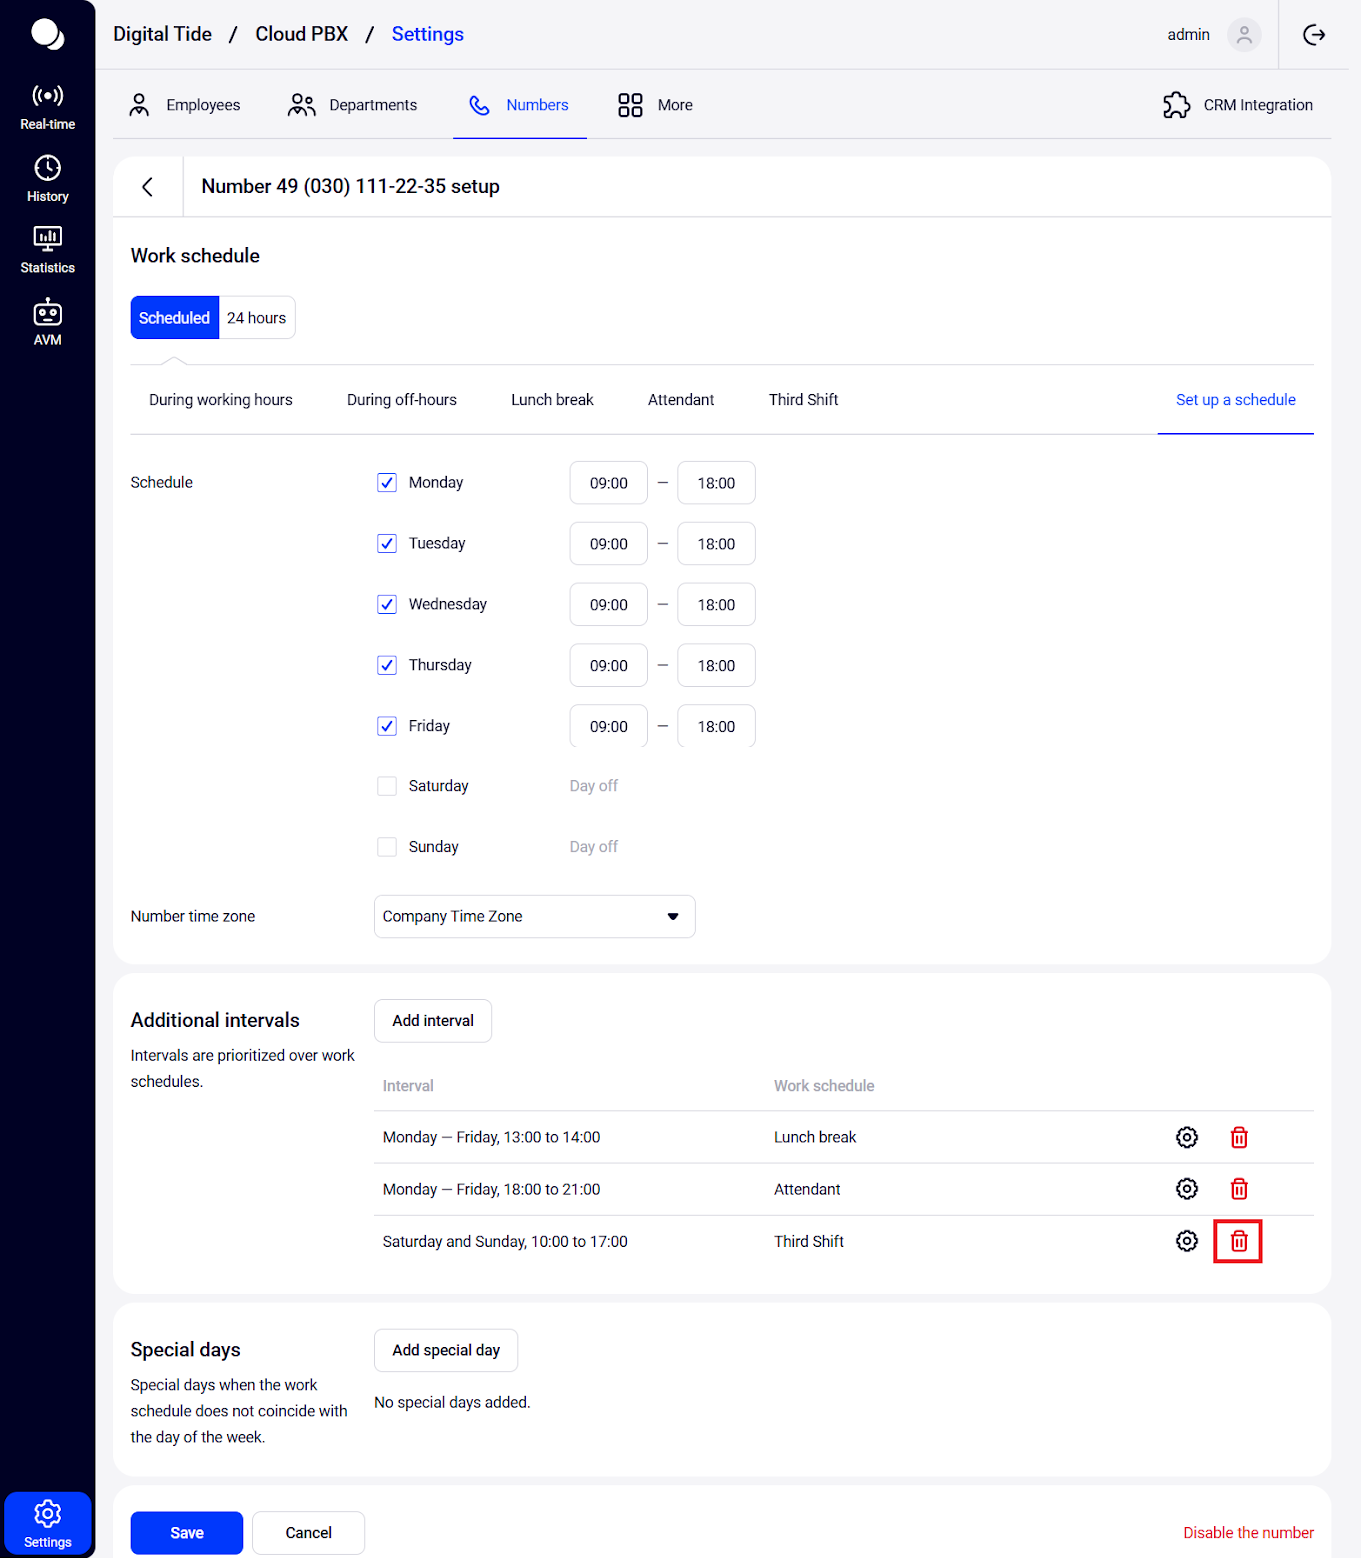
2. Click Set up a schedule. In the Additional intervals section, find the schedule you want to delete (in our example, Third shift), and click the trash can icon on the right.
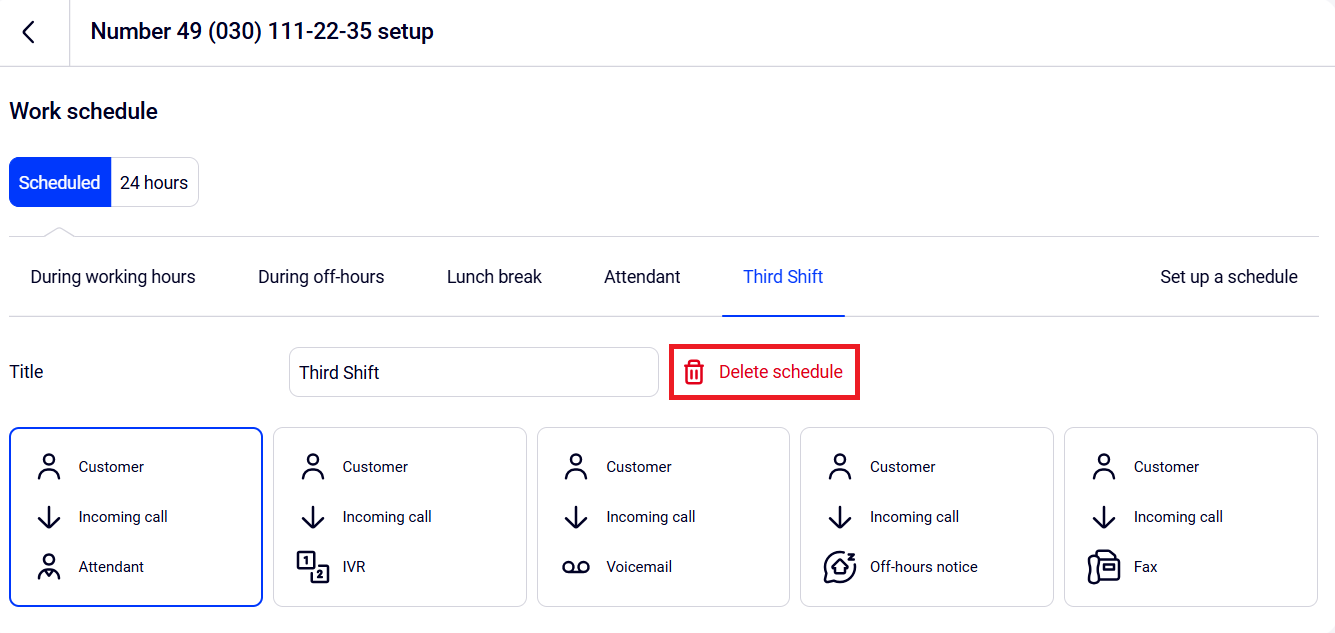
3. If you no longer plan to use this schedule, go to the top of the screen and find the schedule you need to delete among the extra ones you added and click it. Then click Delete schedule.
4. Click Save at the very bottom of the page.
Done!
How to Integrate the Operational Calendar Into Your Schedule
If your employees are off during public holidays and one or more of your numbers stops receiving calls, you can enable the integration of Cloud PBX with the operational calendar. Thanks to this, you will not need to adjust the schedule manually before the holidays — on the estimated dates your Cloud PBX will automatically switch the work schedule for the required numbers to off-hours.
1.In the number schedule settings go to the Special Days section and click the Operational Calendar button.

2. If your employees do not work on holidays, in the window that opens specify that Cloud PBX should consider these days as off-hours. Sometimes holidays shift and Saturday becomes a working day. In this case, calls will be received according to the Friday schedule.
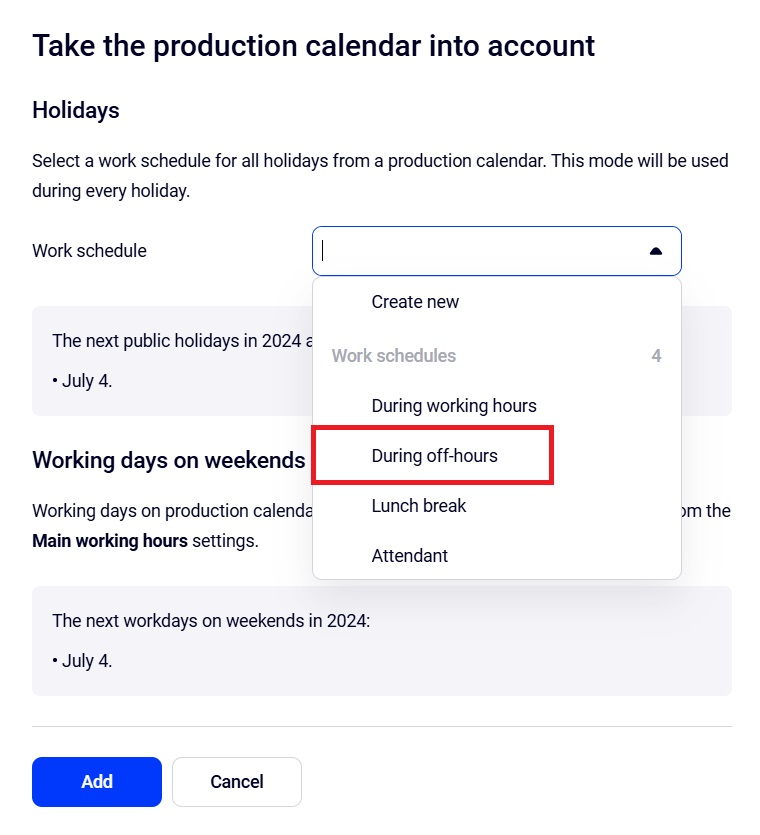
3. Click Add. After that click Save at the bottom of the page.
Done!
Please note: if calls to the number on holidays are received by an attendant, when setting up the operational calendar, select the Attendant option in the work schedule and set up the reception of calls.
How to Add a Special Days Schedule
Sometimes there are major events in the company that need to be taken into account in the schedule. For example, corporate holidays when the entire team goes on vacation at the same time. In Cloud PBX, you can set up a separate call processing mode for such days.
1. In the number schedule settings, go to the Special days section and click the Add special day button.

2. Select one or more days when the working hours will not match the schedule for the day of the week. If your employees do not work on these days, in the window that opens specify that Cloud PBX should consider these dates as off-hours. In this case, calls to the number on the specified days will be processed according to the established route for off-hours.
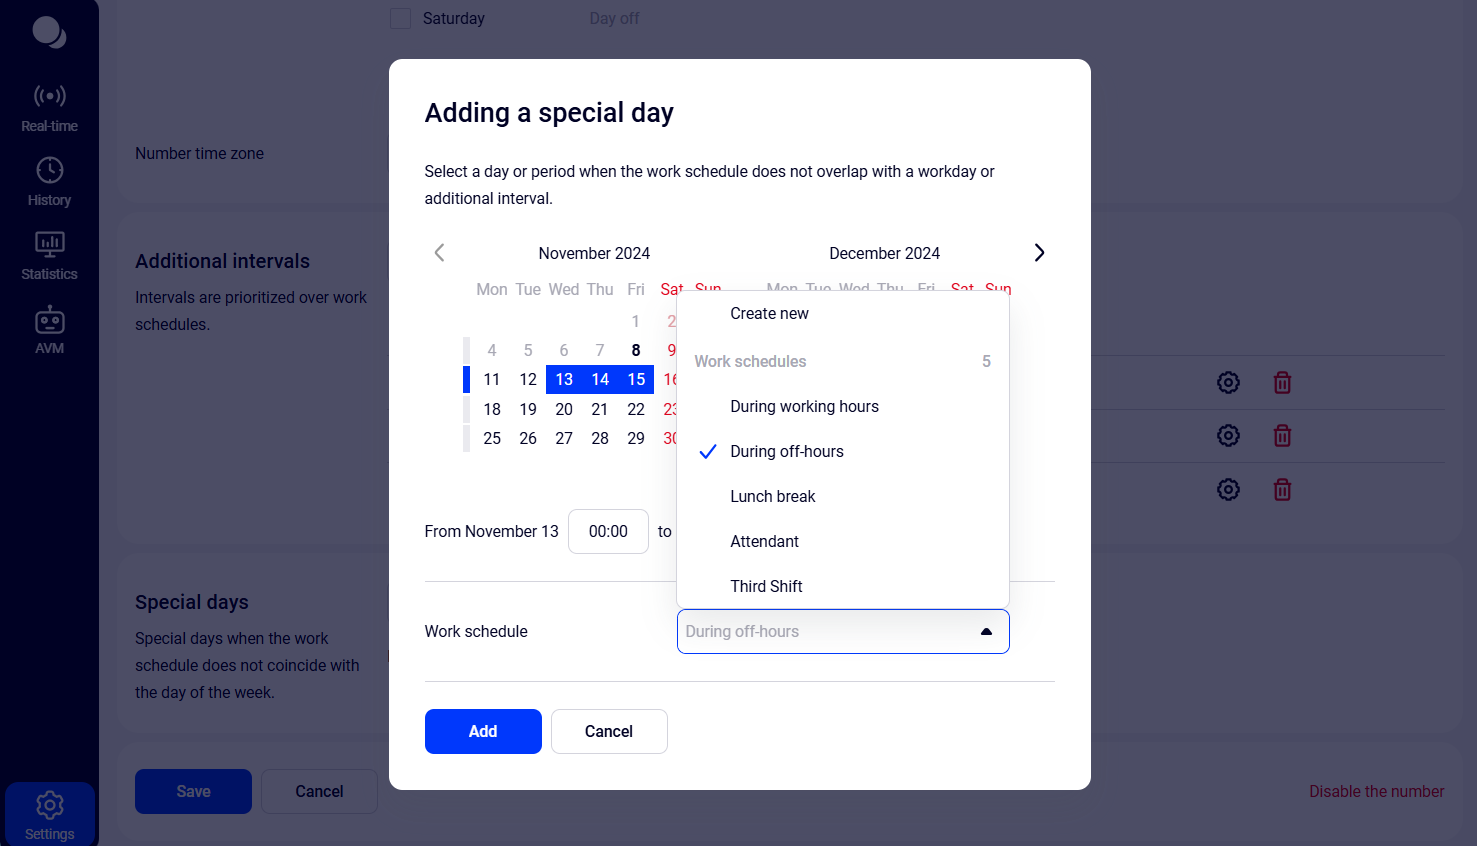
3. Click Add. After that click Save at the bottom of the page.
Tips for Special Days Setup
1. If on special days an attendant is receiving calls to the number, when setting up the operational calendar, in the work schedule select the Attendant option.
2. If you need to set up an early-closing day, create a special rule for receiving calls for the hours when the company will not be operating on a standard schedule.
For example, for an early-closing day, you need to reduce working hours at both the beginning and the end of the day. Create two special days on one date. For the first one, specify the off-hours in the morning, and for the second one, add the off-hours in the evening.
Example.
The company operates on a 5/2 schedule from 8:00 to 20:00, but on May 16 the working day should start an hour later and end two hours earlier.
In this case, in the settings for all numbers, add:
- special day — May 16 from 8:00 to 9:00. Select the work schedule for this interval — off-hours or an attendant;
- another special day — May 16 from 18:00 to 20:00. And, also select the required work schedule (off-hours or an attendant).
In this case, Cloud PBX will receive calls:
- from 9:00 to 18:00 — according to the standard schedule for working hours;
- from 8:00 to 9:00, as well as from 18:00 to 20:00 — according to the special day settings (off-hours or an attendant);
- from 20:00 to 9:00 the following day — according to the standard schedule for off-hours.

How to Set Up an Employee’s Personal Schedule
An employee's personal work schedule is set up on the Employees tab in their profile settings. During off-hours, Cloud PBX will exclude the employee from the department call queue and forward all direct calls to their extension number to a colleague or department. At the same time, customers will hear a notification about the employee's absence and will be ready for another specialist to answer them.
For details see the Employee’s Personal Schedule article.
How to Set Up Employee’s Vacation or Sick Leave
An employee's vacation or sick leave is set up on the Employees tab in their profile settings. To avoid changing the employee’s personal schedule settings during their absence, we have made vacation settings a higher priority. During vacation, the employee will be excluded from the department call queue, and all direct calls to their extension number will be automatically forwarded to the selected colleague or department. Customers will hear a notification about the employee's absence. Such forwarding is automatically disabled when the employee is back from vacation.
For details see the Call Forwarding During Employee's Vacation or Absence.