Employees
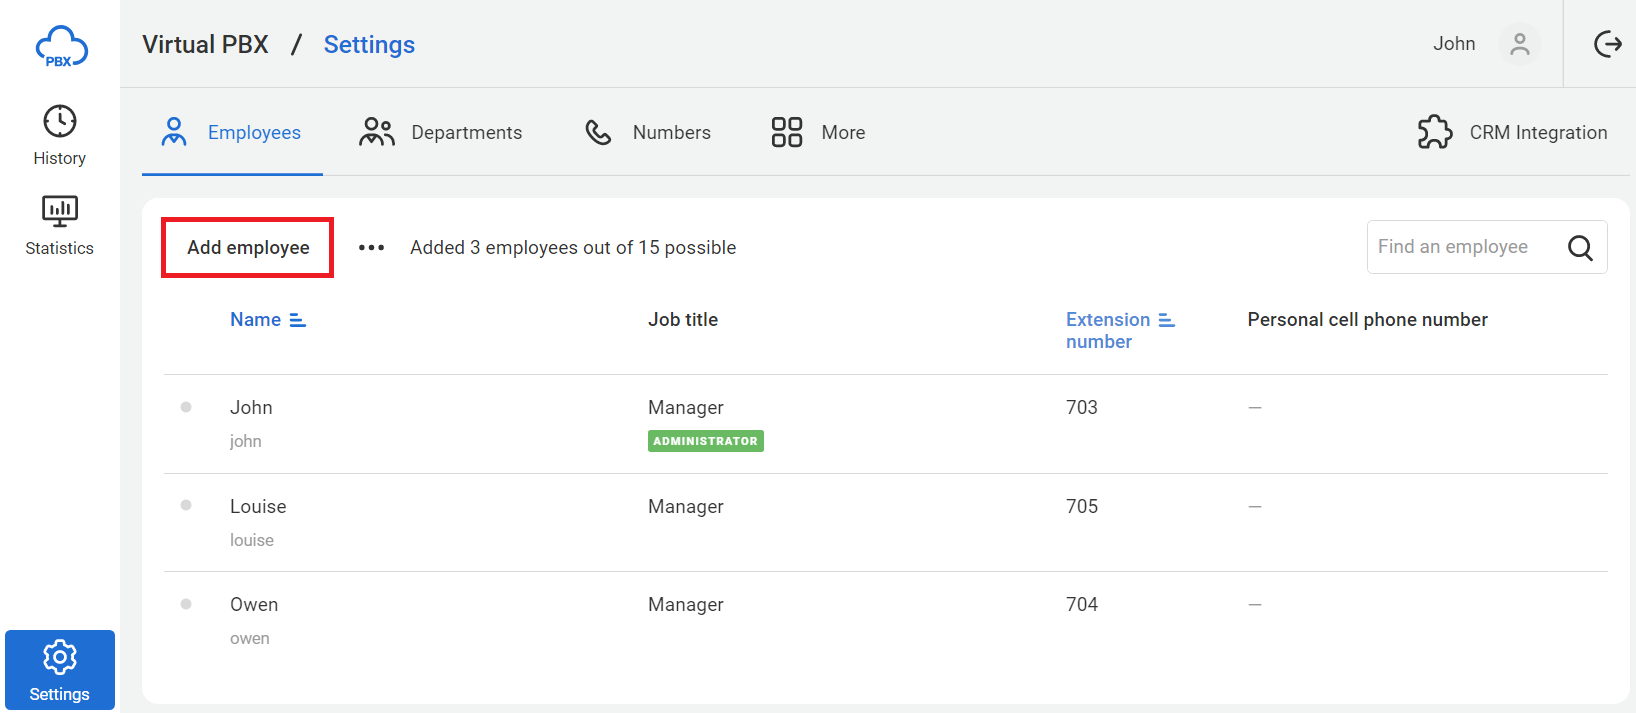
When you log into your Сloud PBX account for the first time, you'll be taken to the Employees tab in the Settings section. This is where you can add new employees who will operate the telephony system.
Click Add employee.
Enter employee credentials.

- Name. Enter an employee name. A username will be autogenerated, but you can modify it if desired. You can also use the username for configuring a SIP phone or a softphone.
- Password. Create or autogenerate a password for the employee account. Besides, it's essential for configuring a SIP phone or a softphone.
- Job title. This information doesn't impact the cloud PBX settings. Fill it in as you wish.
- System rights. Choose one of the three levels of access to the cloud PBX features:
- Administrator. They have complete access to the cloud PBX, including settings, all company calls, and room recordings.
- Head of Department. Depending on the role settings in Rights System, they have access to history and statistics either only for their department or for the entire company and do not have access to general Cloud PBX settings.
- User. Depending on the role settings in Rights System, they see history, records and statistics either only for their department or for the entire company (except for internal calls and conference room recordings). The ability to download call history and listen to recordings can be limited. The only available Cloud PBX setting is forwarding to their mobile phone.
- Limited user. They have access to their external calls (My calls in call history) and can also configure call forwarding to their mobile phone.
- Extension number. The system will autogenerate an extension (short) number, but you can modify it (it's prohibited to choose emergency telephone numbers).
- Email. Enter the employee email address so that they can receive a welcome email with their username, password, and a link to the softphone.
- Personal mobile number. Enter the employee’s personal number. It can be used to recover their password and forward incoming calls.
Call Reception Settings
In each employee’s profile, in the Receiving calls section, you can set several call distribution parameters.
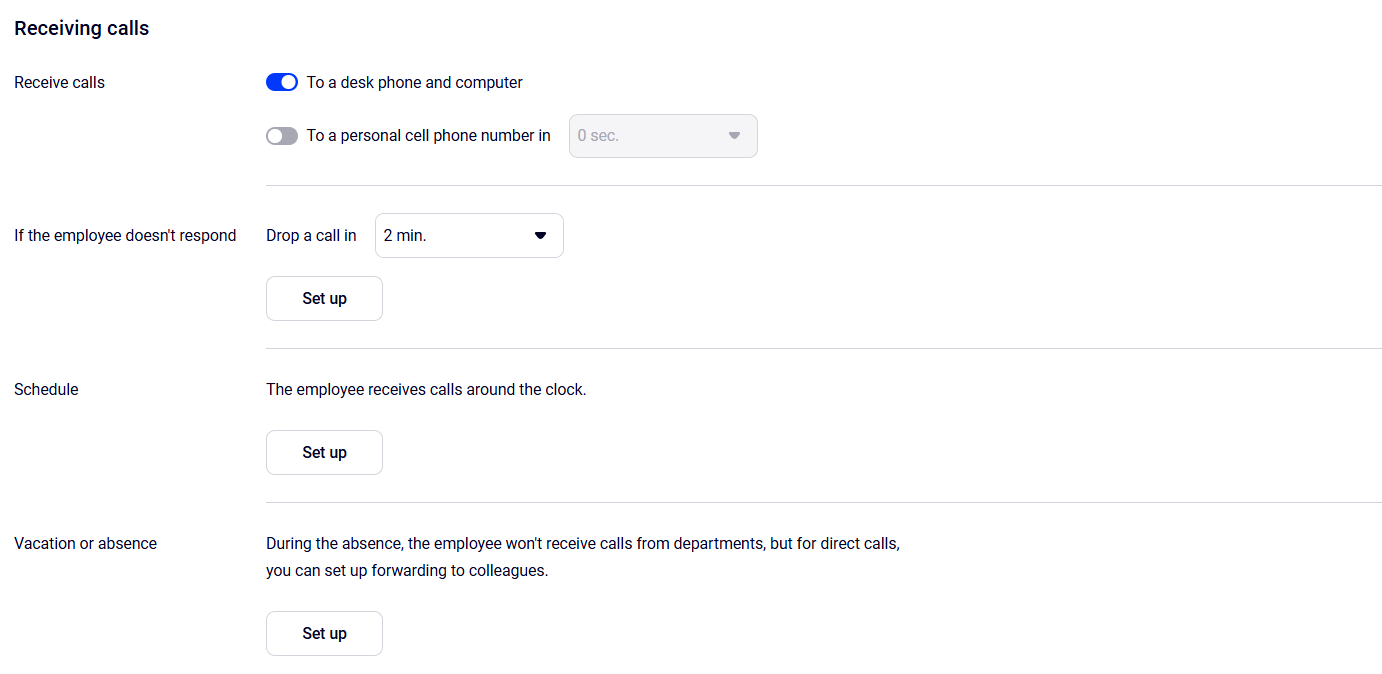
1. Receive calls. Choose on which devices and with what delay the employee will receive calls on weekdays. Whether they will receive calls only on a desk phone and softphone, only on a personal mobile phone, or on all devices at once. If a manager is in the office most of the time and can answer immediately from a desk phone or computer, we recommend setting a delay before forwarding the call to a mobile phone. So, the incoming call will first be sent to office devices, and only then (after, for example, 5 seconds) to the mobile phone. Read more about waiting time settings in the Flexible Setup of Waiting for Response Time article.
2. If the employee doesn't respond. Choose how direct incoming calls to the manager’s internal number that they do not have time to answer will be distributed. Such calls can be automatically dropped, redirected to another employee, department or a voicemail, and you can choose the waiting period for a response before forwarding. For details, see the Forwarding of Direct Calls With a Long Response Time article.
3. Schedule. Specify the employee’s days and hours of work so that during non-working hours Cloud PBX will exclude them from the department’s call queue and transfer direct calls to their extension number to colleagues, to the department, or to the voicemail. For details, see the Employee’s Personal Schedule article.
4. Vacation or absence. (a sick leave, force majeure, etc.). Specify the dates of absence of the employee so that Cloud PBX will exclude them from the call queue for this period. Choose how direct incoming calls will be distributed during the manager’s absence — to their colleague, to a department, or to the voicemail. When the employee returns from vacation, these settings will be disabled automatically. Details are in the Call Forwarding During Employee's Vacation or Absence article.
Save the settings and create accounts for all employees. As a result, the homepage will have a similar appearance to the following:
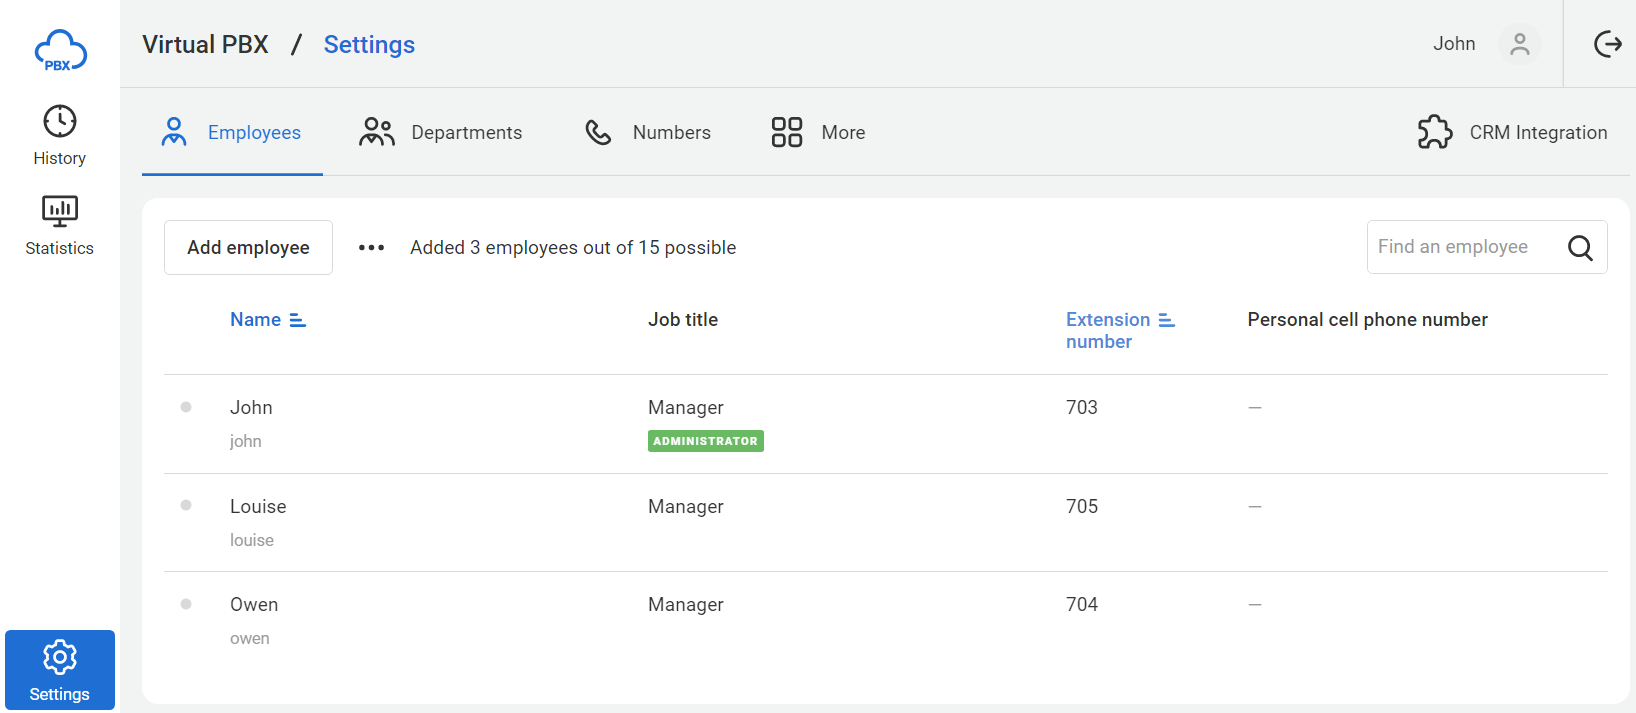
After creating all the accounts, proceed to configure the departments.