Bitrix24 and Cloud PBX Integration Guide
This page describes the steps to connect and configure the Bitrix24 and Cloud PBX integration. To follow them, make sure you have administrator permissions in both systems.
You can integrate both the cloud and the on-premise versions of Bitrix24 with a Cloud PBX. If you want to connect the on-premise Bitrix24, you must have a valid SSL certificate; otherwise, user matching will not work. You can check whether a certificate is installed by following this link.
In the Bitrix24 interface
Go to the Bitrix24 integration marketplace. In the search bar, enter the name of your provider. Open the app page and click the Install button.
In the Cloud PBX interface
1. In your Cloud PBX, go to Settings and open the CRM integration menu. Find the Bitrix24 widget and click Connect.
2. In the window that opens, enter the address of your Bitrix24 account. Click Connect.
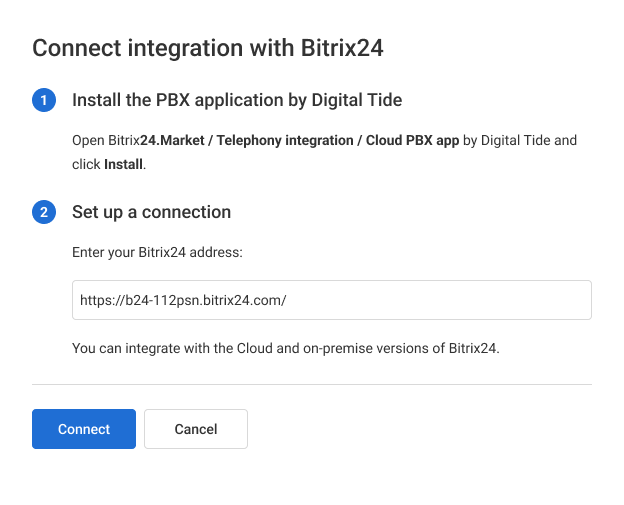
If you are using the on-premise version of Bitrix24, you must specify the domain name for the integration. Otherwise, you will get an error during further setup.
3. In the first step of the integration setup, match all Cloud PBX users to Bitrix24 users. This is required so that the systems can uniquely identify employees and correctly log related events. Only calls of matched users will be logged into Bitrix24. If you add new employees later, don’t forget to match them in the integration settings of the Cloud PBX personal account.
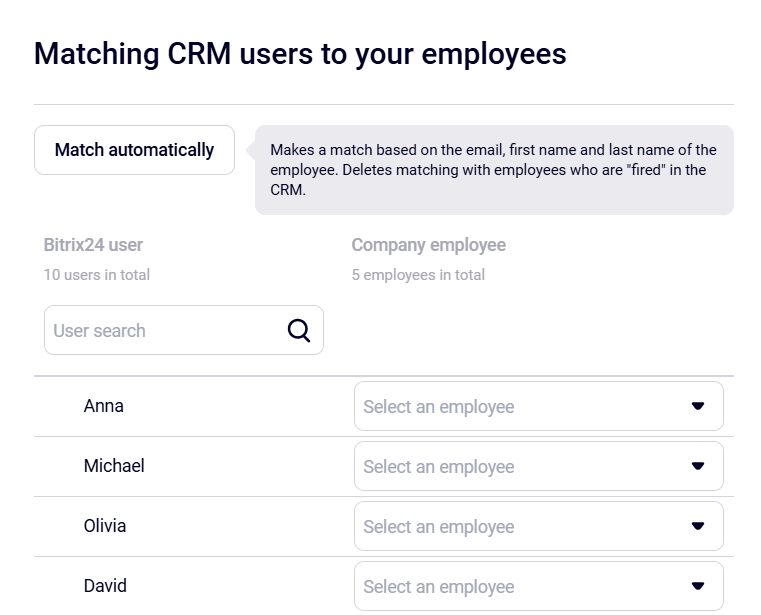
If “something went wrong” during user-matching with the on-premise version of Bitrix24, make sure your domain has an SSL certificate installed. You can check this at https://www.sslshopper.com/ssl-checker.html.
4. You can set up the integration for all numbers at once (this option is selected by default) or individually for each number. For more details, please see the Setup of Multiple CRM Integration Scenarios article.

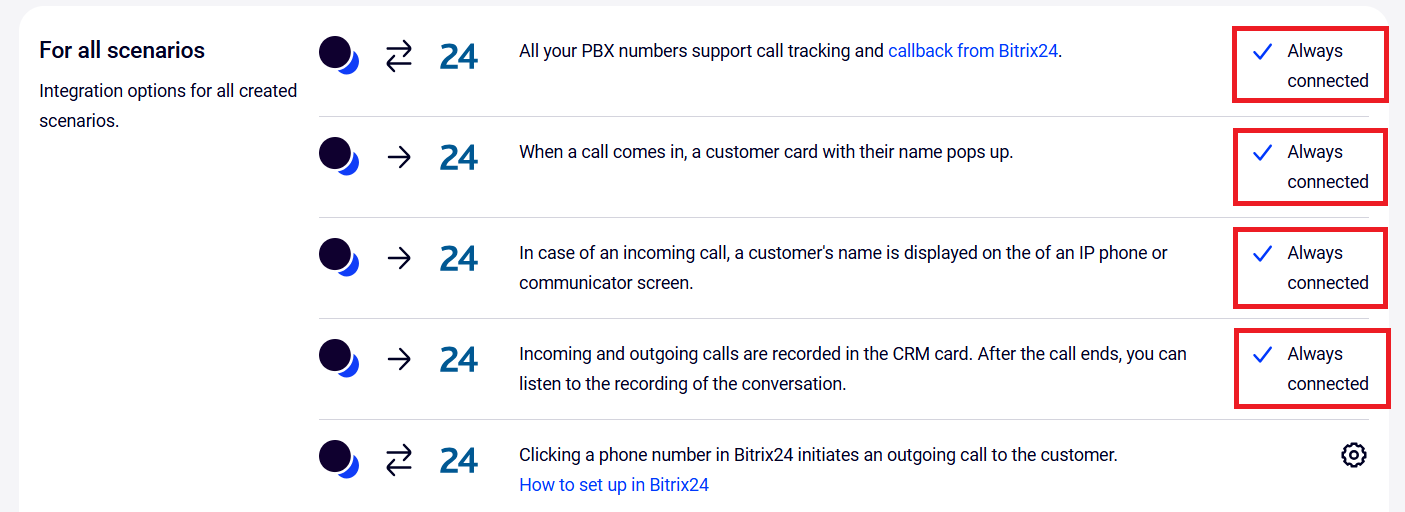
5. The first section contains preset scenarios, where:
- to manage calls directly in the Bitrix24 interface, switch the toggle to the right in the following scenario — The call is made and received directly in Bitrix24 via the built-in widget. Learn more about calling via the Bitrix24 widget in the Calls from Bitrix24 (WebRTC) article;
- to use the Bitrix24 callback widget, install it in advance by following the instructions;
- if you want to set up end-to-end analytics and call tracking from Bitrix24, please see the Bitrix24 End-to-End Analytics article;
6. The rest of the scenarios allow you to flexibly configure the integration based on the tasks your business is currently facing.
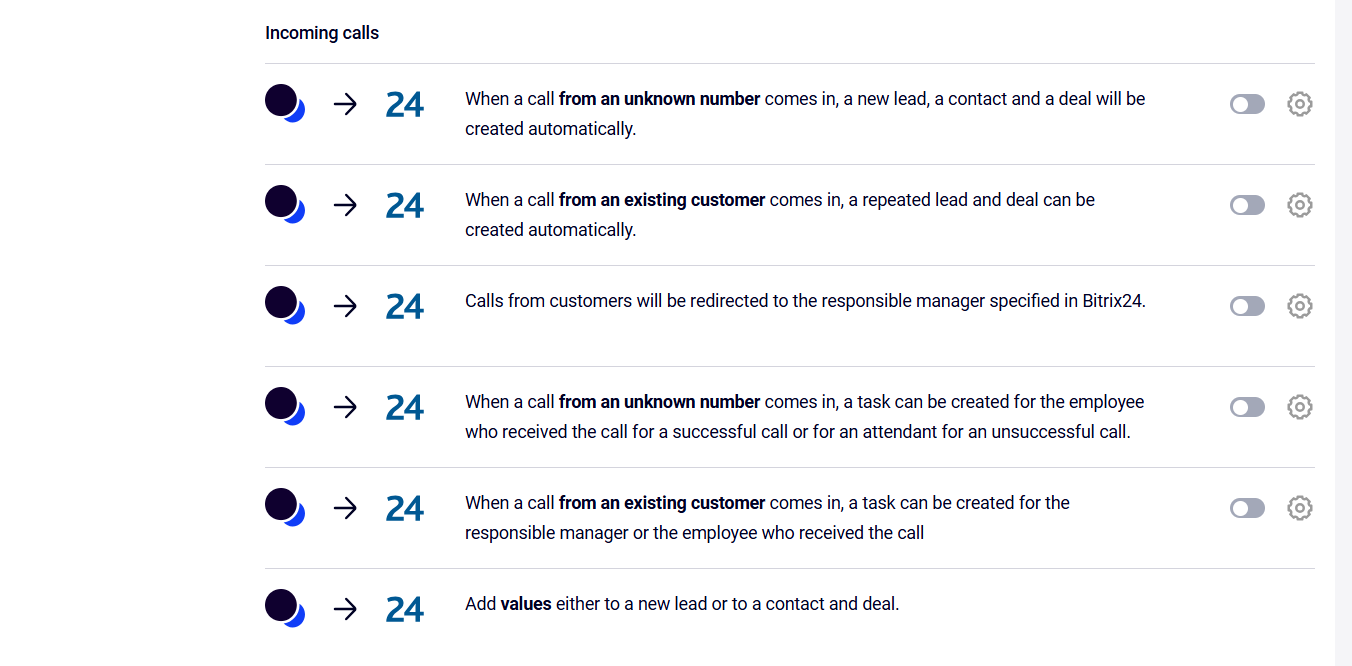
You can set up integration scenarios separately for incoming calls.
And for outgoing calls.
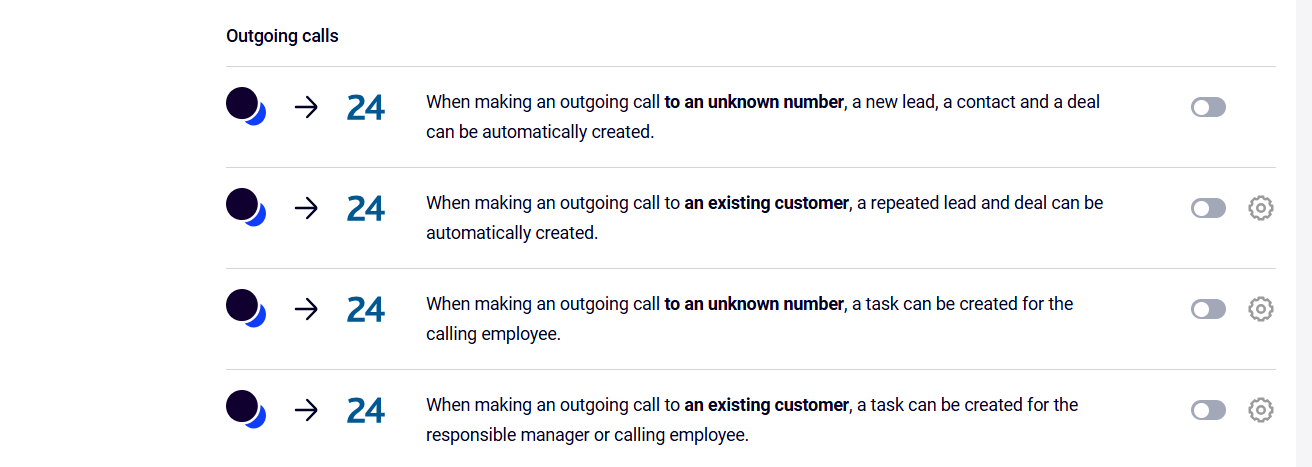
7. Next, let’s have a closer look at the logic of scenario setup.
You can enable creating leads, deals, and contacts separately for:
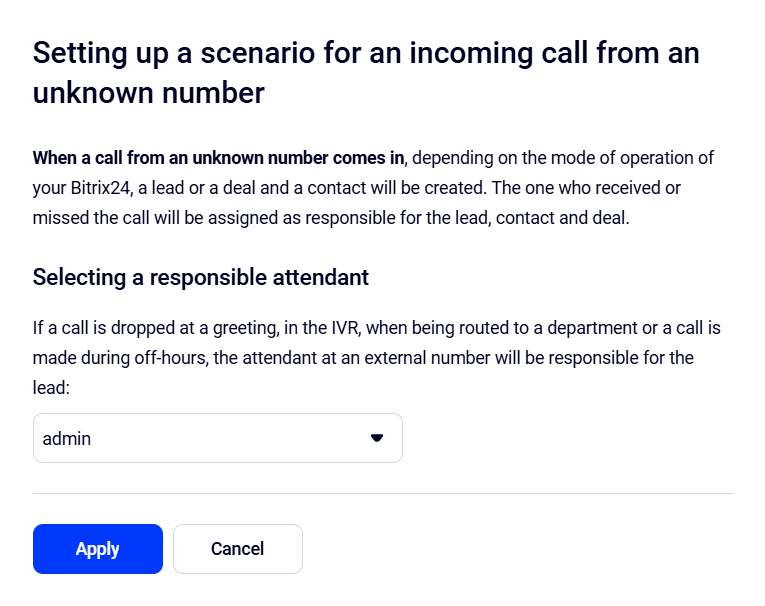
- incoming calls from an unknown number;
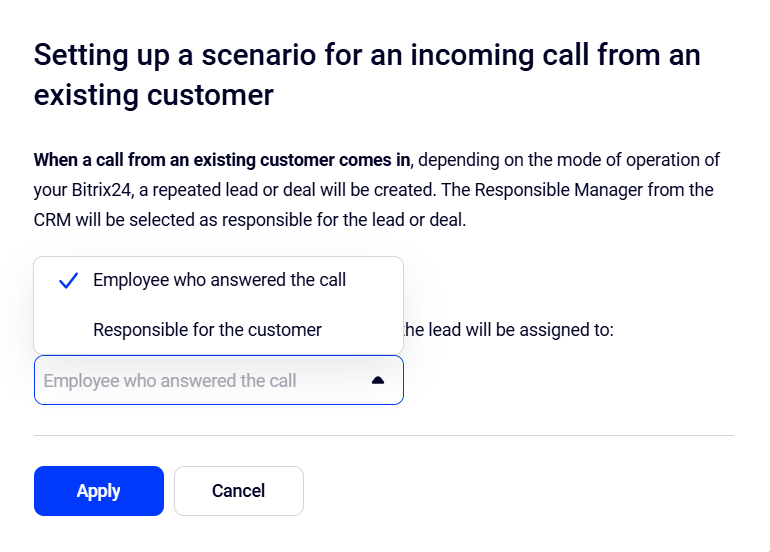
- incoming calls from an existing customer;
- outgoing calls to an unknown number;
- outgoing calls to an existing customer.
For more details on how these entities are automatically created in Bitrix24 and in which of them calls are logged, please see the article.
At the same time, each call type can have its own integration rules.
You choose who will be responsible for the created entities in Bitrix24.
For example, if a call comes from an existing customer, the employee who answered the call or the one responsible for the contact can be assigned as the responsible employee for the lead.
For calls that are dropped during the greeting, in the IVR, while being routed to a department, or come outside working hours, you can choose an attendant who will answer the call on an external number and will be assigned as the responsible employee for the lead.
Set up creating tasks for incoming and outgoing calls (both successful and unsuccessful).
To do this, in the scenario settings, select the person responsible for the task and the watcher who will be able to monitor the task progress and outcome (for example, a manager), select a task deadline, enter a title, and, if necessary, describe the task in more detail in the Task text field.
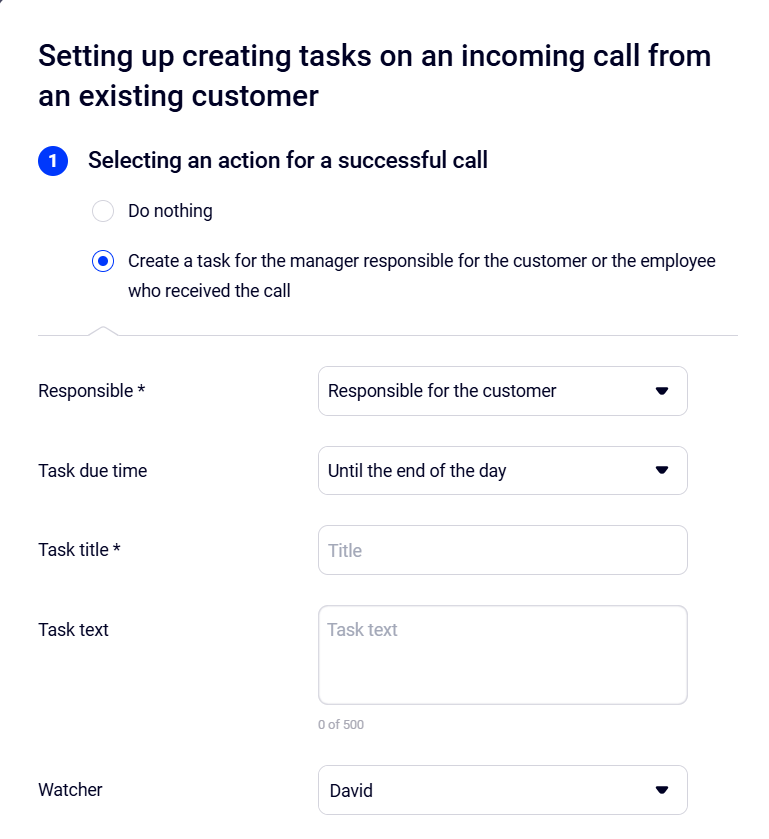
The corresponding lead, deal, or contact will be linked to the created task so that the employee can quickly find the required information.
Customer calls can be automatically redirected to personal managers if you set this rule in the integration settings. You can also specify who the call should be transferred to if the personal manager does not answer.
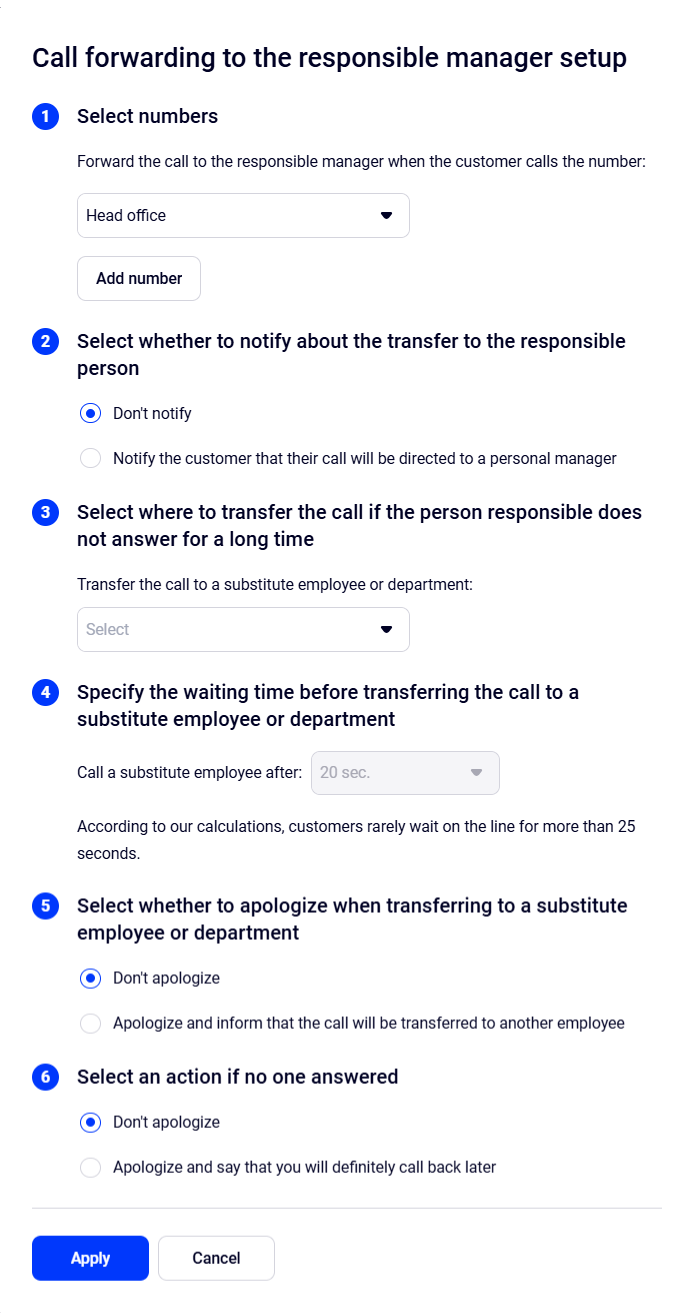
In this case, the customer will no longer have to listen to a voice menu or talk to a secretary or other employees. Cloud PBX will forward the call straight to the responsible manager (optionally, you can enable an automatic audio message that notifies the customer about it).
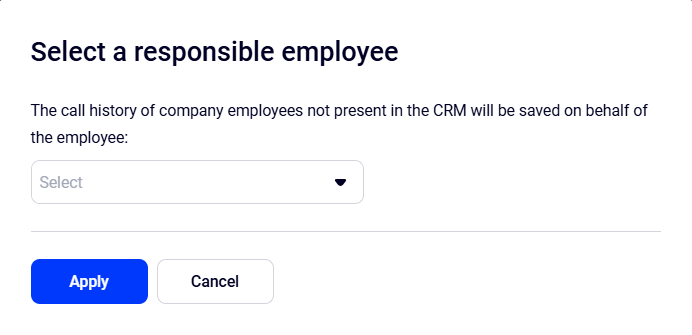
The call history of company employees who are not present in Bitrix24 will be saved on behalf of the selected user. This option can be used if you have not matched all managers or if you have employees who do not work in Bitrix24 but can call customers (an accountant, courier, etc.). Contacts, deals, and leads will not be created for such calls, but the call history and recordings will be stored in Bitrix24.
Completing the Bitrix24 Integration Setup
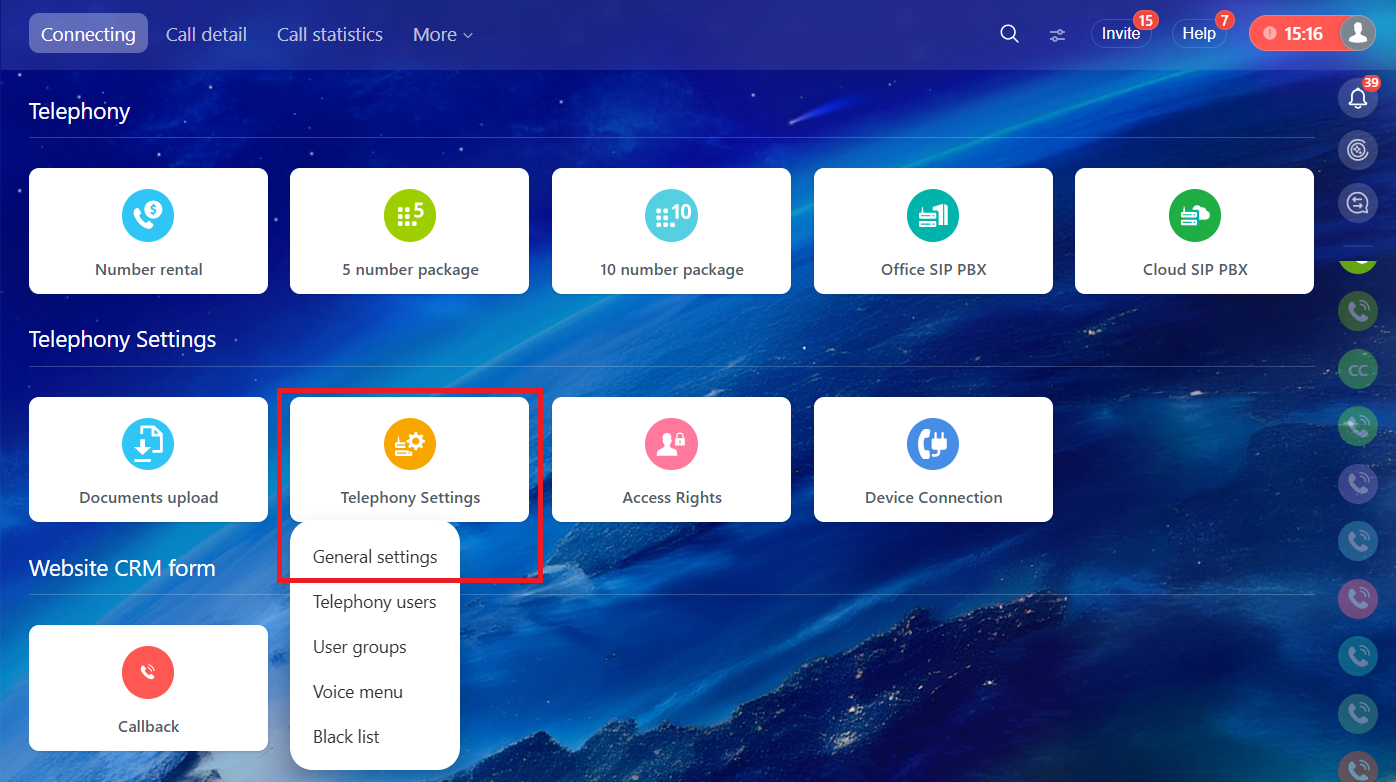
8. In the Bitrix24 search bar, type “Telephony” and go to this menu item. On the new page, find the Telephony Settings section. Click it with the left mouse button and select General settings.
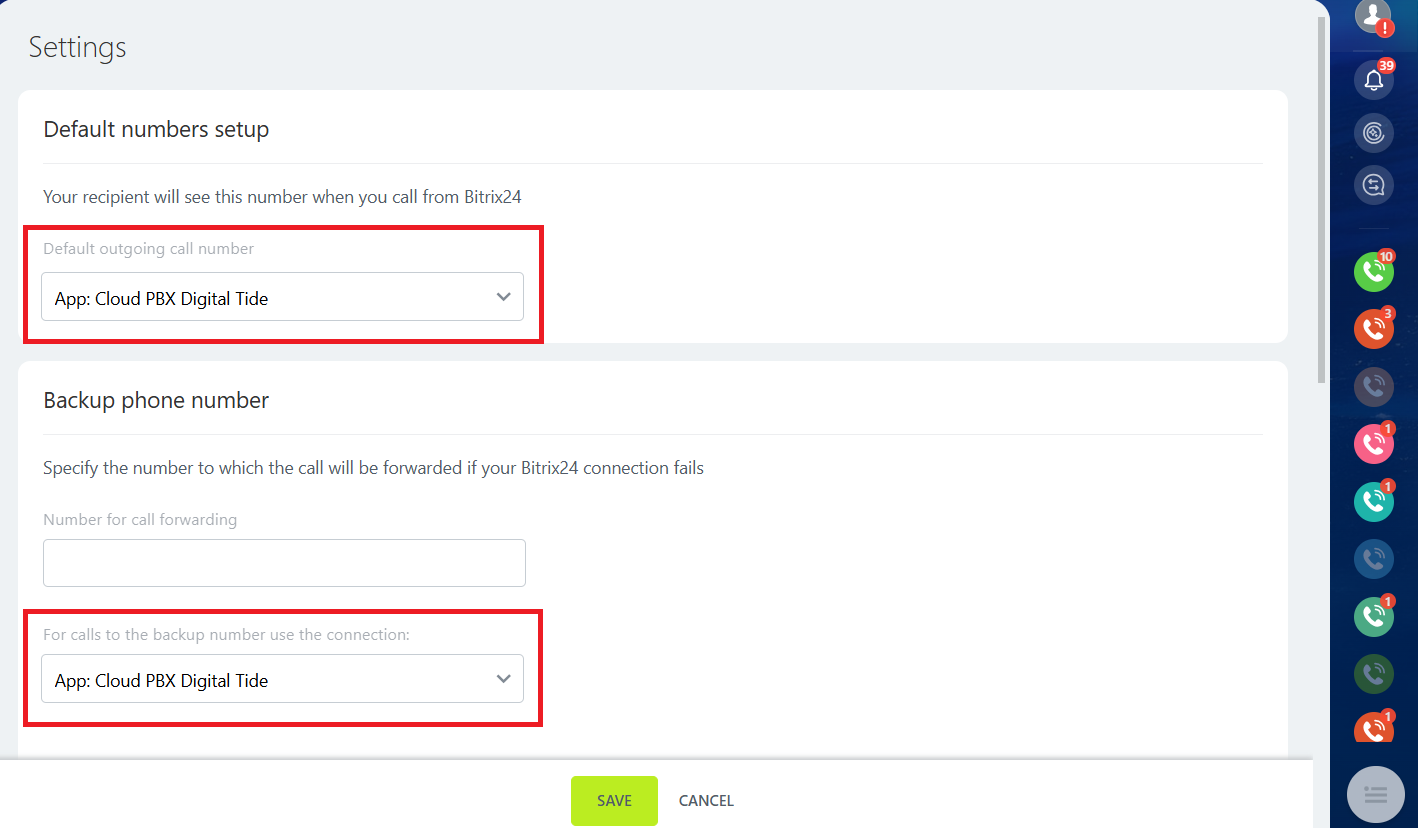
9. In the new tab, select the Cloud PBX application as the number for outgoing calls and as the backup number. Click Save.
10. A successfully connected integration will be displayed in the Telephony section.
If the Integration Does Not Work
If you did everything correctly during setup, but the integration does not work, try reconnecting this step. To do this, first select a different connection method, save it, then return and select the required one. Save again.
Integrating One Bitrix24 Account With Multiple Cloud PBXs
If you have several Cloud PBXs, in order to integrate them with a single Bitrix24 account, each Cloud PBX must be connected to the Bitrix24 account one by one.