Speech Analytics Setup Guide
If you don't have time to analyze your employees' calls, enable Speech Analytics. This article explains how to set it up.
To learn what the service can do, please see:
Step 1. Enable Speech Analytics
Go to Settings — More — Speech Analytics and enable the service.
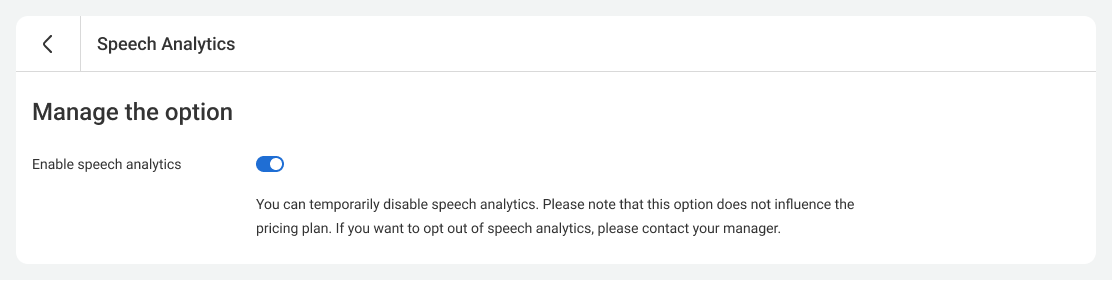
Select the numbers for which you want to track calls.

Step 2. Configure Poor Service Indicators
By default, the system will look for three issues in conversations: customer complaints, rudeness, and filler words. To make analytics more effective, you can add your own evaluation criteria.
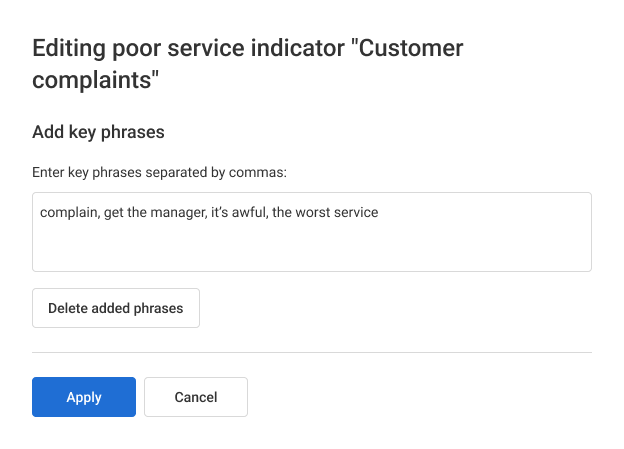
For example, add a key phrase such as “get the manager” or “I'll take this to court.” To do this, click the gear icon next to the default indicator and enter the words separated by commas.
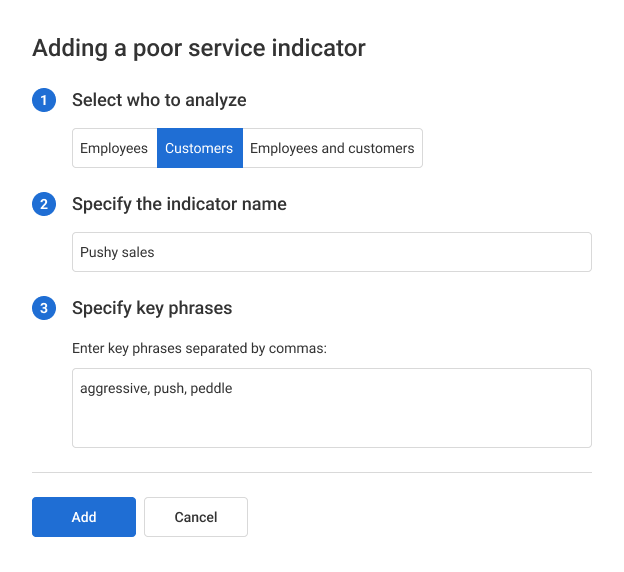
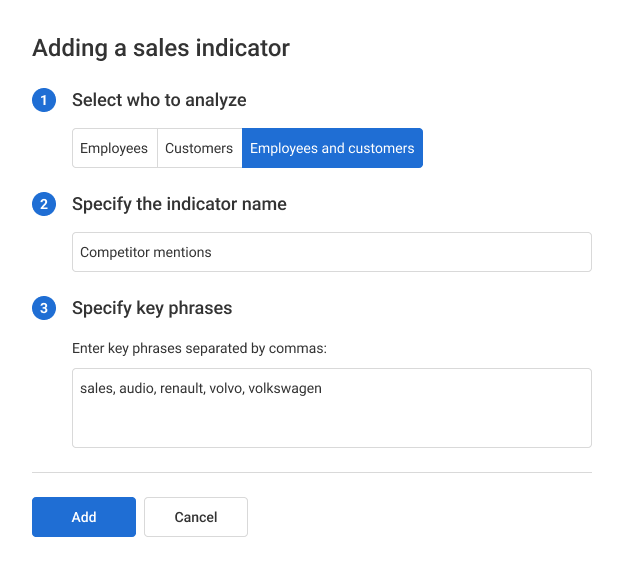
You can also create a new indicator. Select whose speech to analyze: the agent's, the customer's, or both, name the indicator, and add keywords.
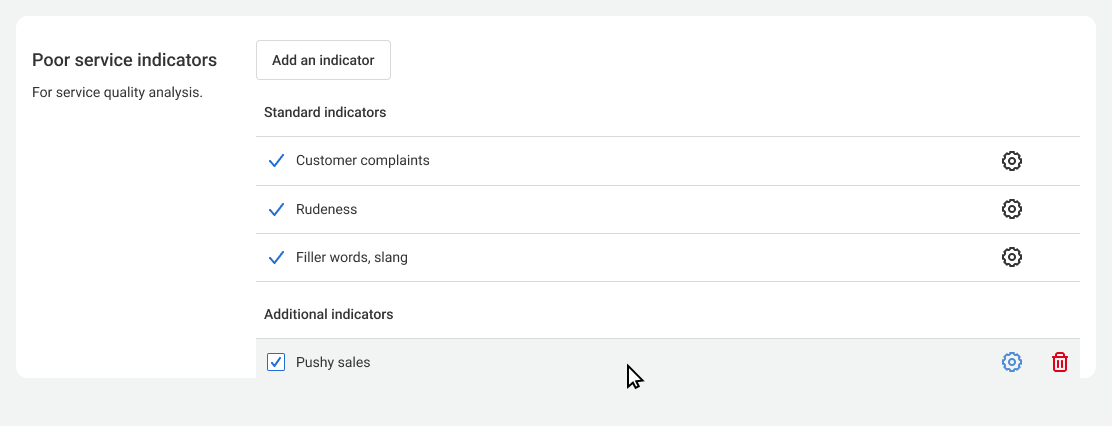
The new indicator will then appear in the list of poor service indicators.
Please note
The service will start working only for new calls after you save the settings.Step 3. Configure Sales Indicators
Configure the indicators for sales-leading conversations the same way as in the previous step. For example, offering additional products and services or mentioning promotions.
Make it easier
Add the Competitor mentions indicator. List the competitor names separated by commas. This way, you'll know which companies your customers mention and can build a better sales strategy.
Step 4. Configure Analysis Limit
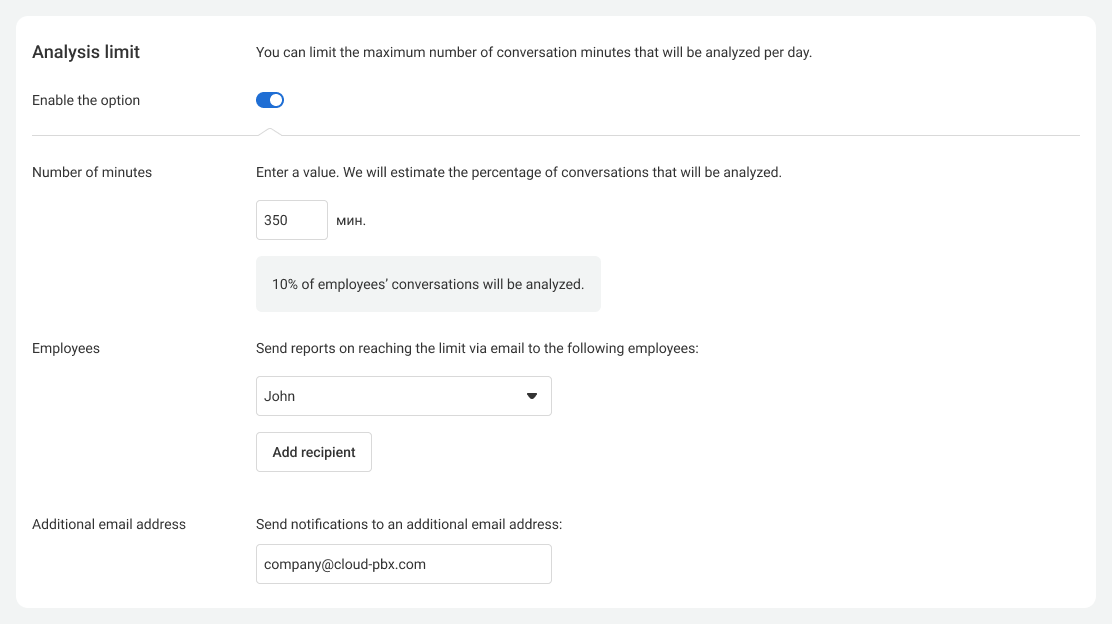
If you get a lot of calls, you can set a daily minute limit for analysis to reduce costs.
- Enable the Analysis limit option.
- Enter the number of minutes. The system will show the percentage of calls that will be analyzed.
- Enter the email address for notifications when the limit is reached.
Please note
100% is the total duration of all company calls for the previous month. But this metric can vary from month to month, so Cloud PBX makes an approximate calculation.Analysis will stop when the limit runs out and automatically resume the next day. You can change the limit at any time, even in the middle of the workday. The system will start analyzing calls as soon as you increase the limit.
For example, you had a 100-minute limit. You used it up by 12:00. At 15:00, you increased the limit by another hour. Cloud PBX will then analyze another 60 minutes of conversations that take place after 15:00.
Click Save. Done! Cloud PBX will now help you improve service and increase sales for every call.