Managing Contacts in Corporate Messenger
Corporate Messenger features customer and employee contact lists. When an employee is registered in Cloud PBX, their contact details automatically appear to all colleagues. Customer contacts can be added directly in the messenger; they are also available to all employees and synchronized with Cloud PBX.
Key Features of the Contact List
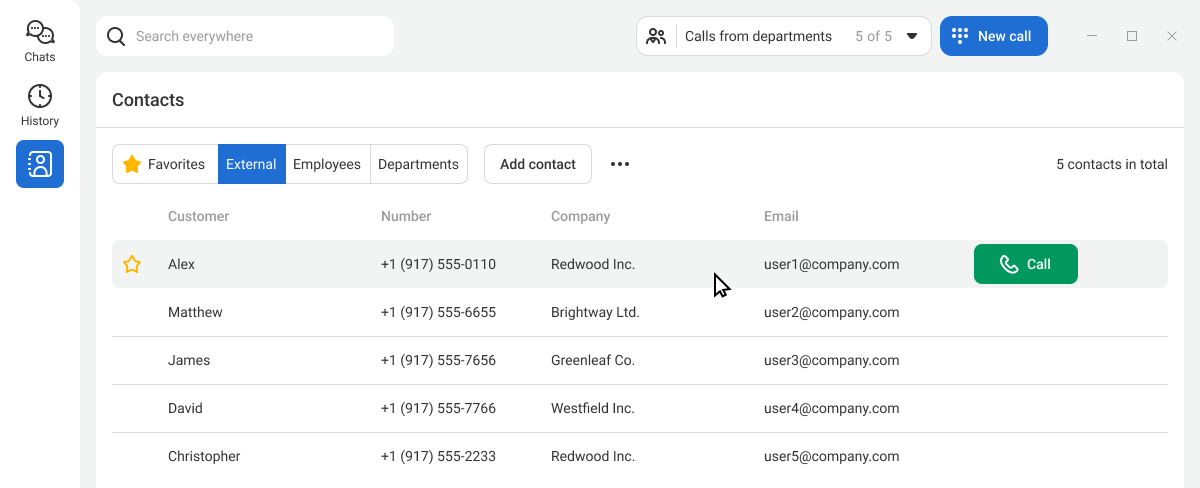
Everything for calls on one screen. If you see a missed call from a contact, click the icon next to their name to review the main details. The contact card also shows the last five calls with this contact, helping you better prepare for the conversation. You can place a call directly from the contact card by clicking Call.
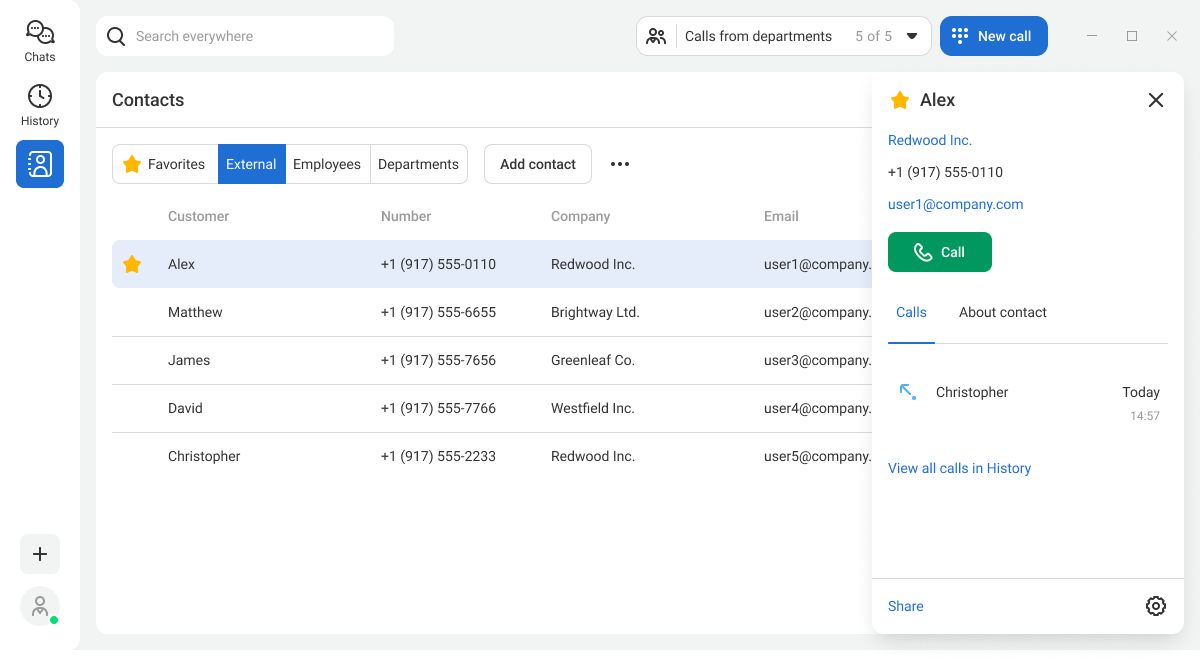
Shared access to contacts for the team. Key customer details will be at every Cloud PBX user’s fingertips in the Contacts section of the messenger and in the Customers section of the web interface. They are synchronized automatically.
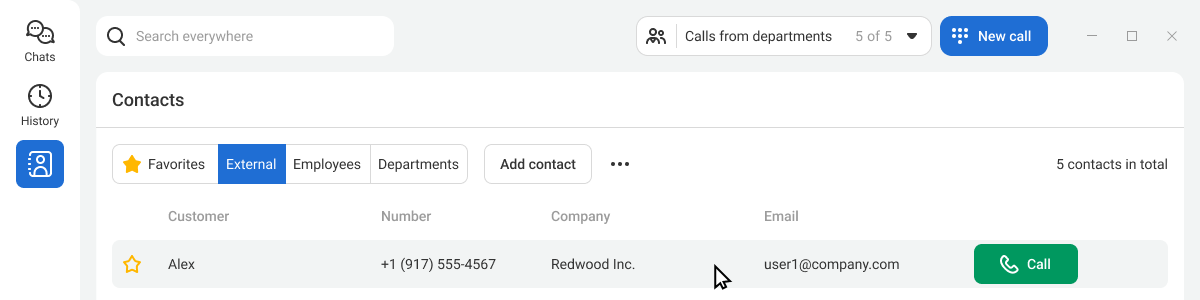
Add contacts manually or import them from an XLS file. Add contacts in the way that works best for you: from the call history or in the Contacts section. You can also import a large contact database at once from an XLS file.
Private access to important contacts: to avoid exposing personal contacts of executives from other companies, you can restrict access to them — such contacts will be visible only to you.
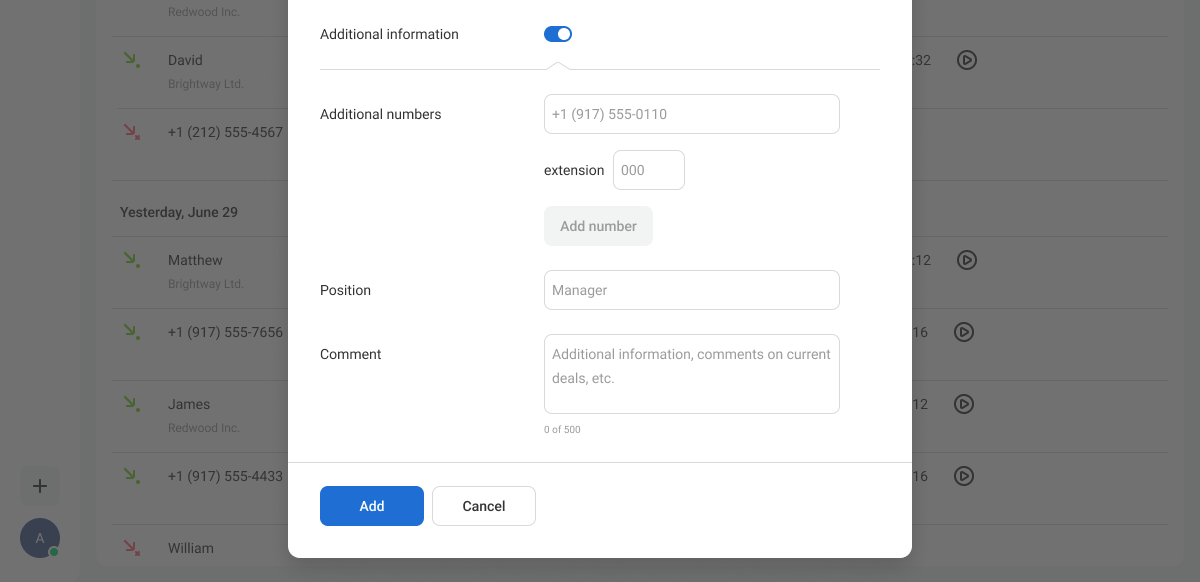
Colleagues' contacts are always at hand. Employee and department contacts are located on the corresponding tabs; all other contacts are on the External tab.
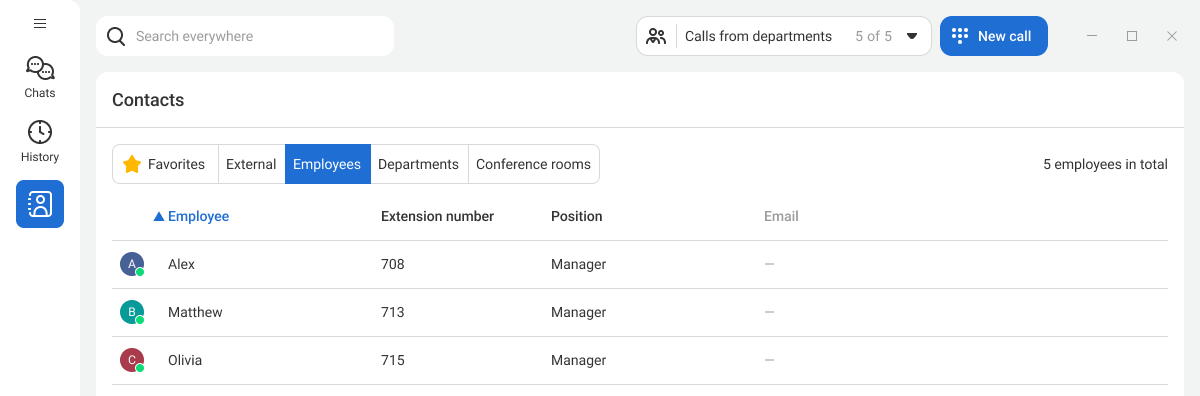
Below, we’ll take a closer look at all contact list settings in Corporate Messenger.
How to Add a Contact From the Call History
1. Hover over the row with the customer’s number in History. Click the icon to the right of the number.
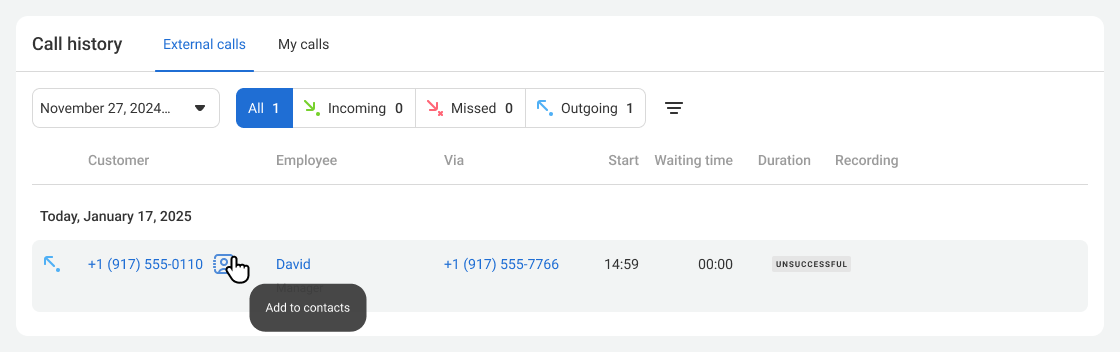
2. The adding contact window will open. At the top of the window, choose whether to create a new contact with this number or add the number to an existing contact.
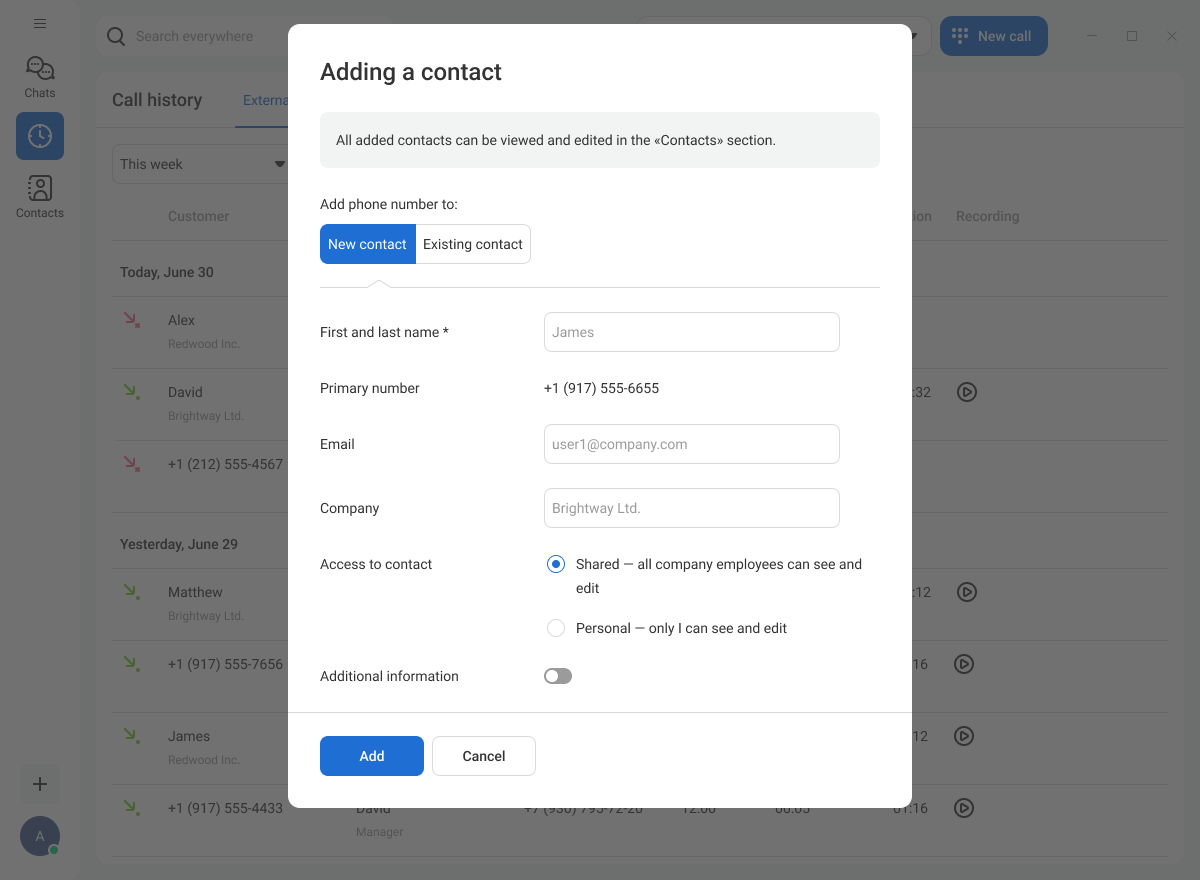
Enter the main customer details: full name, additional phone numbers, email address, and company name. Also specify who can see this contact — only you or all Cloud PBX users.
If you know the customer’s additional number, job title, or want to add other details, switch the Additional information toggle and fill in the fields below.
By default, Cloud PBX will make calls to the customer’s primary number, but you can also add additional numbers. To make an additional number the primary one, click Set as primary.
For more details about calls to additional contact numbers, please see the How to Call Additional Contact Numbers paragraph.
After entering the customer details, click Save. All calls of the saved contact will be automatically named — the contact name will appear in the call history.
How to Create a New Contact
You can create a new contact in two ways: from the call history and from the contact list. Let’s take a closer look at each option.
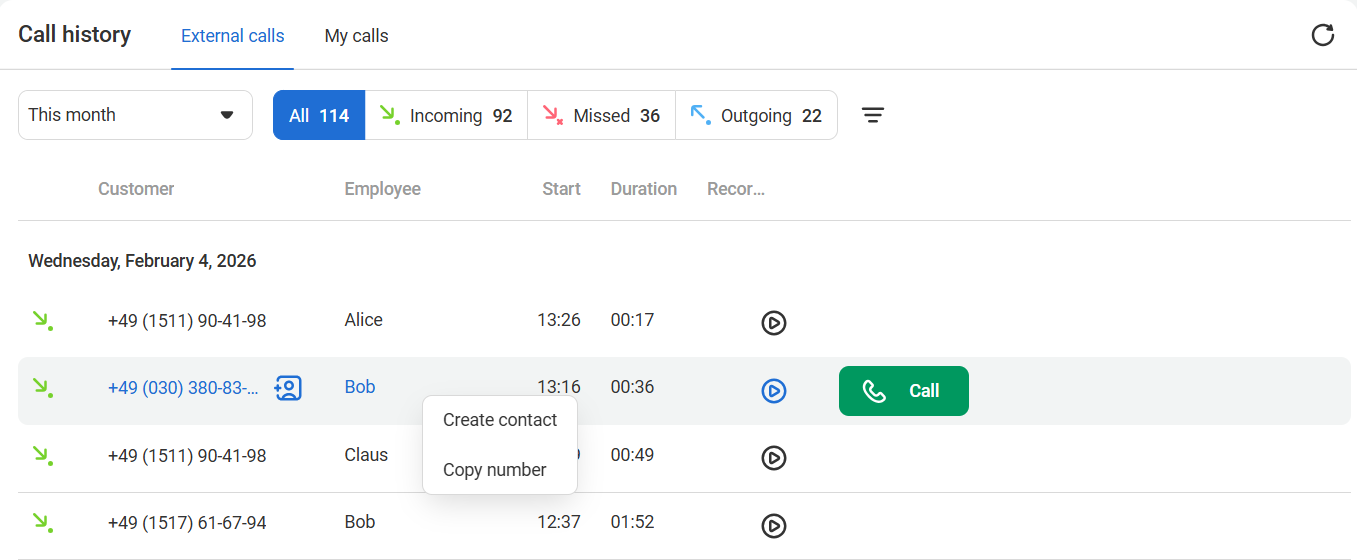
In the call history, right-click and select Create contact.
From the contact list, click Add contact.

The adding contact window will open. Fill in the fields and click Save. The customer details will appear in the shared contact list.
How to Add a Contact During an Active Call
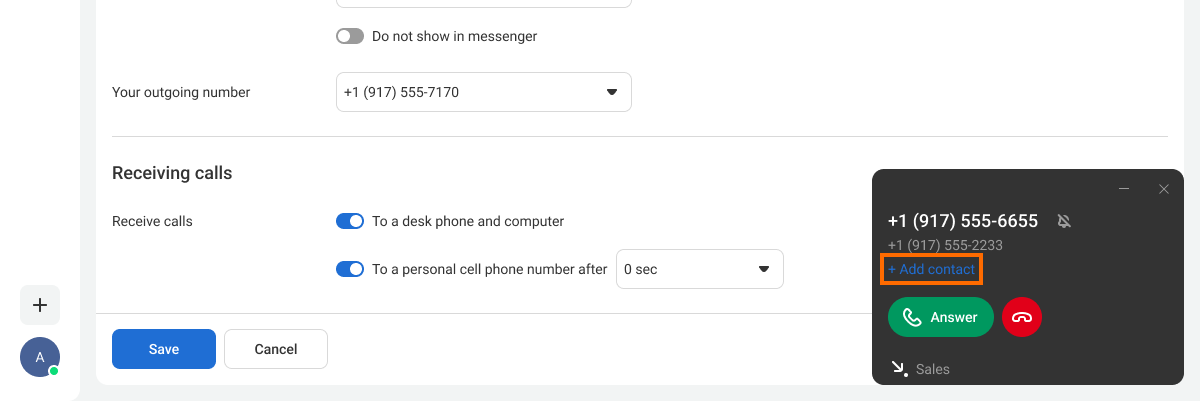
If you are on a call with someone who is not in your contacts and want to add their contact before the call ends, click Add contact on the call card.
How to Import a Contact Database From an XLS File
1. In the Contacts section, click the three dots to the right of the Add contact button, then click the Import contacts button below.

2. Download the Excel file template with an example of how to fill in the contact list.
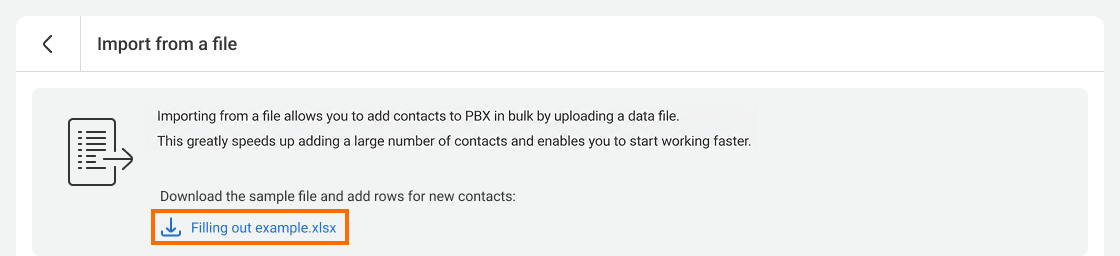
3. In the downloaded file, enter the information for new contacts and save your changes.

4. Return to the messenger interface and upload the updated file.
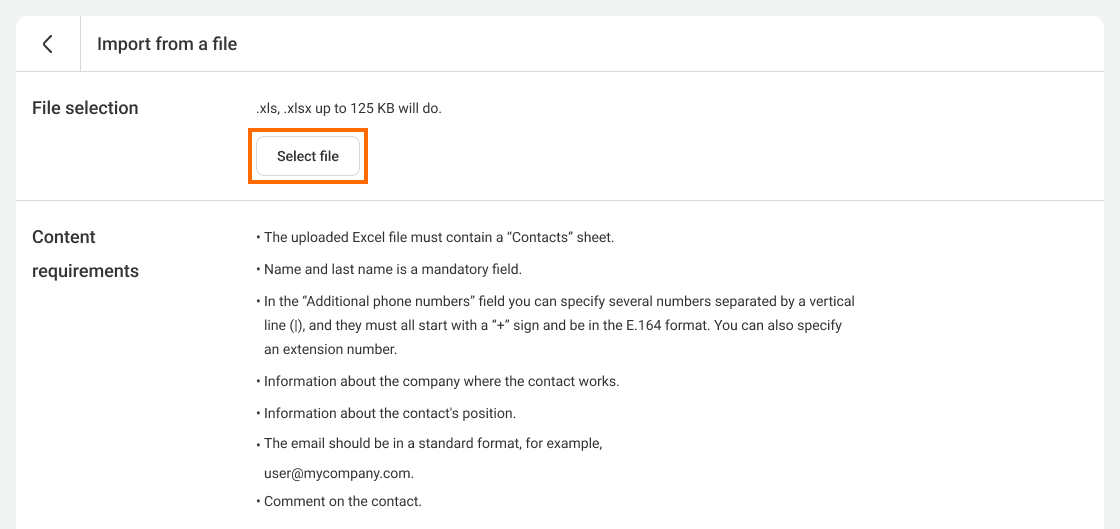
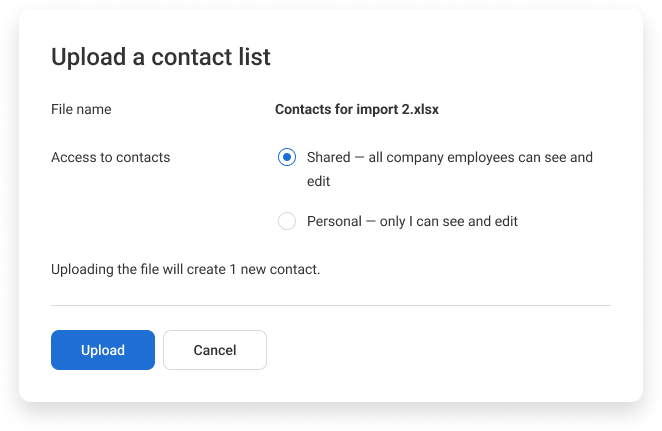
5. Choose who can have access to this contact list — only you or all company employees.
6. Confirm by clicking Upload.
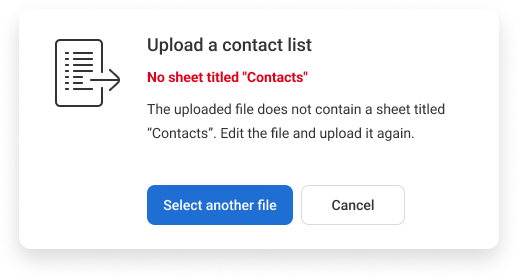
When uploading an XLS file with contacts, two types of errors may occur:
- The file does not contain a sheet named Contacts.
- Errors in the contact data — in this case, you can import correctly formatted contacts into Cloud PBX and download a file with errors.
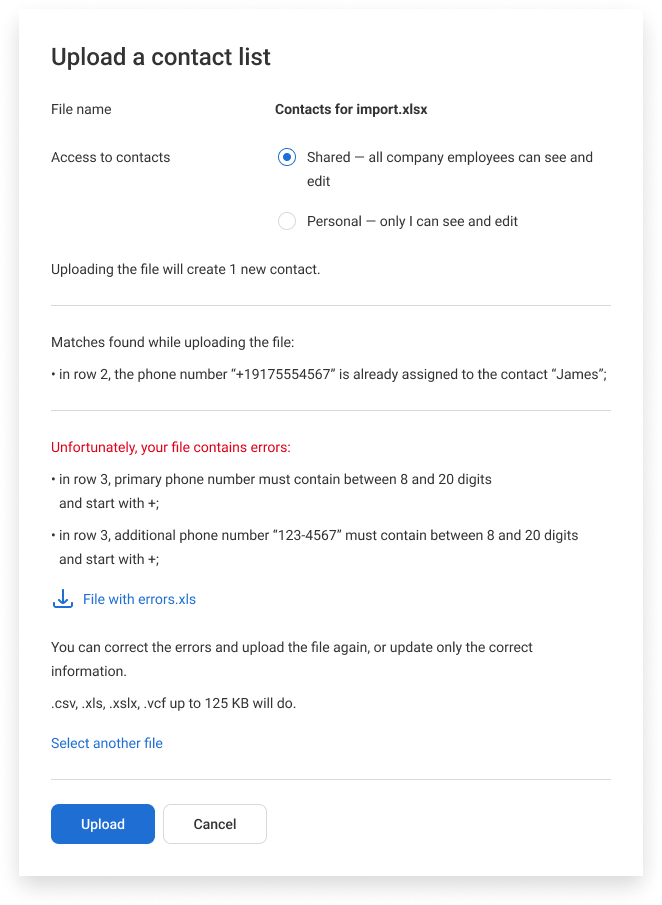
The downloaded file will contain only rows with errors and comments explaining what needs to be fixed. You can correct the data in the same file and re-upload it to Cloud PBX.

How to Edit or Delete a Contact
You can edit a contact either from the contact list or from the contact card. Let’s take a closer look at each option.
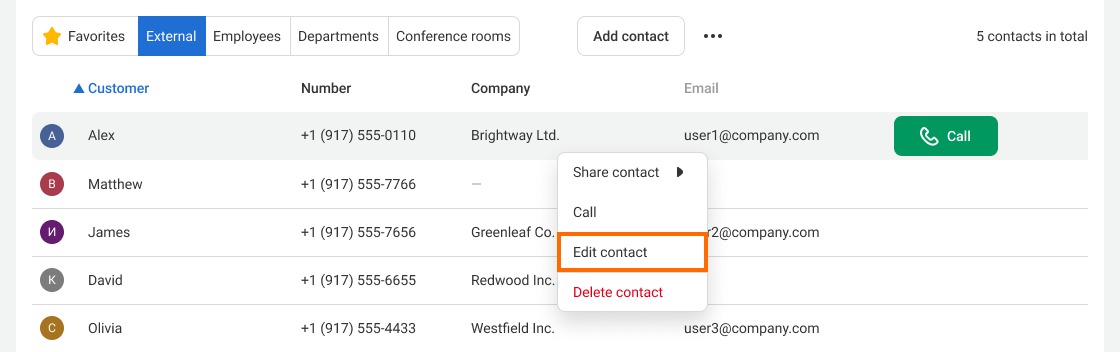
In the contact list, right-click and select Edit contact or Delete contact.
In the contact card, click the gear icon on the About contact tab.

The editing contact window will open. Make the required changes and click Save.
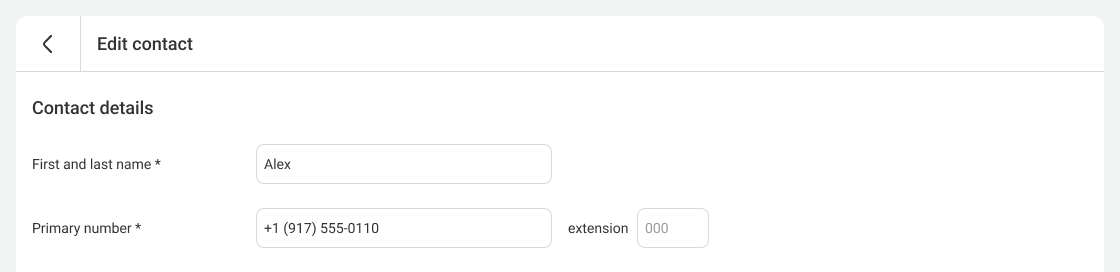
To delete a contact you created, click Delete in the bottom-right corner of the editing window.
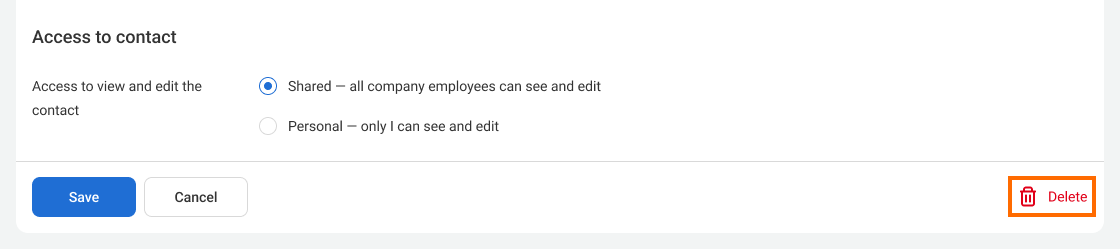
Please note: you can delete only the contacts that you created yourself.
How to Find the Contacts You Need
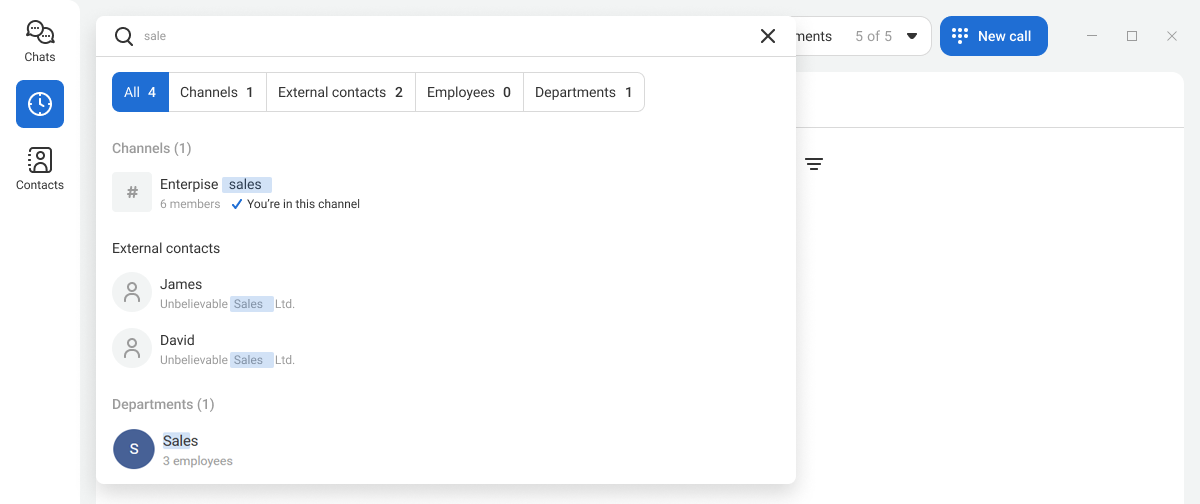
To find a contact, start typing one of the following in the search bar: the contact name, number, email address, or company name.
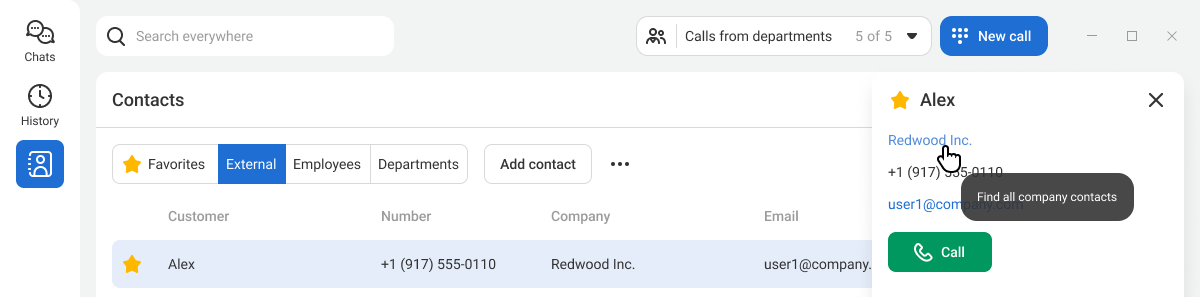
If you want to find all contacts of a customer’s colleagues from the customer card, click the company name.
How to Add a Contact to Favorites
To get quick access to the contacts you call most often, add them to favorites. You can do this both in the Contacts section and in the call history. To add a contact to favorites, click the star icon to the left of the contact name.

To view favorite contacts, open the Favorites tab in the Contacts section.

How to Call an Additional Contact Number
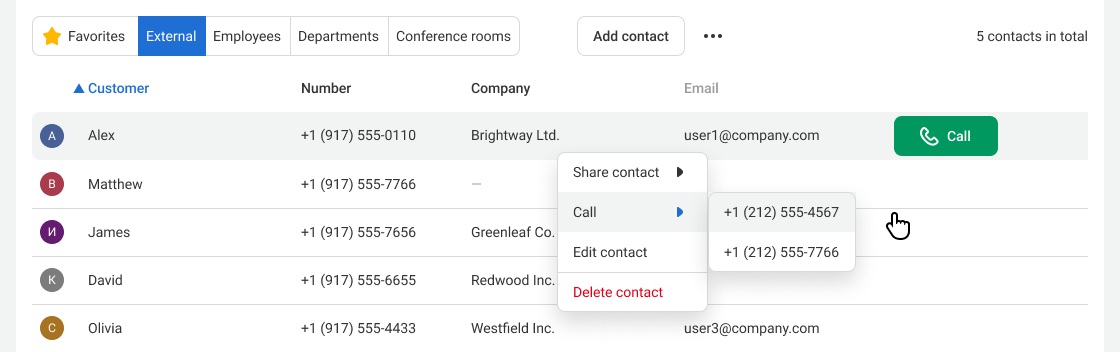
You can call an additional contact number in the messenger in two ways: from the contact list and from the contact card. Let’s take a closer look at each option.
In the contact list, right-click, select Call and the required number.
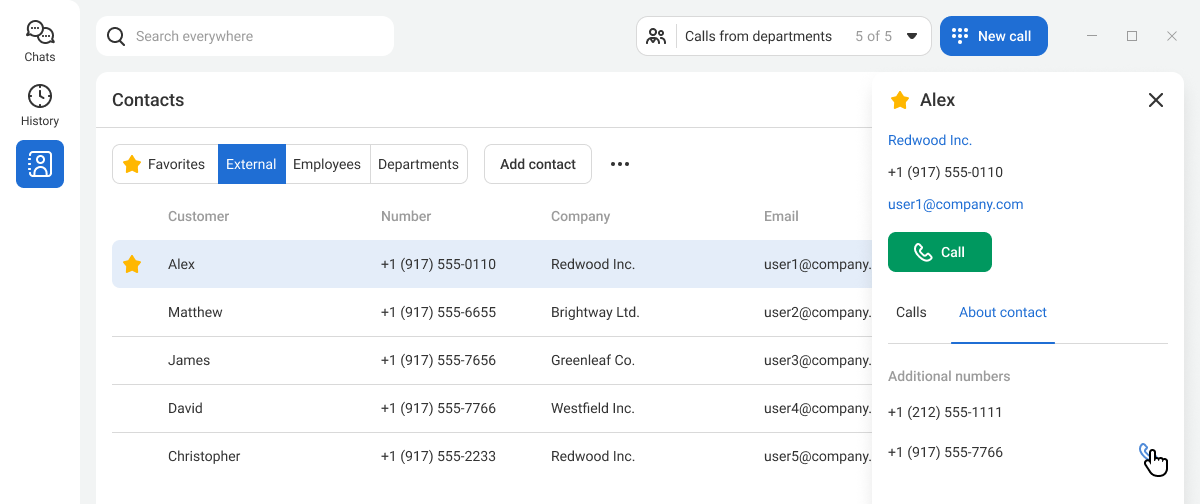
In the contact card, open the About contact tab and click the phone icon to the right of the additional number.
How to Share a Contact
You can share a contact in the messenger from both the contact list and the contact card. Let’s take a closer look at each option.
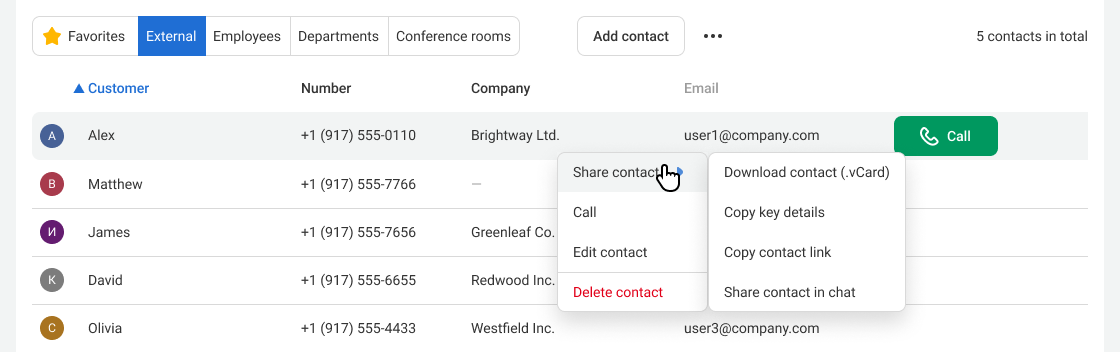
In the contact list, right-click, select Share contact, and then choose the format that works best for you.
In the contact card, on the About contact tab, click Share and choose the next action.

- Copy key details copies the full name, primary and additional phone numbers, company, job title, and email address.
- Download contact (.vCard) means an electronic business card format that contains all contact card fields.
- Copy contact link means a link that opens the contact card in the Cloud PBX web interface.
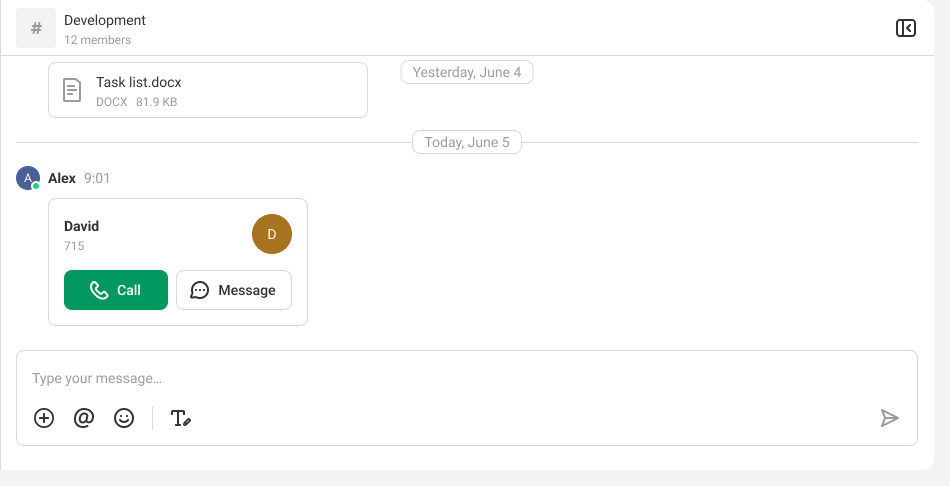
- Share contact in chat sends a compact contact card to the chat, with call and message buttons (for an internal contact).
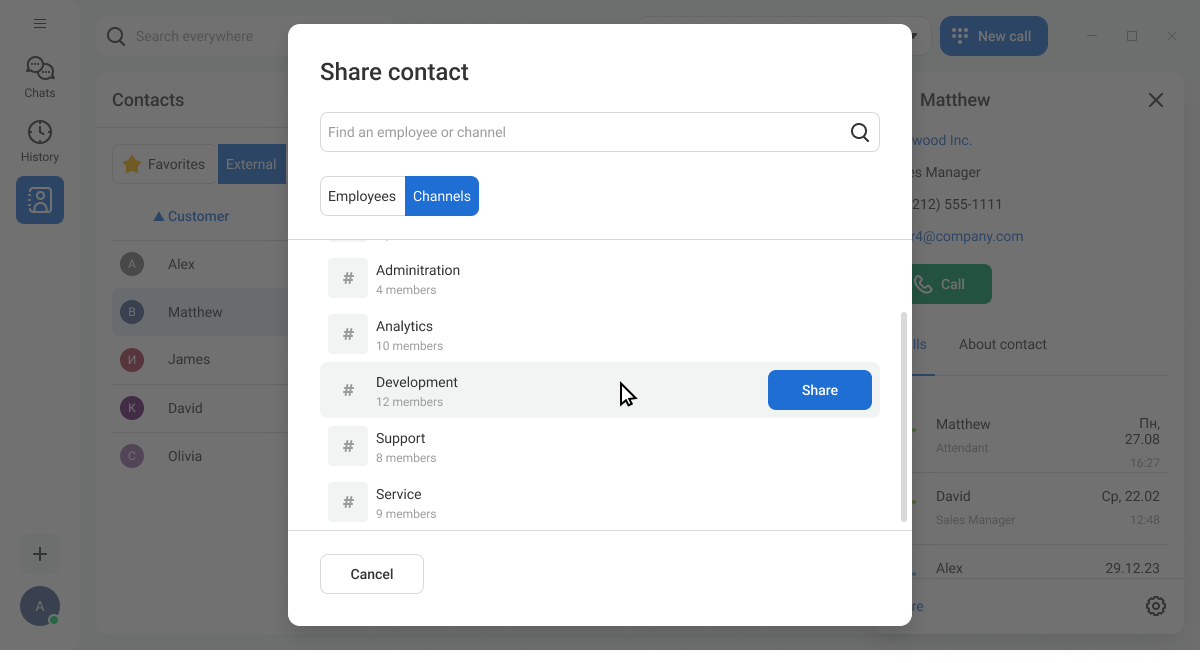
If you want to share a contact in a chat, select where to send it in the window that appears.
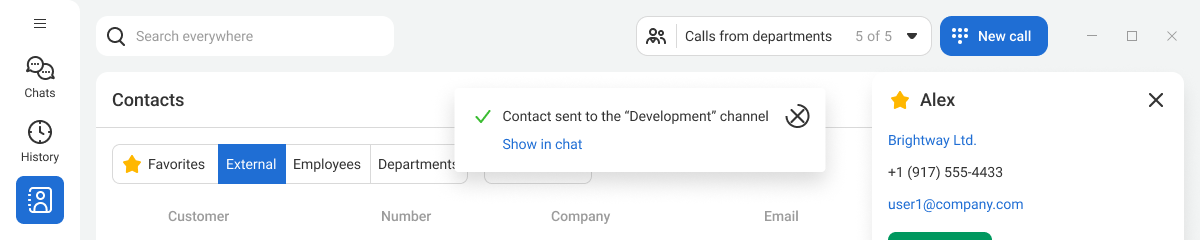
A confirmation window will appear. From there, you can go to the chat where the contact was sent.
A compact contact card will be displayed in the chat. Click the contact name to open the full card.
How to Send an Email to a Contact From Cloud PBX
To speed up sending an email to a contact from Cloud PBX, click the email address in the contact card.

A new message window will open in the default email client on your computer.
How to Check Whether a Colleague Can Answer Soon
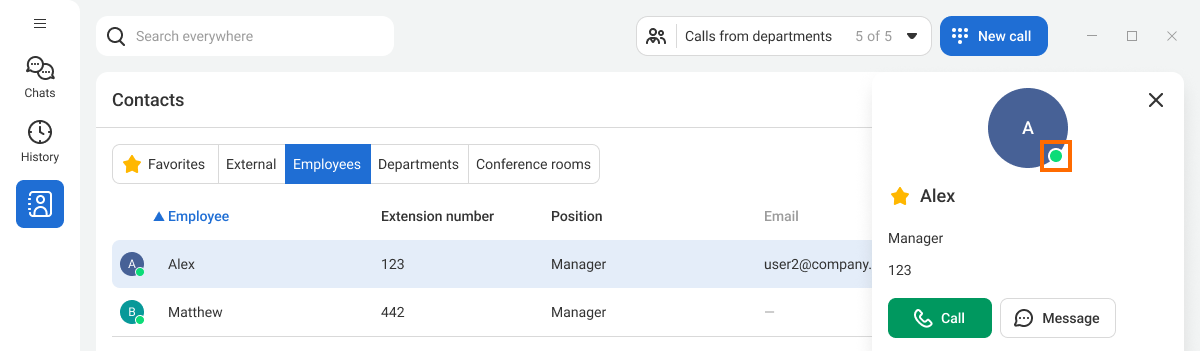
To see if a colleague is available for instant communication, check their presence status in the messenger. This status is displayed in the employee card, as well as in the chat list.
| Presence status | Color | When it appears |
| Online | Green | The messenger app is running, and the employee has used their computer within the last 15 minutes |
| On a call | Red | The employee has the messenger running on their computer and is currently on a call |
| Do not disturb | Red | The employee sets this status manually |
| Away | Yellow | The messenger app is running, and the employee has not used their computer within the last 15 minutes |
| Offline | Gray | The messenger app is not running |
To learn how to set the Do not disturb status, please see the article User Settings in Corporate Messenger.