Corporate Messenger Settings
Settings in Corporate Messenger include:
- messenger app settings that do not affect the web interface, including Do not disturb mode;
- Cloud PBX profile settings, which can also be edited in the web interface.
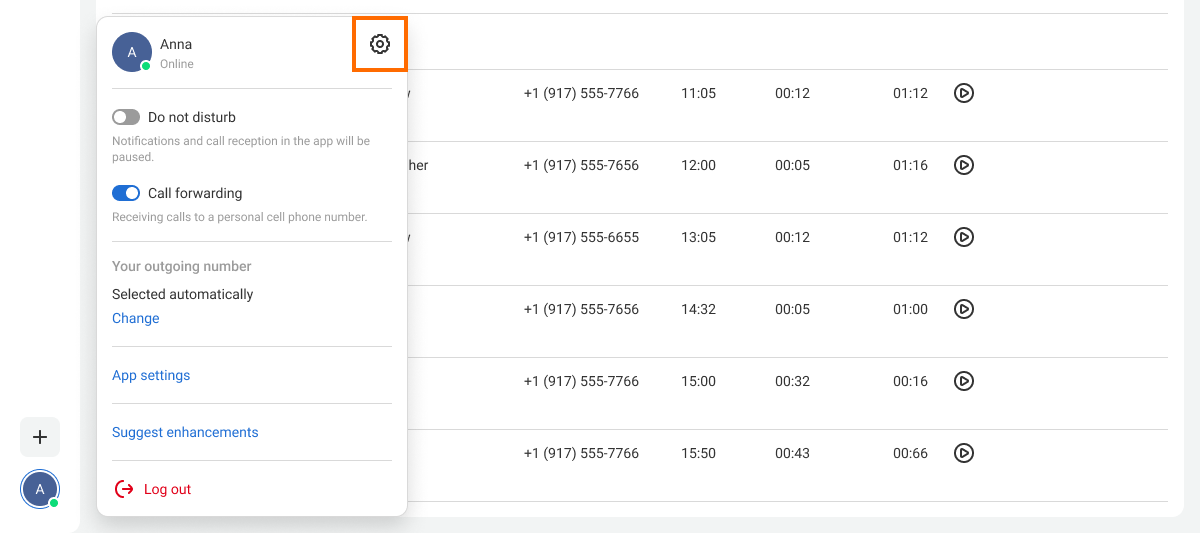
To open the settings, click your avatar in the bottom left corner. Let’s take a closer look at each settings category.
App Settings
App settings include a “Do not disturb” mode, which can be configured directly from the quick menu, and three sections opened by clicking “App settings”:
- call settings configure the microphone and speakers for calls and ringtones;
- notifications about messages and calls;
- system settings (preferences) — app theme, language, launch on startup, hotkeys, logs, etc.
Do Not Disturb Mode
If you need to focus, enable Do not disturb mode. In this mode, you won’t receive calls or notifications about new messages.
To enable silent mode, click your profile picture and switch the Do not disturb toggle to the right. The Do not disturb status will appear at the top of the screen.
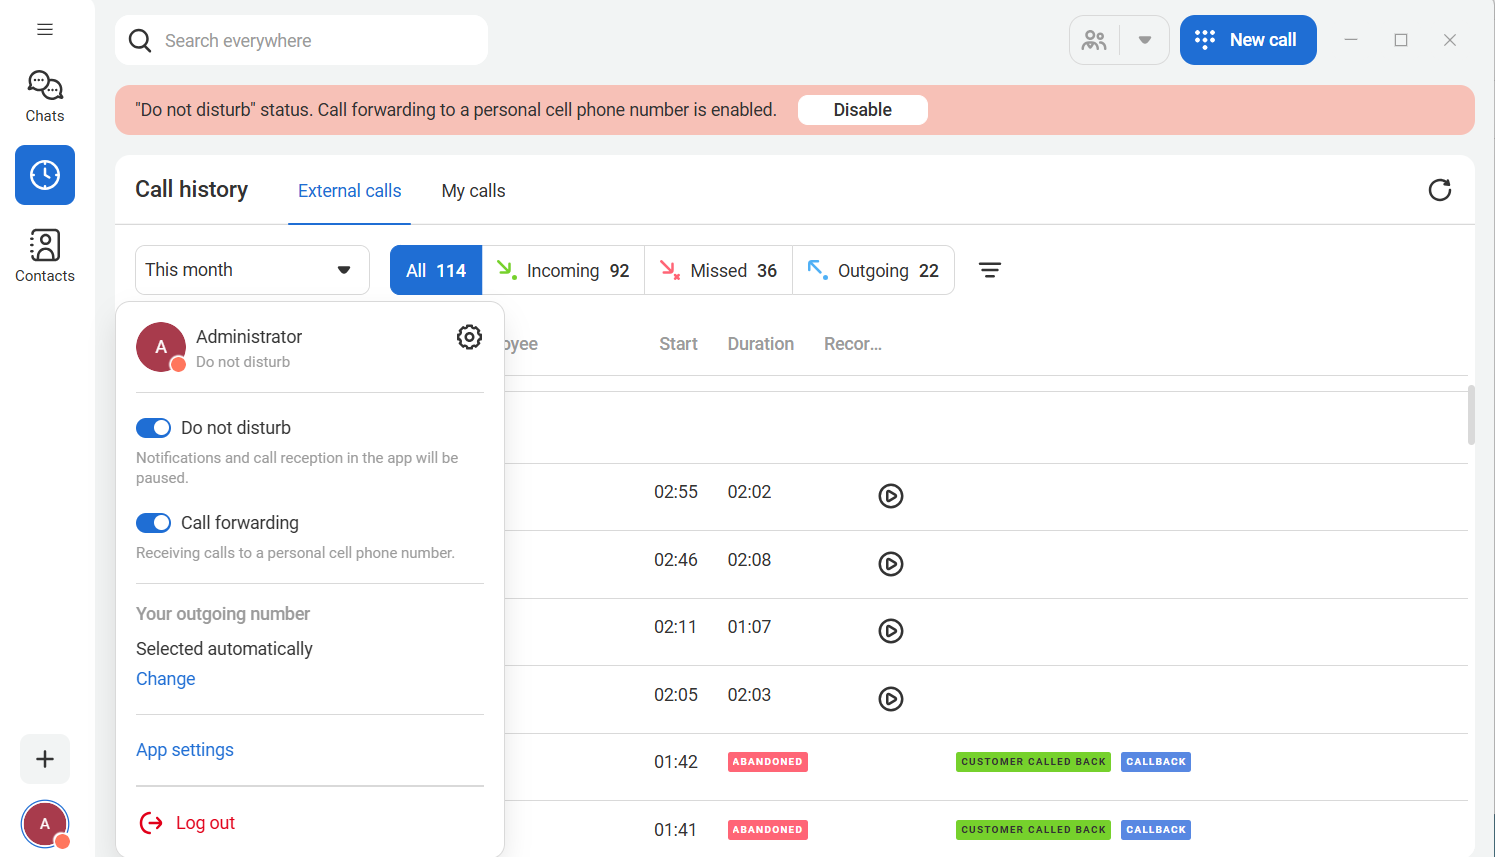
If call forwarding to your personal cell phone is enabled while Do not disturb is active, calls will continue to come there. You can disable forwarding to your personal cell phone from the same drop-down list where Do not disturb is enabled.
Call Settings
To configure the app for handling calls, click your profile picture in the lower‑left corner and select App settings.
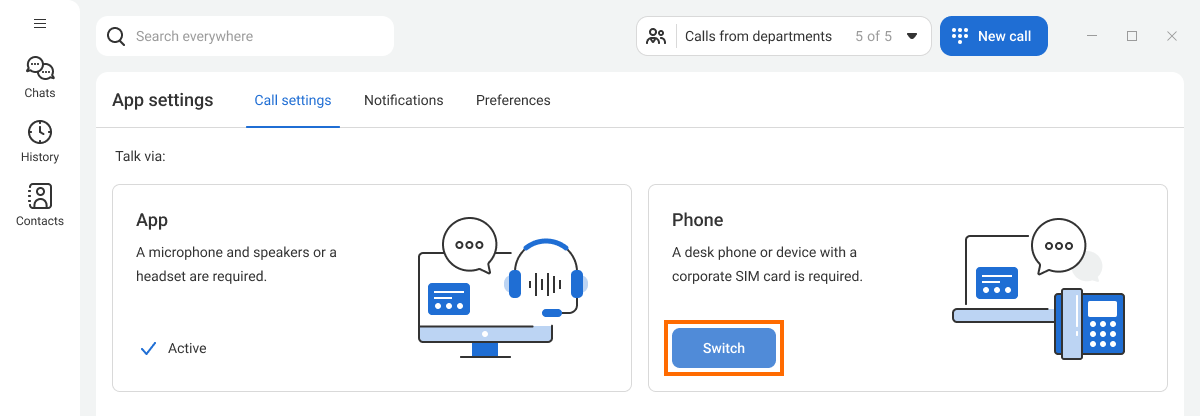
By default, calls are made and received on your computer. To receive incoming calls to your IP phone, enable CTI integration. To do that, click Switch.
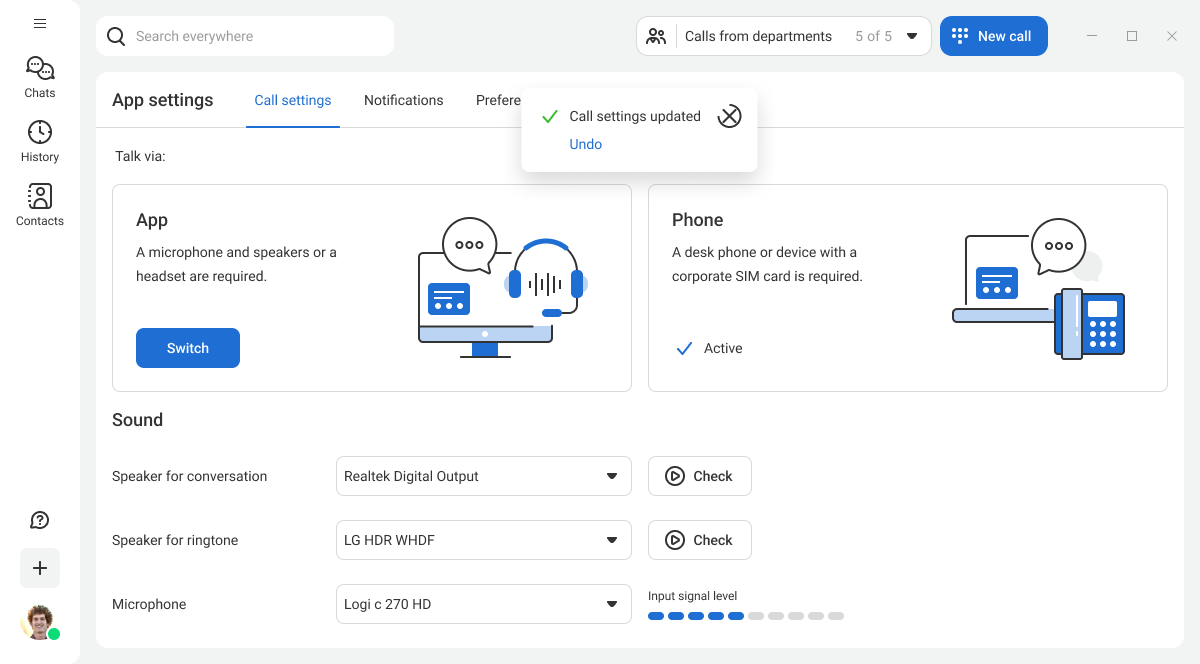
In the Sound section, select and test your speaker for conversation, speaker for ringtone, and your microphone.
If you use a headset for conversations, you can play the ringtone on another device.
System Settings
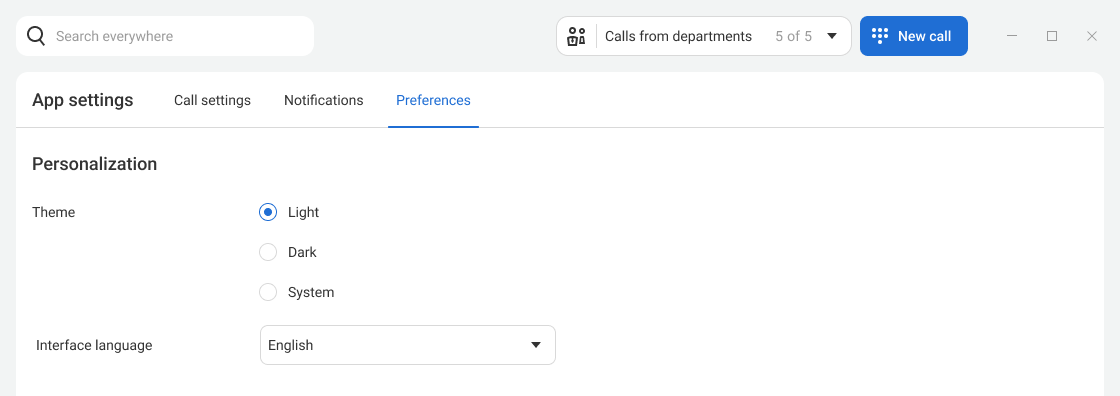
On the App settings tab, you can change the interface theme and language, enable the app to launch automatically at system startup, check for updates, view keyboard shortcuts, and access logs.
To change the app appearance, select the theme you need in the corresponding section.
To change the app language, choose the required option from the drop‑down list.
Notification Settings
In this section, you can configure sound and display settings for message and incoming call notifications.
You can get notified about messages not only inside the app but also by system notifications that appear over application windows, on the lock screen, and in the notification center.
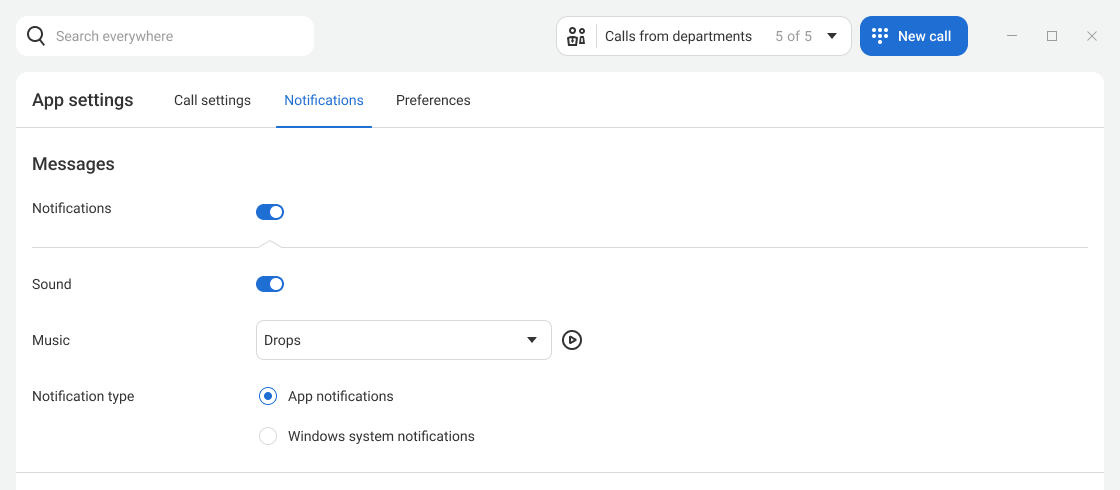
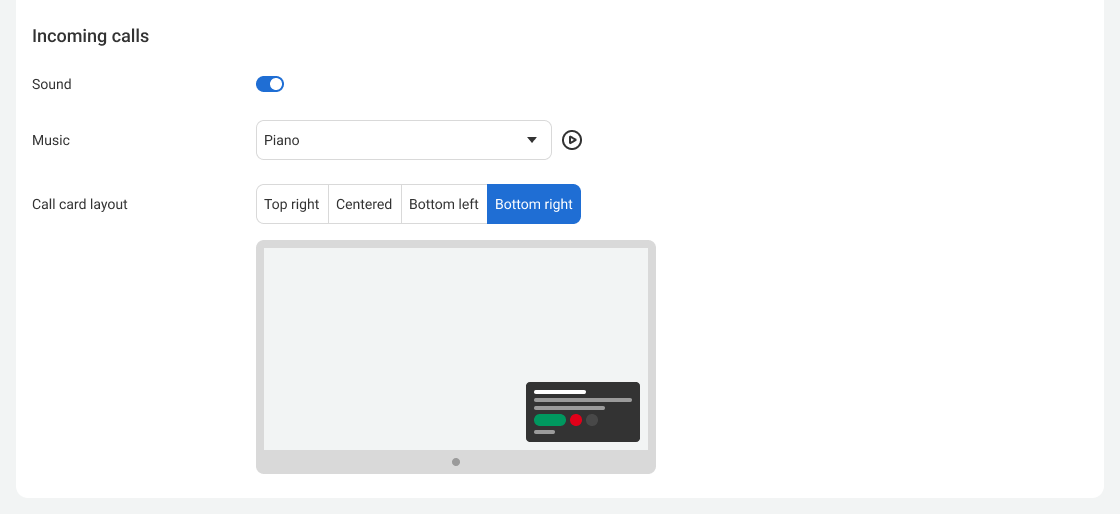
The incoming call card can appear in different areas of the screen, depending on what works best for you.
Profile Settings
To edit your profile, click the gear icon.
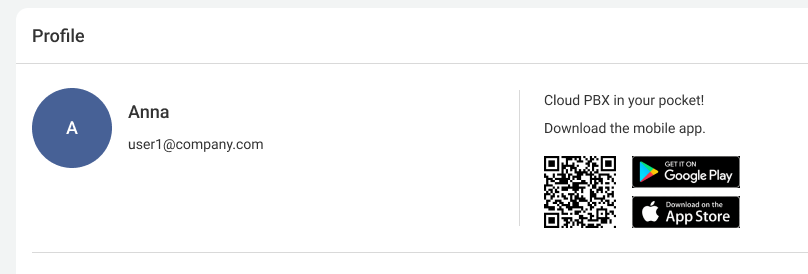
In the top section, you can download the Cloud PBX mobile app, check your username, and change your profile photo.
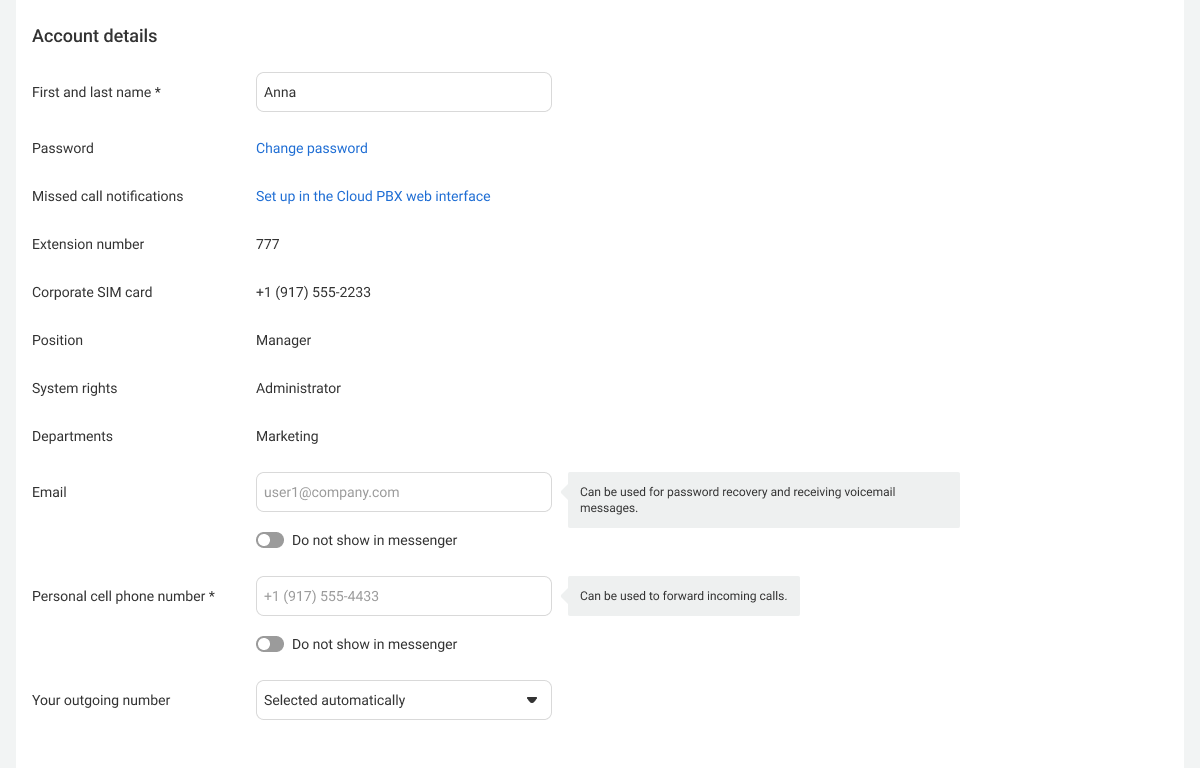
Below, in the Account details section, you can change your name and Cloud PBX login password, select a default outgoing number, add a personal cell phone number to forward incoming calls, and specify an email address for password recovery and notifications.
This section also shows your Cloud PBX extension number, job title, and system access level.
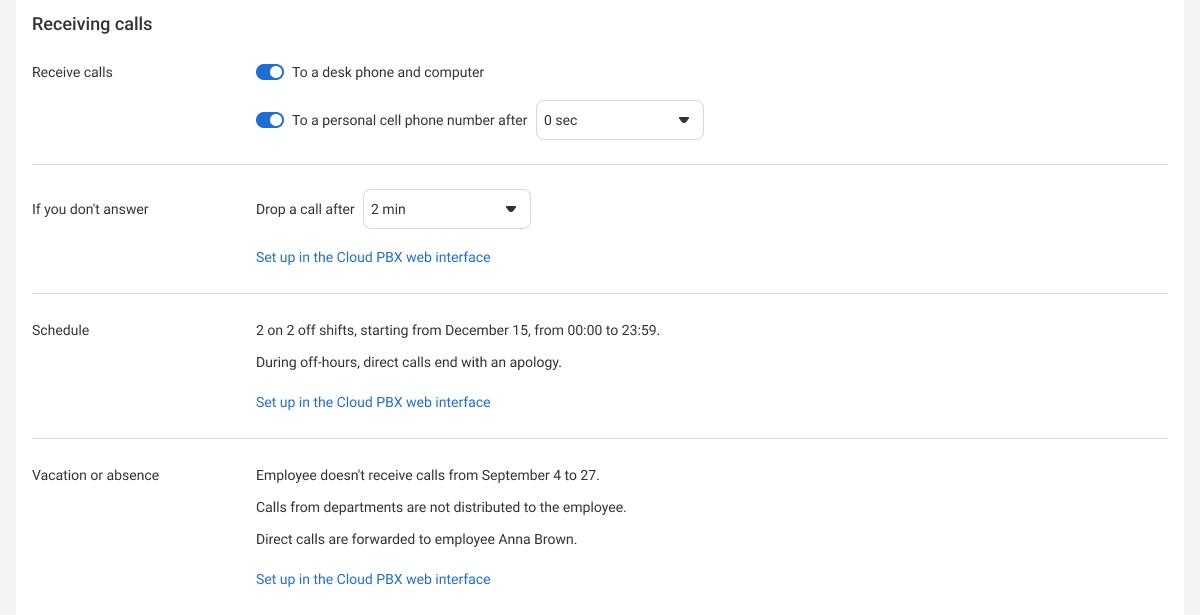
In the Receiving calls section, you can change the following settings:
- receiving calls on a desk phone and on a computer;
- forwarding calls to a personal cell phone number;
- forwarding direct calls to an extension number or a corporate SIM card outside business hours, during vacations, or in case of no response during business hours. These settings can be edited only in the Cloud PBX web interface.
Learn more about all call settings in the messenger.
To apply your changes, click Save at the bottom of the page.
Sound Settings
To set up calling apps, click your avatar in the bottom left corner and then select App settings.
In the Sound section, you can select and test the speaker for calls and the microphone. You can also set a separate speaker for the ringtone. If you use headphones for calls but sometimes take them off, you will still hear the ringtone through your phone or computer speakers and won’t miss incoming calls.